Category: Vegetarian

Southwestern Corn Salad

SW corn salad 3Me: Are you getting full?
Husband: (somewhat defensively) There’s a lot of nutritional value in this!

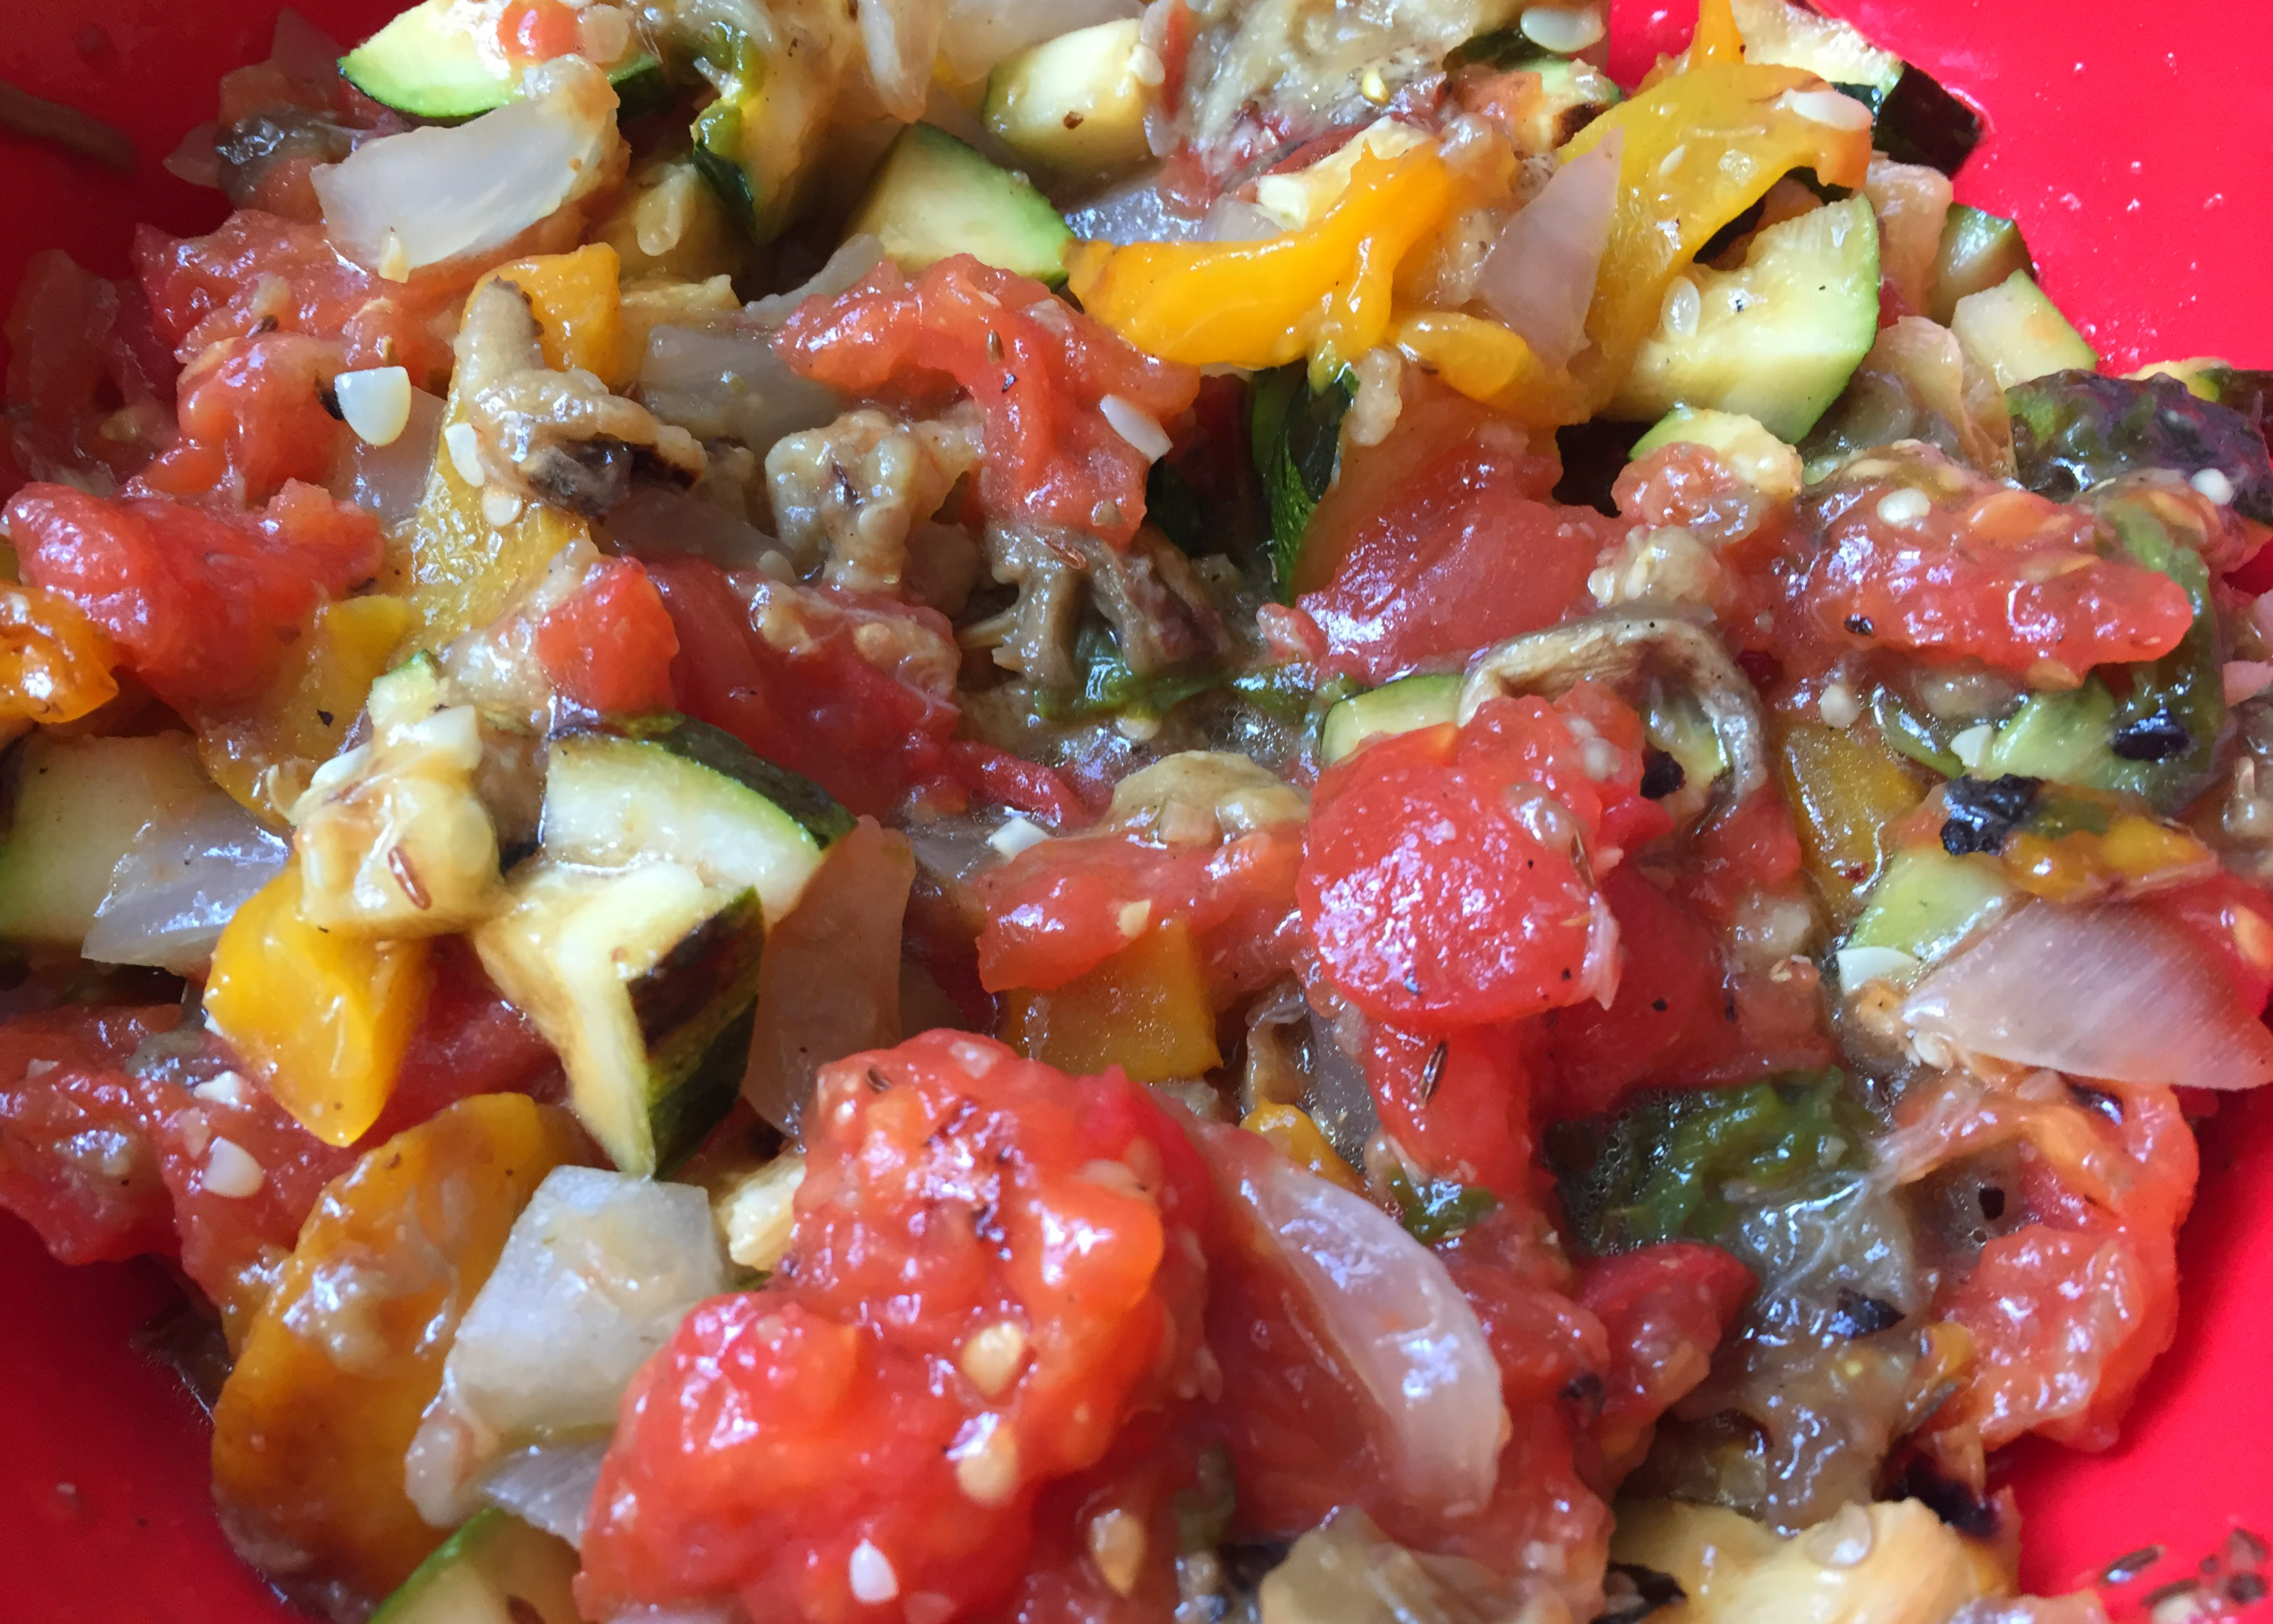
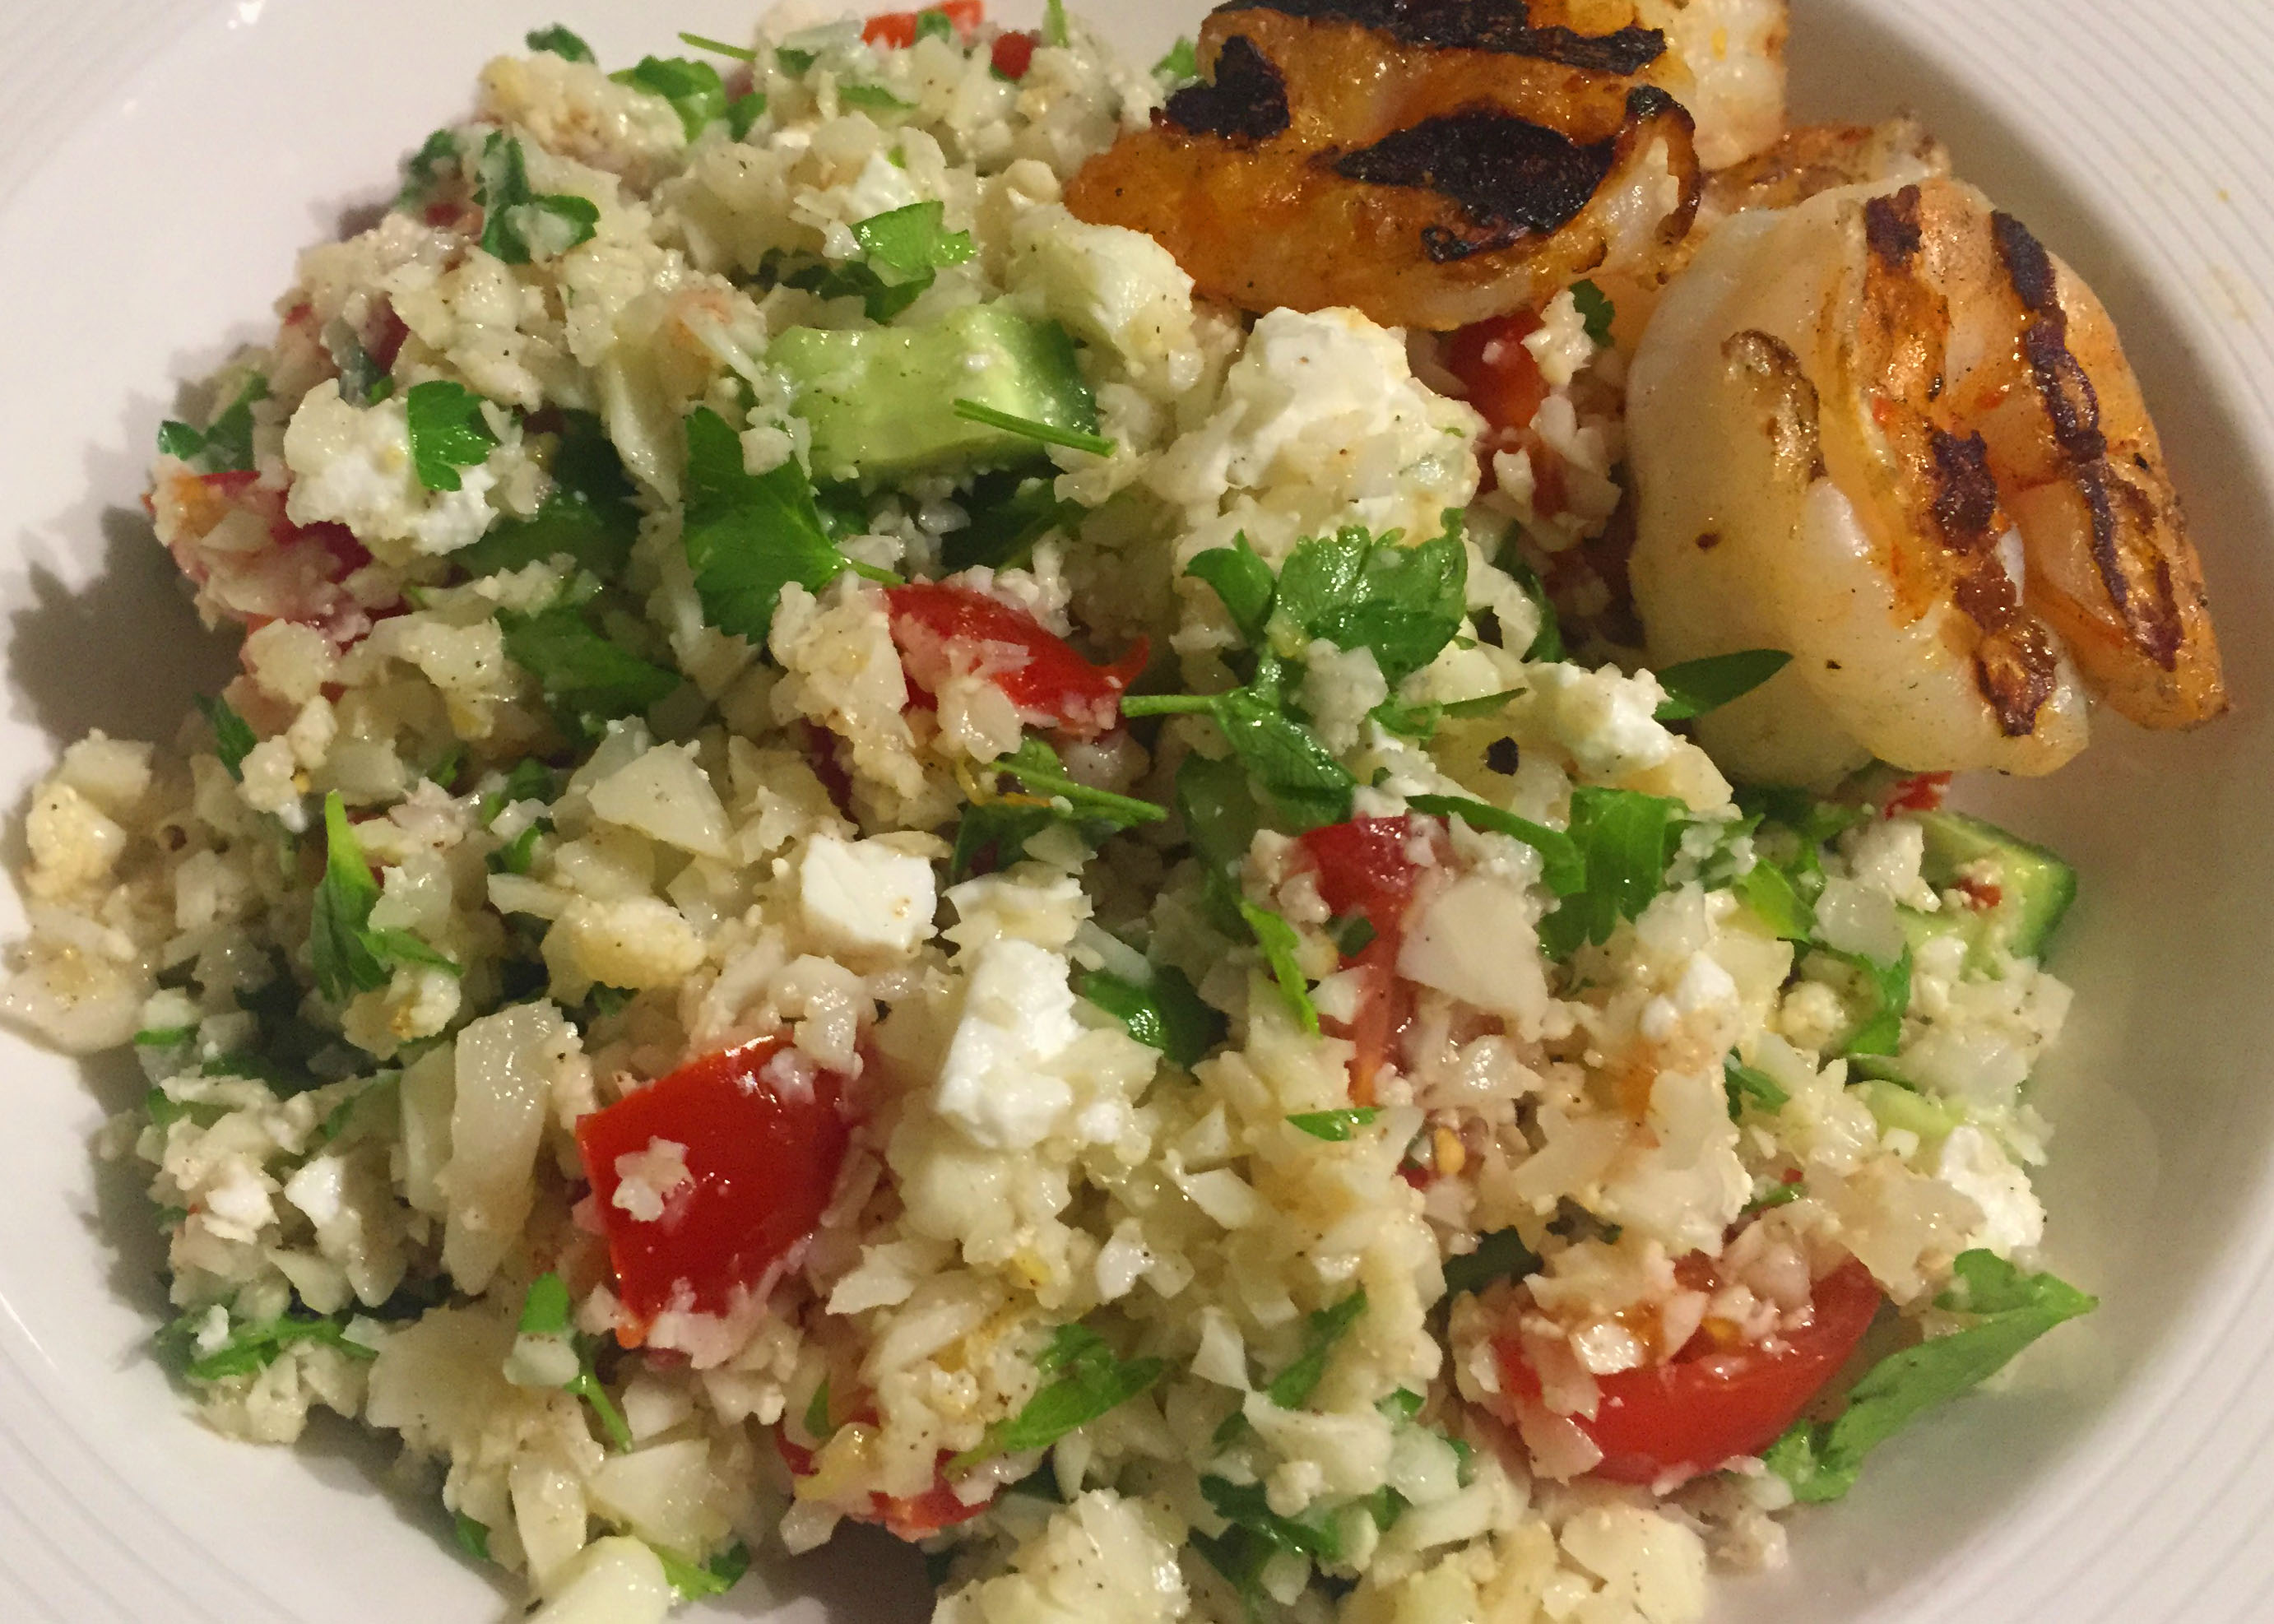
I really wasn’t dissing him for having to take a break from eating! There IS a lot of nutritional value in this salad (in other words, it’s pretty filling)! Even better, there are bucketloads of flavour… BUCKET! LOADS! I have been doing various riffs on this for a couple years and I think I finally nailed it. In past attempts I have used avocado, cucumber, green onion and probably a few other things I can’t remember. You can add what you want but I think this version is pretty amazing. (Although I noticed at the market last weekend that peaches are perfectly in season so one day very soon I might try omitting the honey from the dressing and adding diced peaches for the sweetness… anyone?!)

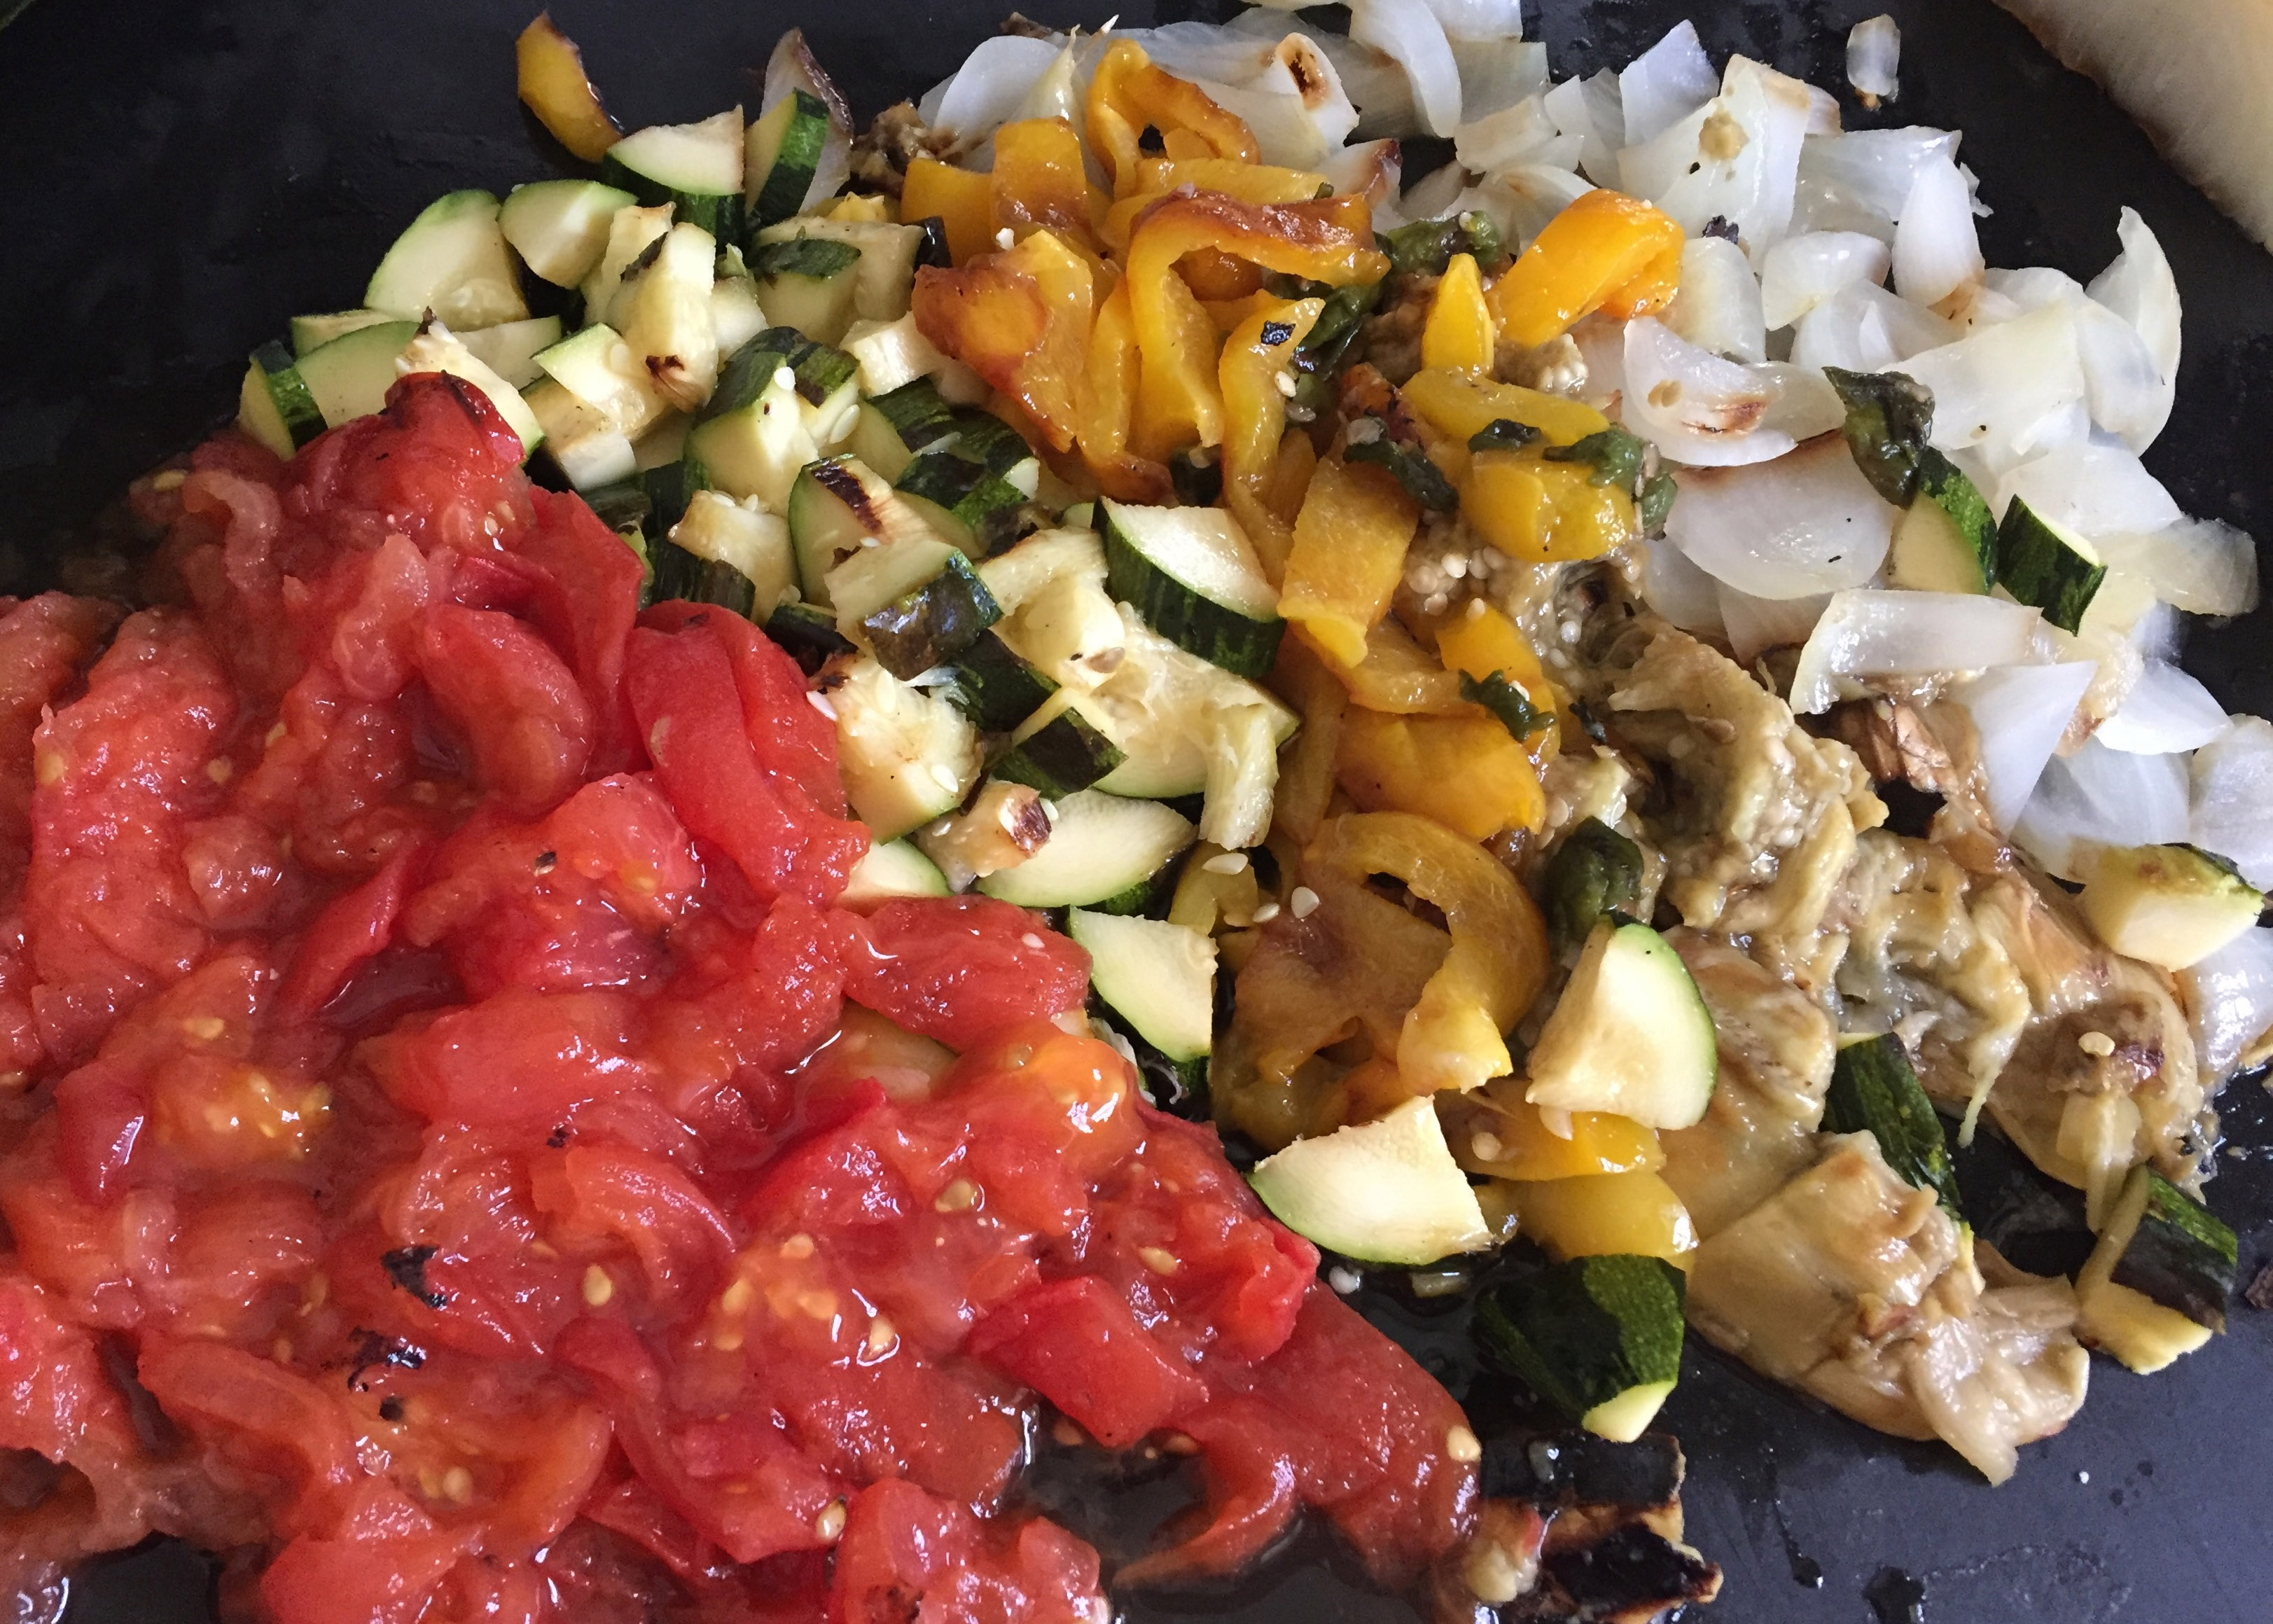
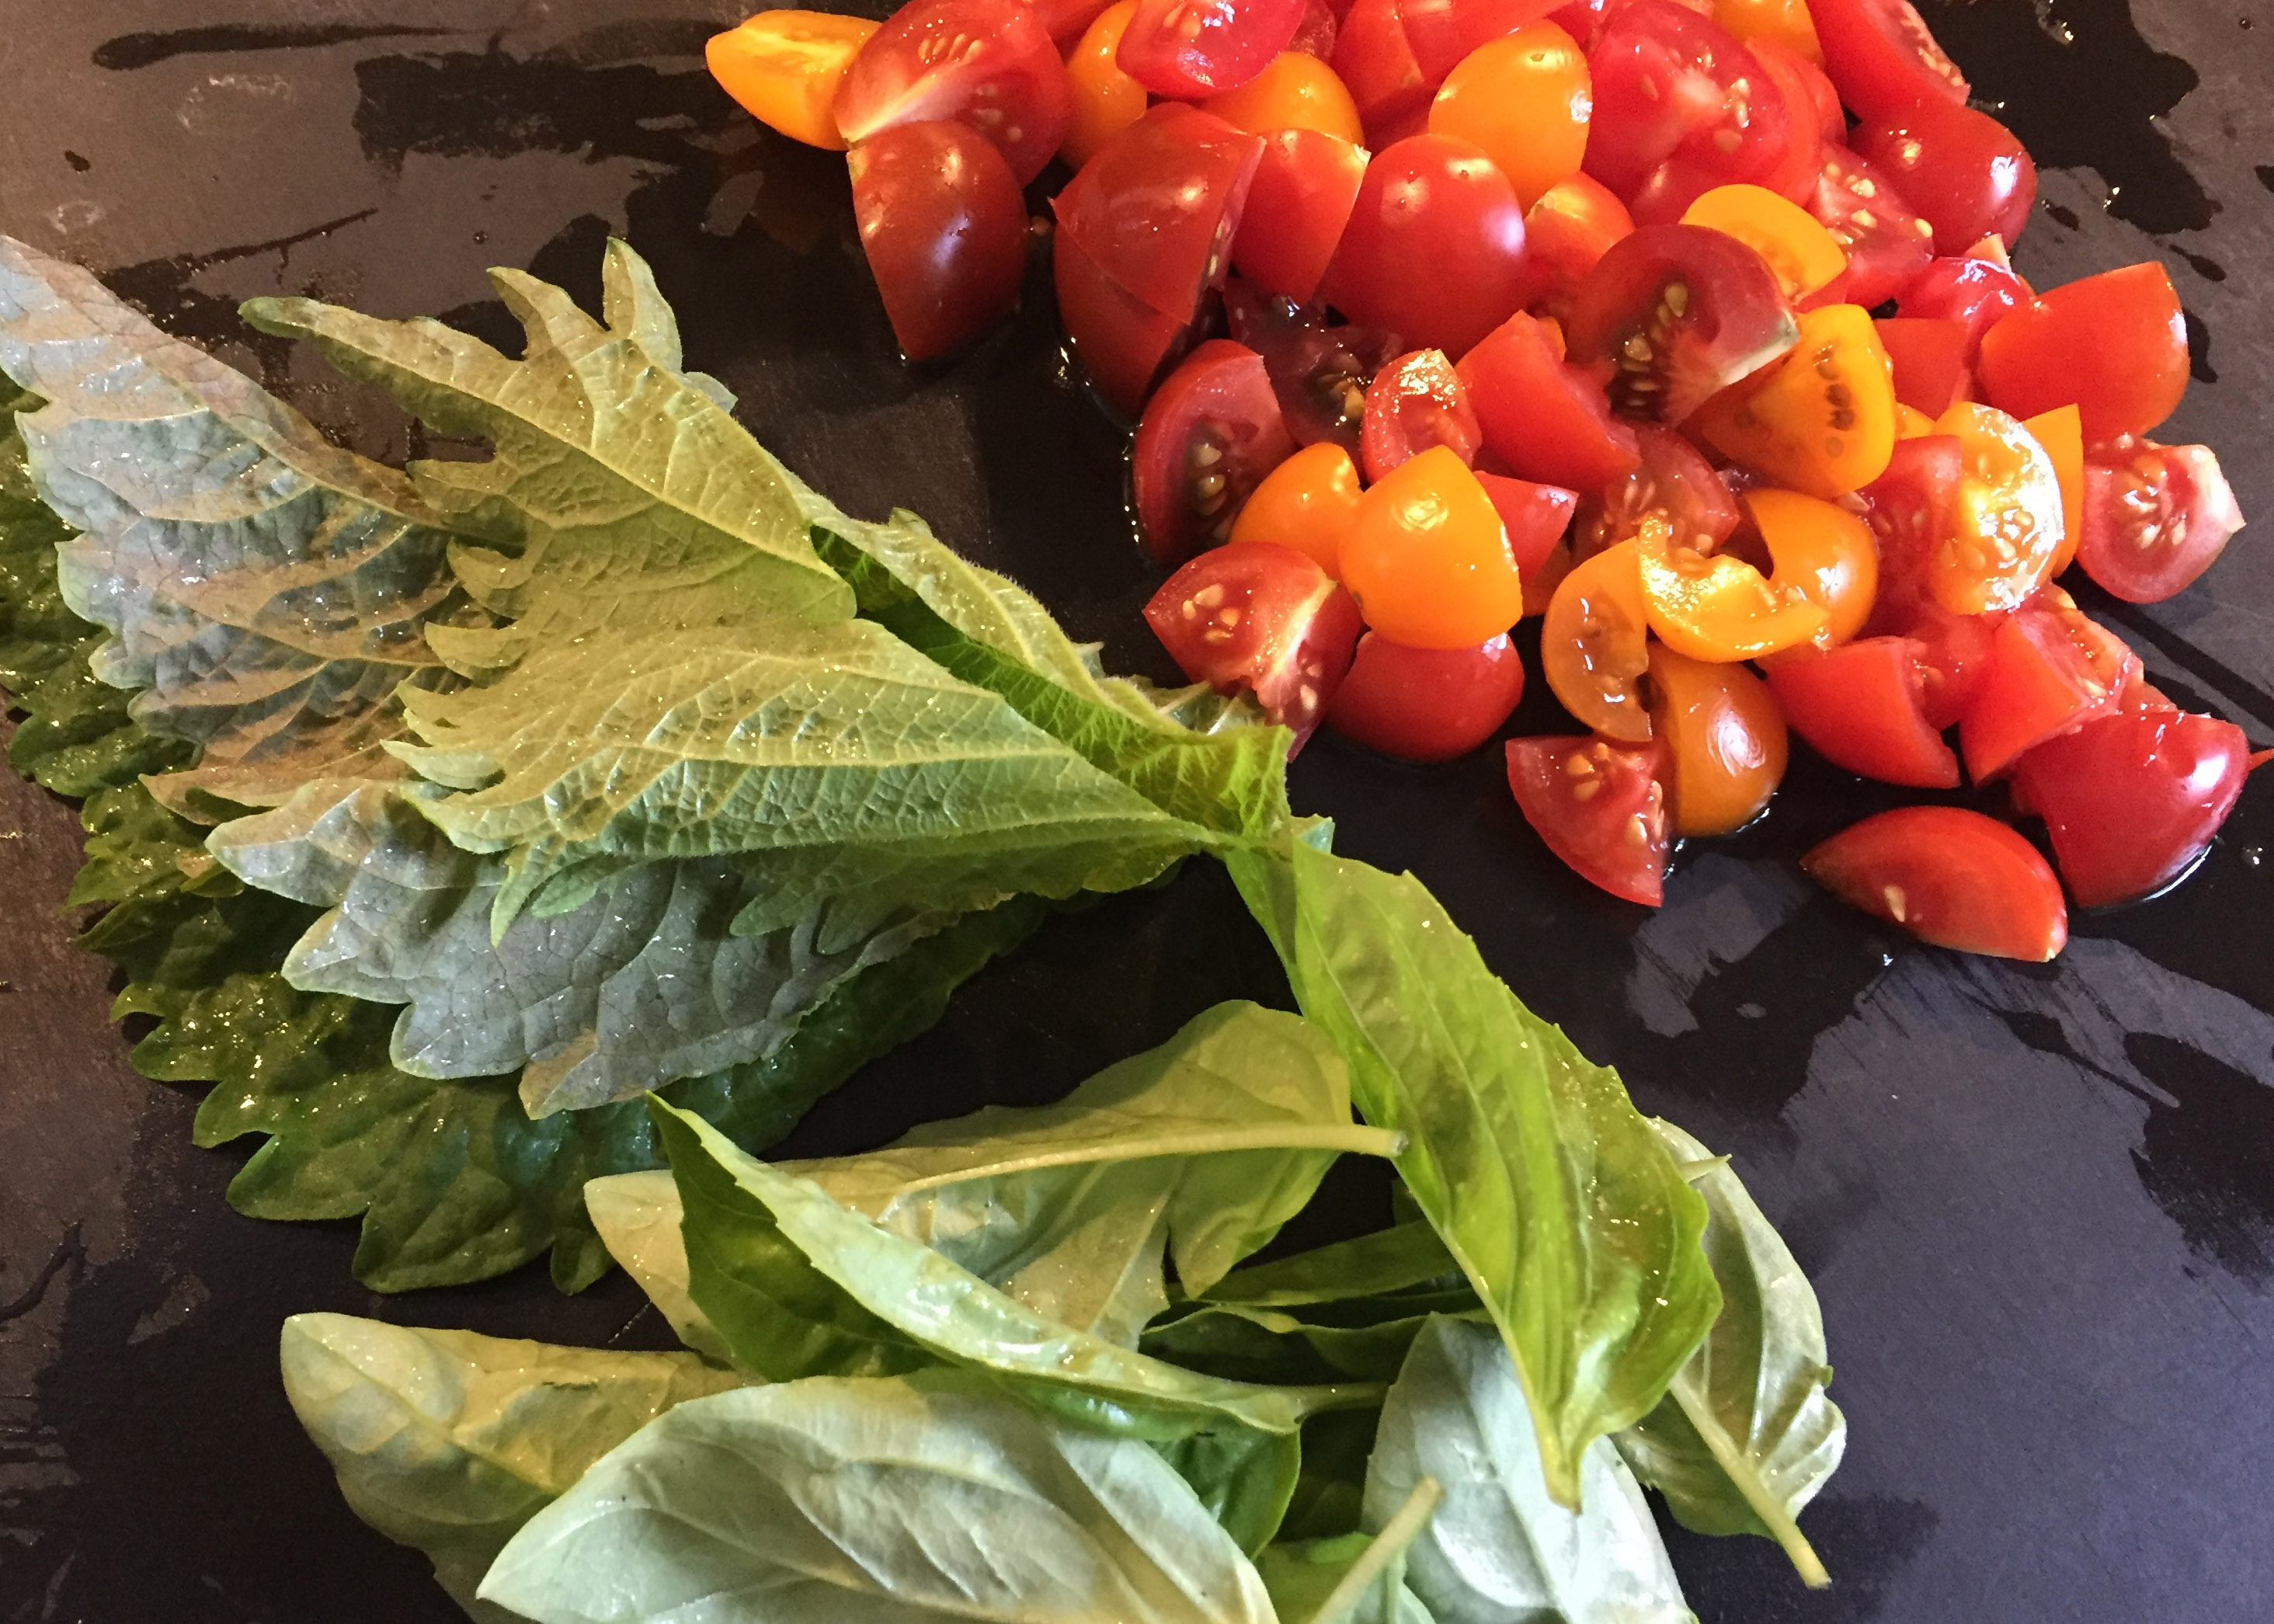
Now I get to pass along one of my first culinary tips to you. Generally in a single dish you want everything to be of similar size. There are exceptions to this, of course, but most of the time the dish is more visually appealing and easier to eat if everything is a similar size. In this salad, we can’t change the size of the corn or the beans so we are cutting everything else quite small. This is why the cherry or grape tomatoes are quartered, and gives you a guideline of how small to dice the peppers.

And finally (note to Husband), you really don’t have to finish the entire dish just because it’s there. This recipe should feed 4-6 people and leftovers will keep very well in the fridge for a day or two. Just sayin’!

Salad:
3 cobs corn, shucked
1 yellow bell pepper, quartered and seeded
1 jalapeño or other medium spiced pepper
glug of olive oil for grilling
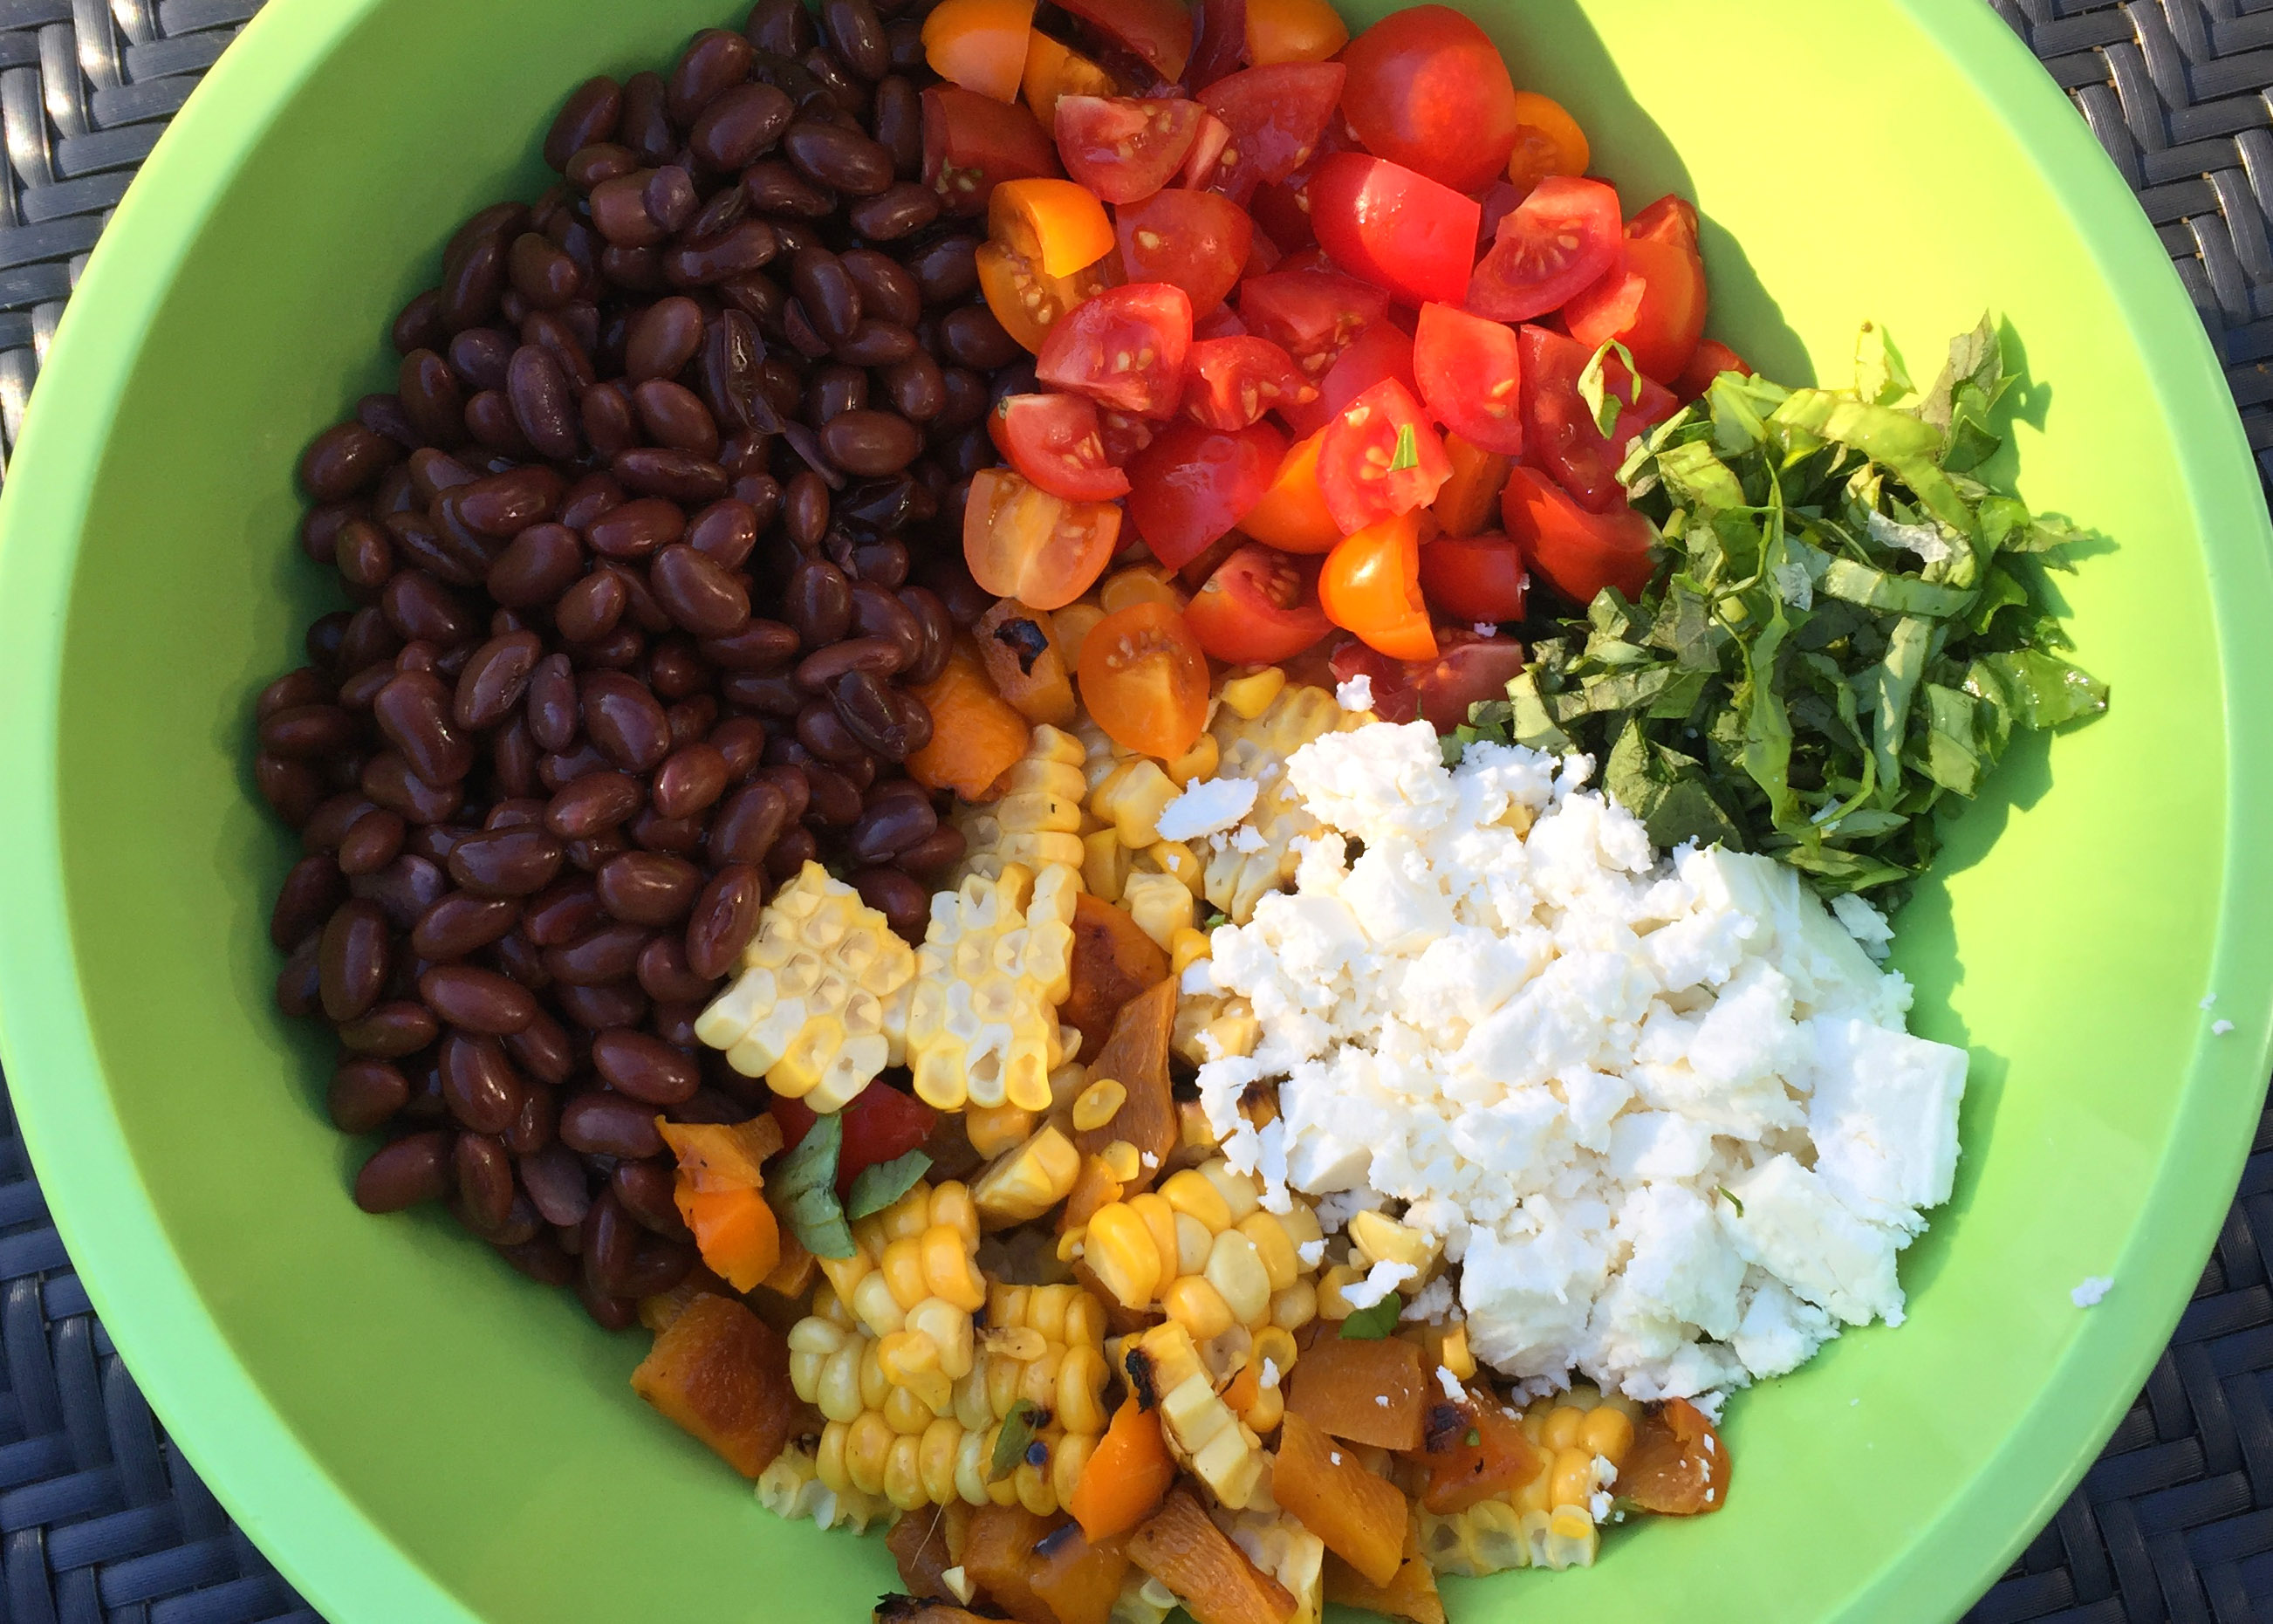
1 can black beans, rinsed and drained
1 pint cherry or grape tomatoes, quartered
2 ounces crumbled feta
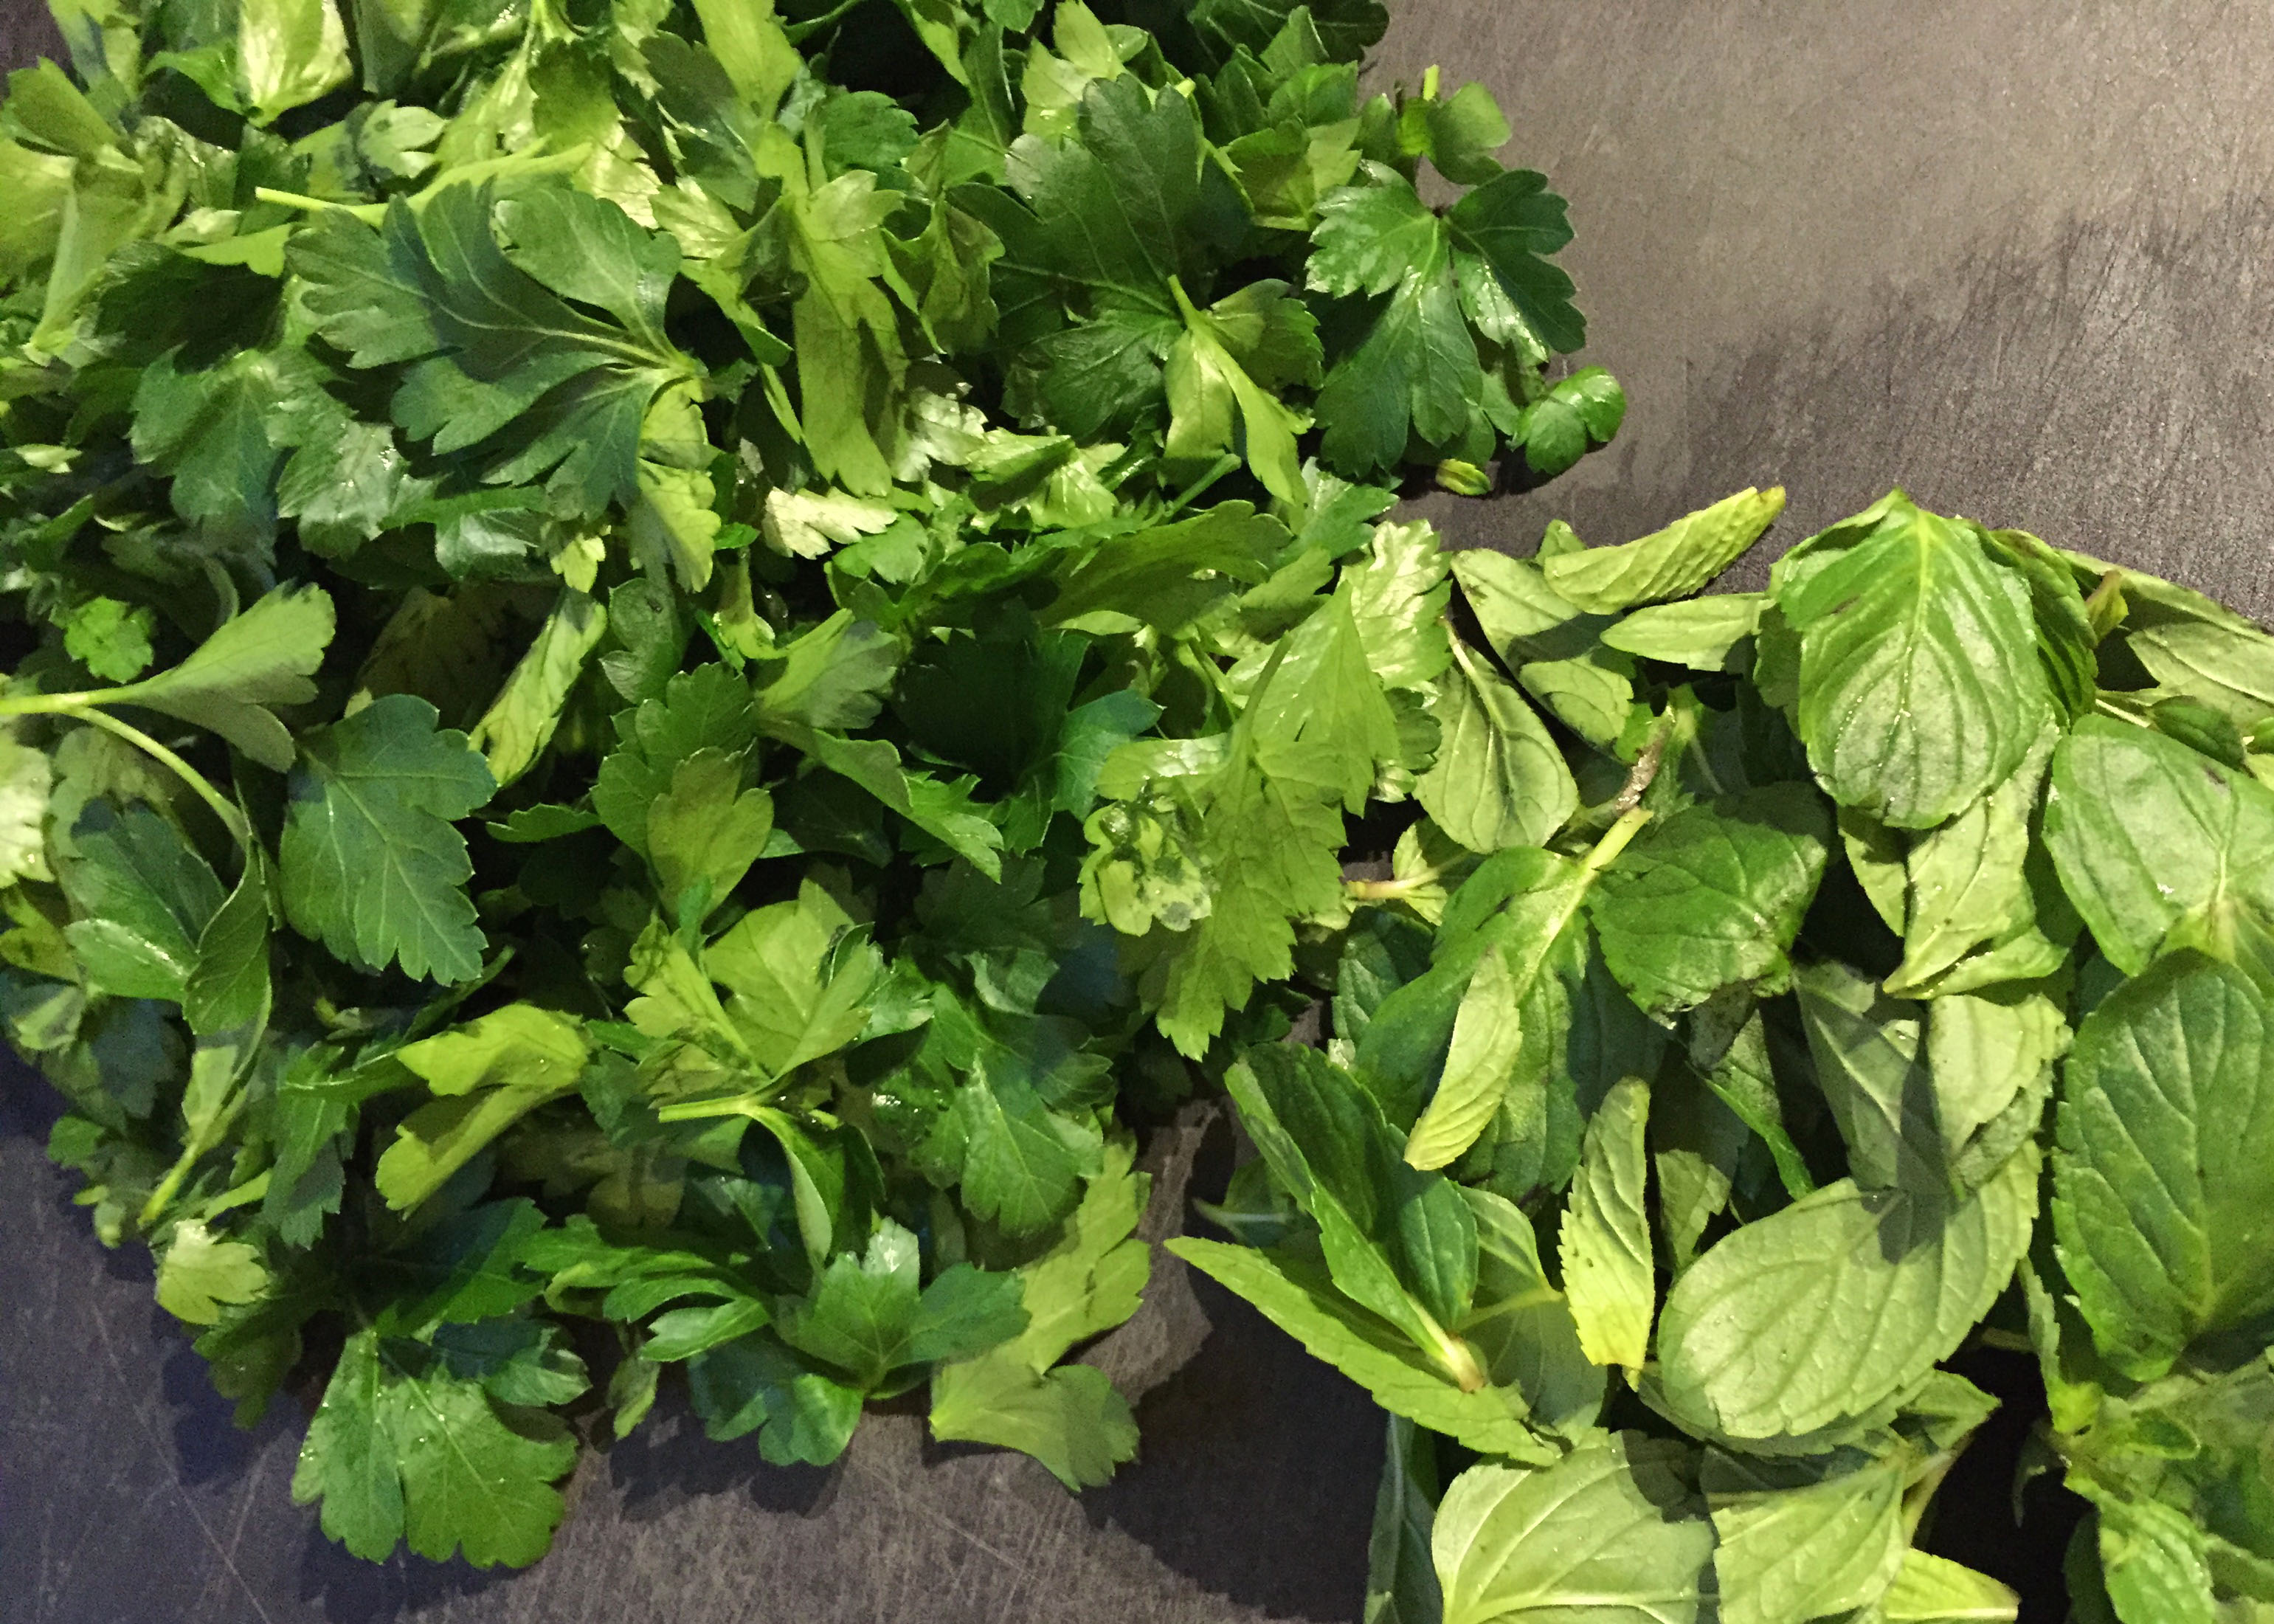
handful of chopped fresh herbs of your choice (I used basil and shiso leaf)

Dressing:
2 TBS fresh lime juice
1 tsp honey
1/2 tsp dijon mustard
1/2 tsp smoked paprika
1/2 tsp ground cumin
3 TBS good fruity olive oil
salt and pepper to taste

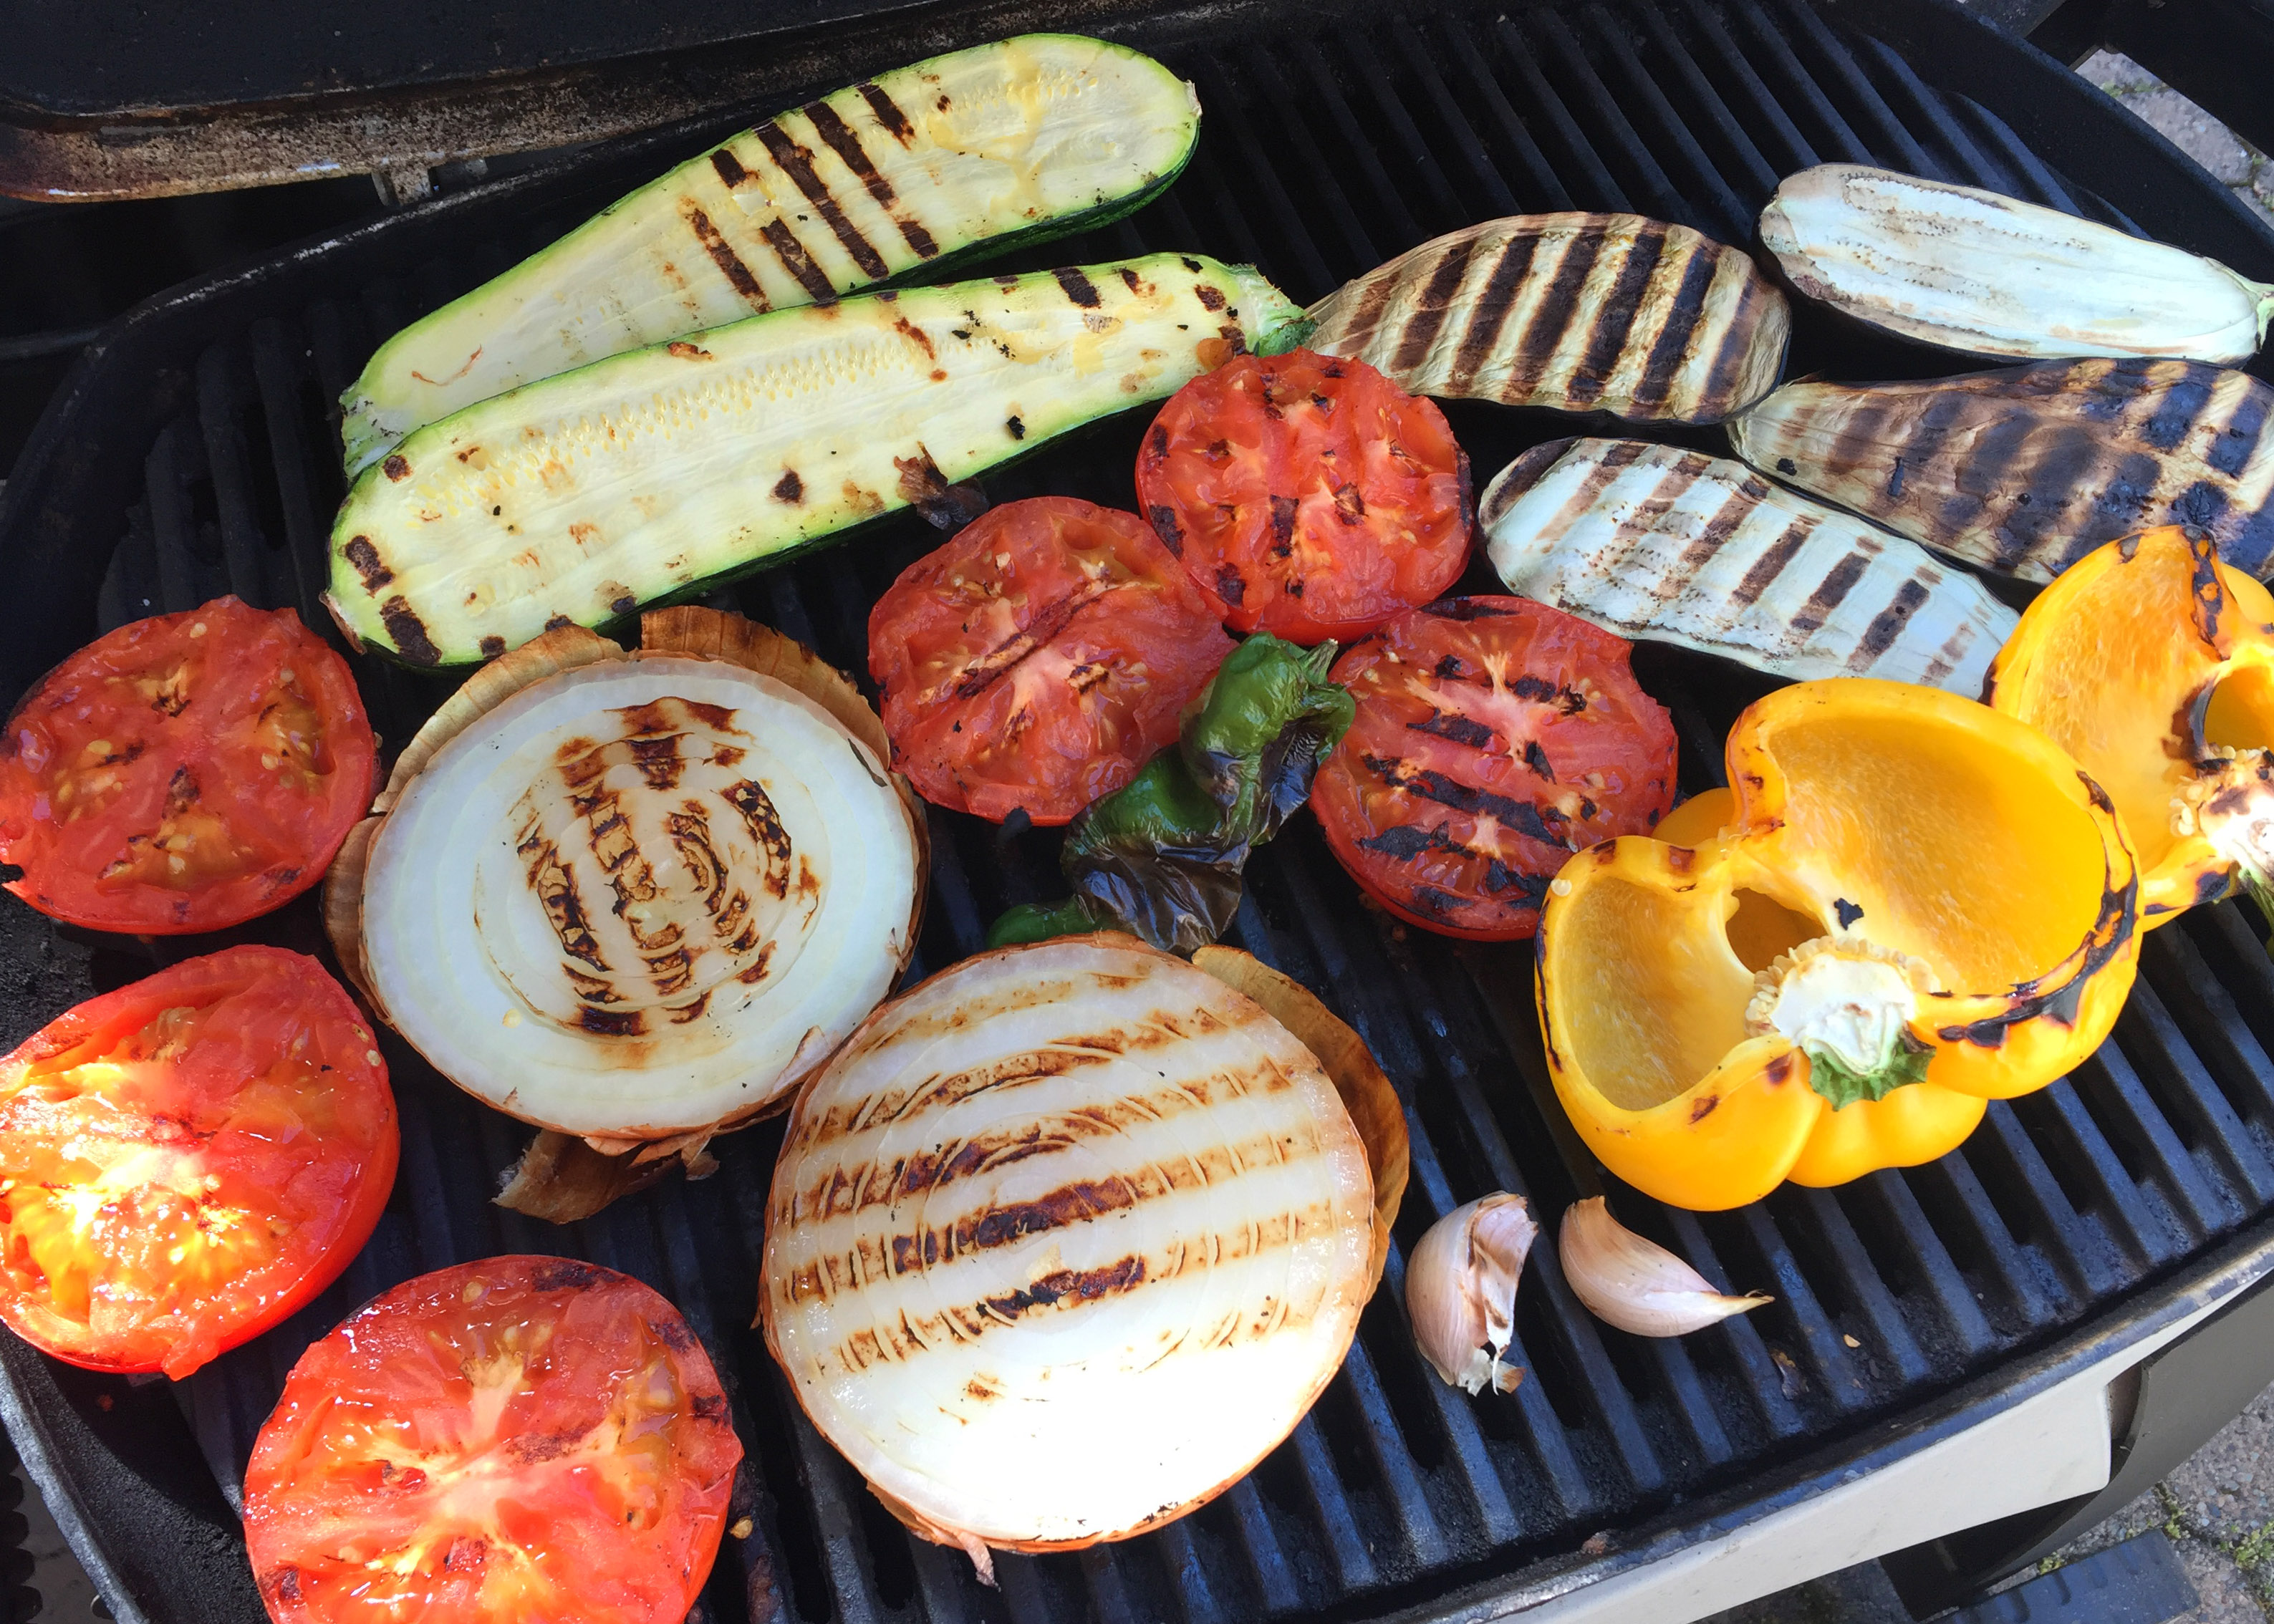
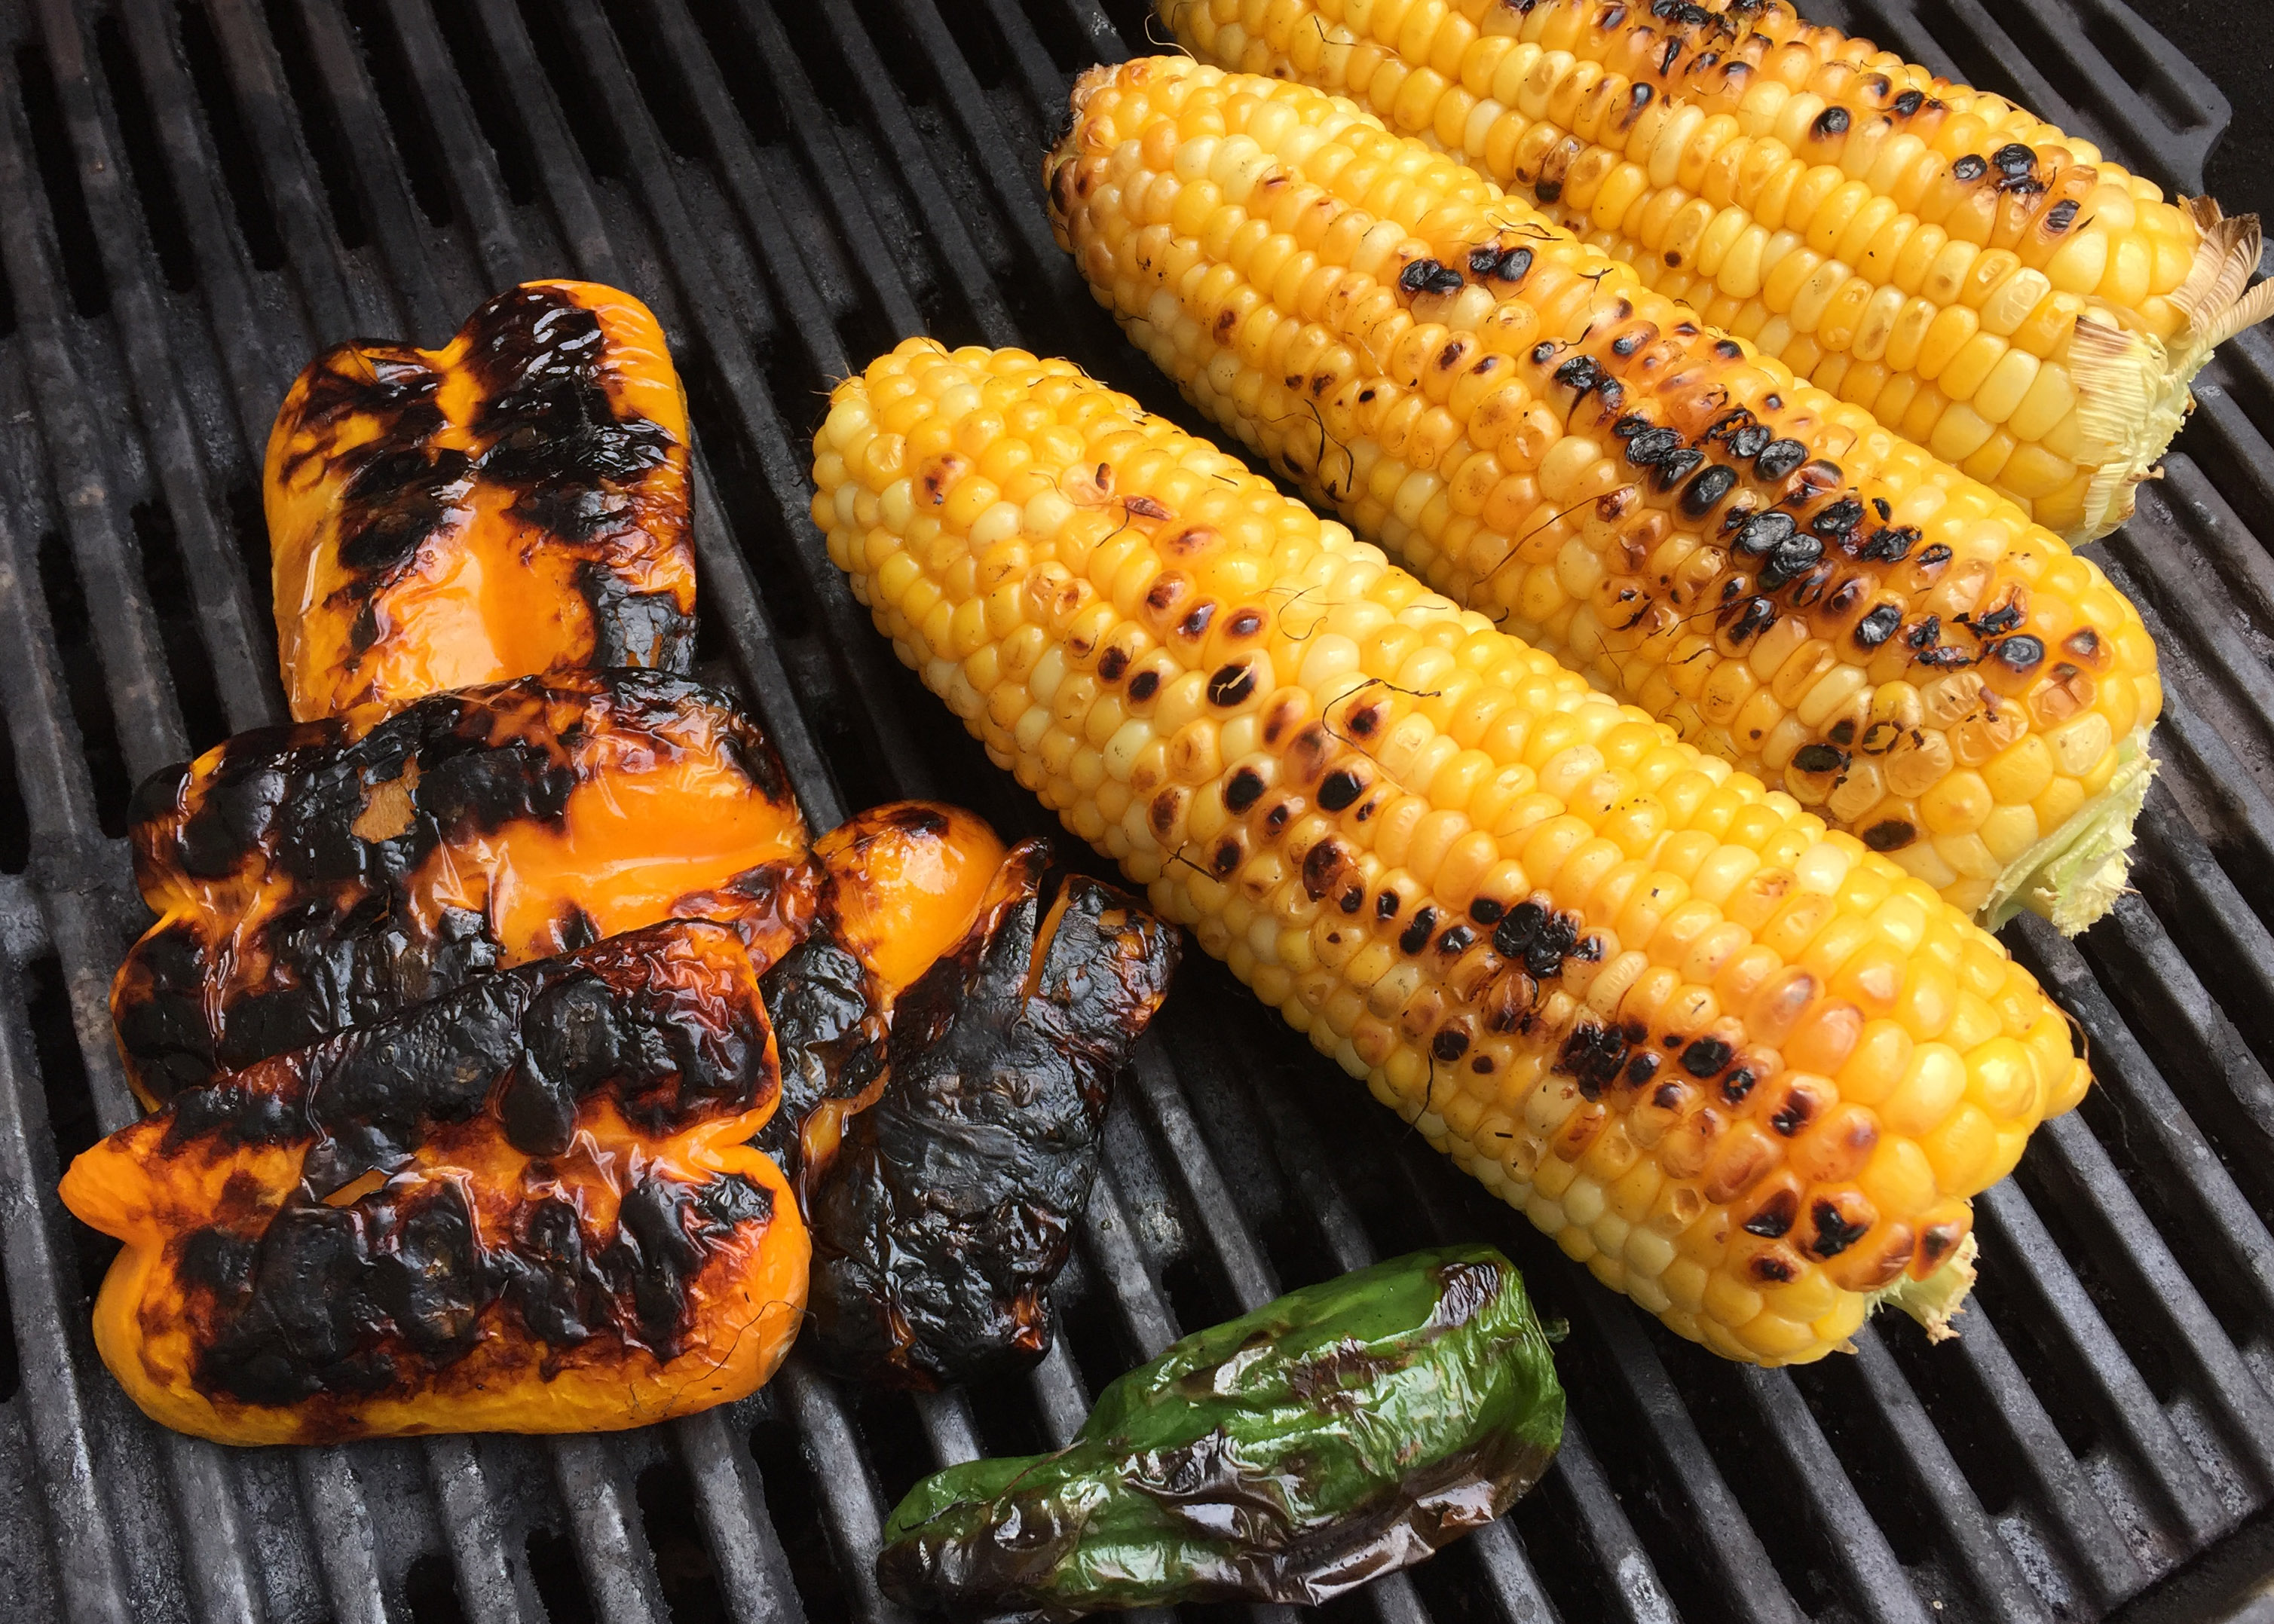
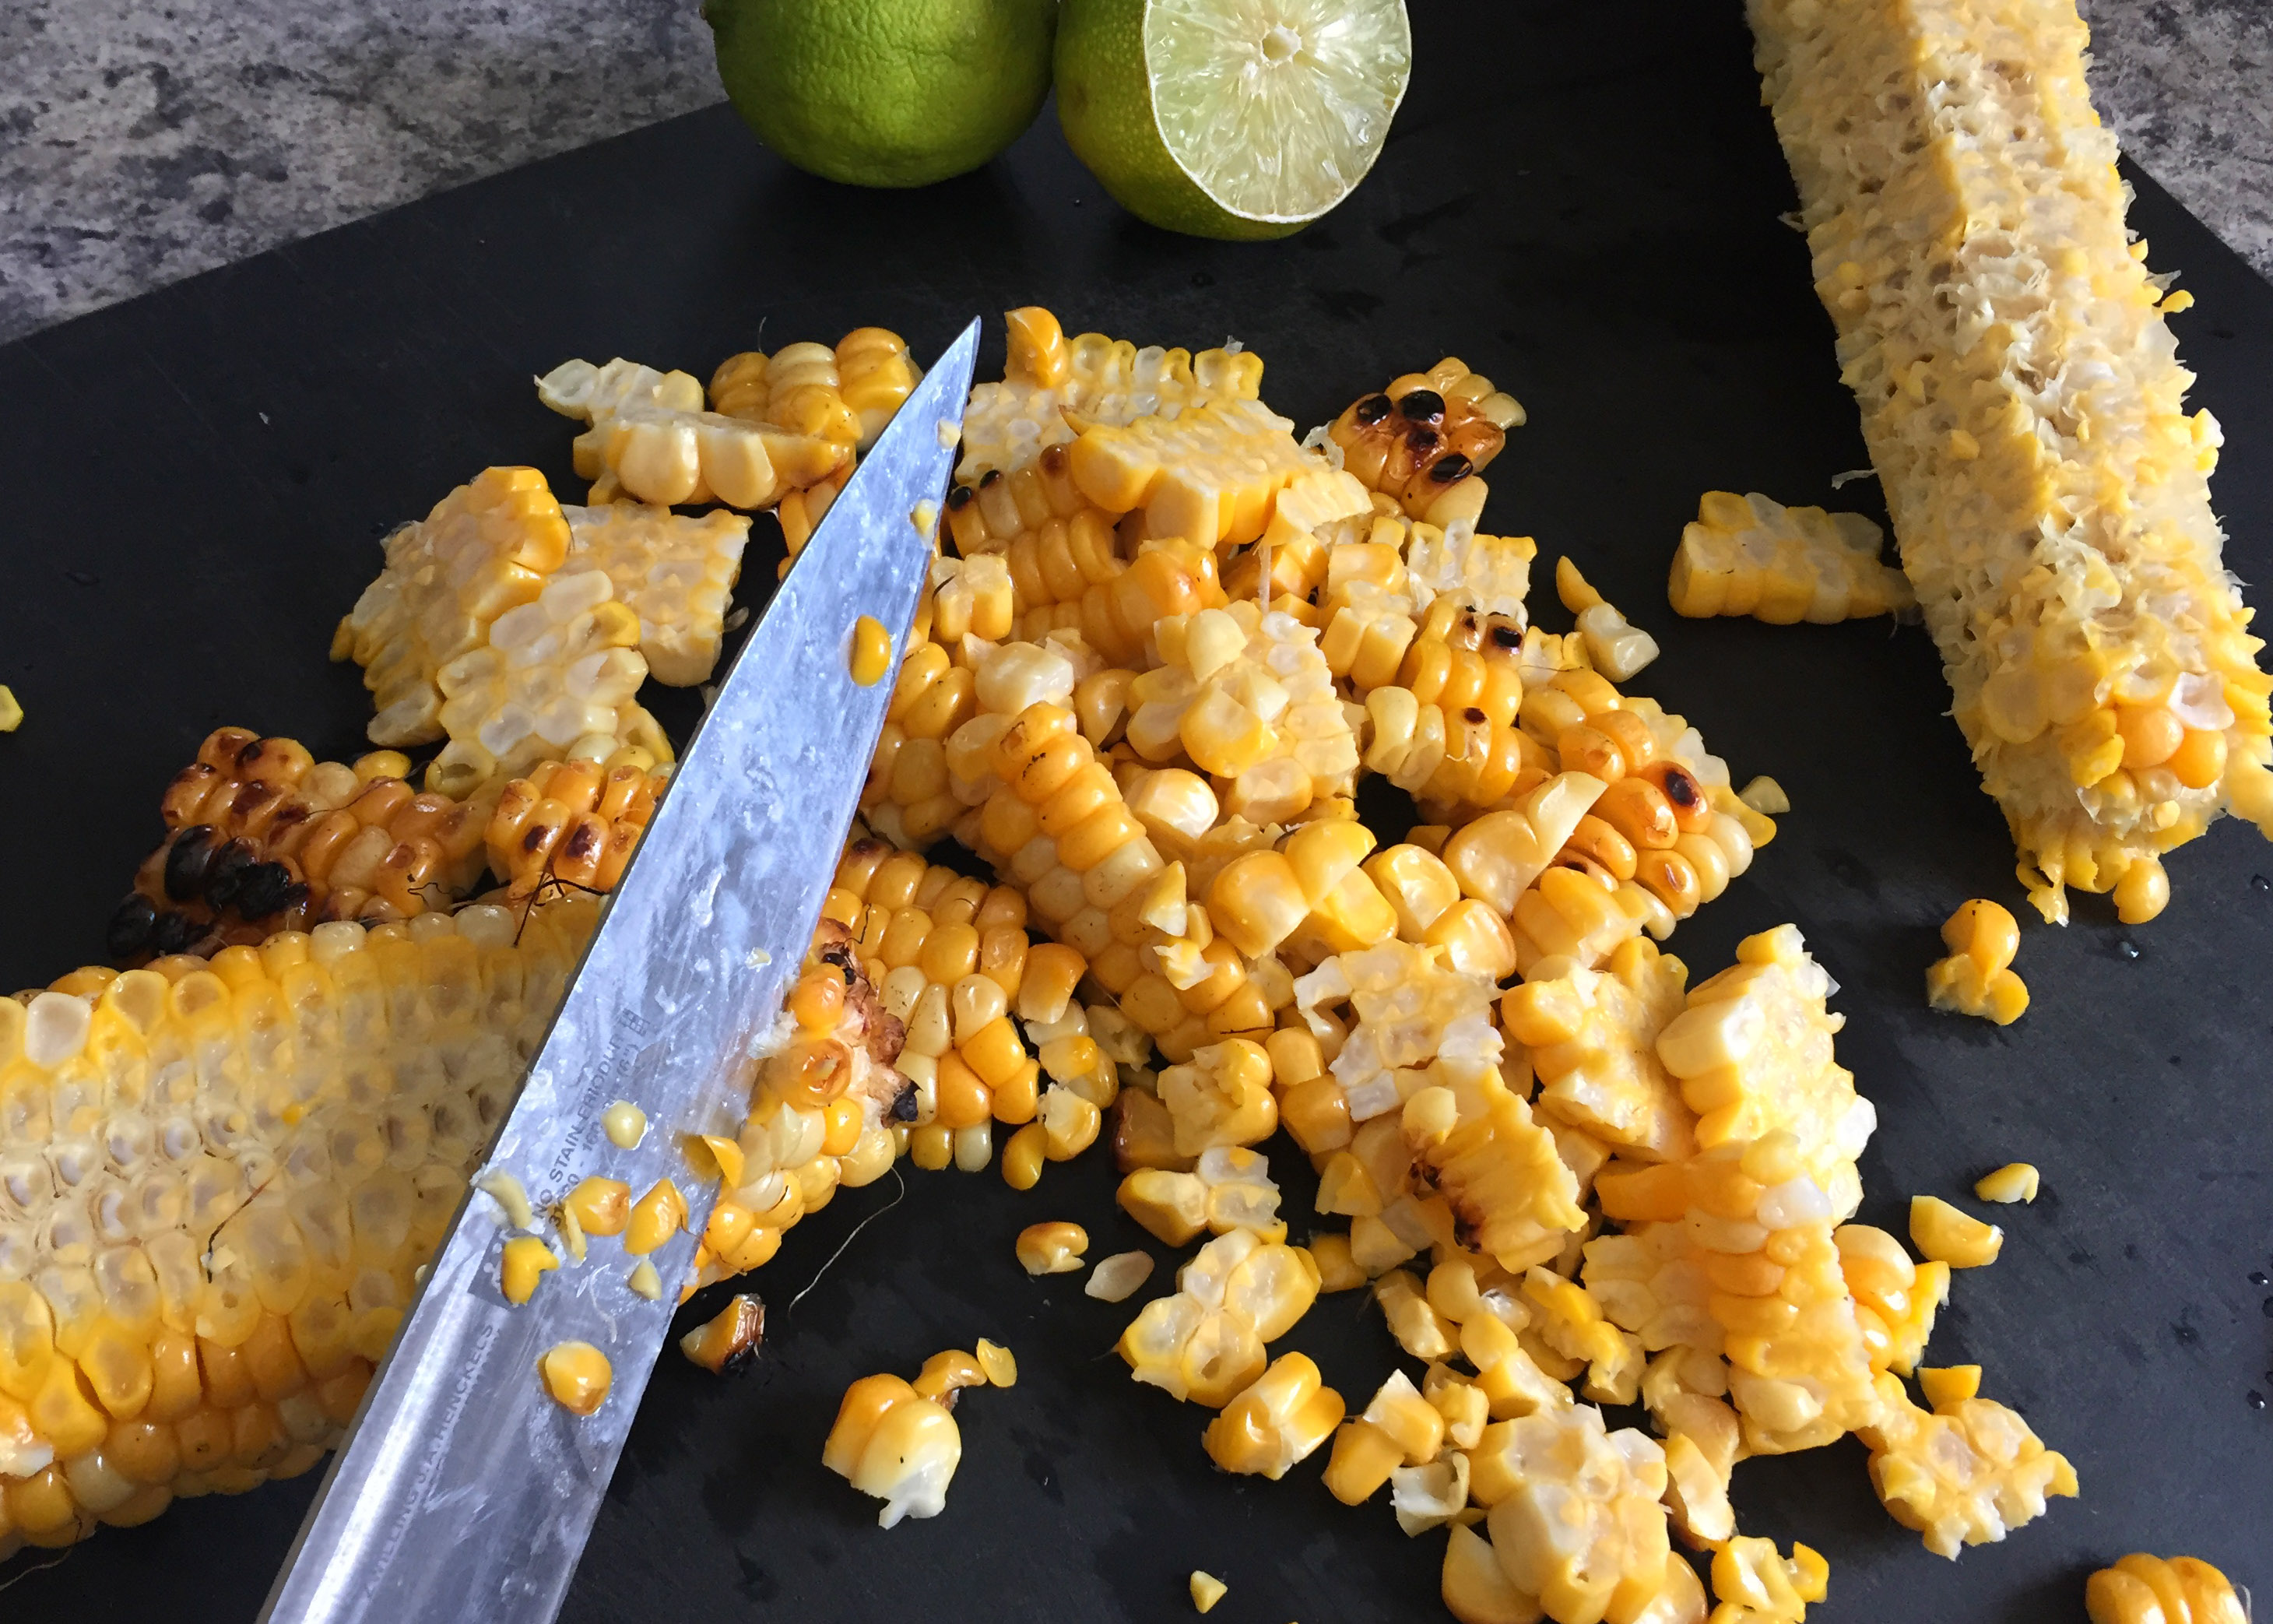
Heat BBQ grill to high. Rub corn, bell pepper and jalapeño with a glug of olive oil and sprinkle with a bit of salt. Grill corn, turning every couple minutes, until just starting to char. Cook peppers, skin side down (grill jalapeño whole), until skin is blackened. Remove from grill and let cool. Cut corn kernels from cobs with a sharp knife. Remove skin from peppers (seed jalapeño pepper) and cut into smallish dice. Add all salad ingredients to a large bowl.

SW corn salad 1

SW corn salad 4

SW corn salad 5

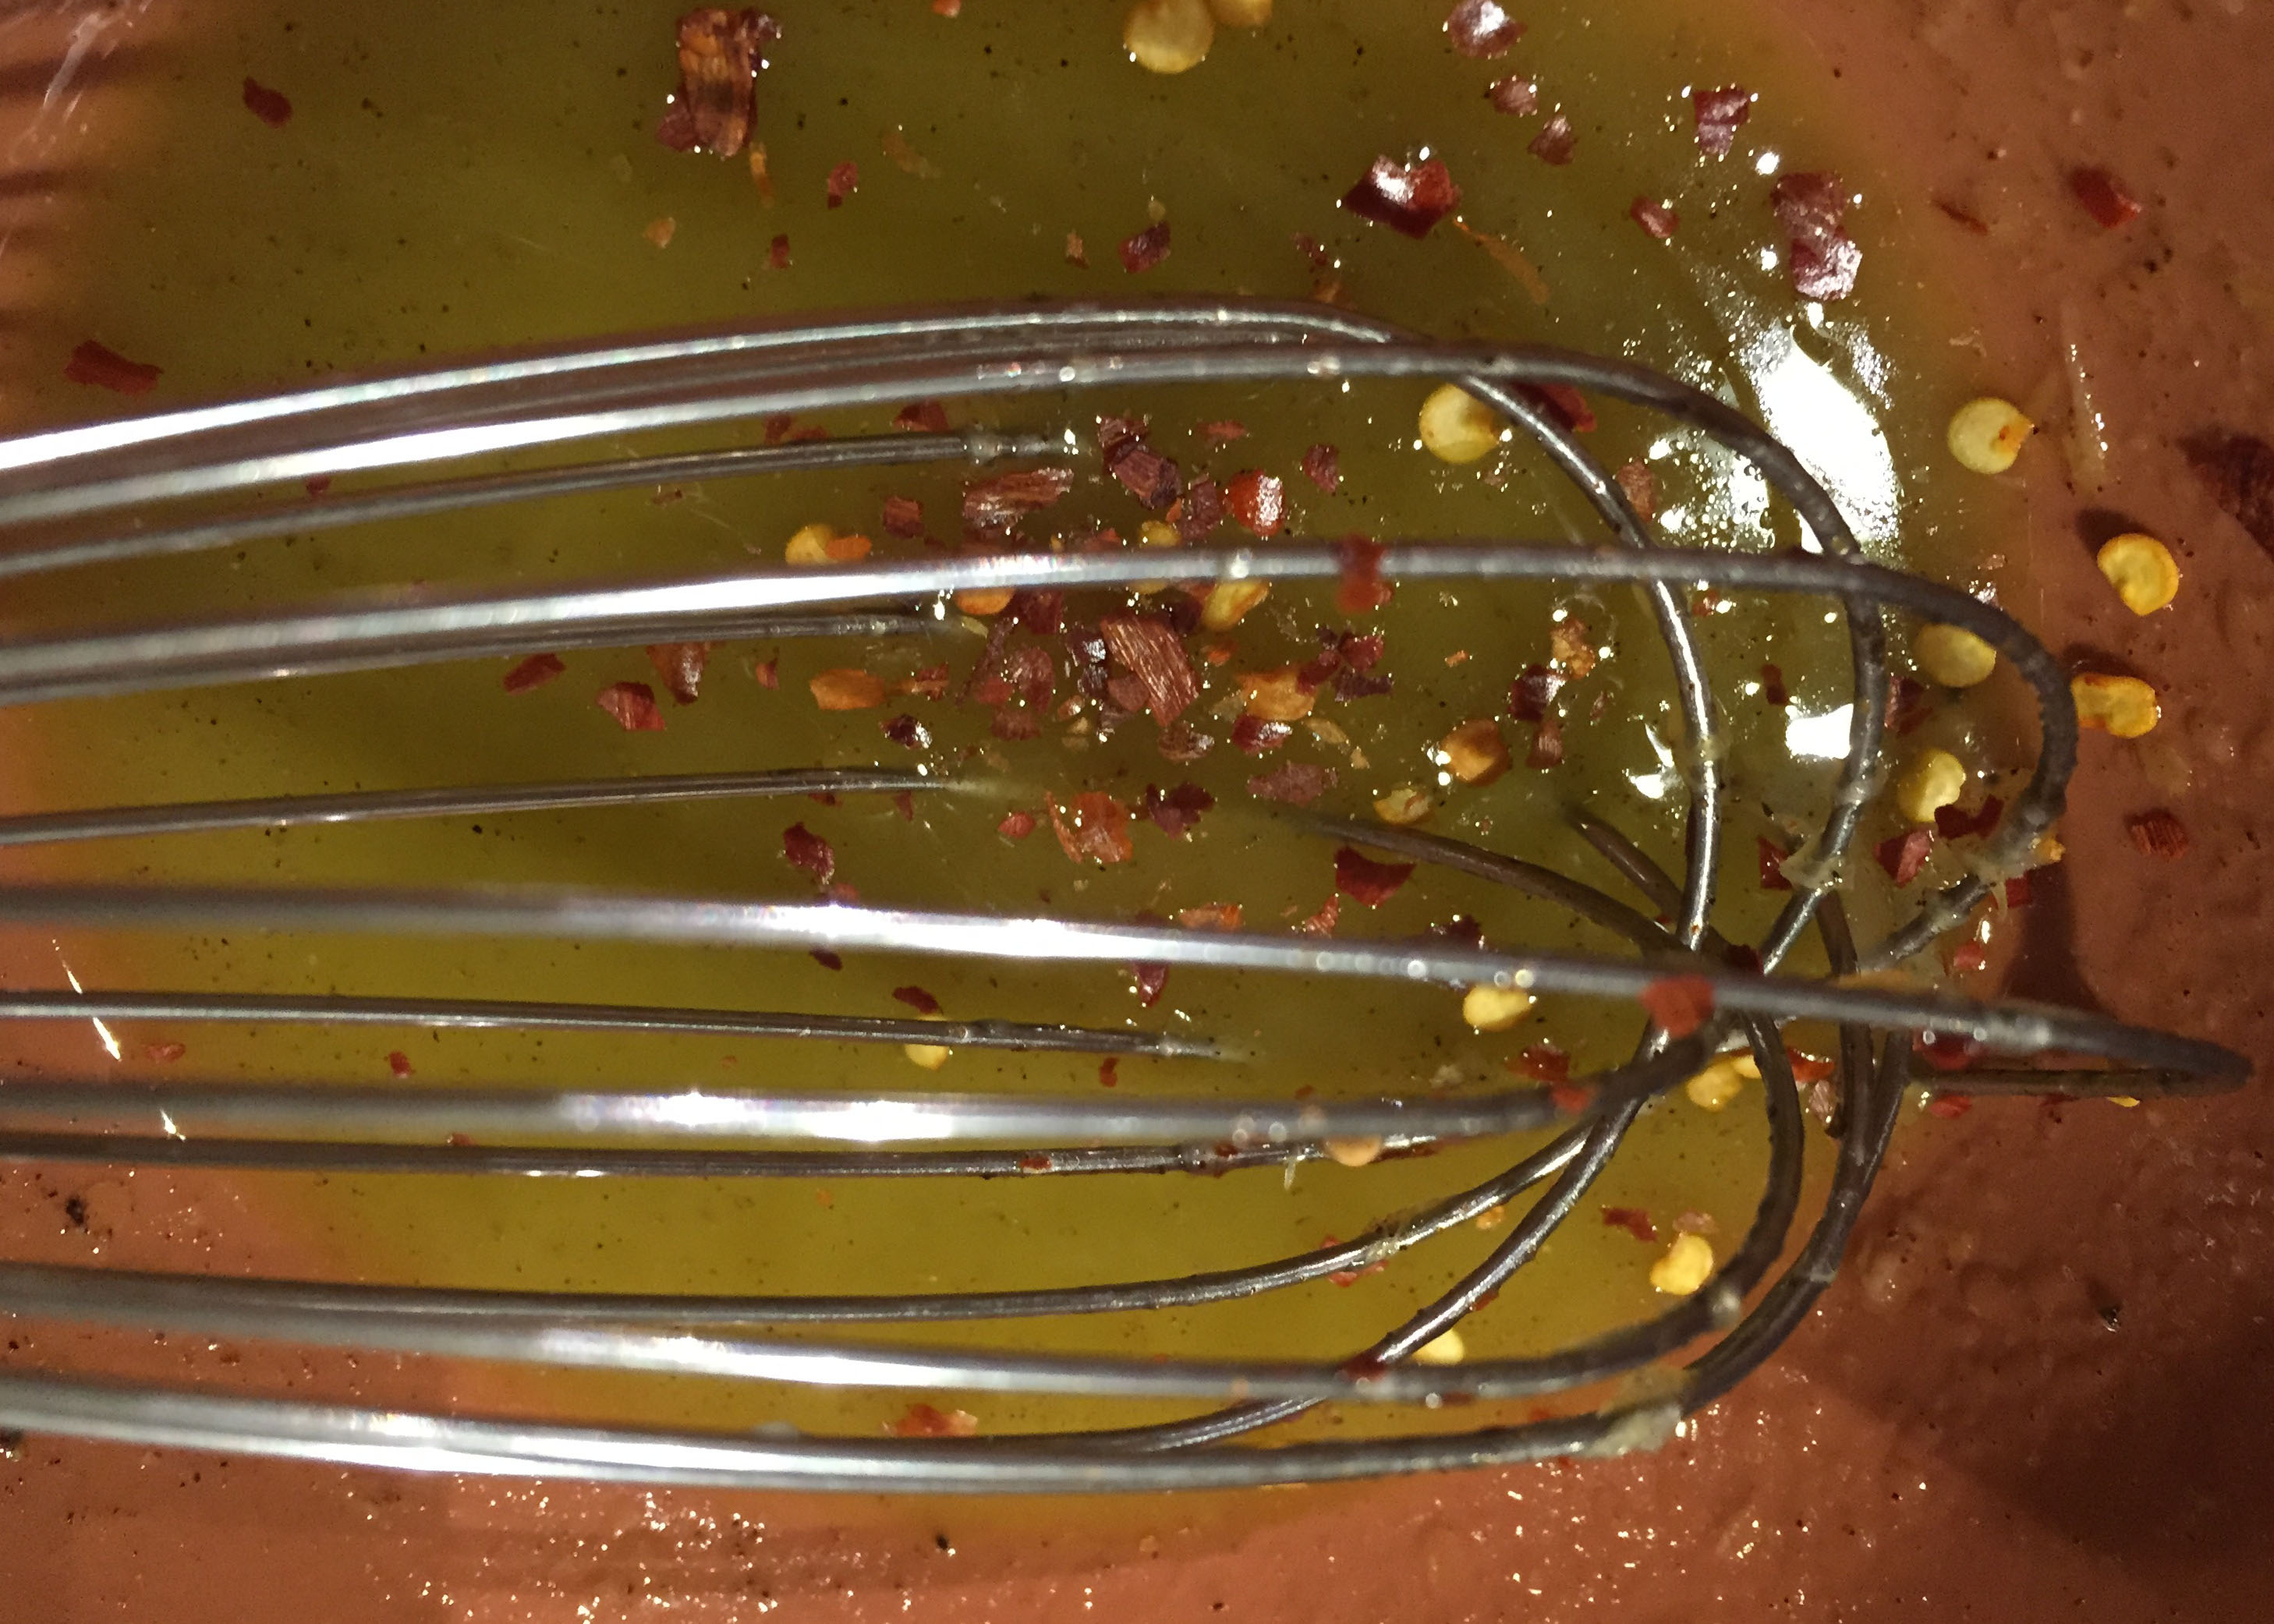
Add the first 5 dressing ingredients to a bowl. Slowly whisk in olive oil. Dressing will be a bit thin, this is ok. Add a pinch of salt and pepper. Taste and adjust seasoning to your liking. Pour over salad and gently stir.

SW corn salad 2

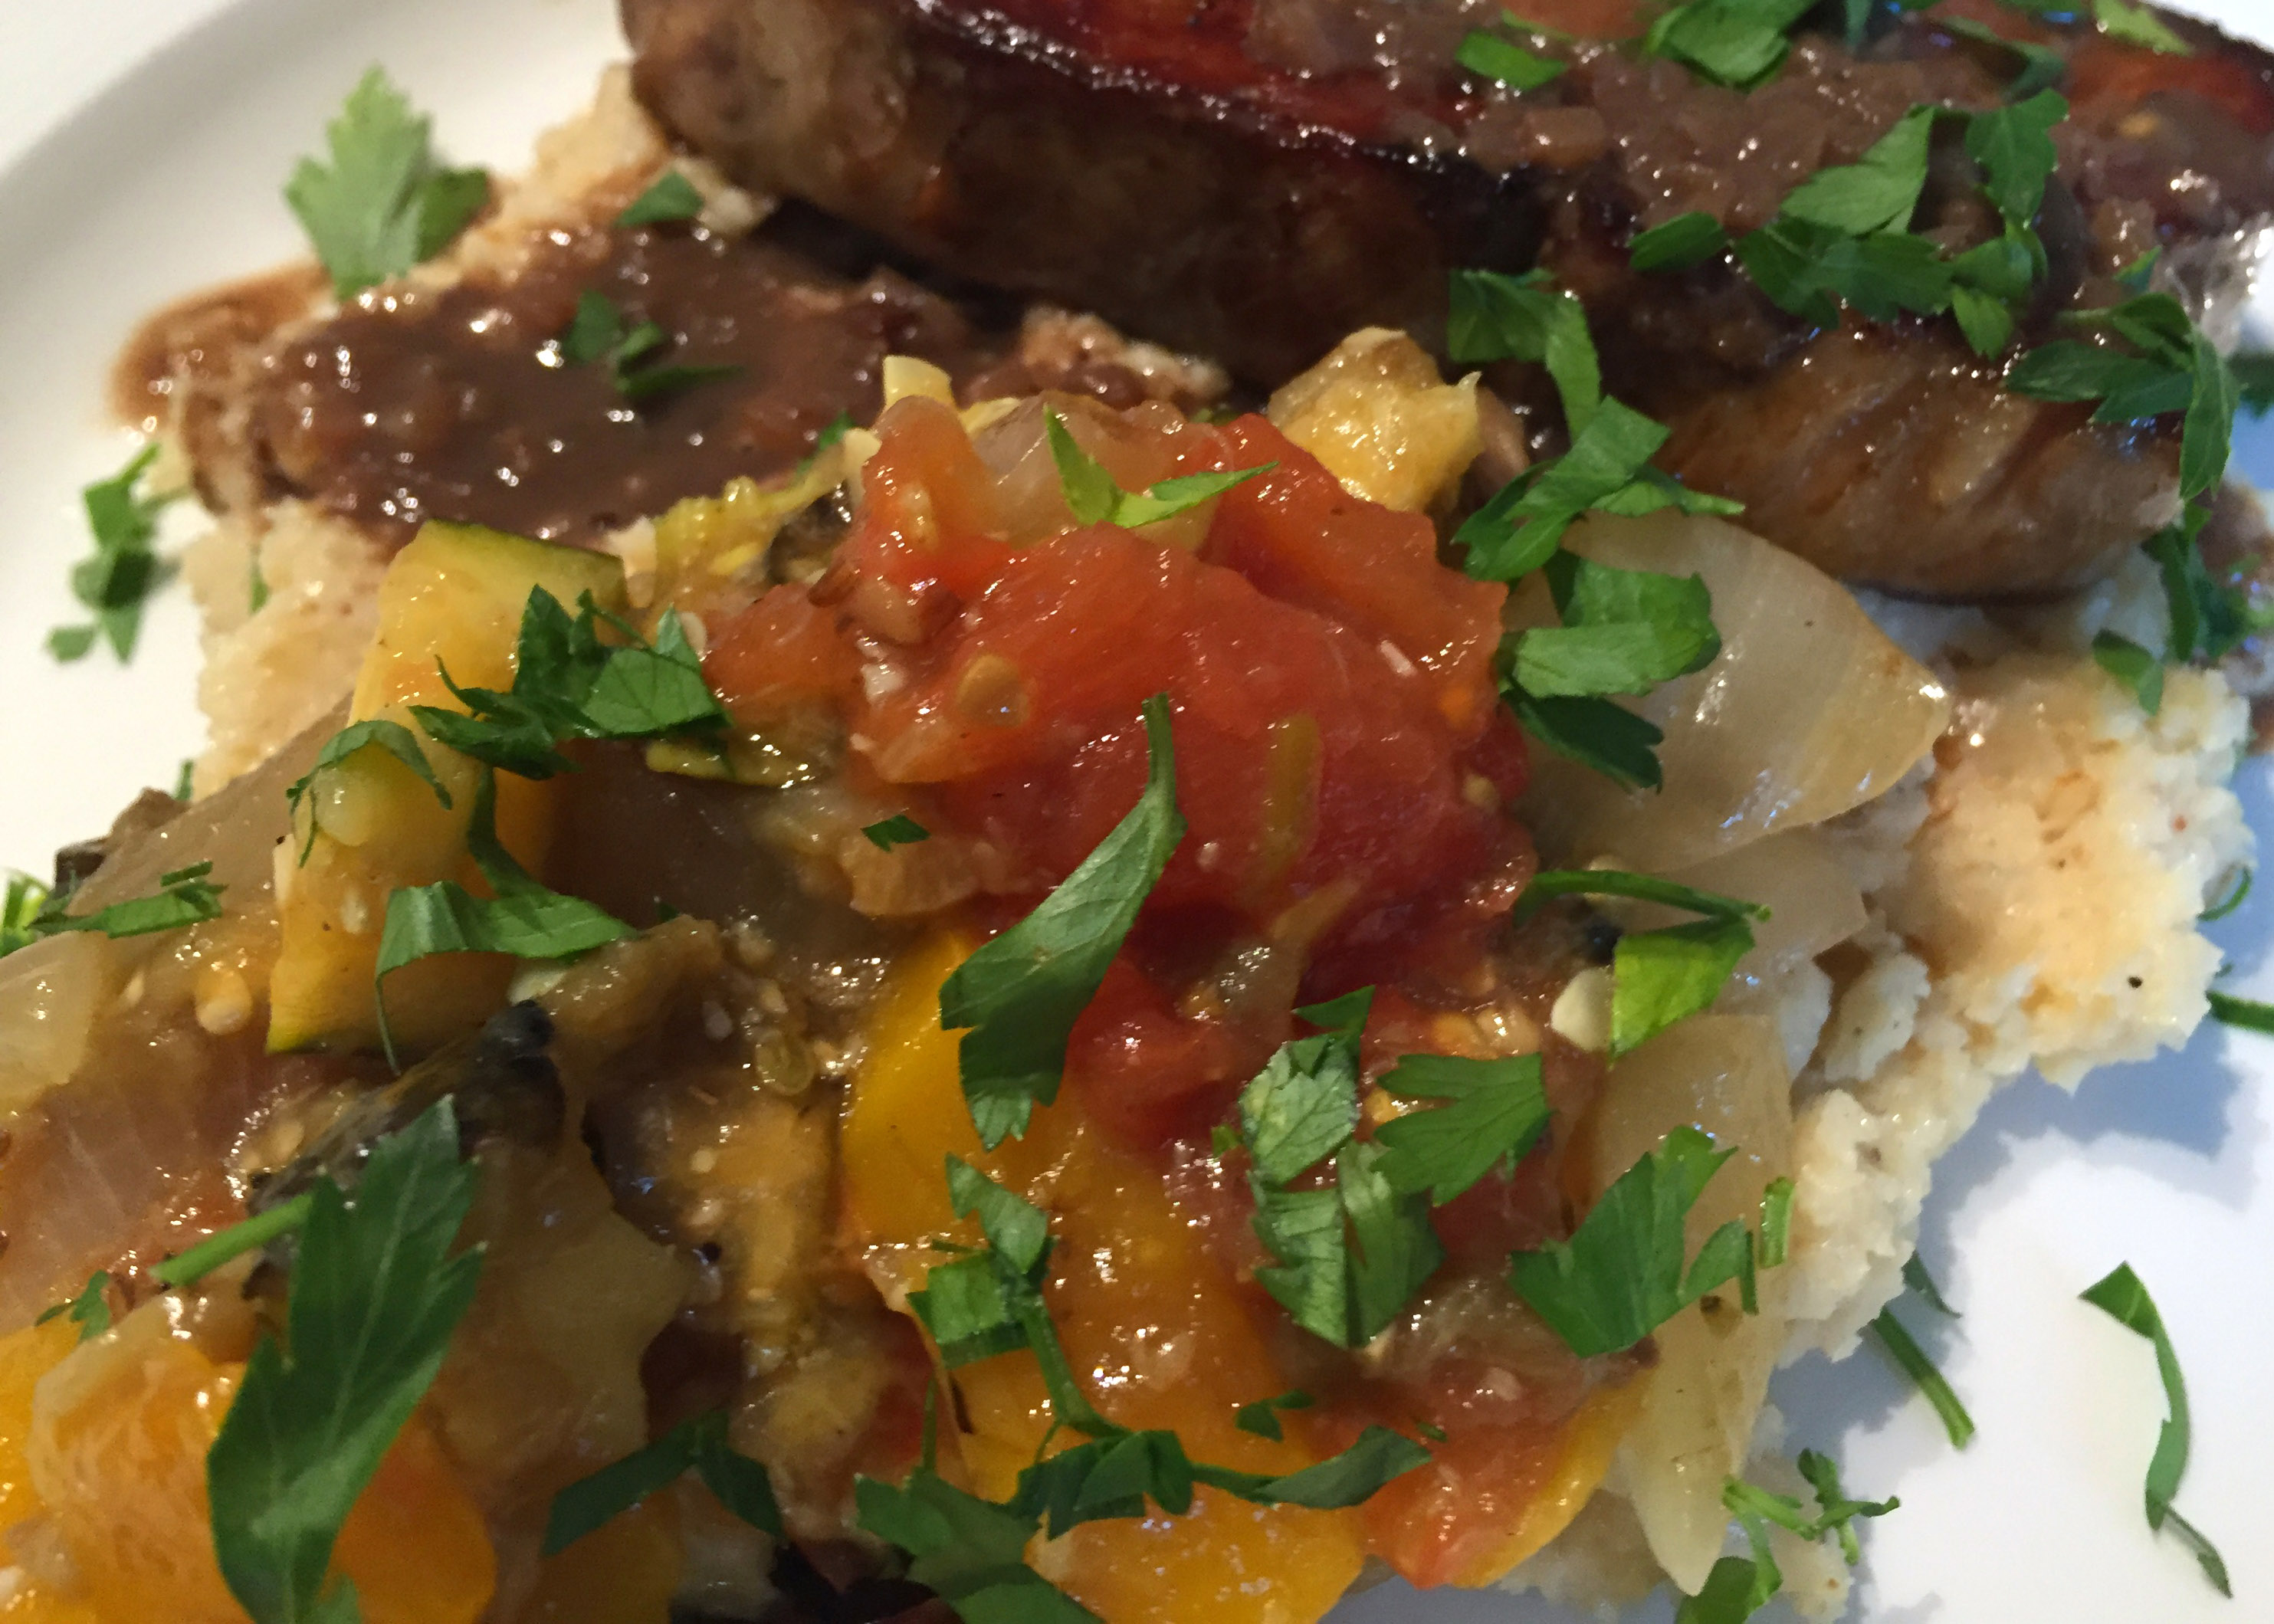
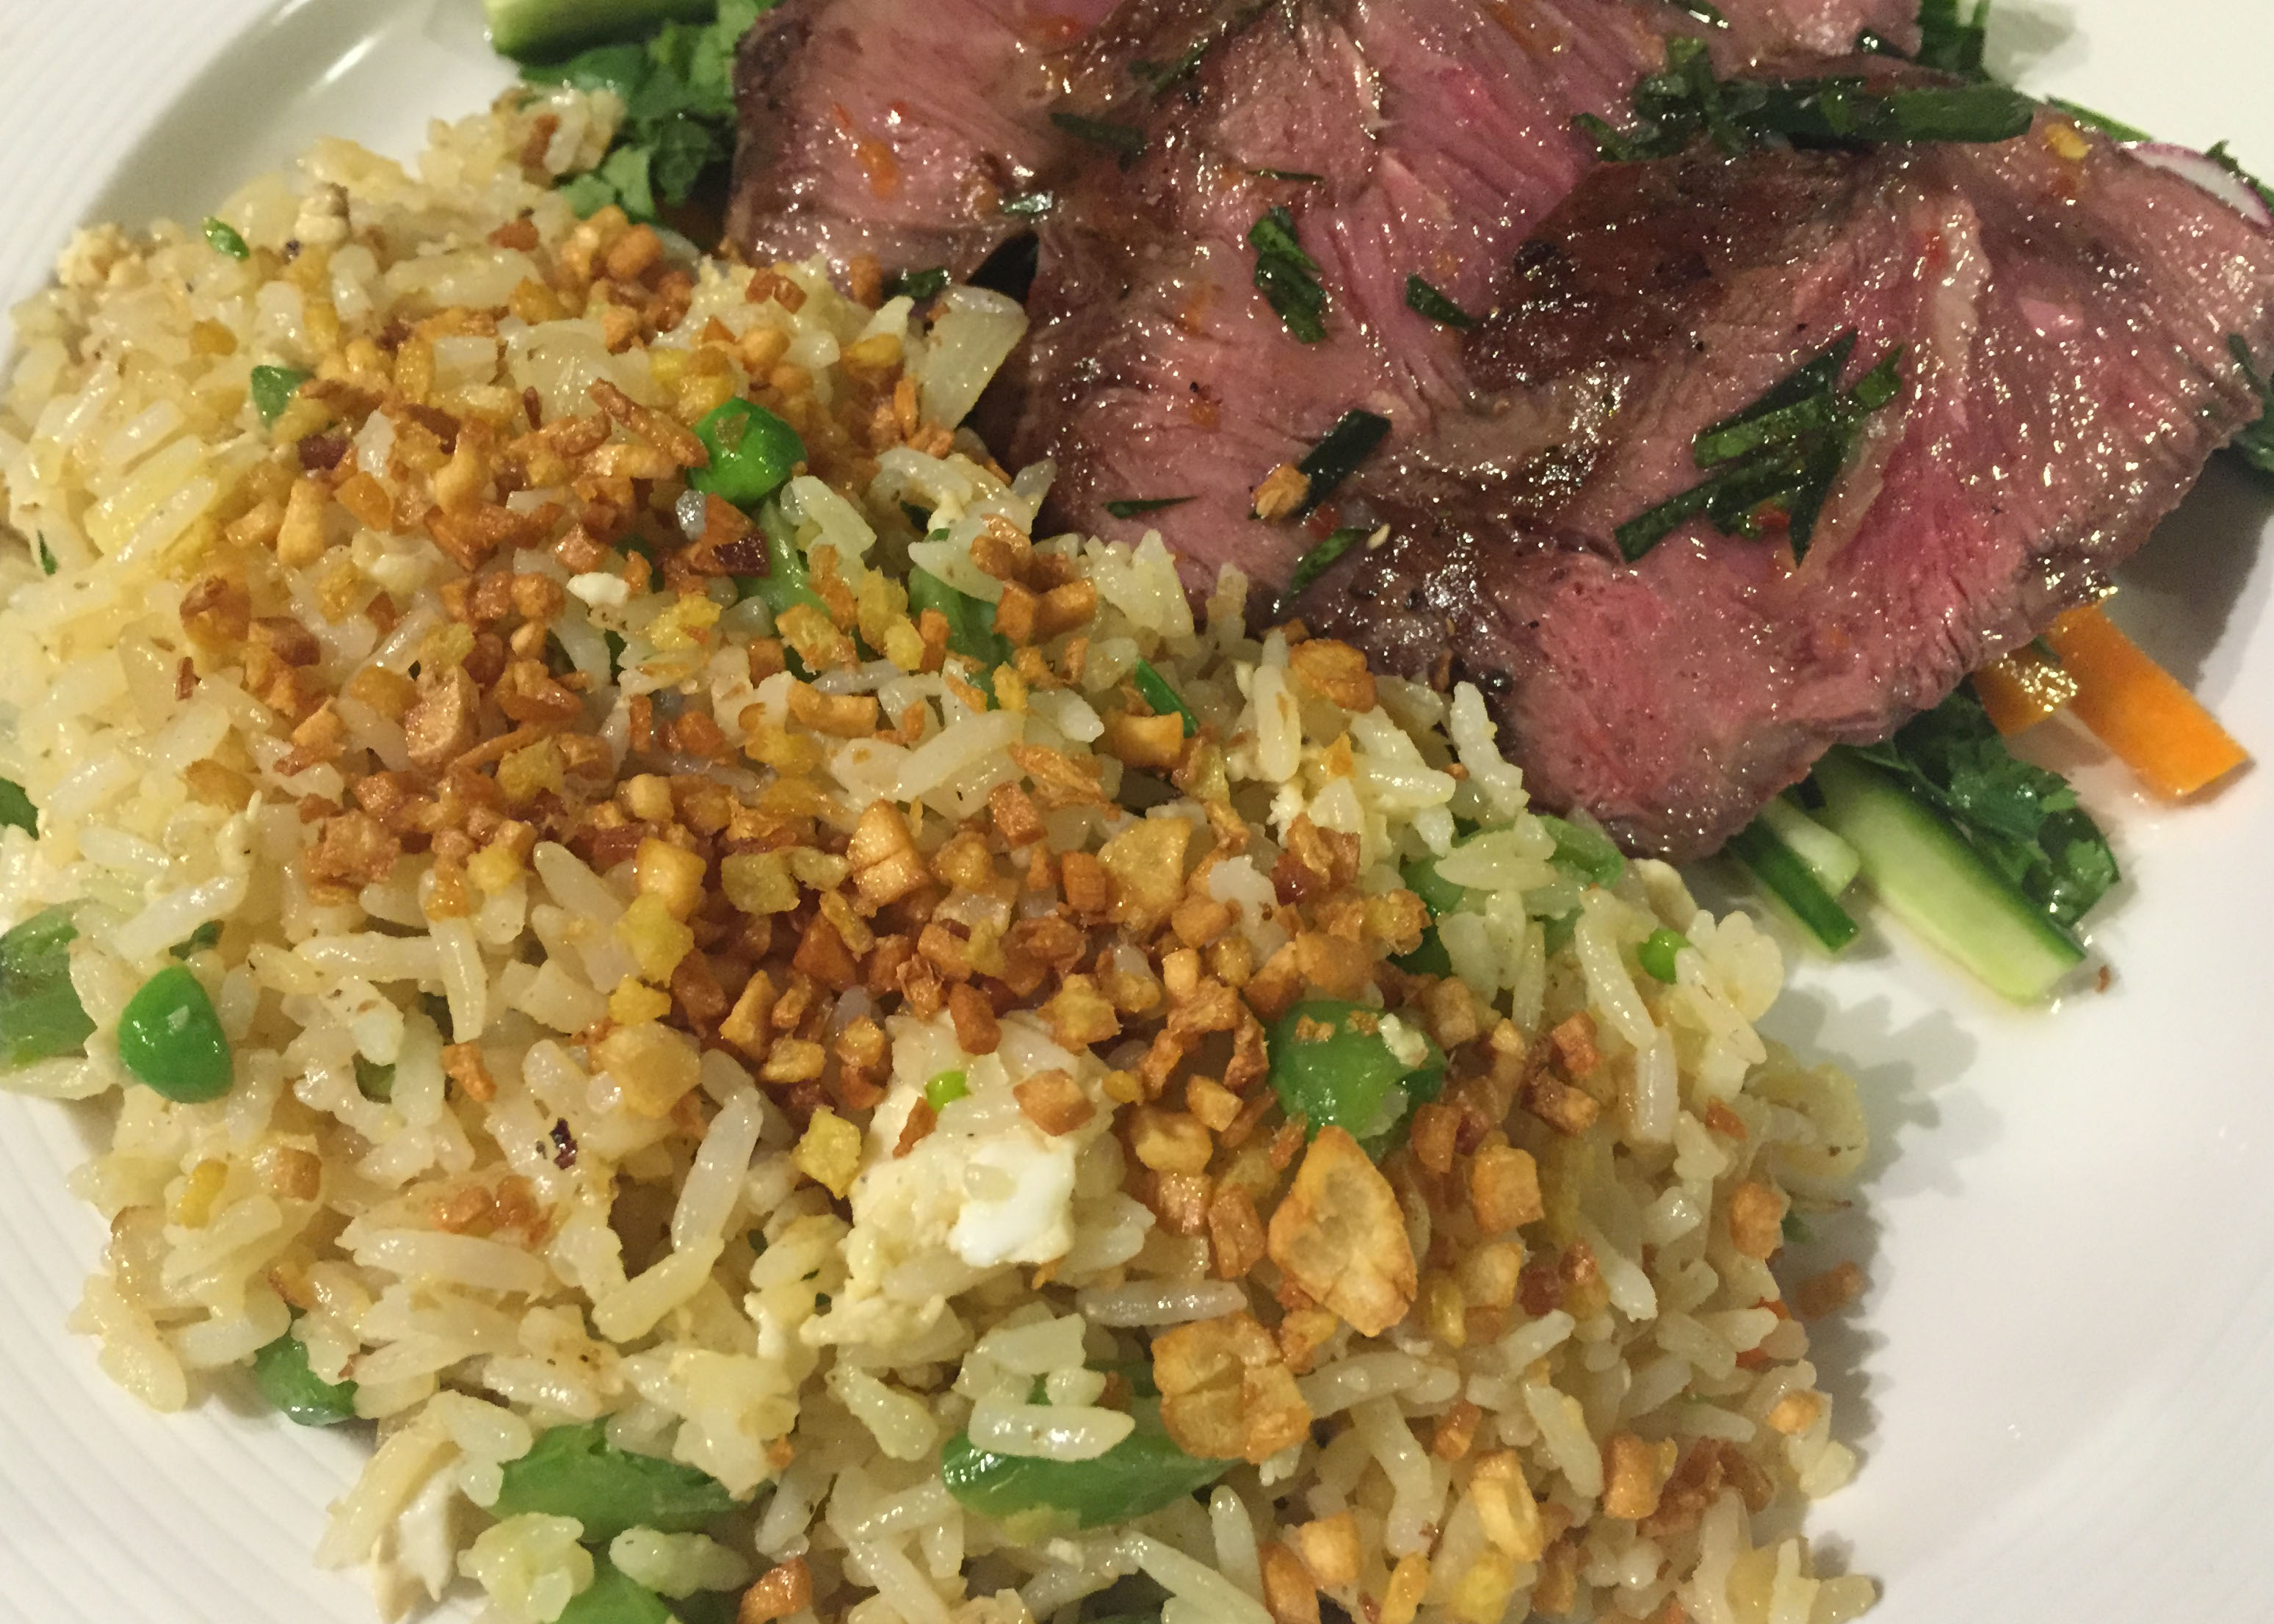
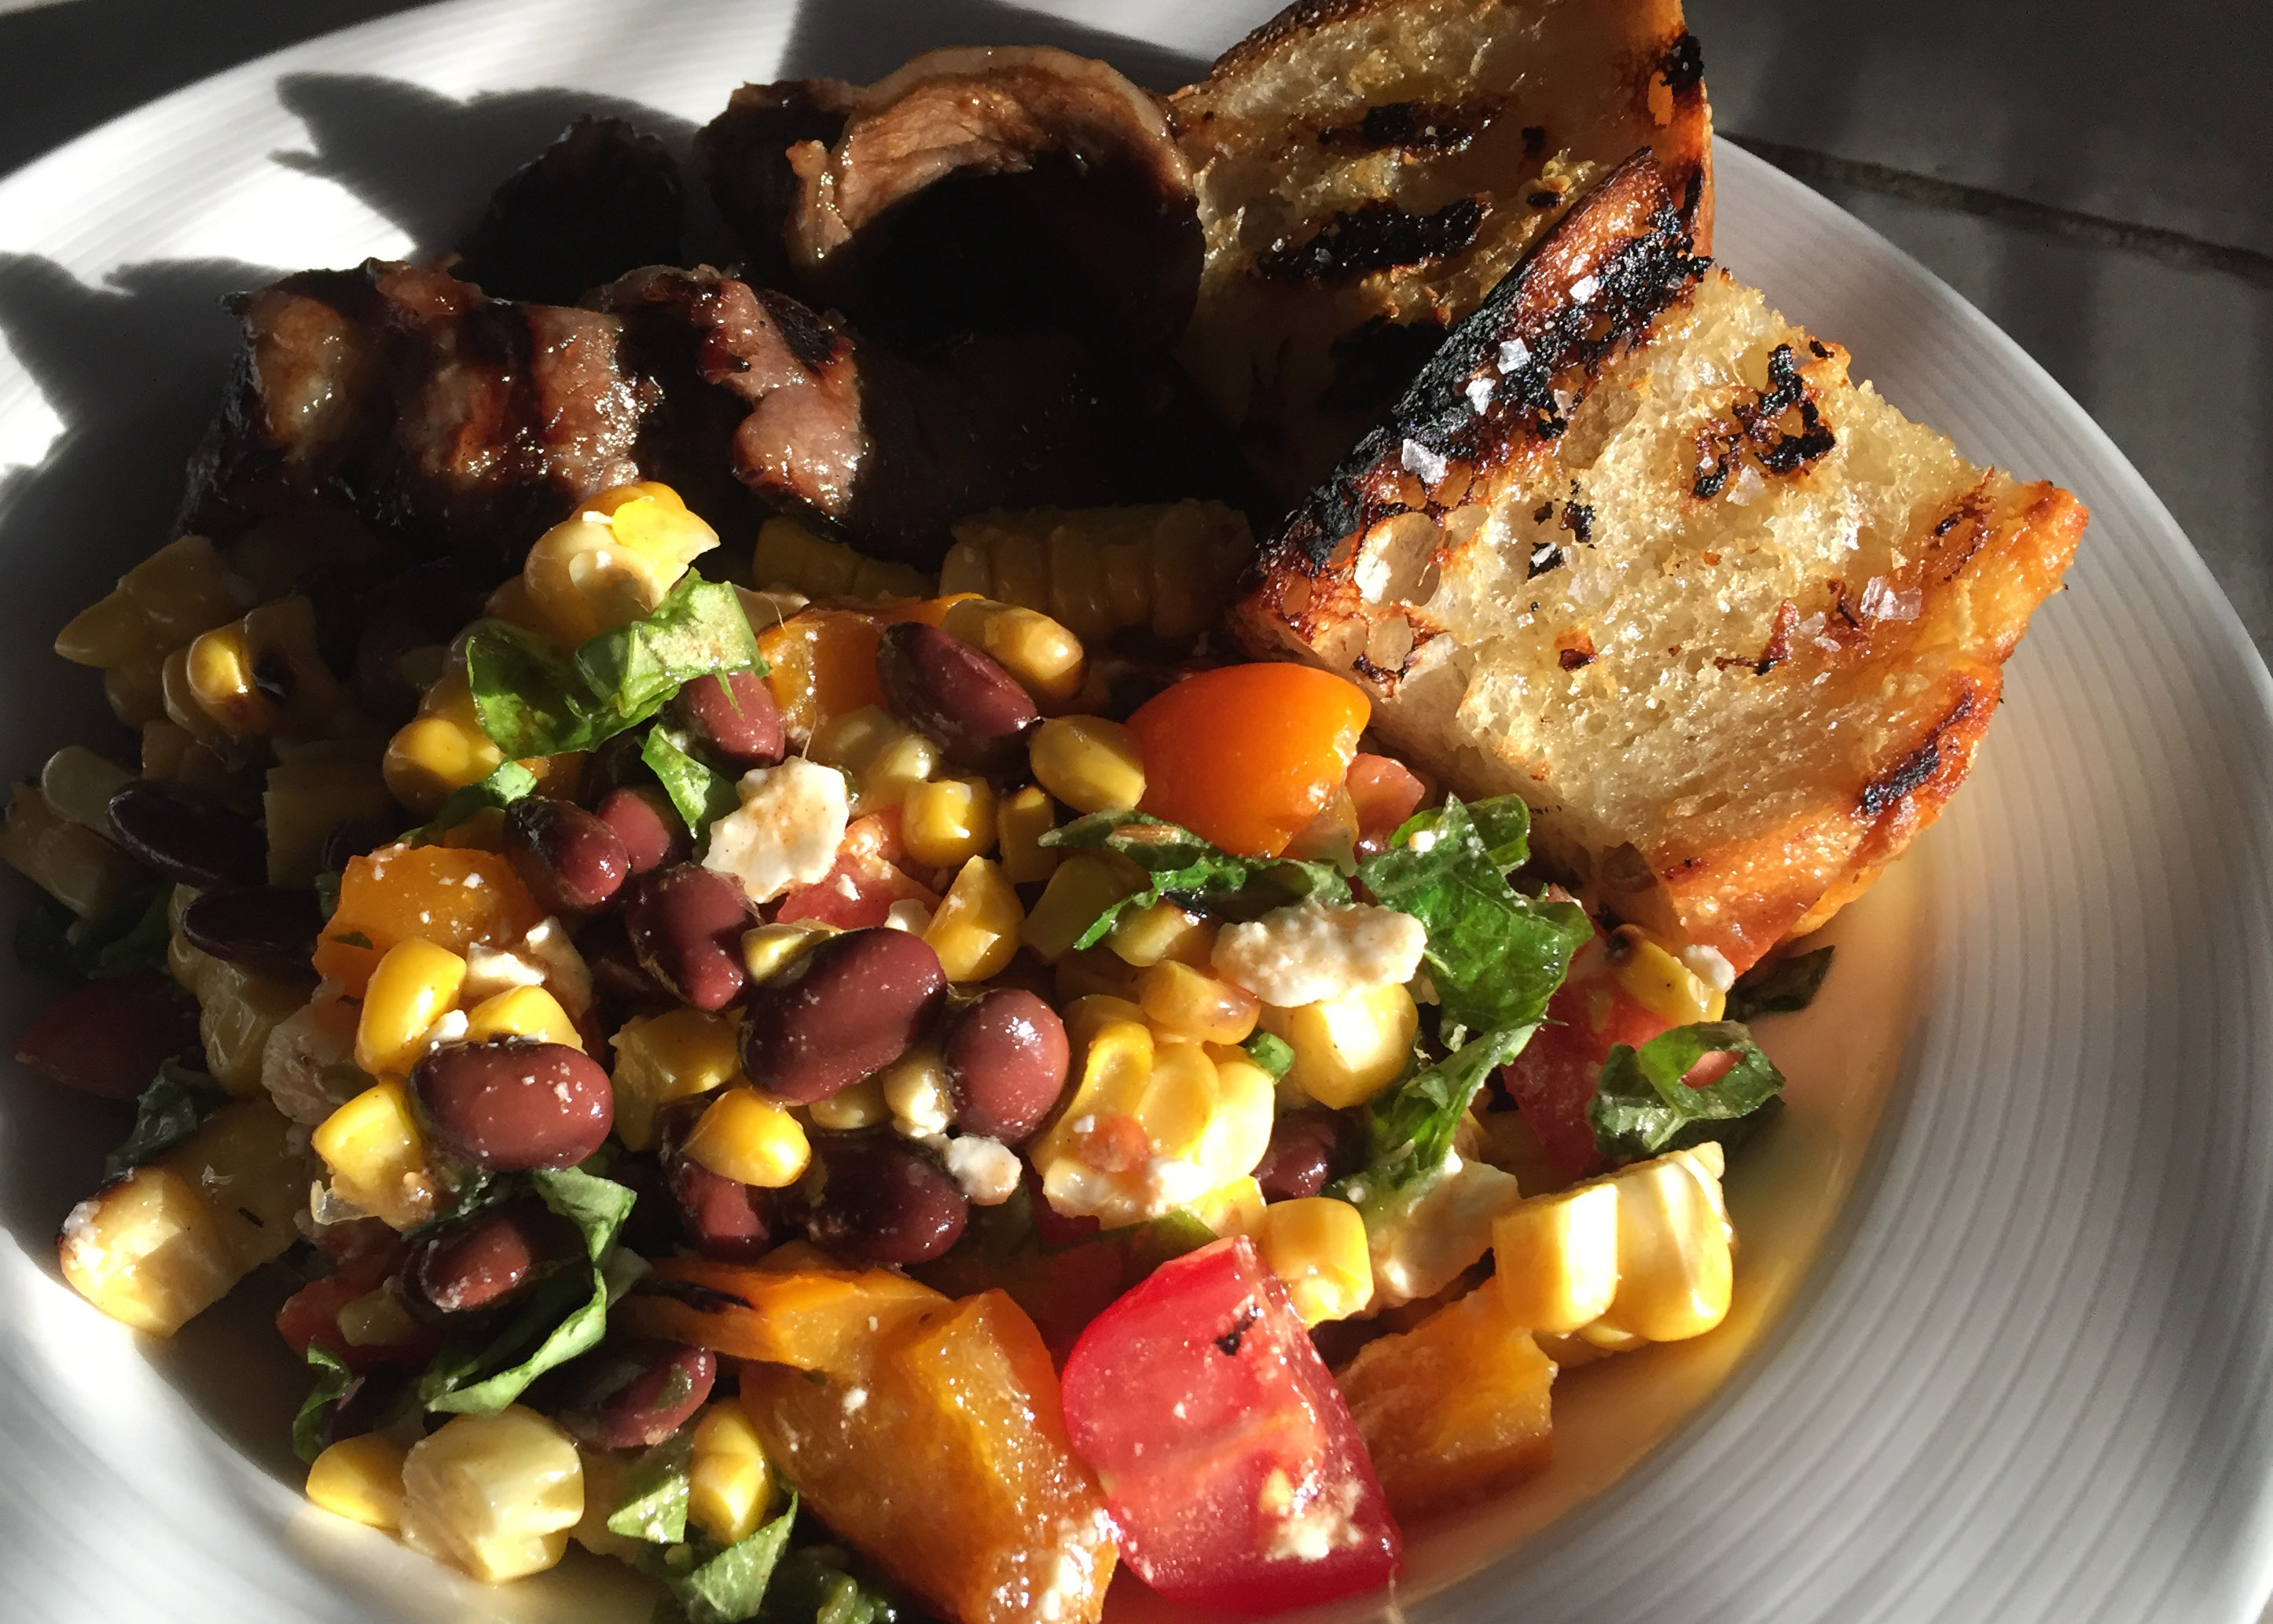
I served this with Korean beef kalbi and grilled bread. The great thing is you don’t need to serve much meat, if any. A few grilled prawns thrown on the side would also be perfect. The salad is so filling that you should consider it the main portion of your meal… the rest is just garnish.

Mechouia (or Tunisian Grilled Vegetable Salad)

mechouia4This is my first post in a while… I’ve been busy! I just finished a 2-month culinary master program. It was soooo much fun; hard work, but FUN! I met so many wonderful people and learned a bunch of new skills (what exactly is a leidenfrost pan and why do you need to know?). I also gleaned a number of new tips and tricks (got fresh herbs?… chop that <bleep> up and throw that <bleep> on everything!). I hope to bump up my cooking a notch and pass along some of my new-found knowledge to you. Stay tuned :)

Yesterday was farmers’ market day and I was inspired to try this “salad” when I saw Ottolenghi’s version of it published in The Guardian here. I added zucchini (who doesn’t need to get rid of a few of those at this time of year) and made an entirely different dressing by using some roasted garlic and adding traditional Tunisian spices. The entire thing was a lovely, silky mess of vegetables with a light, mild dressing which accentuated the natural smoky flavours without overpowering.

Mechouia1

I started my veggies cut side down on the hot BBQ to get some tasty charring. After a few minutes I turned the heat down to medium and flipped the veggies to skin side down to cook through more slowly. You want to cook the vegetables for this dish until they are well done. Many grilled salads you might want the vegetables tender-crisp… not here! These vegetables should be soft enough to melt together into smoky delightfulness.

I am a little bit vague in the EXACT size of vegetables as the amounts can and should be adjusted to your taste. I like tomatoes so I used larger ones. I’m not so hot on zucchini so I used a smaller one. Feel free to omit anything you don’t like and you could add other vegetables as well. I might try some grilled leeks next time and I think slices of squash would also be delicious. And a pinch of smoked paprika in the dressing would definitely not go amiss.

Roasted vegetables:
2 small or 1 large eggplant
1 sweet white onion or red onion
1 yellow pepper
3 tomatoes
1 zucchini
1 jalapeño (or similar medium spiced pepper)
2 garlic cloves (these will be smashed and used in the dressing)

Dressing:
1 garlic clove, minced
1/2 tsp coriander seed, ground
1/2 tsp caraway seeds, ground
2 TBS good quality, fruity olive oil
1 TBS lemon juice
1 tsp sherry vinegar
1 tsp honey
salt and pepper to taste

Garnish:
chopped parsley, basil, cilantro, or mint in any amount you like

Preheat BBQ on high heat.

Leave all vegetables unpeeled. Cut everything in half lengthwise except garlic cloves. Onion should be cut in half around the circumference for even cooking and to keep it together. Place vegetables cut side down on the hot grill and cook for 5 minutes until grill marks appear. Flip the vegetables to the skin side down and lower the heat on the BBQ to medium. Continue to cook, removing the vegetables as they reach the well done stage. My tomatoes and hot pepper were finished with an additional 15 minutes on the grill, the rest took about 30 minutes. The eggplant and peppers should be placed on the hottest part of the grill to char the skin black for flavour and easy peeling, the zucchini on the coolest part of the grill to cook through slowly but not burn the skin as you won’t be peeling it. Let vegetables cool to room temperature.

mechouia2

Once cooled, peel and discard the charred skins from all the vegetables except the zucchini, and seed the peppers. Roughly chop all the vegetables (except garlic) and place in a large bowl. Let sit for 1/2 hour then drain the accumulated liquid from the bowl; let sit for another 1/2 hour and drain again.

mechouia3

Peel and smash the roasted garlic into a paste with a fork or the side of a knife. Put in small bowl and add the un-roasted minced garlic along with the other dressing ingredients. Whisk with a fork to emulsify. Taste and adjust seasoning to your liking. Add to the drained vegetables and let sit for another couple hours (or overnight) to allow the flavours to meld. If you store it overnight in the fridge, remove it and let it sit for a couple hours to come up to room temperature before serving.

mechouia5

Immediately before serving, stir and taste to adjust seasoning again. At this point I added another squeeze of lemon and some salt and pepper. We enjoyed this with smoked pork steaks. It would be a very tasty side to grilled sausages or simply spoon it onto grilled bread or scoop it up with pita and chow down. It’s a very tasty way to enjoy vegetables that are in season right now!

Smokin’ Good Granola Bars

granolabars4I started experimenting with granola bars because Husband needed a better snack on his long bike rides instead of just drinking nutritional gels (ewwwww) and I have learned a few things along the way. I learned that using small-sized muffin or cupcake tins make much better “bars” than baking the bar whole and then trying to slice it. I learned that you have to press the mixture down hard in the tin so when it bakes the ingredients really stick together and the bar doesn’t fall apart when you take a bite. And I learned that adding some bittersweet chocolate chips just makes everything, well… you know.

Read more

Wheatberry “Risotto” (with mushrooms and blue cheese)

wheatberry risotto4Let’s be honest – this is not risotto. And let’s be even more honest – I would probably not be eating a lot of wheatberries if they weren’t healthy. I don’t mind them once in a while, but they do not impart the same starchy creaminess that you find in real risotto. However, I have to admit that married with the earthy, silky loveliness of braised mushrooms and then amped up with blue cheese, you can’t help but fall a teeny little bit “in like”, if not love. They also have a satisfying chewiness that makes me feel like I’m eating more than just “healthy”. And bonus, Husband really enjoyed this (albeit 2 hours late and at room temperature) and that’s always a plus for me!

I have noted in the recipe to sauté the veggies in olive oil but if you’re anything like me, you will have that glass jar in the refrigerator which you are constantly topping up with drippings from bacon, fat from slow roasting pork, and what’s left in the pan after frying sausages, etc. Use it! Pork fat is all about flavour and, after all, everything else about this dish is pretty healthy.

I also used a cup of beef stock to deepen the flavour but feel free to use all poultry stock or make it vegetarian by using all vegetable stock. Whatever floats your boat! :)

½ ounce (1/2 cup, approximately) dried mushrooms (porcini or a mix)
1 1/4 cup boiling water
2 cups chicken, turkey or vegetable stock
1 cup beef stock (or another cup of poultry or vegetable stock)
1 tsp salt
1 cup uncooked wheat berries
2 tablespoons olive oil (or other fat)
1 medium finely chopped onion (approximately 1 generous cup)
12 ounces white or brown mushrooms cleaned, trimmed and sliced
2 large garlic cloves, minced
2 teaspoons chopped fresh rosemary (or other herb like sage or thyme)
1/3 cup dry white wine
salt and pepper to taste
2 ounces of your favourite blue cheese
handful of chopped fresh parsley

To speed up the cooking process you can soak the wheatberries in a bowl covered with hot tap water for 4 hours or overnight.

Put dried mushrooms in a bowl or measuring cup and cover with 1 1/4 cups of boiling water and let sit. Agitate the mushrooms at around 15 minutes to loosen any grit. After 30 minutes remove and finely chop mushrooms. Strain liquid to remove any grit. You should have 1 cup.

wheatberry risotto1

Put all stock in a saucepan (chicken, beef, and mushroom broth) and bring to simmer. Add 1 teaspoon of salt.

Heat the olive oil or other fat in a large skillet. Add the onions and cook, stirring, until they begin to sweat and soften (about 3 minutes). Add the fresh mushrooms and continue to cook until they soften (about 5 minutes). Add a pinch of salt, the garlic and rosemary and continue to cook, stirring occasionally, until the mushrooms start to brown (about 5 more minutes).

Add the wheatberries and reconstituted mushrooms. Stir in the wine and cook until most of the liquid as been absorbed, scraping the bottom of the skillet to remove any brown bits. Add 3 cups of the heated stock to the pan. Cover and maintain at a low simmer for 60-90 minutes. The timing will depend on your wheatberries. At the 60 minute mark check every 10 minutes or so until the wheatberries have reach desired doneness (ok, that may not be a real word but I’m using it anyway), adding more of the reserved stock if necessary to keep the dish from drying out.

wheatberry risotto3

When the wheatberries are done to your liking, taste and re-season with salt and pepper (remember you will be adding more blue cheese to don’t go crazy with the salt). Stir in the chopped parsley. Remove from heat, crumble blue cheese over the pan and top with the rest of the parsley. Serve and enjoy.

Grilled Asparagus with Gremolata (aka Green on Green)

asparagus grem1I know spring is really here because ugly woodpecker is back. Every spring he pecks on the metal facing of my chimney to attract a female and the sound reverberates throughout the entire house. I know he is ugly because long after all the other woodpeckers have found their soulmates, ugly woodpecker is still at it. And the earlier the sun rises, the earlier he starts. It’s going to get really annoying in the next couple months but, for now, SPRING HAS ARRIVED!

Here on the West Coast we have had absolutely gorgeous weather the past few weeks (I even got a bit of a sunburn last week?!?!), and my first sowing of radishes, carrots and peas are poking up in the garden. To top it off, I spotted some brilliant green, fat spears of asparagus in the grocery store the other day. I don’t think they were local (probably too early for that) but I snapped them up anyway as they taste like spring to me.

Read more

Wife’s Choice: Indian Spiced Cauliflower and Potatoes

potatocauli5Yesterday I told you about two new dishes I made this past week and gave you Husband’s favourite. Now it’s my turn! This recipe is all over the internet, first published by Gourmet magazine several years ago and given new life on various food blogs, most famously on Smitten Kitchen (which you should definitely check out if you haven’t yet!).

I made a couple small change to the original recipe including not to peel the potatoes (I’m not sure why you would but go ahead if you want to). I also added some quartered mushrooms when I roasted the cauliflower and potatoes because I had a few strays in my fridge. This is an ideal way to use up any veggie bits and bobs that take well to roasting hanging around your crisper (carrots, broccoli stems, parsnips). If I had leftover peas, I think they would be a great addition thrown into the pan in the last 5 minutes to reheat.

Make sure you taste the jalapeno before you go all crazy and just toss it in there. The heat level can vary a lot and if yours is really hot you may want to remove the seeds or omit the cayenne from the recipe.

1 medium head cauliflower, cut into 3/4-inch-wide florets
1 1/4 lb Yukon Gold potatoes, cut into 1/2-inch cubes
vegetable oil
1/2 teaspoon cumin seeds
1 teaspoon salt, divided
1 medium onion, small dice
2 garlic cloves, finely chopped
2 teaspoons fresh jalapeño, small dice (seeds optional)
2 teaspoons minced peeled fresh ginger
1 teaspoon ground cumin
1/2 teaspoon ground coriander
1/4 teaspoon turmeric
1/4 teaspoon cayenne
1/2 cup water

Place a shallow baking pan on rack in the middle of the oven. Preheat oven to 425°F.

Toss cauliflower, potatoes (and any other vegetables you may want to use up) together in a bowl with a big glug of oil, cumin seeds, and 1/4 teaspoon salt. Spread in hot baking pan and roast, stirring occasionally, until cauliflower is tender and browned in spots and potatoes are just tender, 20-30 minutes.

potatocauli3

While vegetables are roasting, add a glug of oil to a heavy, large skillet and cook onion, garlic, jalapeño, and ginger over medium heat, stirring frequently, until very soft and beginning to turn golden, 8 to 10 minutes. Add ground cumin, coriander, turmeric, cayenne, and remaining 3/4 teaspoon salt and cook, stirring constantly, 2 minutes.

potatocauli1

potatocauli2

Stir in water, gently scraping up any brown bits from the bottom of the skillet, then stir in roasted vegetables. Continue to cook, stirring occasionally, 5 more minutes.

potatocauli5

We enjoyed this with a couple of butter chicken spiced sausages.

Husband’s Choice: Pulao with Turkey

turkeypulao5This week I experimented with two brand new recipe ideas for dinner. The first was a desperate act to use up the last of the turkey from Easter dinner (I am now referring to this dish as Turkey 4.0 as it was the fourth turkey dish in as many days) and the other was an attempt to get as far away from turkey as possible. Funnily enough, both dishes are Indian in flavour. Go figure.

Husband really loved the Indian pulao (basically a South Asian rice pilaf) to which I added diced leftover turkey (not authentic… don’t judge) and heaped into portobello mushroom caps and baked. My favourite was Indian spiced cauliflower and potatoes (which I will share with you shortly).

I know I just said that Indian pulao is basically Indian rice pilaf, but instead of plain rice I used a mixture of 11 different rices/grains/lentils that I buy at my local grocery store (T&T for anyone who is interested). It’s very healthy and tasty. I like to undercook it slightly so the grains keep some of their nice chewy texture. Your cooking time and amount of liquid may vary depending on what rice or grain you are using. My grains took about 30 minutes and I had to add another 1/2 cup of water. If you are using basmati rice, it should take less than 15 minutes to cook with no extra liquid.

You can easily make this recipe vegetarian by leaving out the turkey of course. If you still want to make a full meal of it, bake it in portobello mushroom caps like I did, or just serve it as a tasty side dish. I love recipes that are adaptable, don’t you?

2 cups of rice (basmati, wild, or a mix of grains, rice, and lentils), rinsed
1 tsp cumin seeds
1 TBS butter
3 TBS chopped almonds
3 TBS golden raisins
glug of oil (vegetable or peanut)
1 large onion, halved and finely sliced
1 cinnamon stick
5 green cardamom pods
1 tsp sugar
1/4 tsp turmeric
1 TBS finely chopped fresh ginger
1 tsp salt
1/2 cup water to deglaze
1/2 cup coconut milk (optional, replace with water if not using)
2 cups of water
1 cup diced turkey or chicken (optional)
1/4 cup frozen peas, thawed
portobello mushroom caps, stem and gills removed (brushed with a mixture of oil and balsamic or soy sauce, optional)

Place a heavy-bottomed frying pan over medium heat and toast cumin seeds until fragrant (about a minute). Remove to side dish.
Add butter to same frying pan and fry almonds and raisins until starting to brown. Remove to separate side dish.
In the same pan, heat the vegetable or peanut oil and add the sliced onions and fry until dark golden brown (about 10 minutes), then remove to side dish with almonds and raisins.

turkeypulao2

turkeypulao3

Again, in the same pan (don’t you love that we’re only dirtying one pan?!) add toasted cumin seeds, cinnamon stick, cardamom pods, sugar, turmeric, ginger and salt. Toast, stirring constantly (a minute or so) until aromatic. Deglaze the pan by pouring in 1/2 cup of water and gently scrape up any brown bits stuck to the bottom.

turkeypulao6

turkeypulao7

Add the rice and/or grains, coconut milk (if using) and the rest of the water. Cover and gently simmer until the rice and/or grains are cooked to your liking and the water has evaporated. Check as you are cooking to ensure that the filling doesn’t dry out before it’s cooked… this will depend on what you have used for the rice and/or grains. If necessary, add more water a quarter cup at a time until done to your liking (about 15 minutes for white rice, 30 minutes or longer for whole grains/legumes). Add the peas and diced turkey if using. Stir in reserved almonds, raisins and onion. Heat through (2-3 minutes).

turkeypulao4

You can serve “as is” at this point or if you wish, brush portobello mushroom caps with a mixture of oil and balsamic or soy sauce to increase the flavour, roast cap-side up in a 400F oven for 15 minutes. Remove caps and turn over, spoon in filling, and return to oven for another 15 minutes or until mushroom is roasted and filling is heated through. Enjoy!

Cauliflower “Tabbouleh”… Not!

cauliflower tabbouleh 4Today is penance day. You knew it had to come when you saw last week’s galette recipe, didn’t you? It was inevitable. However, in our home, penance day does not mean eating boring vegetables for dinner.

Hoooold it. Scratch that. Actually, yes it does! It DOES mean eating vegetables for dinner, but never boring. And today it means eating cauliflower for dinner! Not my favourite vegetable but this recipe lets it shine. And Husband is very happy to eat it which is a plus.

It does sort of bug me to call one food by the name of another (that’s not a hamburger folks, that’s a LENTIL patty) but it doesn’t stop me from trying these weird, healthy concoctions. I have made cauliflower “fried rice” a number of times and I’ve tried to love it, but I don’t. It’s ok, but it’s not fried rice. This recipe, for me, comes a bit closer to the real thing, in texture anyway. It does not have the earthiness of bulgar wheat which is usually the base of tabbouleh, but when you add so many other vibrant ingredients it doesn’t seem to matter as much. It’s not really tabbouleh, but it does have similar flavours with lots of zingy lemon, herby parsley and mint, crunchy cucumber, and summery tomato.

The addition of allspice in my cauliflower salad is an idea from Yotam Ottolenghi who uses it in his tabbouleh recipe. I use half as much as he recommends because I don’t want my salad to taste like allspice, but I do think it adds a more complex background note to the dish. I’ve also added crumbled feta because, cheese. Throw a few grilled prawns or squid on top and you have a healthy, tasty meal… truly.

All the measurements below are very approximate. Use what you have, add more of what you like, cut back or eliminate what you don’t. I have also been known to add in thinly sliced spring onion or chives if I have them around. It’s all good. :)

1 medium head of cauliflower
glug of olive oil
1 medium bunch of parsley, washed and leaves picked
1 small handful of mint leaves, washed and leaves picked
1/2-1 pint or so of cherry or grape tomatoes, quartered or 2-3 ripe whole tomatoes, chopped into 1 cm dice
1/4-1/3rd English cucumber, seeded and chopped into 1 cm dice
1 large juicy lemon, zested and juice added to zest (about 3-4 TBS)
3-4 TBS good fruity olive oil
1/2 tsp ground allspice
1/2 tsp salt
pepper to taste
shake of red pepper flakes
3 oz crumbled feta

Chop the cauliflower into medium flowerettes, with a good portion of the stem (once it goes through the food processor you won’t be able to tell the difference). In two or three batches, add the cauliflower to the food processor and pulse 10-15 times until the cauliflower is almost completely broken up into pieces about the size of rice or a bit smaller. Do not over-process, don’t worry if there are some bigger chunks in there, you won’t even notice them.

Warm a glug of olive oil in a pan over medium-high heat and saute the cauliflower, stirring constantly, for 2-3 minutes just to soften and sweeten. Do not overcook. Remove to bowl and let cool completely.

cauliflower tabbouleh 3

Combine the lemon zest, juice, allspice, salt, pepper, and red pepper flakes in a bowl. Whisk in olive oil. Set aside.

cauliflower tabbouleh 2

Chop parsley and mint leaves together and add to cauliflower.

caulifower tabbouleh 1

Pour dressing over and mix thoroughly. Fold in tomatoes, cucumber and crumbled feta. Taste and and adjust seasoning if necessary. Serve at room temperature. We use this salad as a base for grilled prawns or squid for a complete, very healthy meal.

Ginger Fried Rice

ginger fried rice finalWell, THAT never happens.

Seriously. As any cook will confirm, you never get it perfect on the first try. You could always add a touch more of this, cook this a little longer, add that at a different time.

It. Is. Never. Perfect.

I have achieved the impossible.

:)

Sorry. Sorry. Perhaps I’m blowing my horn a little too loudly. It’s just that I was imagining a side dish that was subtle, yet not bland (oh, Lordy… there’s that word again), simple and focused, a side dish that didn’t need to overwhelm but simply showed off the ingredients in the best way possible, and I nailed it the first time.

Dinner last night was a Vietnamese beef salad which I do plan to share with you in the future but, case in point, it needs a few more tweaks to make it perfect. I wanted a side dish not just as a filler, but to compliment the salad. Since I was making Vietnamese, rice of course was the perfect choice, but my usual fried rice is Chinese-style with lots of vegetables and flavoured with soy sauce… nope. I searched the internet for a Vietnamese or Thai fried rice but the recipes I found weren’t any different from Chinese-style fried rice. So, a different tact, I searched ginger fried rice. Cha-ching badda-bing, up came what looked like a beautiful fried rice by Jean-Georges Vongerichten, as interpreted by Mark Bittman http://www.nytimes.com/2010/01/27/dining/27mini.html?ref=dining&_r=0.

The Vongerichten recipe looks lovely as a main dish with a runny yolk fried egg on top and one of these days, that will be dinner, but I took the idea (especially the topping of fried minced ginger and garlic… holy!) and made it my own.

To begin, I made the rice my usual way by first sauteing it in a bit of butter to coat the grains and added a tablespoon of coconut cream powder (basically, dehydrated coconut), while cooking the rice. This doesn’t make the rice taste like coconut, I think it simply boosts the flavour of jasmine rice when making Thai or Vietnamese dishes. If you skip this step it likely won’t make much of a difference in the end. I also used the trick of a friend (thank you, Jay) who makes the best Chinese fried rice; when preparing the eggs, separate the yolks from the whites, mix the yolks in with the pre-cooked rice so each grain gets a lovely yolky coating before stir-frying, and fry the egg whites in the wok beside the veggies. Adding the yolks to the rice elevates the flavour of the rice, and the entire dish.

Then, with the recipe as a general guide, I replaced the leeks with onion, added fresh ginger to give even more flavour the rice while stir-frying, added thinly sliced snap peas for colour, texture and sweetness, and replaced the soy sauce at the end with fish sauce to make it less Chinese, more Vietnamese.

Finally, it IS best if you cook the rice the day before and store it in the fridge, but I cooked mine in the morning and let it cool for an hour before putting it in the fridge for about 6 hours and it worked fine.

It sounds like a lot of steps for fried rice, and it is. But it’s worth it. If you try it, please let me know what you think!

For the rice:
a couple pats of butter
1 cup uncooked jasmine rice (to make 3 cups cooked rice)
1 TBS coconut cream powder (optional)
1 1/4 cups of water
1/4 tsp salt

For the topping:
3 TBS minced ginger
3 TBS minced garlic
3 TBS peanut oil
salt

For the veggies:
1 cup diced onion
1 cup snow or snap peas, cut into 1/4″ pieces on the diagonal
1 TBS minced ginger
2 eggs, yolks and whites separated (yolks will be mixed with the rice before frying)
peanut oil

For the sauce:
1 TBS (or more) fish sauce
1 tsp sesame oil

Rinse rice. Melt butter in pot until foamy. Add rice and stir to coat the grains with butter. Add water, salt, and coconut powder (if using) and simmer until the water has been absorbed. Remove from heat and let cool. Store in the fridge overnight. When cooking any white rice, I always saute in a bit of butter first and use 1:1 rice to water ratio, plus 1/4 cup for the pot. It always turns out perfectly.

About 1/2 hour before you start dinner, remove the rice from the fridge. Separate the egg whites and yolks. Add the yolks to the rice and gently fold until all the grains are coated. Set aside.

In a wok or large heavy-bottomed skillet, heat 3 TBS peanut oil over medium heat. Add garlic and ginger and fry, stirring occasionally, until brown and just starting to crisp. With a slotted spoon, transfer the ginger and garlic to paper towels and salt lightly.

ginger fried rice topping

Using the oil left in the wok which has now been flavoured with garlic and ginger, turn the heat up to medium-high and add the onions frying until just starting to turn golden, about 5-6 minutes. Add the peas and minced ginger. Continue to fry until the peas are tender-crisp, about 3 more minutes.

ginger fried rice veggies

Add more oil to the wok if necessary, push the veggies to the side and add the egg whites, stirring until almost set. Stir the veggies and egg together. Add the rice to the wok, and quickly stir-fry until the rice is hot and starting to pick up some colour. Mix fish sauce and sesame oil together. Drizzle over rice and toss to distribute the flavour. Taste and add more fish sauce to your liking. Sprinkle with fried garlic and ginger.

If you are so inclined, you could fry an egg until the whites are set but the yolk is still runny, and place on top of the rice. That’s dinner… maybe tomorrow. :)

ginger fried rice fry

Grilled Carrots with Carrot-Top Pesto

carrot pestoEvery Saturday morning, May through September, an amazing farmers’ market pops up a 3 minute walk outside my back door. When we were house-hunting just over 5 years ago, we never imagined moving to the area of the city in which we now live, but one look at the massive park (with a lake!) just outside the back gate sold us. And with each passing year we fall more and more in love with our neighbourhood, including all the wonderful festivals and special events that happen in and around our park, one of which is our farmers’ market.

Right now the market is filled with fresh peas, baby carrots, spring greens, zucchini blossoms, and the first strawberries, blueberries, and cherries of the season. Soon there will be peppers, zucchini, and new potatoes, which will eventually lead us into the fall crop of crisp apples and sweet corn. But right now, it’s about the first gatherings of spring and last week my eyes fell on a beautiful bunch of new carrots and I knew I had to try a recipe from Food 52 (if you love to cook and you’re not following Food 52, you’re missing out).

This recipe was a revelation for me. I never imagined using carrot tops to make pesto (and I am now waiting anxiously for enough radish greens in my garden to try making pesto with those, because, why not?!). I haven’t changed the recipe ingredients at all, but I did grill my carrots on the BBQ rather than roasting them in the oven… it IS spring after all. As well, I did not top the carrots with burrata as per the original recipe because I didn’t have it on hand, but I’m sure it would be delicious. The recipe says it serves 4-6 people, but as per usual, we polished off the entire dish. Apparently, the leftover pesto freezes very well… mine didn’t last long enough to test this claim.

For the carrot top pesto:

4 cups lightly packed washed carrot tops, stems discarded, roughly chopped
a small handful basil leaves
1/2 cup walnuts, toasted
1 ounce grated Parmesan cheese
1 medium garlic clove, roughly chopped
1 teaspoon Maldon or other flaky sea salt
1/2 cup extra-virgin olive oil

carrot pesto tops

Make the pesto: Combine the carrot tops and basil in a food processor, pulse, then add the nuts, cheese, garlic, and salt. Pulse again, and then with the machine continuously running, add the oil in a thin stream. (You’ll have to stop to scrape down the sides a few times.) Taste and adjust for seasoning.

carrot pesto pesto

For the carrots:

20 small carrots, scrubbed and tops trimmed but stems left on (or, if your carrots are bigger as mine were, cut in half (crosswise) and then cut the wider half of the carrot in two, lengthwise)
large glug of extra-virgin olive oil, plus extra for drizzling
1 teaspoon plus a few pinches flaky salt
3 tablespoons carrot top pesto, plus more to taste
Half a lemon

Make the carrots: Turn your BBQ on to high and heat to 400°F.
Top carrots with a glug of olive oil and toss to coat. Sprinkle with 1 teaspoon of salt. Toss onto the hot BBQ and grill, turning occasionally, until the carrots are browning in spots. Turn heat down to medium and cook with the lid closed until the carrots are done to your liking. Remove and let cool slightly.

carrot pesto grilled

Toss the cooked carrots very gently with the pesto, using more or less based on your taste. Transfer the coated carrots to a platter (this is where you can top with the burrata, if you wish).

Dress with a squeeze of lemon, a drizzle of good fruity olive oil, and a small pinch of salt.