Category: Main

Kuku Cauliflower Cake

cauliflower-cake5I have always loved breakfast for dinner so the other day when I was searching for a way to use up a head of cauliflower and ran across an Ottolenghi recipe for cauliflower cake (sort of an omelet/frittata with flour), it was a no-brainer to use that as a springboard recipe. There are a number of different versions on the internet and after reading some of the reviews (most complaints were about it being a bit bland) I decided to amp up the flavour by roasting the cauliflower with smoked paprika instead of simply boiling, and subbing in a bunch of parsley and cilantro for the basil as a nod to the “kuku” which is sort of the Persian version of an omelet with a ton of herbs. I also replaced part of the onion with leek because, fall garden cleanup. It’s a bit of a mess of different dishes but the end result is a somewhat dense, delicious… ermmmm… “thing” which fed us two nights in a row alongside a salad.

1 medium cauliflower (1 1/2 – 2 pounds)
glug olive oil
1 tsp smoked paprika
salt and pepper to taste

2 cups sliced leeks (white and light green part only) OR 1 large onion, peeled and diced, or a mix of both
4 TBS olive oil
1 tsp finely chopped rosemary or Herb de Provence mix
1 clove garlic, finely chopped

6 large eggs
1 cup flour (125 grams)
1 1/2 tsp baking powder
1/2 tsp ground turmeric
salt and pepper
1 cup grated pecorino cheese (or other hard strong cheese, such as parmesan or gruyere)
handful chopped parsley leaves
handful chopped cilantro leaves

Butter, for greasing pan
1 TBS kalonji or nigella seeds (or substitute white or black sesame or poppy seeds, or a mix of any of those)
1 shallot, peeled and thinly sliced (or reserve a couple slices from your onion above) for decorating the top

Preheat oven to 400F. Break cauliflower into smallish florets. Drizzle with a generous glug of olive oil and sprinkle with paprika, salt and pepper. Spread onto lightly oiled baking sheet and roast for 20 minutes, tossing a couple times during cooking. Remove from oven and let cool.

cauliflower-cake1

Heat 4 TBS olive oil in a frying pan over medium heat and fry onion and rosemary until very soft, about 8 minutes (it may seem like a lot of oil but this is also the oil you are adding to your cake, we are just nicely flavouring along the way!). Add chopped garlic and fry 1 minute more. Remove from heat and let cool.

cauliflower-cake2

Crack eggs into a bowl along with 1/4 cup of milk and whisk well. In a another large bowl blend the flour, baking powder, turmeric, 1 teaspoon salt, and plenty of pepper. Add egg mixture and whisk until fully incorporated and mostly smooth (don’t overmix or your cake will be tough). Stir in onion filling, herbs and cheese until well blended. Gently fold in the cauliflower, trying not to break up the florets.

cauliflower-cake3

If you are not using a non-stick pan, line the bottom of an angel food cake pan or 7-8 inch springform pan with parchment paper. Butter the sides generously and toss the kalonji seeds (or whatever you are using) in the pan so they stick to the sides. Gently spoon or pour in cauliflower batter and scatter shallot or onion slices on top. Bake in the centre of the 400F oven until the top is golden and the centre of the cake is set. This should take about 30 minutes if you are using an angel food cake pan or 40 minute for a springform pan.

cauliflower-cake4

Let cool to warm or room temperature. Run a knife along the sides of the pan to remove. We ate this alongside a cucumber and tomato salad tossed with a simple vinaigrette.

cauliflower-cake6

Beet Galette

beetgalette7A friend from culinary school emailed me a while back to chat (mainly about food) and mentioned she was having guests over that night and was making spanakopita.

ARRRGHHHH. Cue the monster craving! Does that ever happen to you? You are going along minding your own business and then, BAM… you spot a kid eating an ice cream cone and you’re not much into ice cream but you LOVE crunchy and salty so you start thinking about potato chips but those aren’t “appropriate” for dinner so you imagine all the salty crunchy foods you could actually eat for dinner without attracting the attention of the food police and your mind wanders through the possibilities of nachos, homemade french fries, deep fried onion rings, fried chicken, fried chicken and bacon(!) and so on and so on…

So, yup… that happened. Now I had spanakopita on the brain but no filo dough and no spinach. My mind started twirling with ideas. Could I make spanakopita with pastry dough sort of like a hand-held pie instead of the light and crispy filo dough? But no, that would be waaaaaay too heavy. What if I did it open faced (half the pastry!) but instead of a pie, I made a galette? And could I use something from my garden instead of spinach? What about beet greens? And HOOOOOLD ON… what if I used the beets as well?!? \Whoa lady, this could be good!

beetgalette1

After mulling it over a few days (craving still burning hot), I decided to add onions to cut the sweetness of the beets and throw in some feta (my “nod” back to the original spanakopita idea). The end result was, if not one of the tastiest experiments I have ever embarked on, definitely one of the prettiest!

I used my new pressure cooker to cook the beets (15 minutes!) but it is very easy to boil or roast them… just takes a bit longer.

The dough is my usual recipe which you can find here except I subbed in whole wheat flour for half the white. You can use any pie crust dough you are comfortable with. You will need enough to make one round about 14-15 inches across and slightly thicker than 1/8th inch.

Pie crust dough to make one round 14-15 inches across
1 generous pound beets
8 cups beet greens, washed
2 cloves garlic, sliced
Couple glugs olive oil
1 medium onion, halved and thinly sliced
couple sprigs fresh thyme
salt and pepper to taste
pinch red pepper flakes
3 oz feta, crumbled
1 egg
1/4 cup cream
Optional: 1 additional egg whisked with water to brush pastry if you want that shiny look

To make the filling, cook the beets to your liking (boil, bake, or in a pressure cooker). Once cooled enough to handle, peel and slice into 1/4 inch slices. Set aside.

Wash beet greens, do not dry. Warm a glug of olive oil and garlic in a large pan over medium-high heat. Add beet greens and toss until wilted, about 3 minutes. Drain and set aside in a bowl.

beetgalette2

Heat another glug of olive oil in the same pan you used for the beet greens. Add onions and fresh thyme. Fry until starting to turn golden, 7-8 minutes. Discard thyme and add onions to the beet greens.

beetgalette3

Add crumbled feta and pinch of red pepper flakes to the filling. Season with salt and pepper.

beetgalette4

Assemble the galette:

Preheat oven to 375F.

Roll out dough on a clean, lightly floured piece of parchment in a circle about 14-15 inches across and slightly thicker than 1/8th inch. No worries if the dough goes over the edges as you will be folding it up over the galette shortly. Spoon approximately half the beet green/onion mixture in a circle evenly in the centre of the dough, ensuring you have a good 2 inch border all around the edge. Top with beets overlapping the slices in circles. Finish with the remaining beet greens. Fold the edge of the dough up and over the filling, overlapping where necessary and press down lightly to create the folds.

beetgalette5

beetgalette8

Slide the parchment with the dough onto a cookie sheet. Whisk the egg yolk and cream together and pour into the centre of the galette. If you would like the pastry to be shiny, brush the border with the egg wash and sprinkle with flake sea salt.  Place in oven and bake 35-40 minutes until crust is golden. Remove and let sit for 5 minutes before slicing. We ate this as our main course but a smaller wedge alongside a leafy salad would be a lovely first course.

beetgalette6

Chicken and White Beans: A One Pan Miracle

chicken white bean6We were at a friend’s place for dinner last year where another guest regaled us with the story of a previous thanksgiving fiasco when he had been put in charge of roasting the turkey on the BBQ but instead of watching the bird, decided to work out instead. When he returned the turkey was burnt to a crisp and it was about 2 hours before their guests arrived. Wife was still at work and would not be amused. He ran out to the local grocer and paid waaaaay too much money for another turkey and long story short, they didn’t eat until midnight. I wanted to ask why he didn’t spatchcock the bird but that wasn’t the point… it was a funny story.

But, seriously, why didn’t he spatchcock the bird? I cooked a 12 pound turkey for thanksgiving last year in 90 minutes. It’s not magic!

Spatchcocking (or butterflying) is a technique used most often for grilling but it’s ideal for roasting as well. A whole chicken or turkey in its natural form takes a long time to cook because the inside must reach a certain temperature to safely eat. The problem with this is the exterior (and especially the breast) often becomes overdone and dry before the inside is cooked. Opening it up and laying it flat by removing the backbone positions the breast at the centre of the meat which protects it while the darker meat takes most of the heat. It doesn’t make for a very amusing story, but it produces a heck of a tasty bird!

chicken white bean1

The balance of this dish is really just another attempt by me to use up some of my garden vegetables along with another healthy filler… beans. My first thought was to use chickpeas which I think would be a great substitute, but I usually cook my chickpeas from dried (I think they taste better) so I didn’t have any canned in the pantry. I did however have some canned white beans. And, as always, use whatever vegetables are handy. Squash would be great, sweet potatoes, peppers, zucchini, brussels sprouts in the winter. You could substitute rosemary or sage for the thyme. It’s very adaptable. If you’re not using harissa as I did (which has a nice spicy kick), sprinkle over a few red pepper flakes as well.

The miracle part of this recipe is laying the chicken over the vegetables to cook which bathes everything in those rich drippings and multiplies the flavour of this meal by, oh… I don’t know… a thousand?!!! And having only one dish to wash after making dinner?!?! It’s a festivus miracle times two. :)

Chicken:
1 small 2 1/2-3 1/2 pound chicken
1 tsp harissa spice mix
1 tsp za’atar
1 tsp salt
(Or substitute 1 TBS of your favourite rub for the 3 spices above. You could use organo for Greek flavour or a rub with smoked paprika and cumin for southwestern BBQ. Just make sure 1/3rd of your rub is salt.)

Veggies:
olive oil
a few cups sliced mixed veggies (I used carrot, baby golden beets, a leek, shallot, a few little potatoes and the greens from my beets)
few sprigs of thyme
1 pint small tomatoes
2 cloves garlic, sliced
1 can cannellini (white) beans (rinsed and drained)
1/2 cup white wine (or chicken stock)
salt and pepper

Garnish:
lemon
cilantro, chopped

Place chicken, breast side down, on a work surface. Starting at the thigh end, cut along one side of backbone with kitchen shears. Turn chicken around and cut along other side. Discard backbone or save for stock. Flip chicken and open it like a book. Press firmly on breastbone to flatten. Sprinkle both sides with your rub and refrigerate for at least an hour, or overnight.

Preheat oven to 400F degrees.

Separate veggies into two groups, veggies that take longer to cook (carrots, beets and potatoes) and veggies that don’t take as long (leek, garlic, tomatoes).

Put the longer cooking veggies in your cooking vessel along with the sprigs of thyme, drizzle with olive oil and season with salt and pepper. Roast in oven for 15 minutes.

chicken white bean2

After 15 minutes, remove the pan from the oven and add the softer vegetables (except beet greens), tomatoes, white beans, and wine. Re-season with salt and pepper and stir. Brush or drizzle the chicken with olive oil and place, skin side up, over the vegetables and return to oven to roast for about 20 minutes.

chicken white bean4

At this point I like to gently lift the chicken with some tongs and give the vegetables a stir to ensure they are cooking evenly. Return the pan to the oven for another 20-30 minutes, until the chicken is cooked through (internal temperature should be 165F). I check the internal temperature every 10 minutes and once it’s getting close, I stir in the beet greens. When the chicken has hit desired temperature, remove from the oven and let rest for 10 minutes.

Cut up the chicken and serve family style or in individual bowls garnished with a wedge of lemon and chopped cilantro.

chicken white bean5

Wheatberry “Risotto” (with mushrooms and blue cheese)

wheatberry risotto4Let’s be honest – this is not risotto. And let’s be even more honest – I would probably not be eating a lot of wheatberries if they weren’t healthy. I don’t mind them once in a while, but they do not impart the same starchy creaminess that you find in real risotto. However, I have to admit that married with the earthy, silky loveliness of braised mushrooms and then amped up with blue cheese, you can’t help but fall a teeny little bit “in like”, if not love. They also have a satisfying chewiness that makes me feel like I’m eating more than just “healthy”. And bonus, Husband really enjoyed this (albeit 2 hours late and at room temperature) and that’s always a plus for me!

I have noted in the recipe to sauté the veggies in olive oil but if you’re anything like me, you will have that glass jar in the refrigerator which you are constantly topping up with drippings from bacon, fat from slow roasting pork, and what’s left in the pan after frying sausages, etc. Use it! Pork fat is all about flavour and, after all, everything else about this dish is pretty healthy.

I also used a cup of beef stock to deepen the flavour but feel free to use all poultry stock or make it vegetarian by using all vegetable stock. Whatever floats your boat! :)

½ ounce (1/2 cup, approximately) dried mushrooms (porcini or a mix)
1 1/4 cup boiling water
2 cups chicken, turkey or vegetable stock
1 cup beef stock (or another cup of poultry or vegetable stock)
1 tsp salt
1 cup uncooked wheat berries
2 tablespoons olive oil (or other fat)
1 medium finely chopped onion (approximately 1 generous cup)
12 ounces white or brown mushrooms cleaned, trimmed and sliced
2 large garlic cloves, minced
2 teaspoons chopped fresh rosemary (or other herb like sage or thyme)
1/3 cup dry white wine
salt and pepper to taste
2 ounces of your favourite blue cheese
handful of chopped fresh parsley

To speed up the cooking process you can soak the wheatberries in a bowl covered with hot tap water for 4 hours or overnight.

Put dried mushrooms in a bowl or measuring cup and cover with 1 1/4 cups of boiling water and let sit. Agitate the mushrooms at around 15 minutes to loosen any grit. After 30 minutes remove and finely chop mushrooms. Strain liquid to remove any grit. You should have 1 cup.

wheatberry risotto1

Put all stock in a saucepan (chicken, beef, and mushroom broth) and bring to simmer. Add 1 teaspoon of salt.

Heat the olive oil or other fat in a large skillet. Add the onions and cook, stirring, until they begin to sweat and soften (about 3 minutes). Add the fresh mushrooms and continue to cook until they soften (about 5 minutes). Add a pinch of salt, the garlic and rosemary and continue to cook, stirring occasionally, until the mushrooms start to brown (about 5 more minutes).

Add the wheatberries and reconstituted mushrooms. Stir in the wine and cook until most of the liquid as been absorbed, scraping the bottom of the skillet to remove any brown bits. Add 3 cups of the heated stock to the pan. Cover and maintain at a low simmer for 60-90 minutes. The timing will depend on your wheatberries. At the 60 minute mark check every 10 minutes or so until the wheatberries have reach desired doneness (ok, that may not be a real word but I’m using it anyway), adding more of the reserved stock if necessary to keep the dish from drying out.

wheatberry risotto3

When the wheatberries are done to your liking, taste and re-season with salt and pepper (remember you will be adding more blue cheese to don’t go crazy with the salt). Stir in the chopped parsley. Remove from heat, crumble blue cheese over the pan and top with the rest of the parsley. Serve and enjoy.

Husband’s Choice: Pulao with Turkey

turkeypulao5This week I experimented with two brand new recipe ideas for dinner. The first was a desperate act to use up the last of the turkey from Easter dinner (I am now referring to this dish as Turkey 4.0 as it was the fourth turkey dish in as many days) and the other was an attempt to get as far away from turkey as possible. Funnily enough, both dishes are Indian in flavour. Go figure.

Husband really loved the Indian pulao (basically a South Asian rice pilaf) to which I added diced leftover turkey (not authentic… don’t judge) and heaped into portobello mushroom caps and baked. My favourite was Indian spiced cauliflower and potatoes (which I will share with you shortly).

I know I just said that Indian pulao is basically Indian rice pilaf, but instead of plain rice I used a mixture of 11 different rices/grains/lentils that I buy at my local grocery store (T&T for anyone who is interested). It’s very healthy and tasty. I like to undercook it slightly so the grains keep some of their nice chewy texture. Your cooking time and amount of liquid may vary depending on what rice or grain you are using. My grains took about 30 minutes and I had to add another 1/2 cup of water. If you are using basmati rice, it should take less than 15 minutes to cook with no extra liquid.

You can easily make this recipe vegetarian by leaving out the turkey of course. If you still want to make a full meal of it, bake it in portobello mushroom caps like I did, or just serve it as a tasty side dish. I love recipes that are adaptable, don’t you?

2 cups of rice (basmati, wild, or a mix of grains, rice, and lentils), rinsed
1 tsp cumin seeds
1 TBS butter
3 TBS chopped almonds
3 TBS golden raisins
glug of oil (vegetable or peanut)
1 large onion, halved and finely sliced
1 cinnamon stick
5 green cardamom pods
1 tsp sugar
1/4 tsp turmeric
1 TBS finely chopped fresh ginger
1 tsp salt
1/2 cup water to deglaze
1/2 cup coconut milk (optional, replace with water if not using)
2 cups of water
1 cup diced turkey or chicken (optional)
1/4 cup frozen peas, thawed
portobello mushroom caps, stem and gills removed (brushed with a mixture of oil and balsamic or soy sauce, optional)

Place a heavy-bottomed frying pan over medium heat and toast cumin seeds until fragrant (about a minute). Remove to side dish.
Add butter to same frying pan and fry almonds and raisins until starting to brown. Remove to separate side dish.
In the same pan, heat the vegetable or peanut oil and add the sliced onions and fry until dark golden brown (about 10 minutes), then remove to side dish with almonds and raisins.

turkeypulao2

turkeypulao3

Again, in the same pan (don’t you love that we’re only dirtying one pan?!) add toasted cumin seeds, cinnamon stick, cardamom pods, sugar, turmeric, ginger and salt. Toast, stirring constantly (a minute or so) until aromatic. Deglaze the pan by pouring in 1/2 cup of water and gently scrape up any brown bits stuck to the bottom.

turkeypulao6

turkeypulao7

Add the rice and/or grains, coconut milk (if using) and the rest of the water. Cover and gently simmer until the rice and/or grains are cooked to your liking and the water has evaporated. Check as you are cooking to ensure that the filling doesn’t dry out before it’s cooked… this will depend on what you have used for the rice and/or grains. If necessary, add more water a quarter cup at a time until done to your liking (about 15 minutes for white rice, 30 minutes or longer for whole grains/legumes). Add the peas and diced turkey if using. Stir in reserved almonds, raisins and onion. Heat through (2-3 minutes).

turkeypulao4

You can serve “as is” at this point or if you wish, brush portobello mushroom caps with a mixture of oil and balsamic or soy sauce to increase the flavour, roast cap-side up in a 400F oven for 15 minutes. Remove caps and turn over, spoon in filling, and return to oven for another 15 minutes or until mushroom is roasted and filling is heated through. Enjoy!

Spicy Sausage and Fennel Galette

galette sausage fennel 5Happy pie day a day late!!! Pie is good. Pie is usually sweet but can be savoury. Pie has a beautiful crust. Pie is… a bit straight-laced. And pie, well she can stress me out.

Don’t get me wrong! I do love a good fruit pie with a piece of cheese, or a tart and tangy shaker pie full of slices of lemon with a piece of cheese. Do you see a pattern here? Why not put cheese IN… THE… PIE?!?! And what if that pie was just a little more hippy-dippy than your usual pie? What if that pie was the sort of free form pie that wore gauzy shirts and long skirts and beaded twine bracelets? What if that pie was *GASP*, Galette?!?!

Whoa lady.

Galette is 78.3% easier than pie and every bit as impressive. The dough comes together in about 15 minutes, give it an hour or so in the fridge to get nice and cold, roll that puppy out into sort of a circle, scoop on your filling and fold up the edges. 40 minutes in the oven and she’s all yours. Ahhh Galette. J’taime.

Now that I’ve sold you on galette, let me sell you on something else you are going to love but you don’t know it yet… savoury galette. That’s right… saaaaaavoury. And not just savoury but spicy with delicious sausage balanced with the sweetness of fennel and topped with smoked cheese. Ya, you heard me.

The filling is inspired by this recipe. The dough is my usual recipe which you can find here but you can use any pie crust dough that you are comfortable with. You will need enough to make one round about 14-15 inches across and slightly thicker than 1/8th inch.

Use whatever sausage you like but make sure to taste the filling and adjust the seasoning before you spoon it onto the dough. Every sausage is different so yours might need a dash of salt, a touch of sugar, or a shake of worchestershire to give it some depth. It’s much easier to correct the seasoning at this point than after the pie is made.

Pie crust dough to make one round 14-15 inches across
1 pound spicy sausage meat (I used regular hot Italian but fennel would also be delicious)
1 medium onion, thinly sliced
1 medium fennel bulb, thinly sliced
1 tsp sugar
1/4 cup sun-dried tomatoes, soaked in oil, chopped
1 cup shredded smoked cheese (gouda or mozzarella)
2 TBS chopped fresh sage
2 TBS chopped fresh rosemary
1 egg, lightly beaten with a teaspoon water for egg wash
flake sea salt

Heat oven to 375F.

For the filling:

Sprinkle thinly sliced fennel with 1 tsp sugar and set aside.

galette sausage fennel 1

Remove meat from casings if you have purchased it in sausage form and fry over medium high heat until the fat starts to melt and coat your pan. Add onion and fry for about 4 minutes. Add the thinly sliced fennel and continue to fry until everything is soft and lighlty browned, approximately another 5 minutes. Remove from heat and stir in sun-dried tomatoes, and chopped sage and rosemary. Taste and adjust seasoning. Set aside.

galette sausage fennel 2

Assemble the galette:

Roll out dough on a clean, lightly floured piece of parchment about 14-15 inches across and slightly thicker than 1/8th inch. No worries if the dough goes over the edges as you will be folding it up over the galette shortly. Scoop filling onto the centre of the dough with a slotted spoon or tongs, leaving behind most of the fat in the pan. Ensure you have a good 2 inch border all around the dough. Sprinkle the top with shredded cheese and fold the border up over the filling, overlapping the dough where necessary and press down lightly to create the folds.

galette sausage fennel 3

galette sausage fennel 6

Brush the border with the egg wash and sprinkle with flake sea salt. Slide the parchment with the dough onto a cookie sheet and place in oven. Cook for 35-40 minutes until crust is golden.

galette sausage fennel 4

Remove from oven and let sit 5 minutes before cutting. Serve alongside a salad with a zesty, fresh dressing to balance the richness of the pie.

Pot Roast with Fresh Cranberries

cran pot roastHappy New Year! I hope you had a great one! Ours was pretty low-key as usual, except we did have my beautiful niece stay with us for a few days. We are used to being alone at Christmas but Niece is such a pleasant and positive person (which I’m not sure is true of all 22-year olds), that it was an absolute treat to have her around (and she didn’t even complain about having to watch the Lord of the Rings trilogy three nights in a row! How’s that for pleasant?! :) ).

As you would expect, we spent most of our time cooking, eating and drinking (luckily, Niece has inherited these important traits from Auntie). We made a pulled lamb shoulder with mint and peas served over pasta for Christmas Eve, and an AMAZING prime rib with AMAZING blue cheese “scalloped” potatoes for Christmas dinner (Niece spent quite a bit of time stacking those potato slices sideways so we got yummy crispy edges). I absolutely have to blog about those dishes one of these days.

Since then I have been trying to eat a bit healthier but yesterday I was craving braise-y meaty comfort food. Plus I had a bag of cranberries in the crisper so… pot roast with fresh cranberries.

Husband loved this dish and it was very good, but I was a bit disappointed how the cranberries disappeared right into the sauce, although they did give just the right amount of tang (dare I say a touch of freshness?) to the dish. Next time, I will try holding back a third of the cranberries and add them in the last hour for some texture and colour. We ate this with charred cauliflower sprinkled with my pangrattato.

3 pound beef chuck roast
salt + pepper
couple glugs of vegetable oil
1 onion, cut into sixths
3 large or 6 small carrots, chopped into 1-inch pieces
12 ounces baby potatoes
1 cup full-bodied red wine
2 cups chicken stock (feel free to add another cup if your roast is bigger or if you like it very saucy)
1 1/2 TBS worcestershire sauce
2 TBS balsamic vinegar
2 TBS honey
3 sprigs fresh thyme
1 sprig fresh rosemary
12 ounces (1 bag) fresh cranberries

Preheat the oven to 325F.

cran pot roast ingred 1

Season the pot roast with salt and pepper. Add a good glug of oil to a dutch oven or heavy-bottomed large pot and sear the roast over medium-high heat on all sides. You want lovely dark brown caramelization; don’t rush this part. Remove roast to a side plate. Add another glug of oil to the pot and add onion, carrots and potatoes until they start to show some colour; about 5 minutes.

cran pot roast ingred 2

Add the red wine to the pot and gently scrape up any brown bits stuck to the bottom. Let the wine reduce by half and add chicken stock, worcestershire sauce, balsamic vinegar, honey, thyme, rosemary, and cranberries. Nestle the meat in amongst the vegetables, cover the pot, and place in oven. After one hour, turn the heat down to 300F. Continue to braise for another 2 hours or until the meat is falling apart.

(Next time I make this, and there will be a next time, I will add 2/3rds of the cranberries at the beginning and add the rest in the last hour, just for some texture and colour).

Remove from oven. Pull the meat apart into large chunks with a fork. You could omit the potatoes from the recipe and serve over mashed potatoes or pasta. We were happy to eat it straight up with more veggies on the side.

cran pot roast final

Pseudo-Korean Grilled Flank Steak

korean beef finishSometimes laziness is your friend.

Yesterday I did not want to leave the house. It was rainy and windy and yucky. But I hadn’t bought any groceries because we spent the entire weekend out socializing. I was pretty much stuck with what was in my pantry and freezer, and a few odd herbs. What to do… what to do. I have a ton of frozen flank steak (thanks Jay) so I knew I could make use of that, and of course rice in the pantry. I sort of started with the idea of Korean Bulgogi (Korean BBQ beef) which has pear in it, subbed in apple because I had no pear, and then sort of threw things in until the marinade tasted like what I was imagining. I don’t know what to call it so I’m calling it “pseudo-Korean”. I’m also calling it delicious.

Read more

Chicken Pot Pie

chicken pie finished
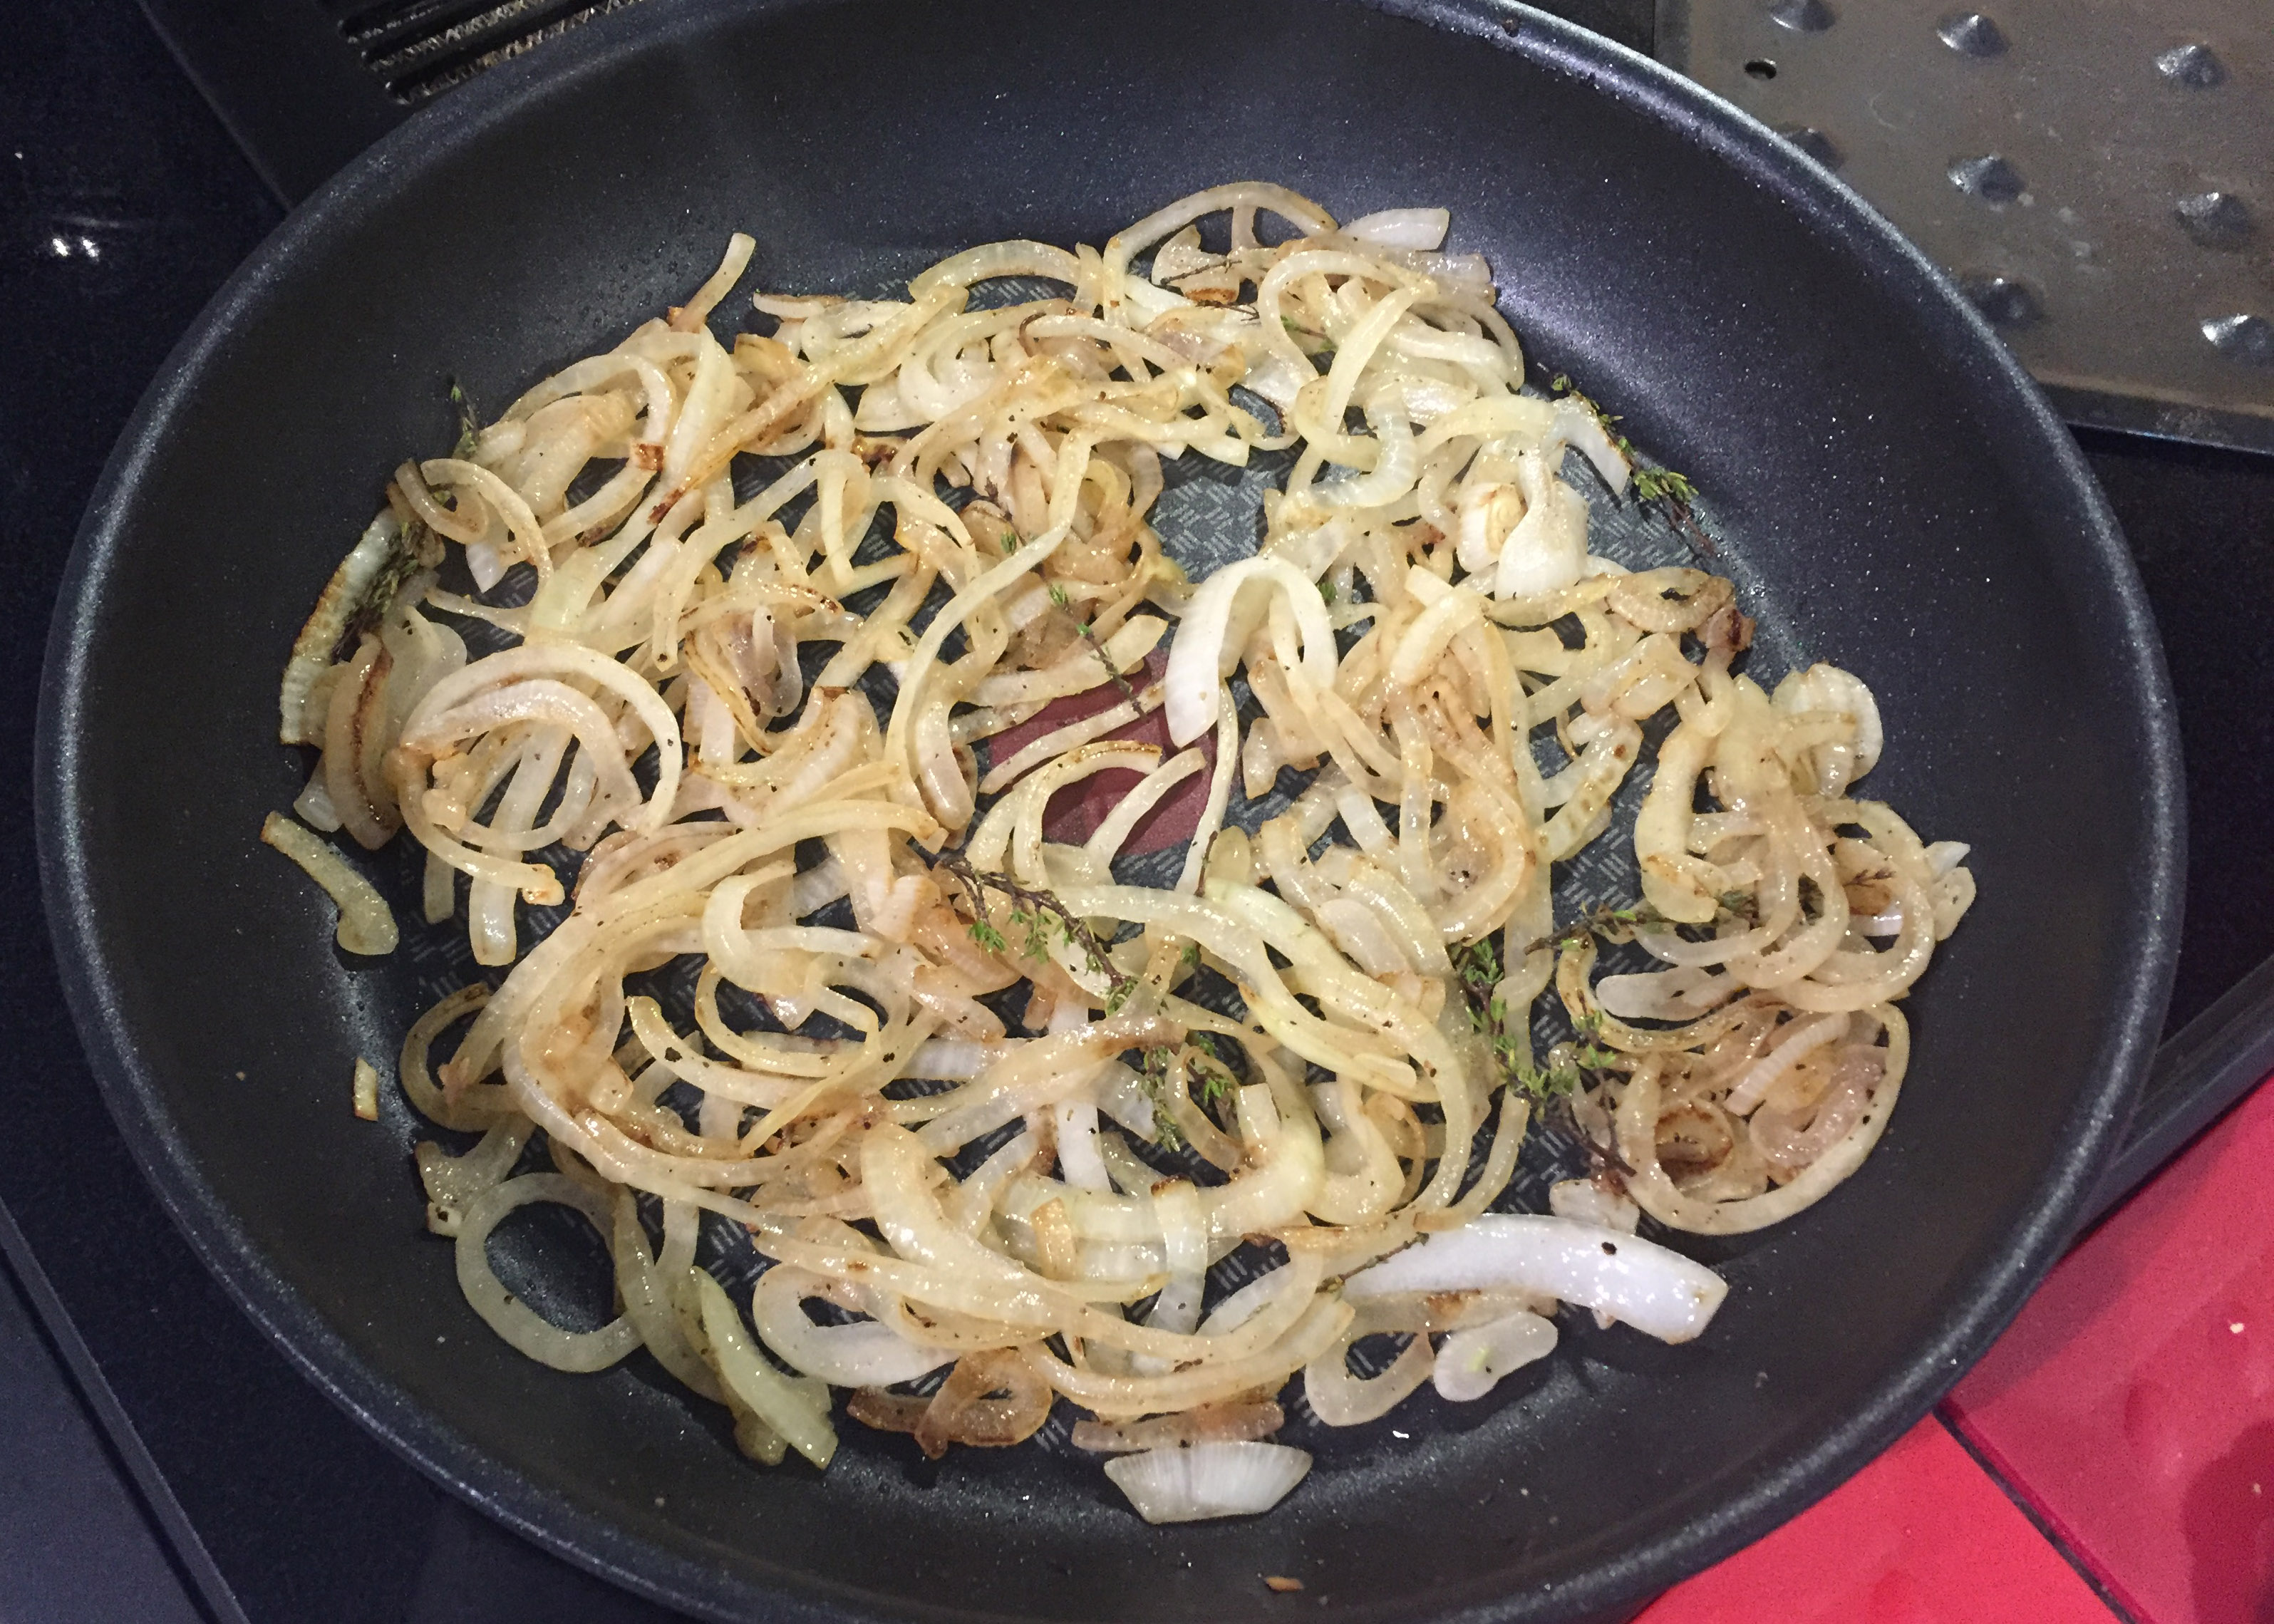
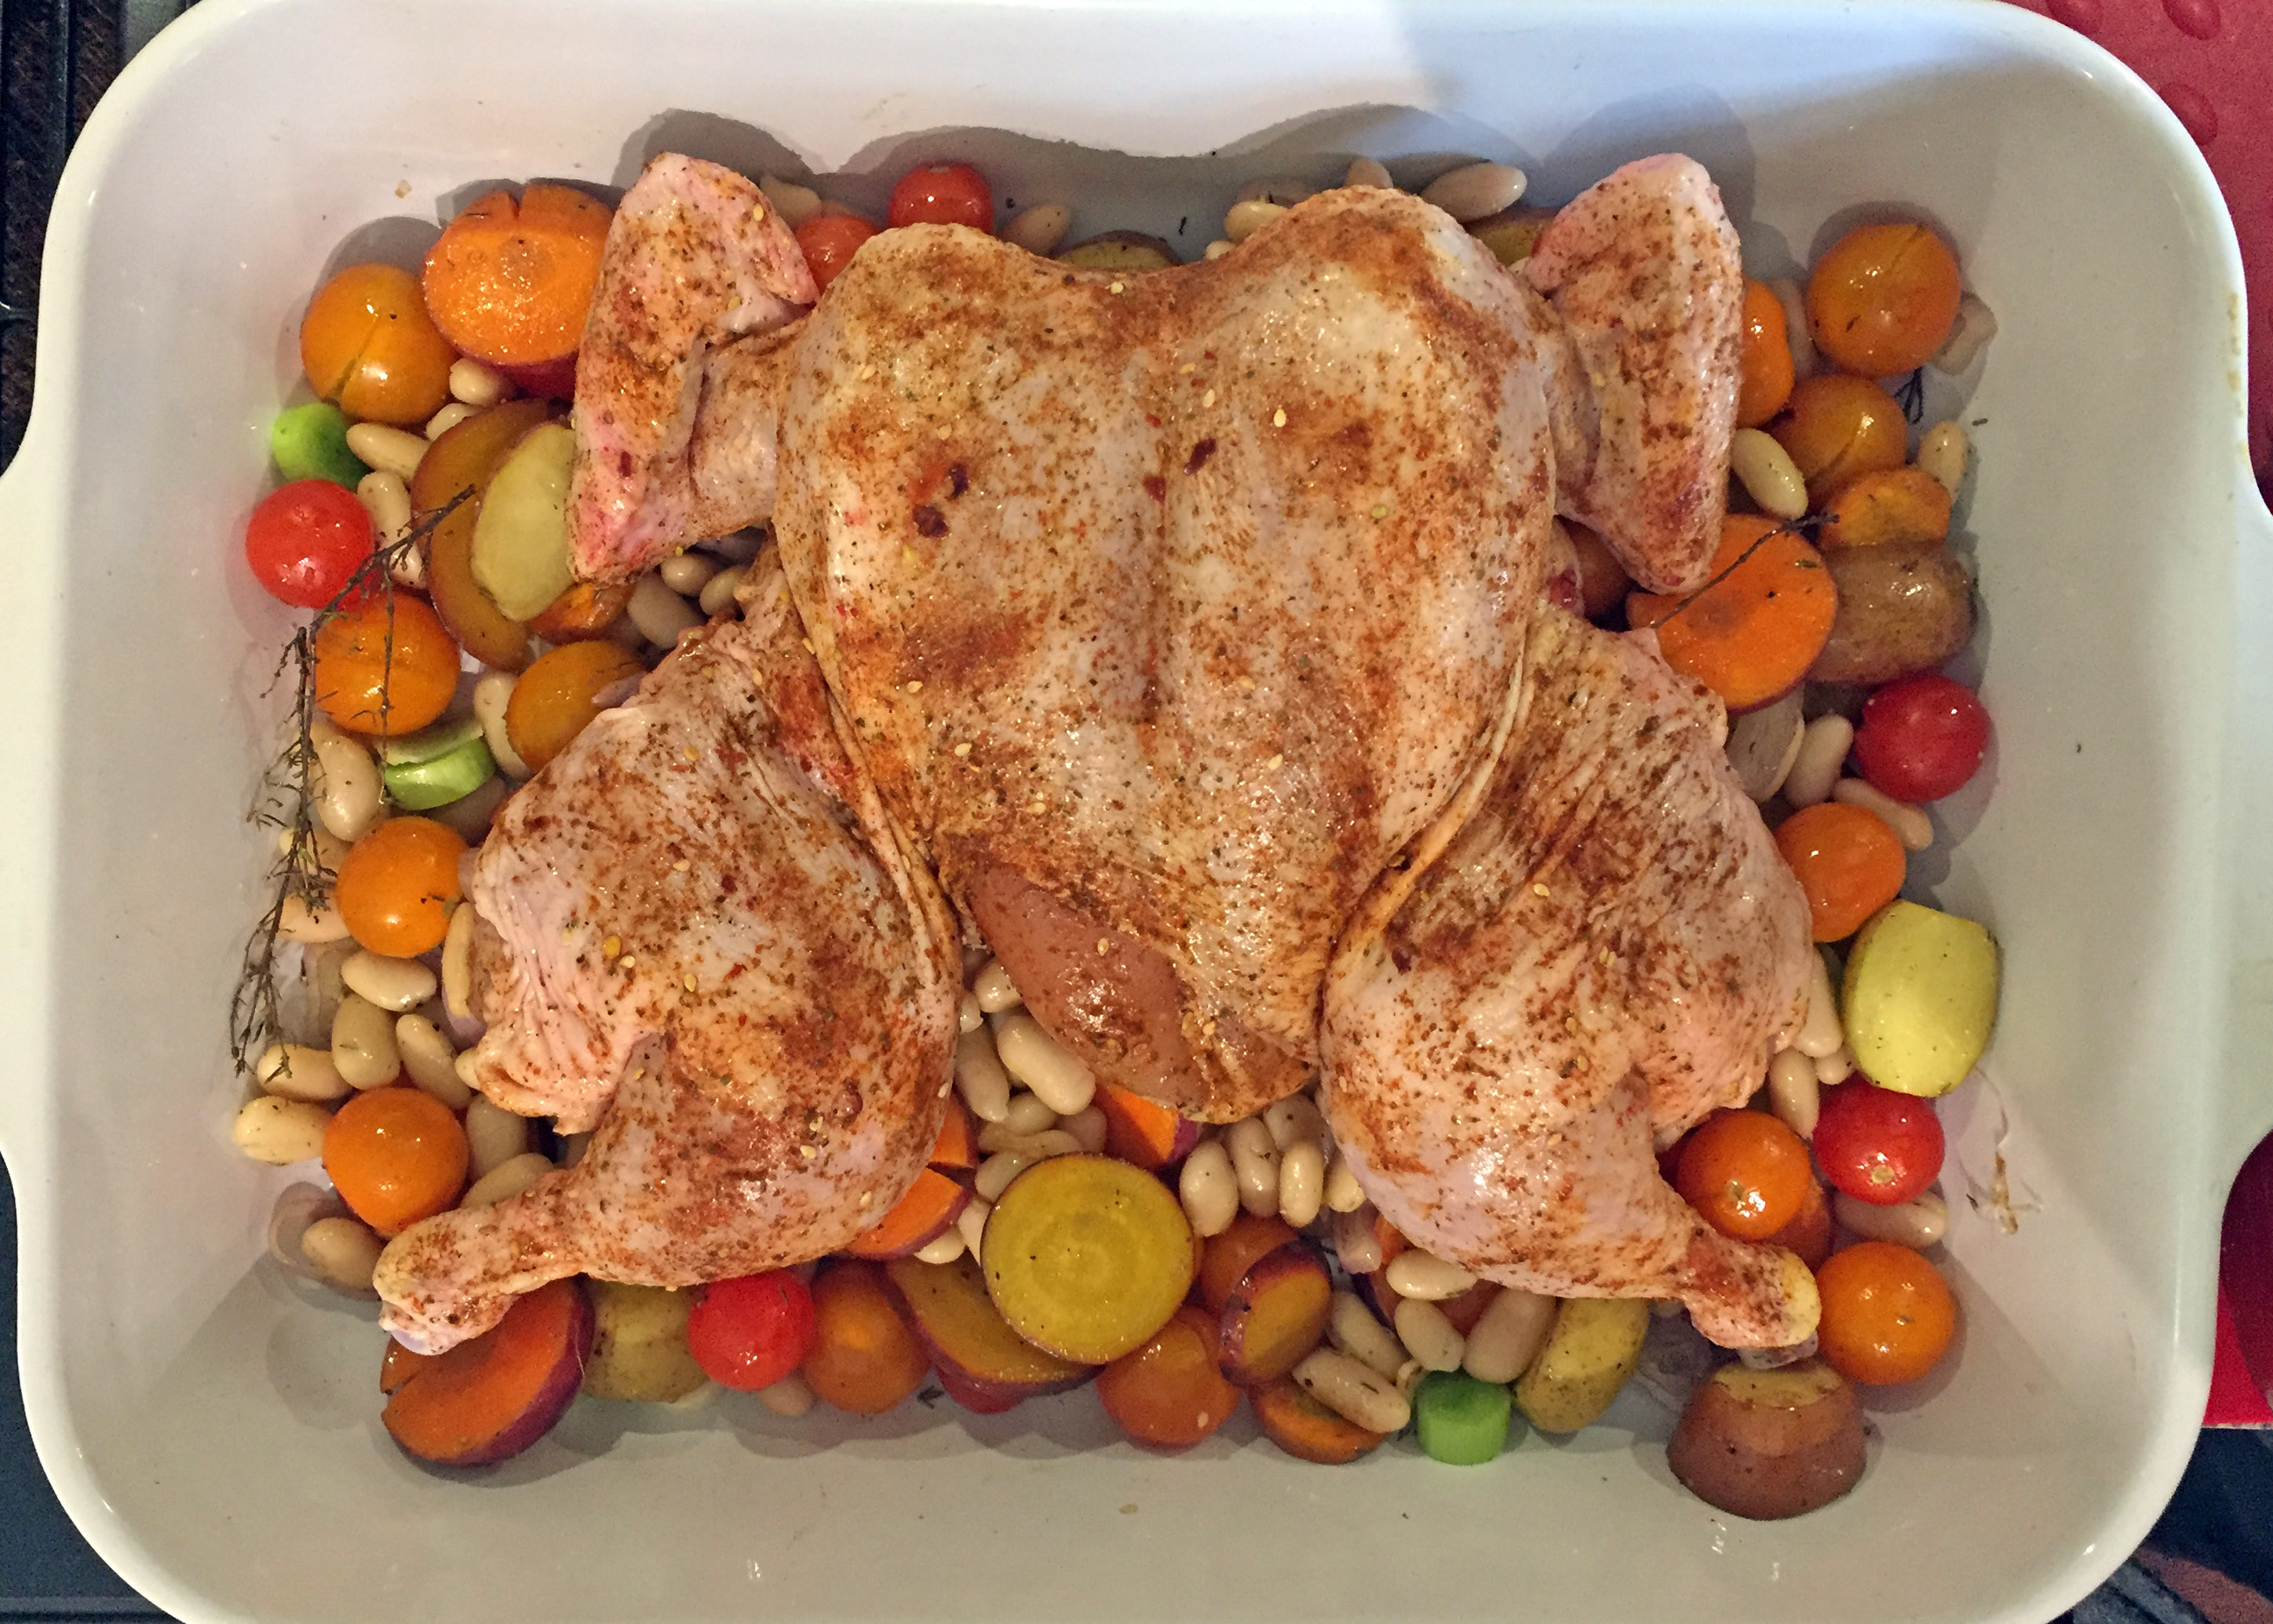
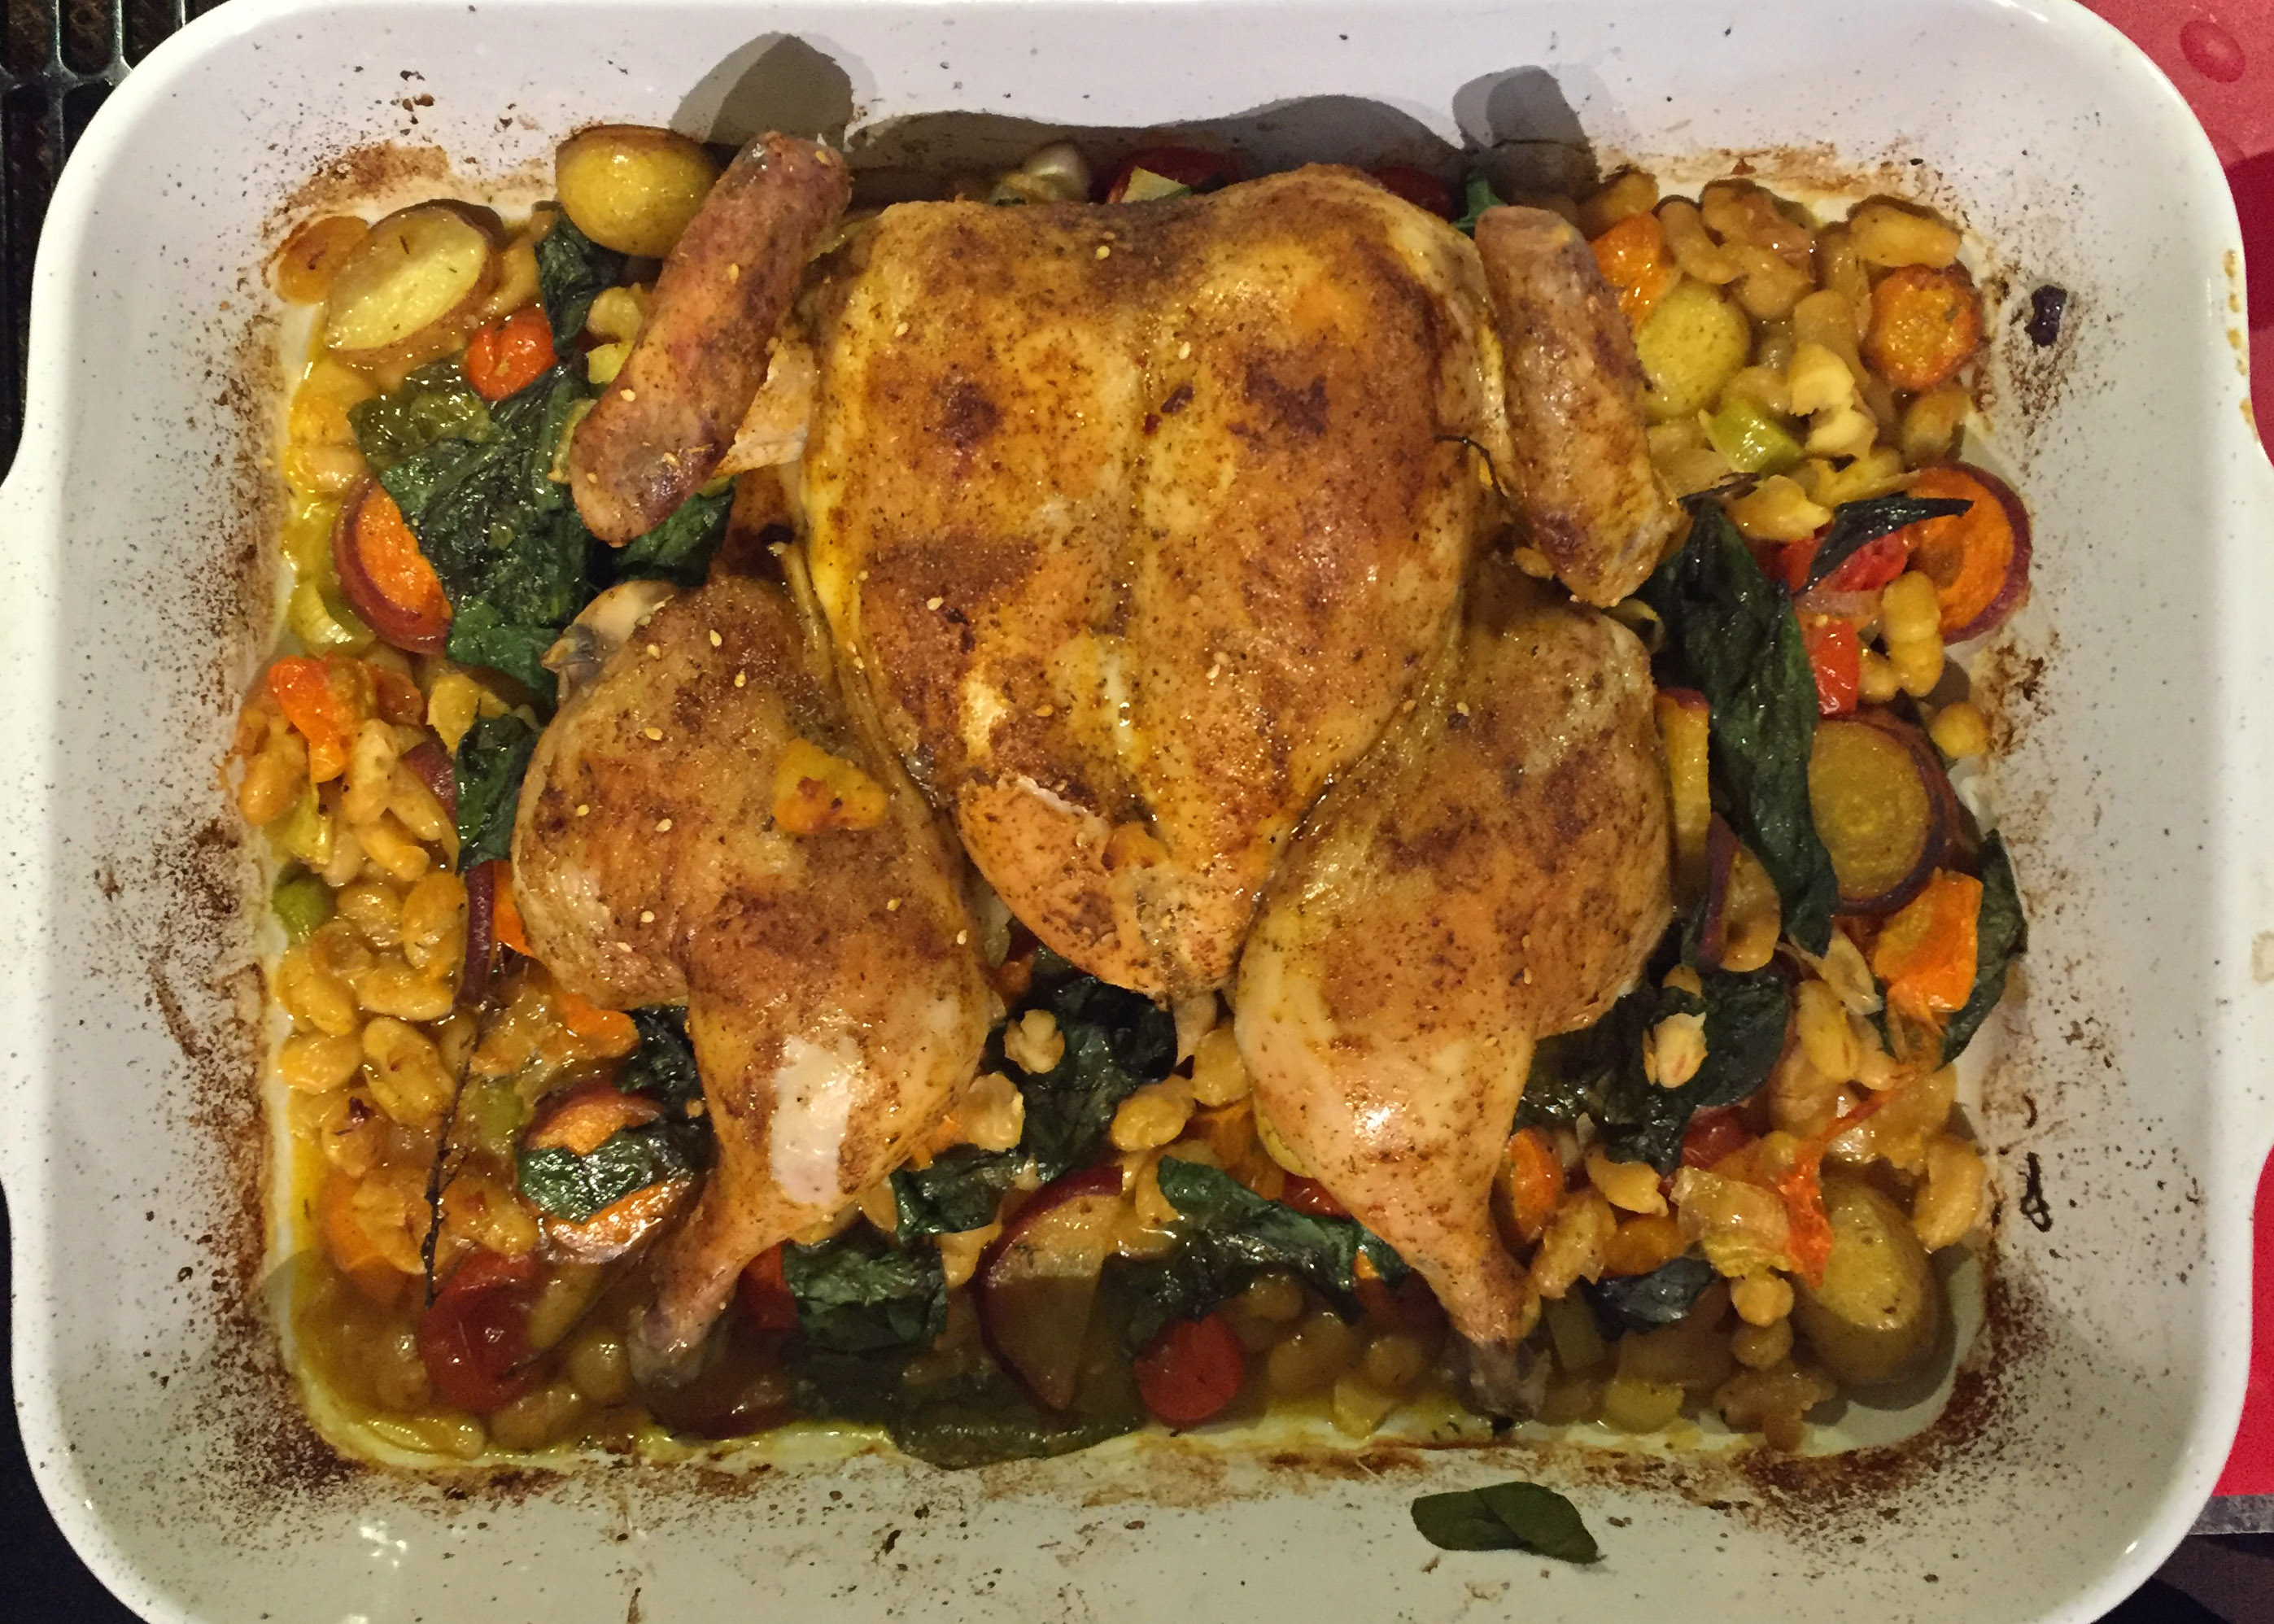
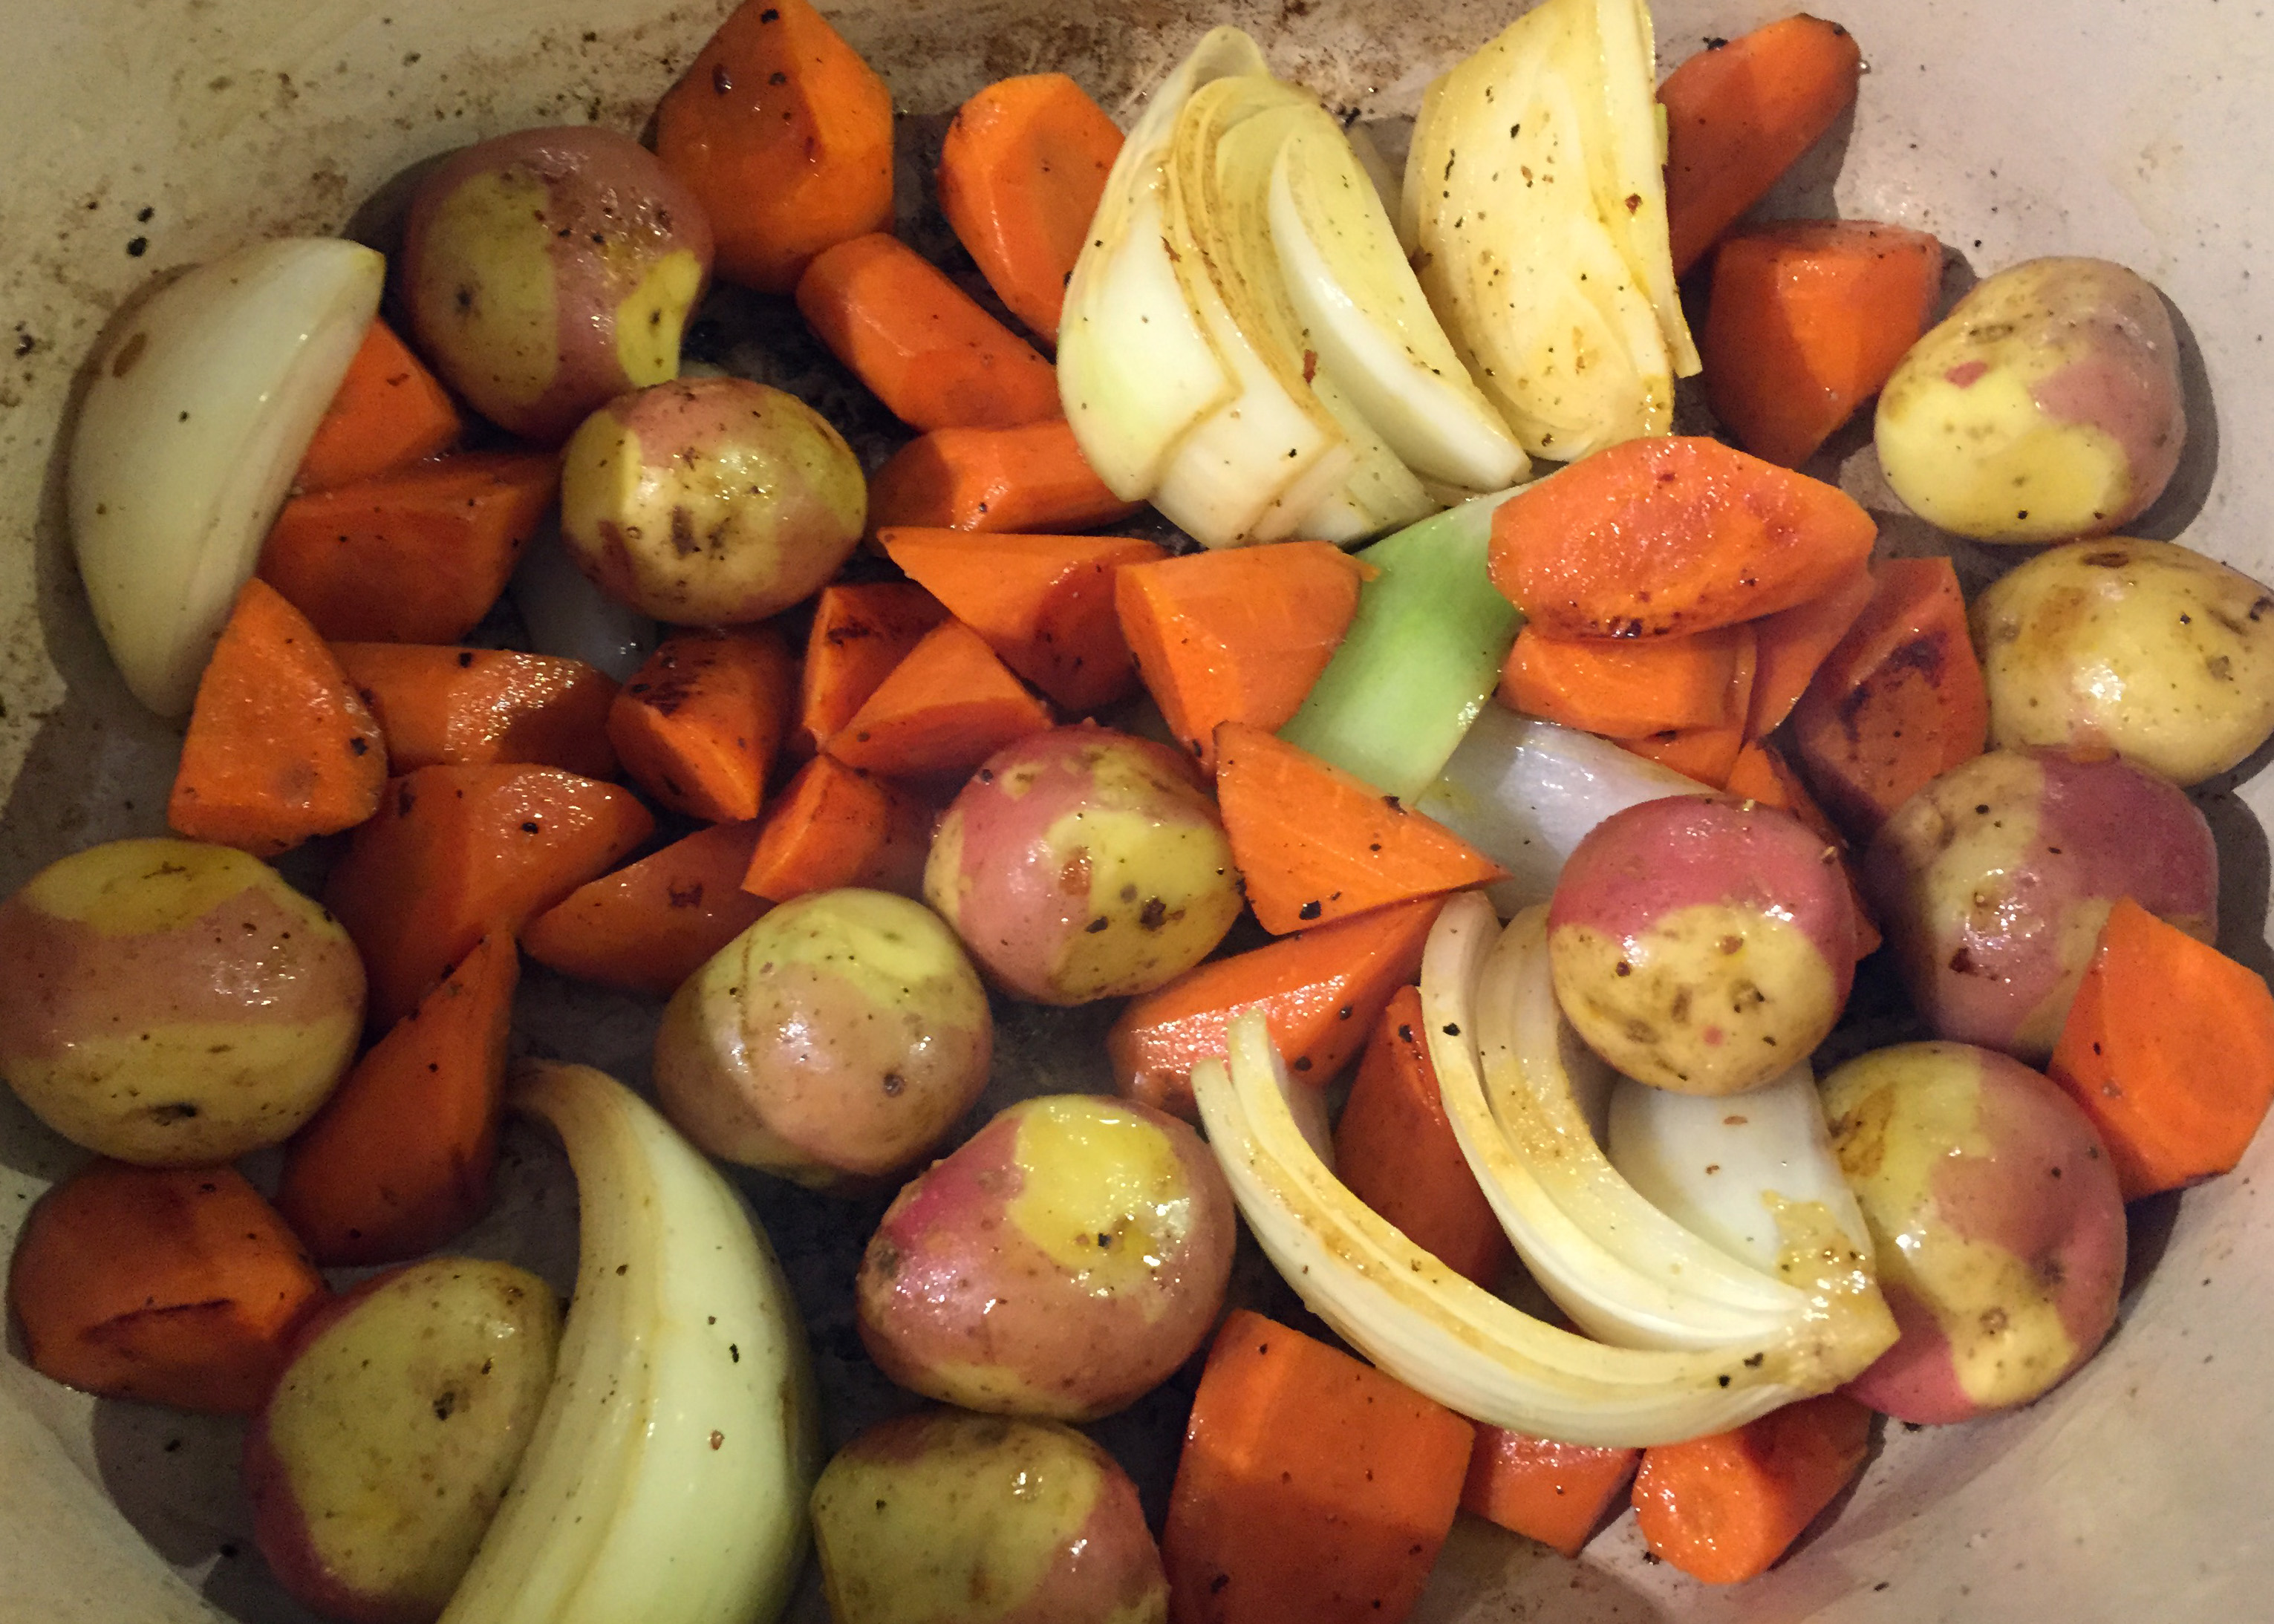
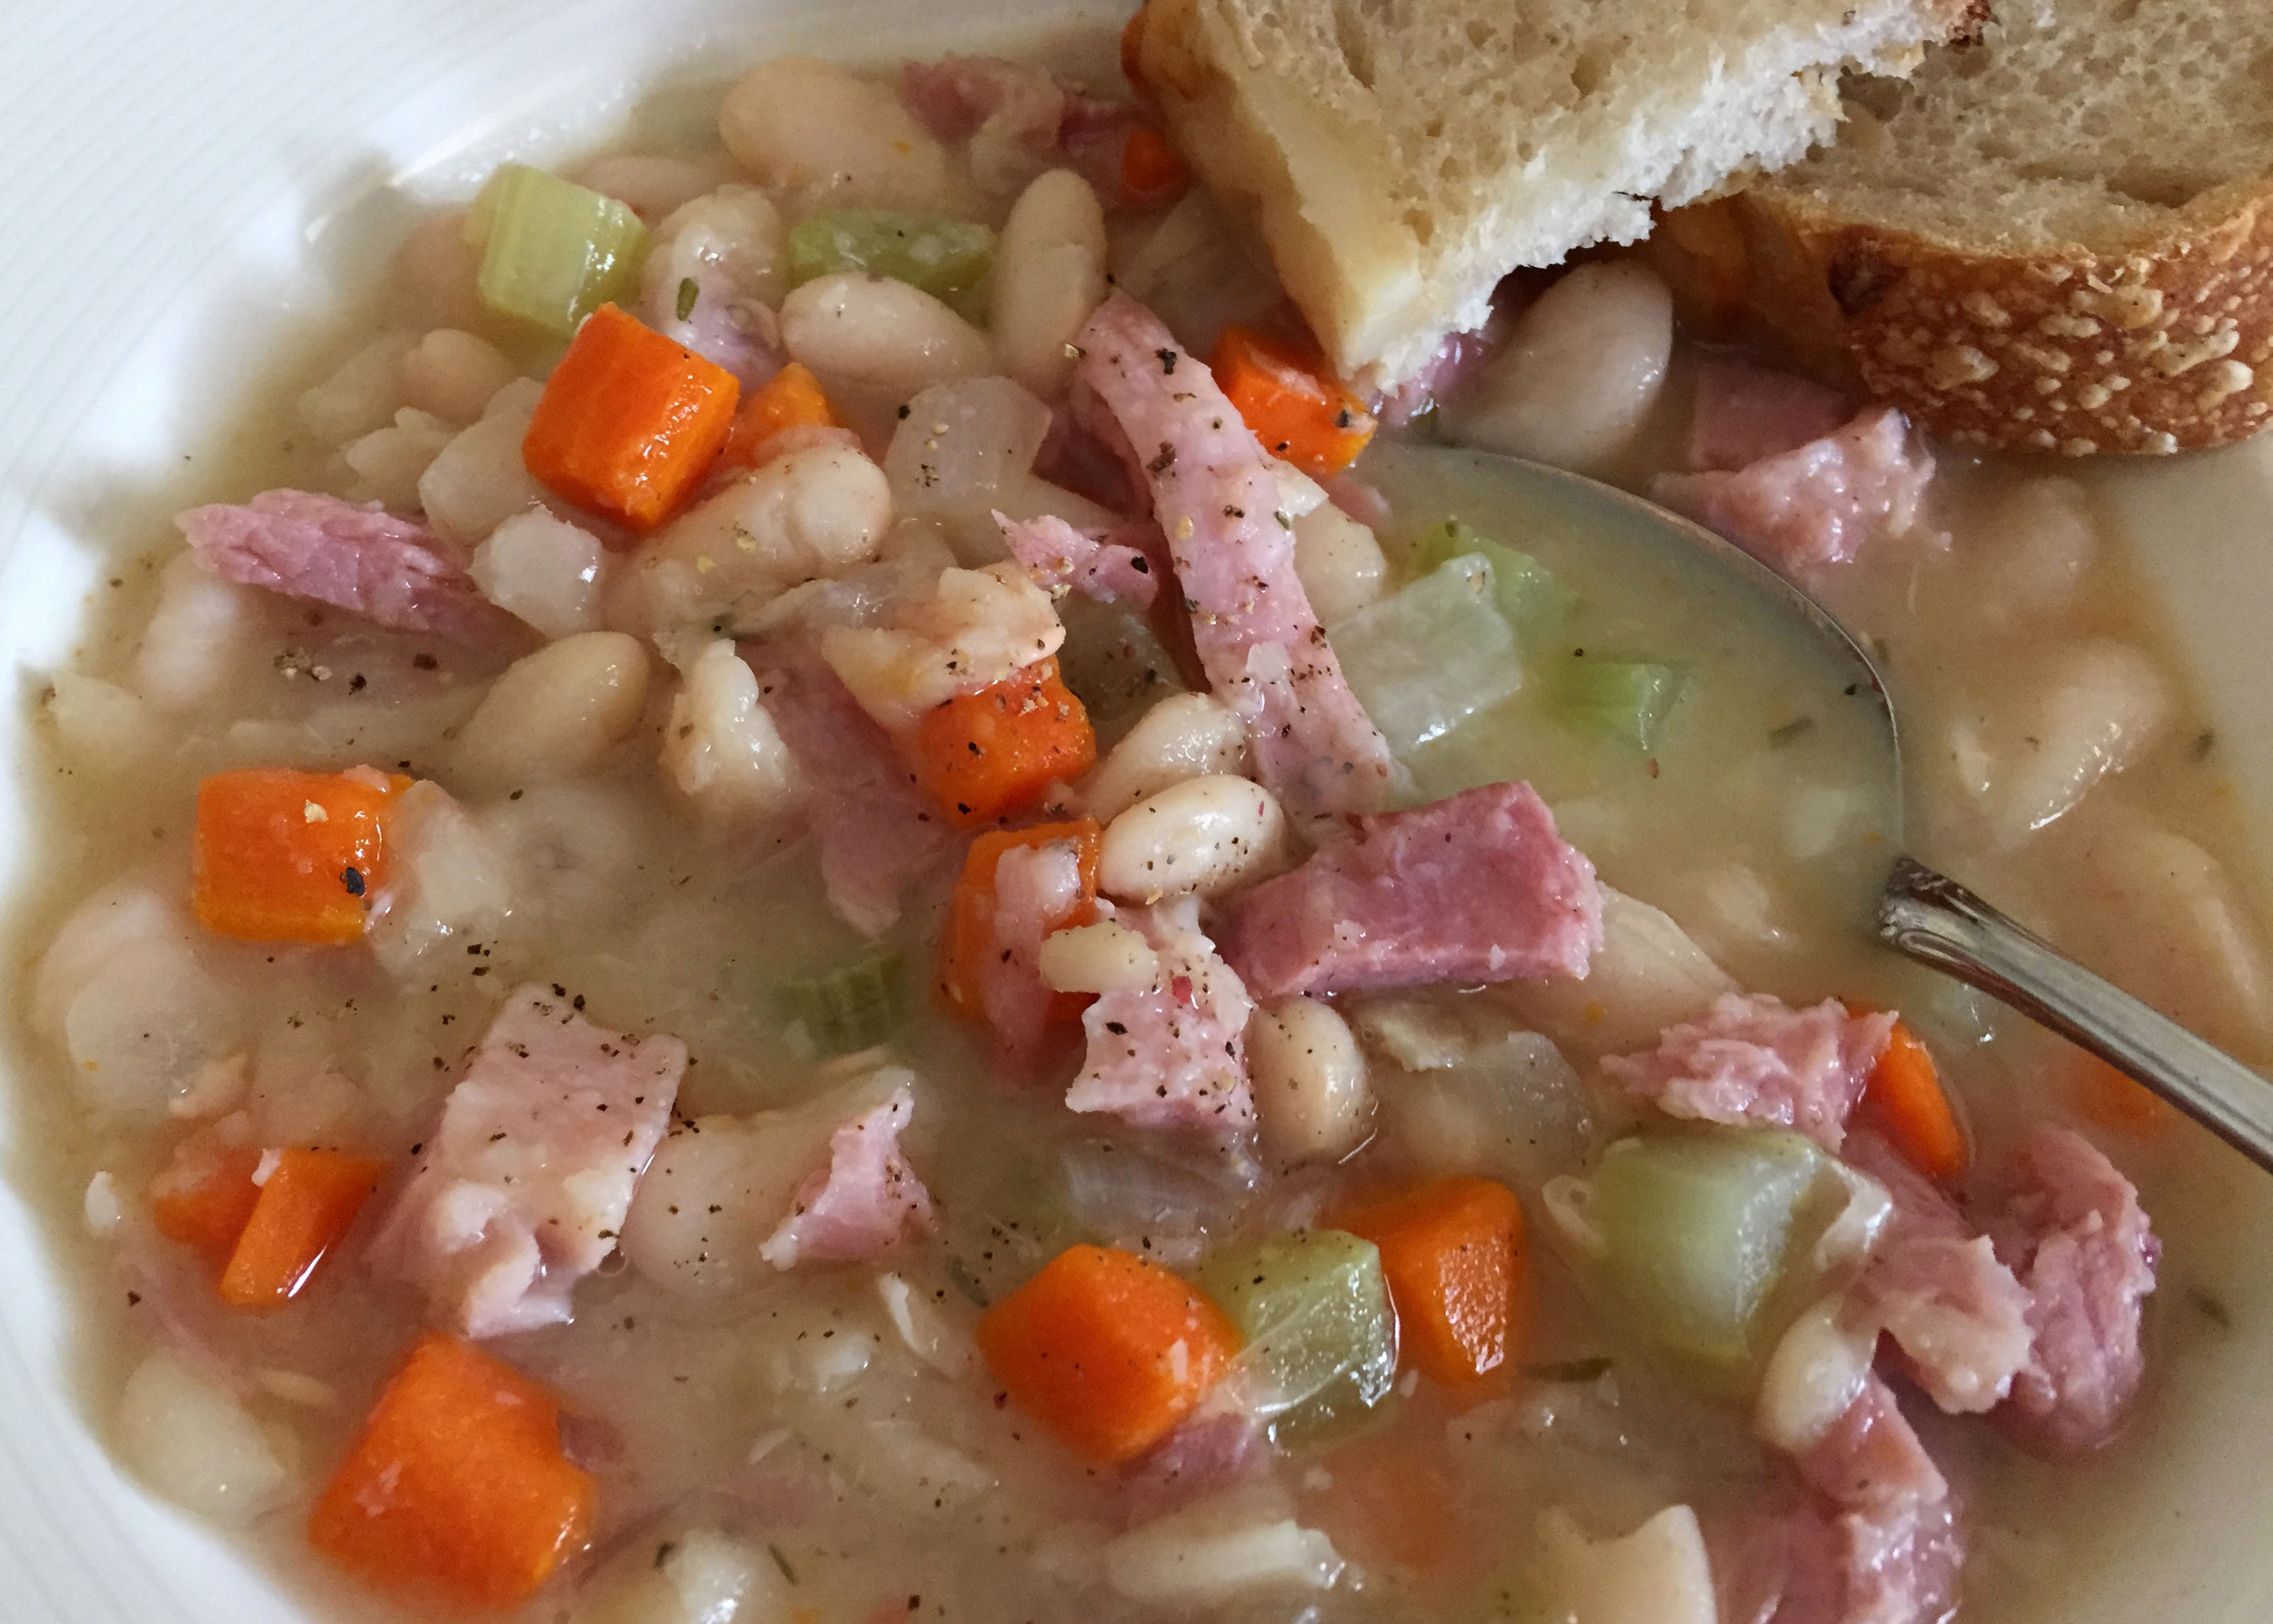
There are days when it’s rainy and blowy outside and you just want to hunker down with a blanket, slippers, and a good book. Fire crackling (in a fireplace or tuned in to that local “Christmas log” TV station that seems to show up over the holidays every year). Delicious smells wafting from the oven. I was feeling this last weekend when we received record amounts of rain over 2 days. To quote Eeyore, “The nicest thing about the rain is that it always stops. Eventually.” Another nice thing about rain is that it makes me think COMFORT FOOD, and I looooove comfort food, don’t you?!

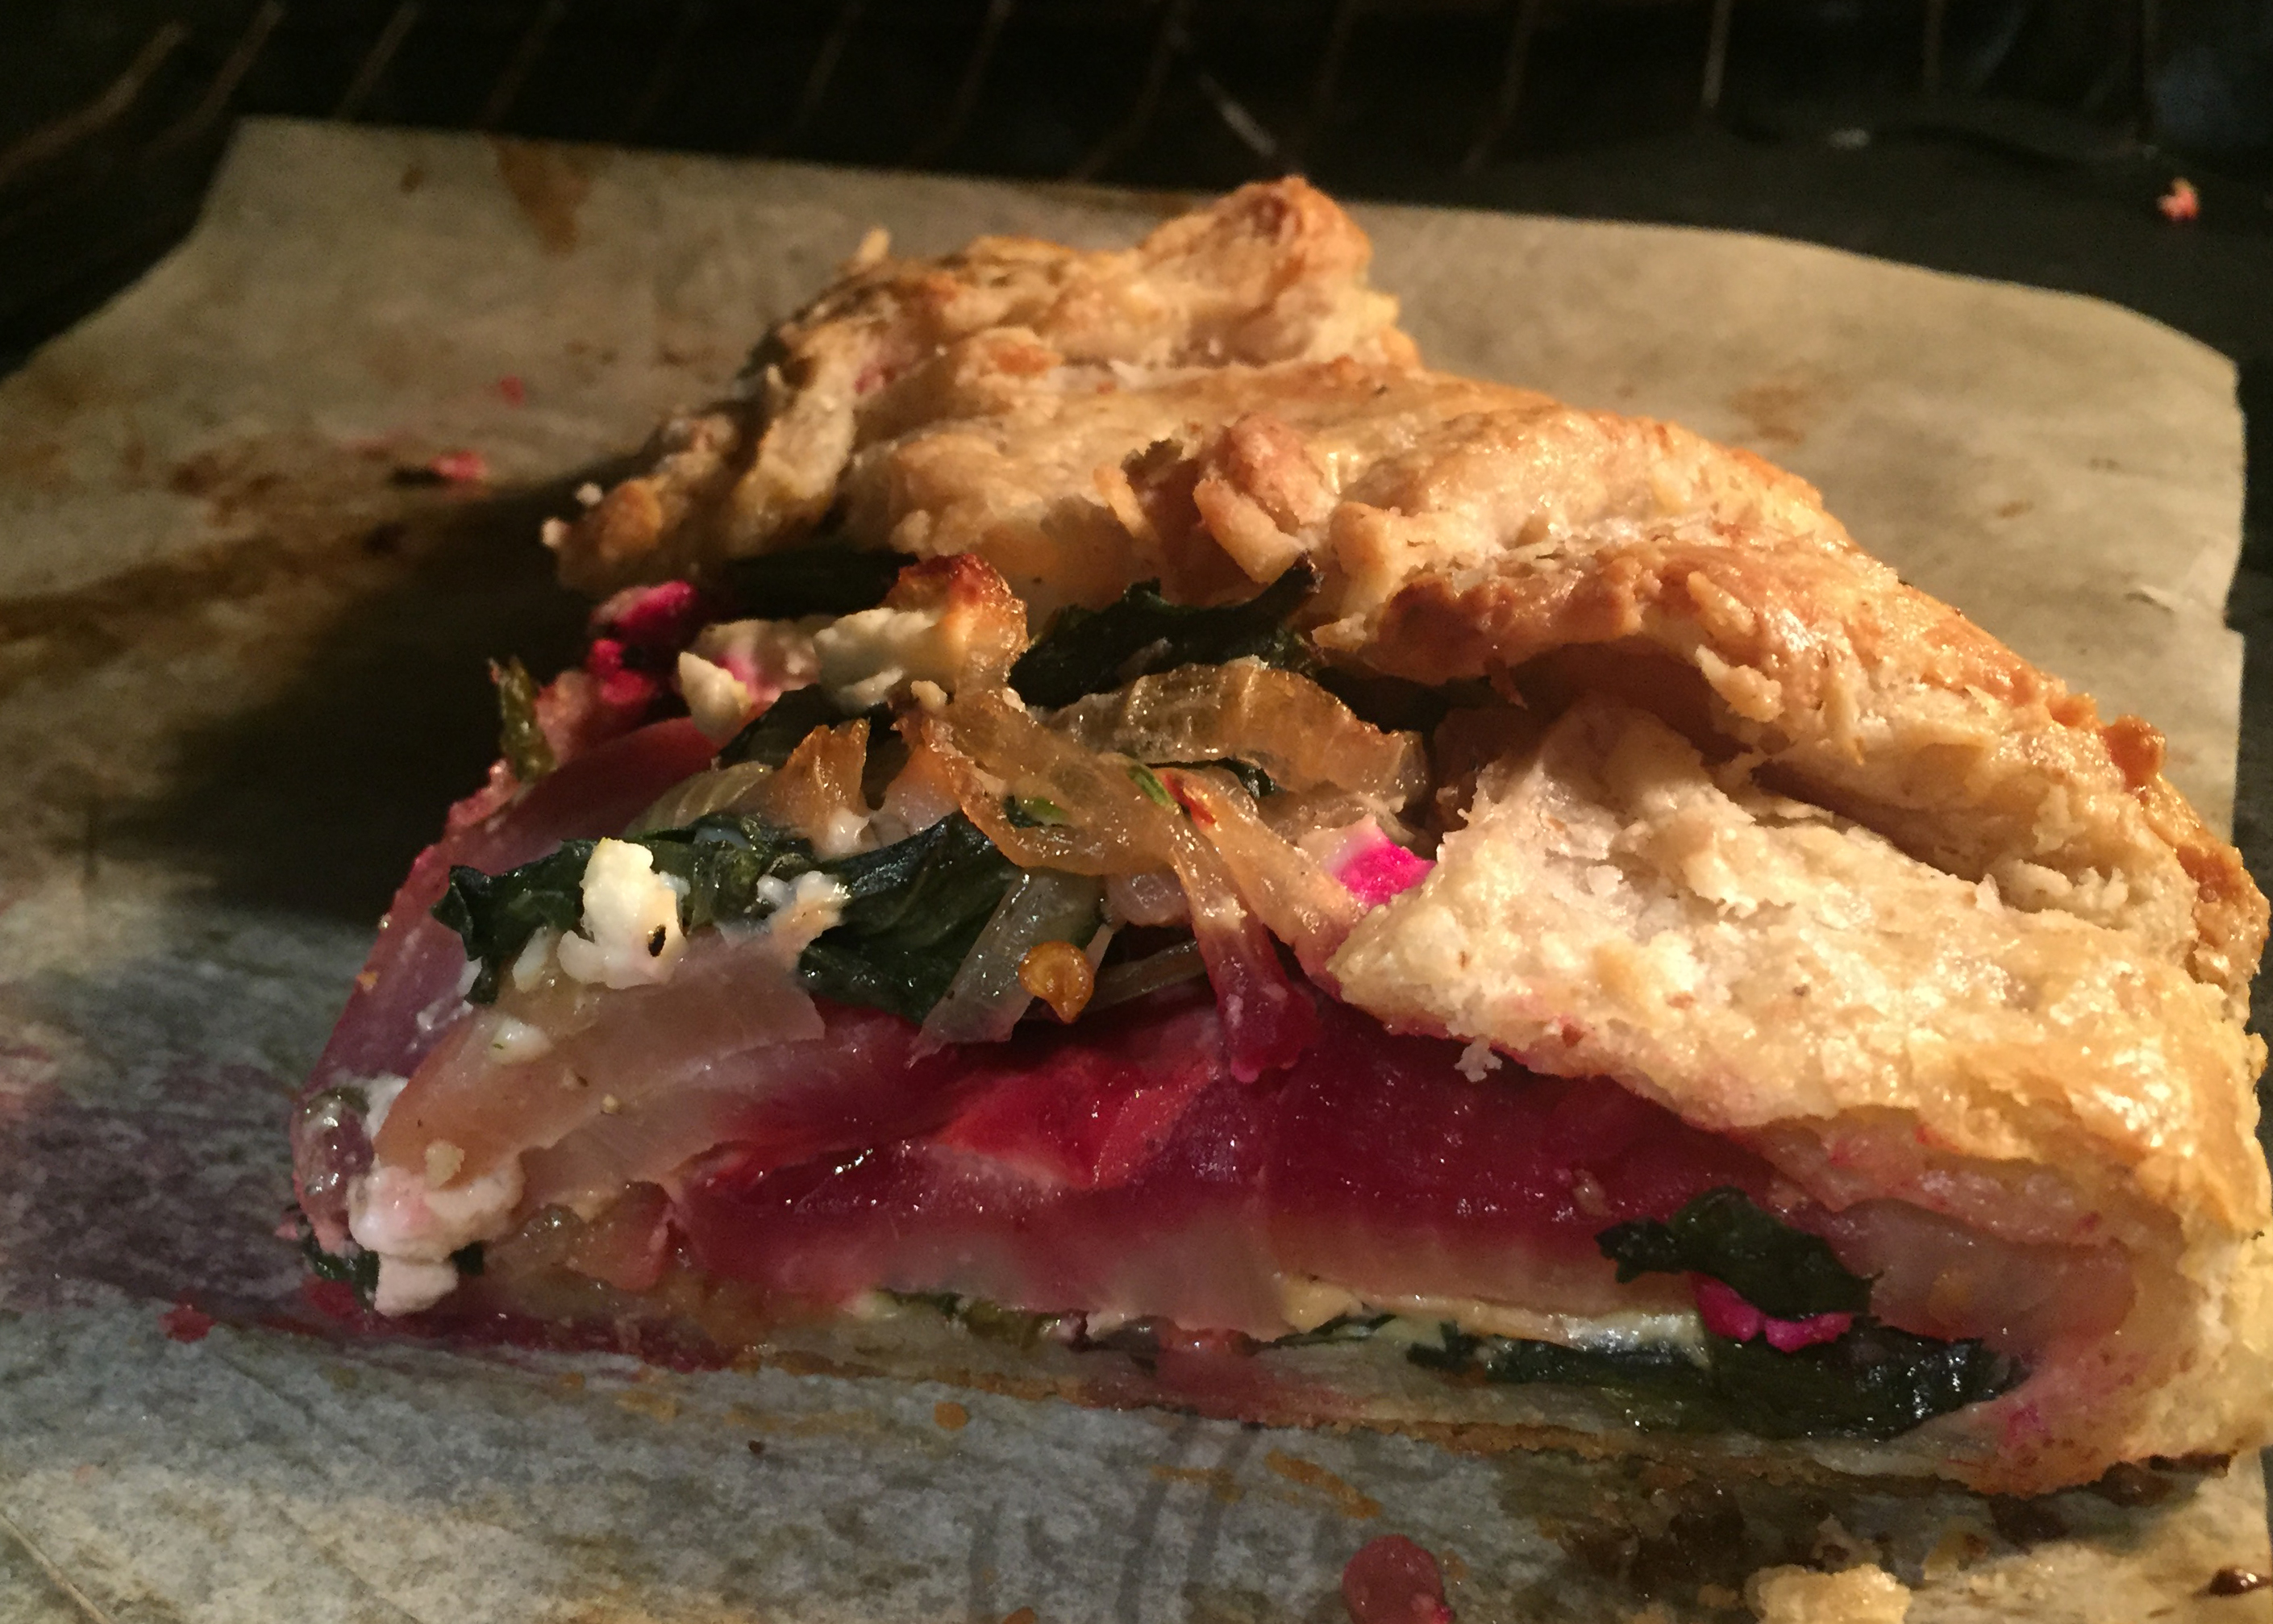
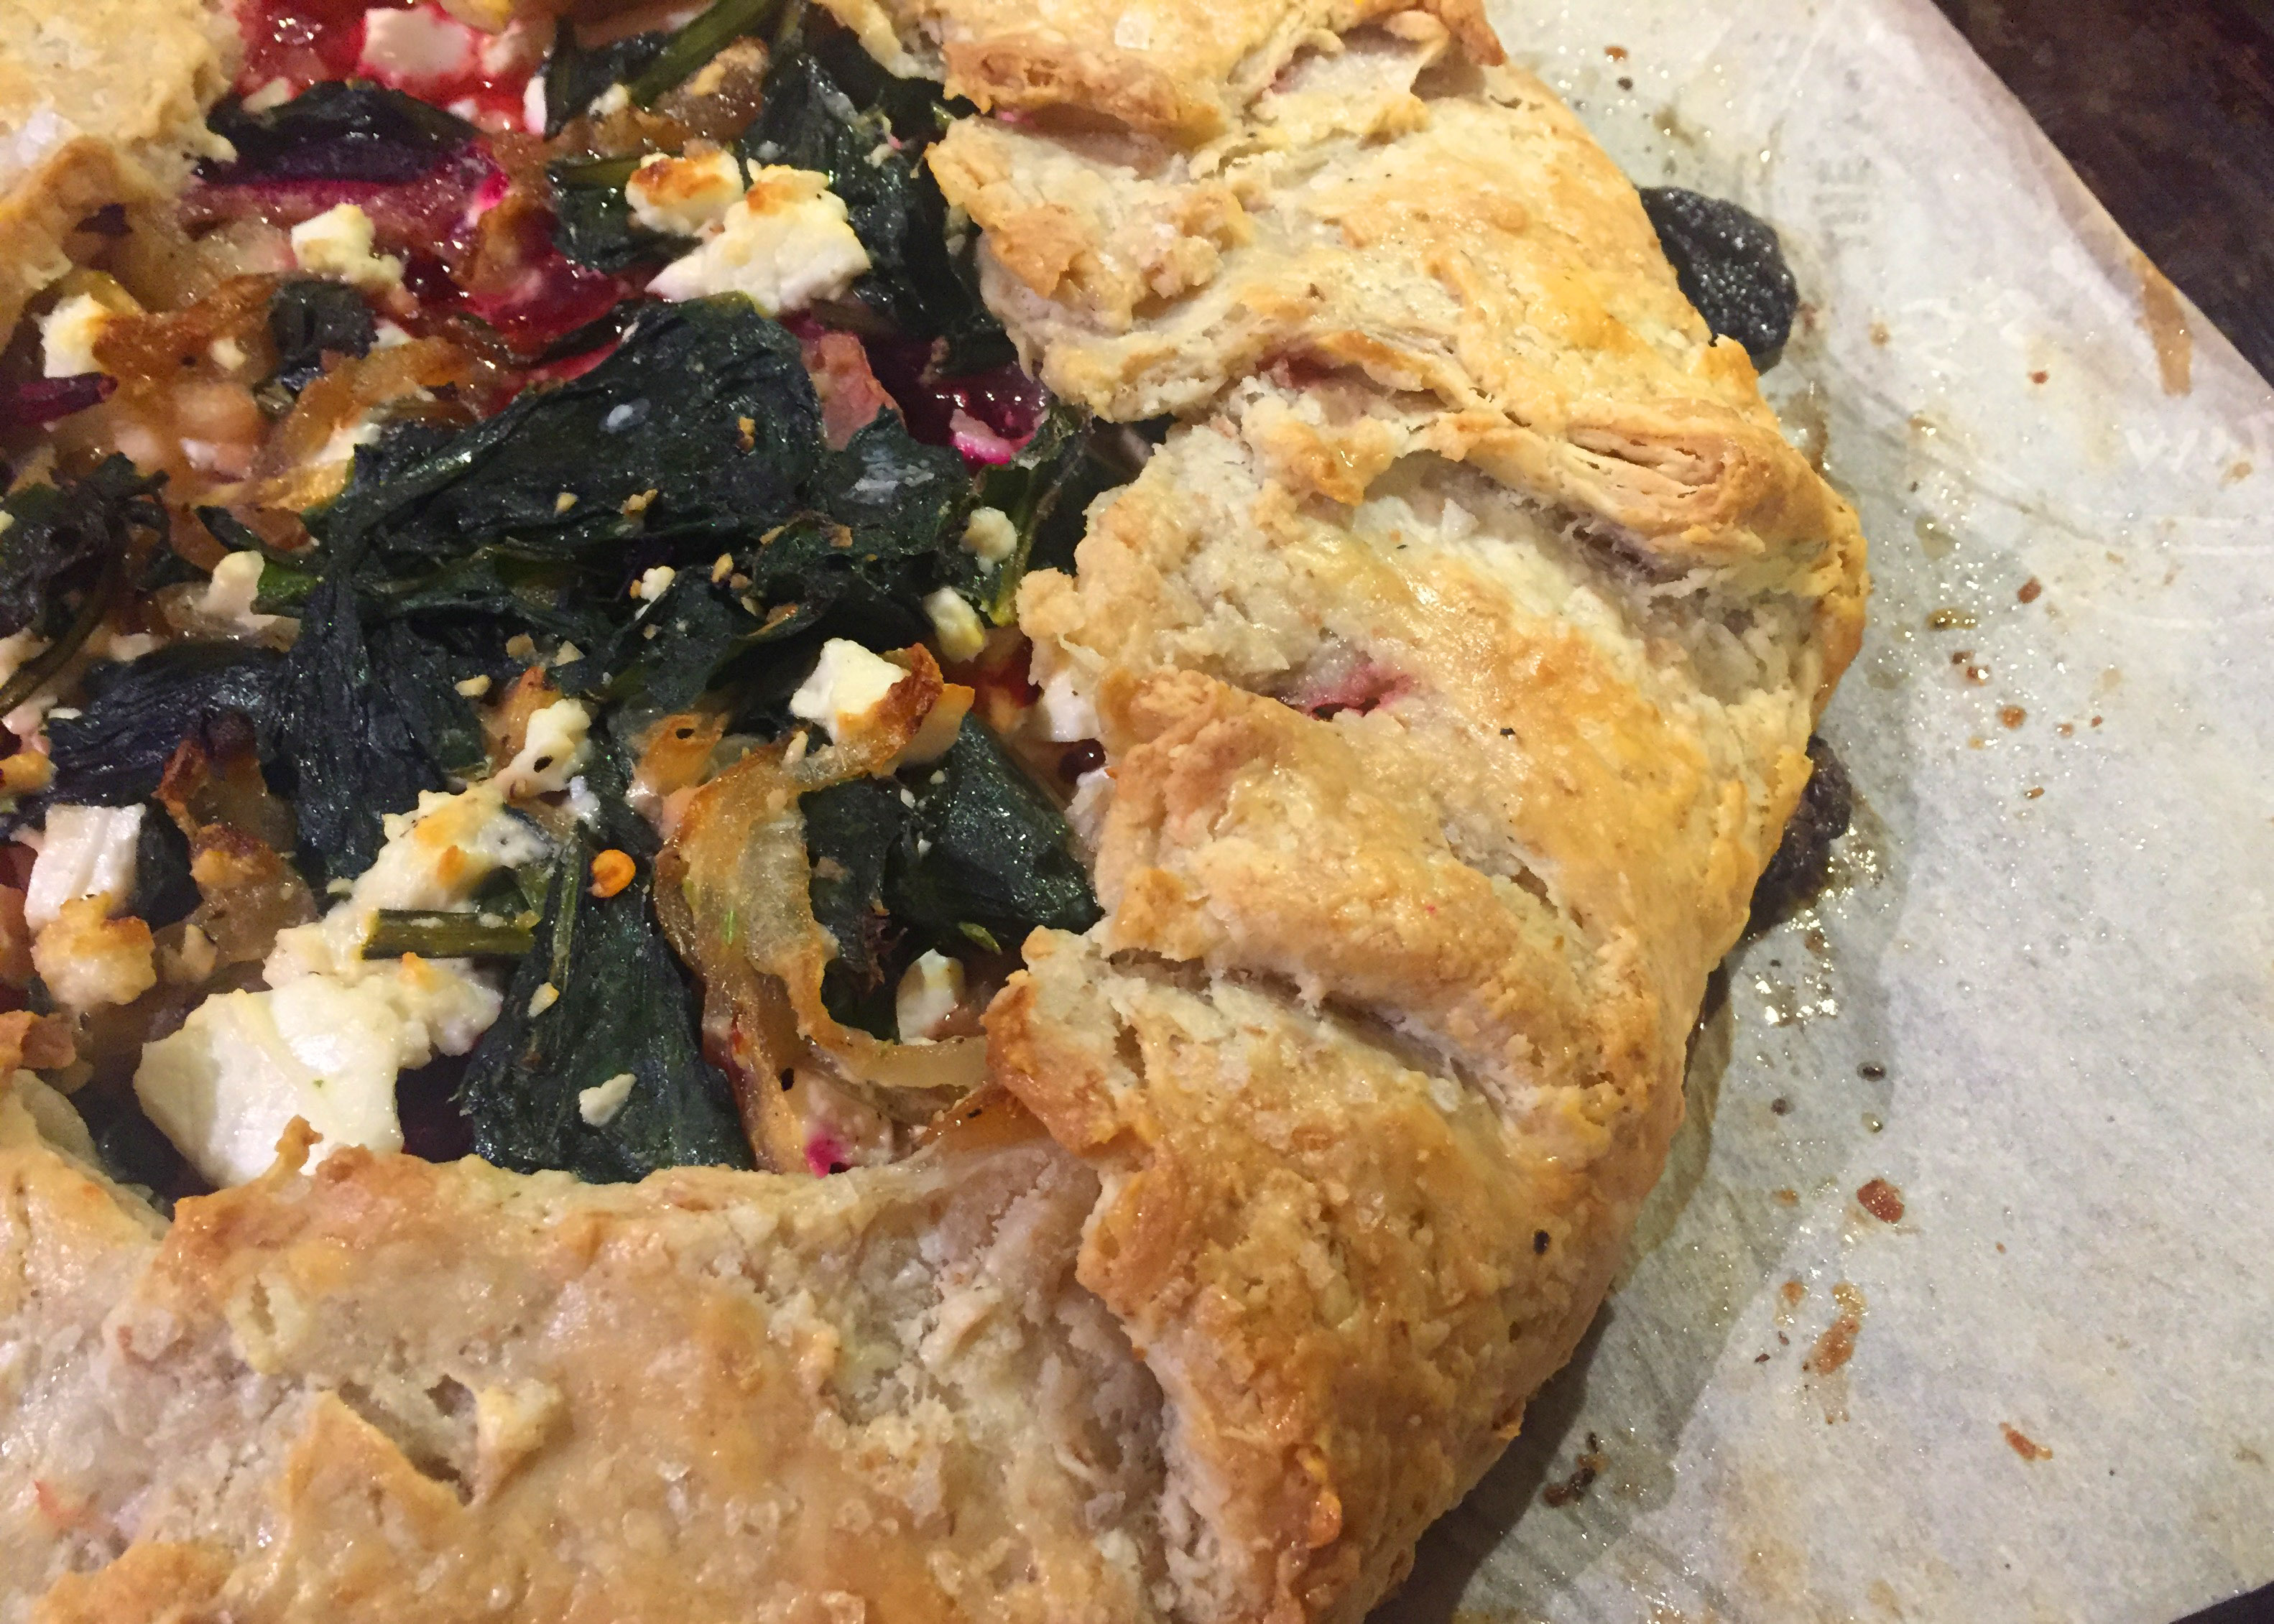
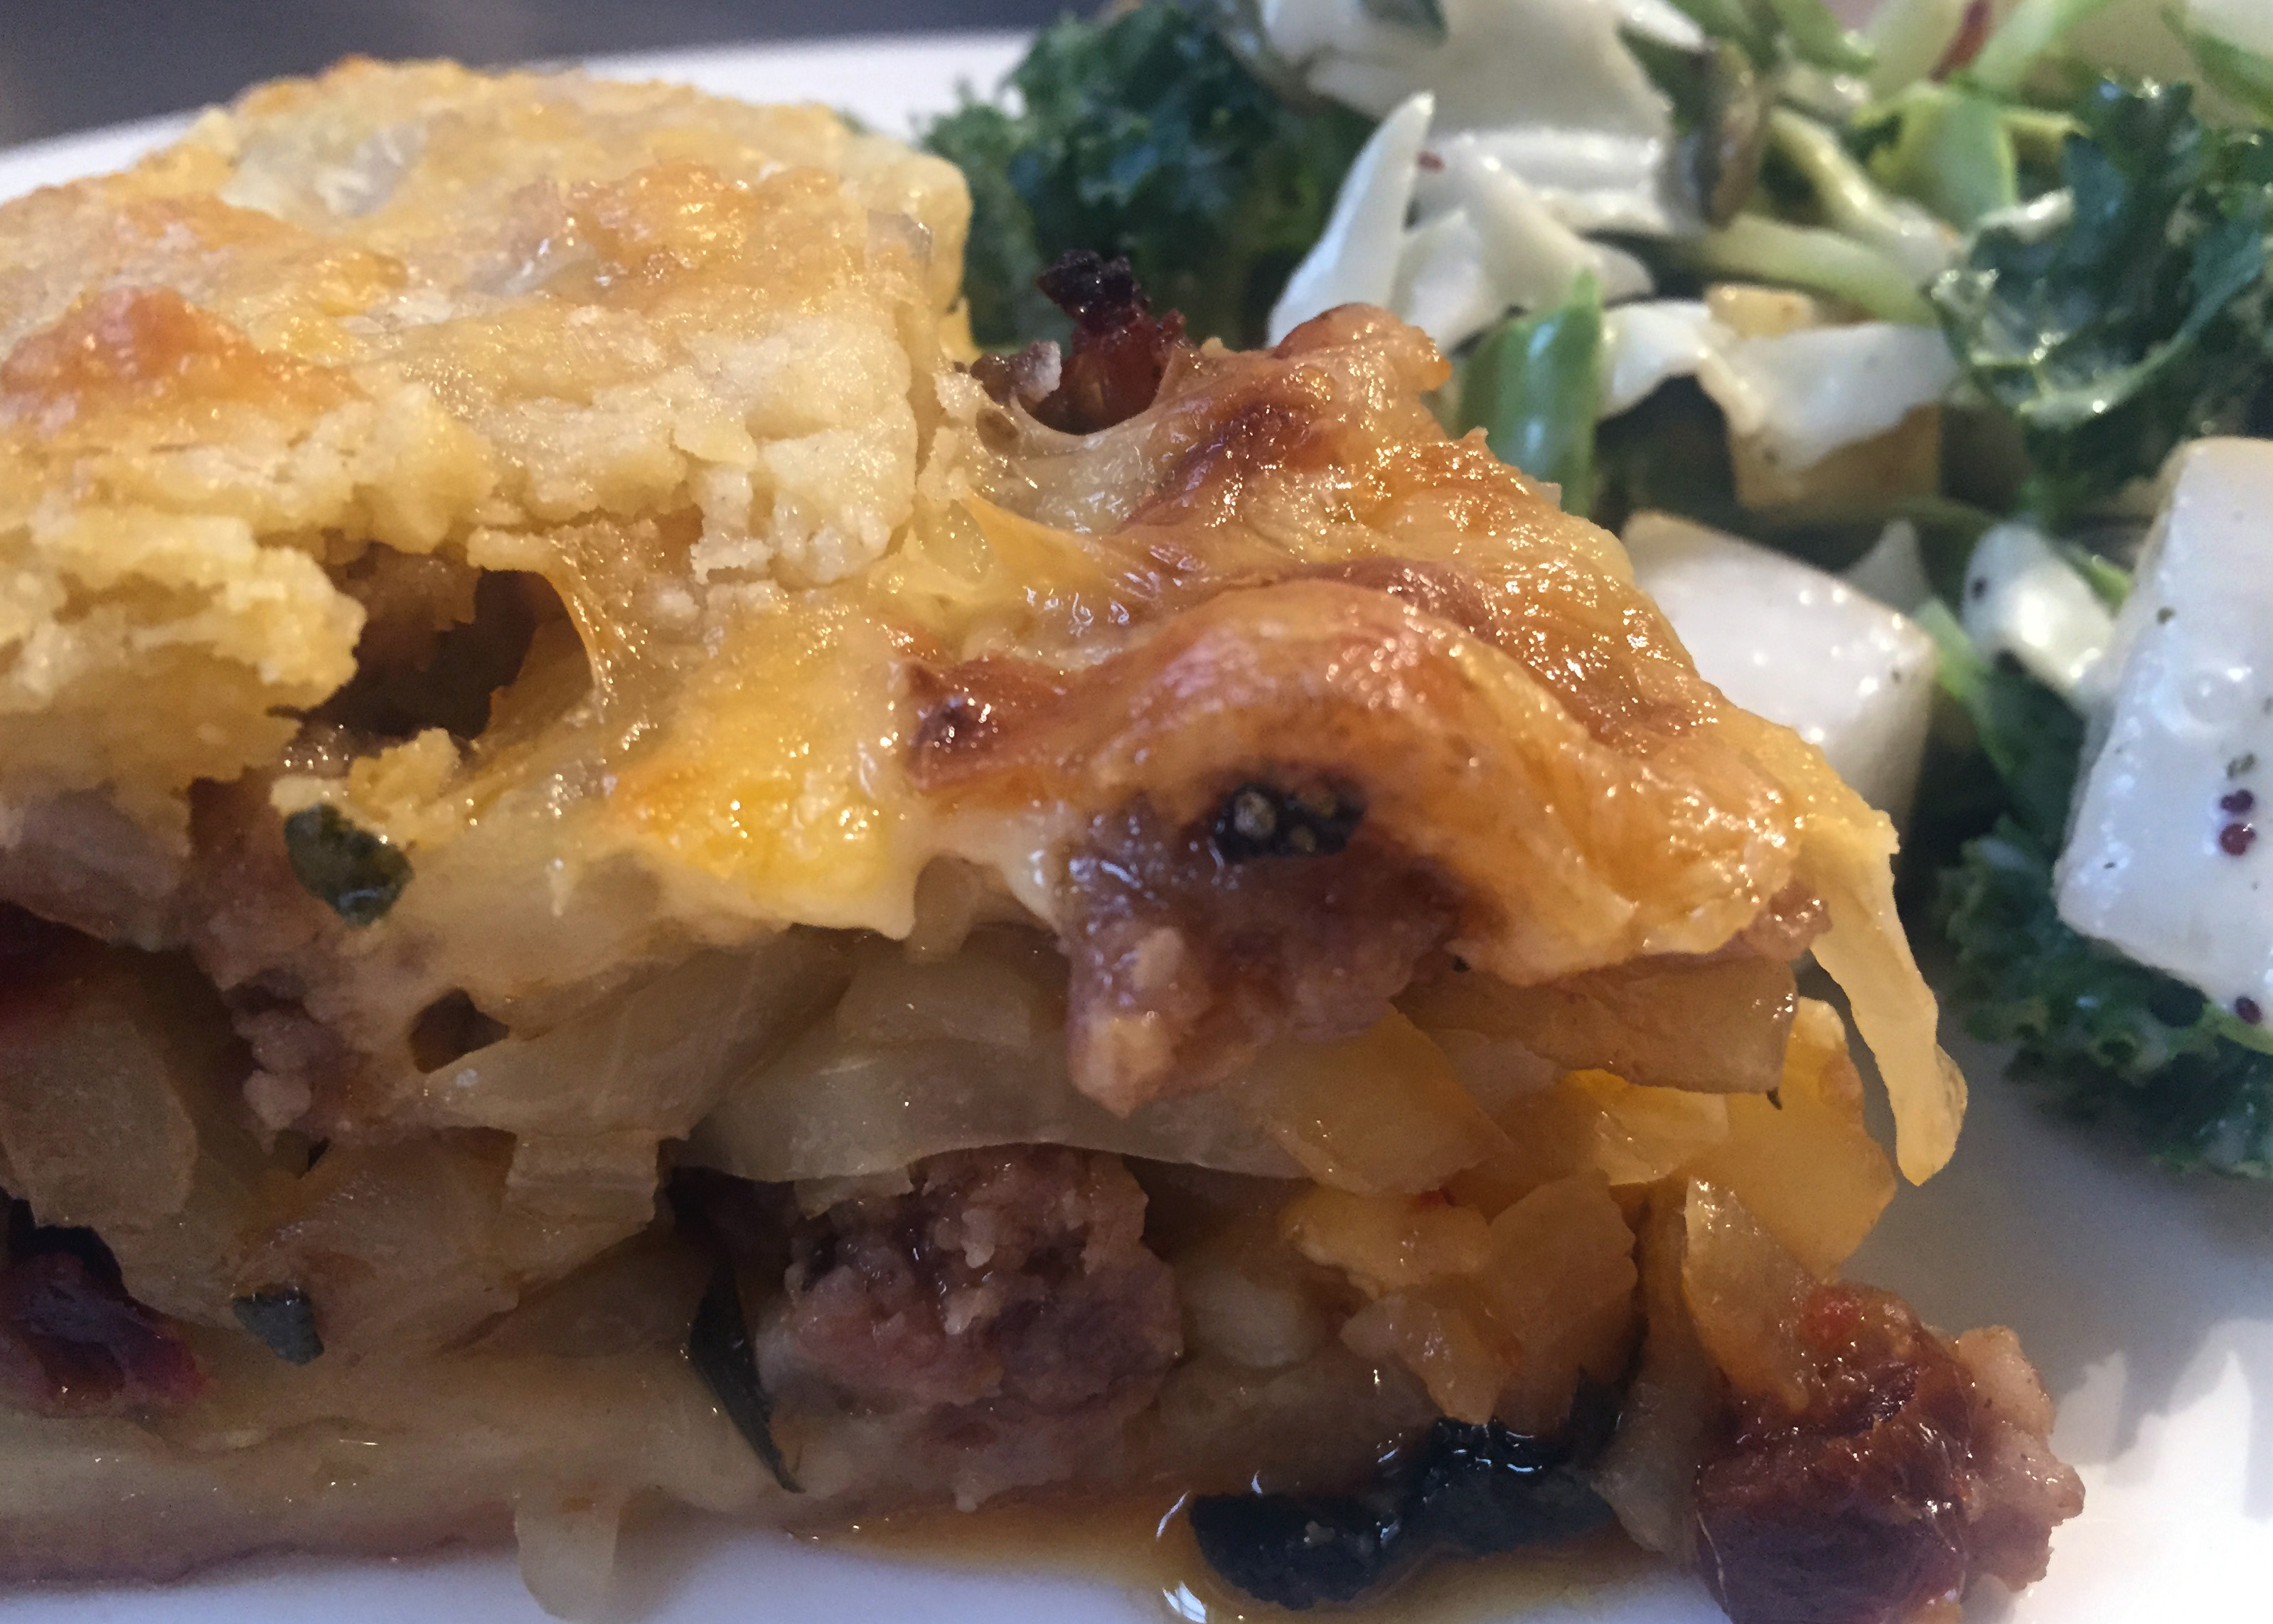
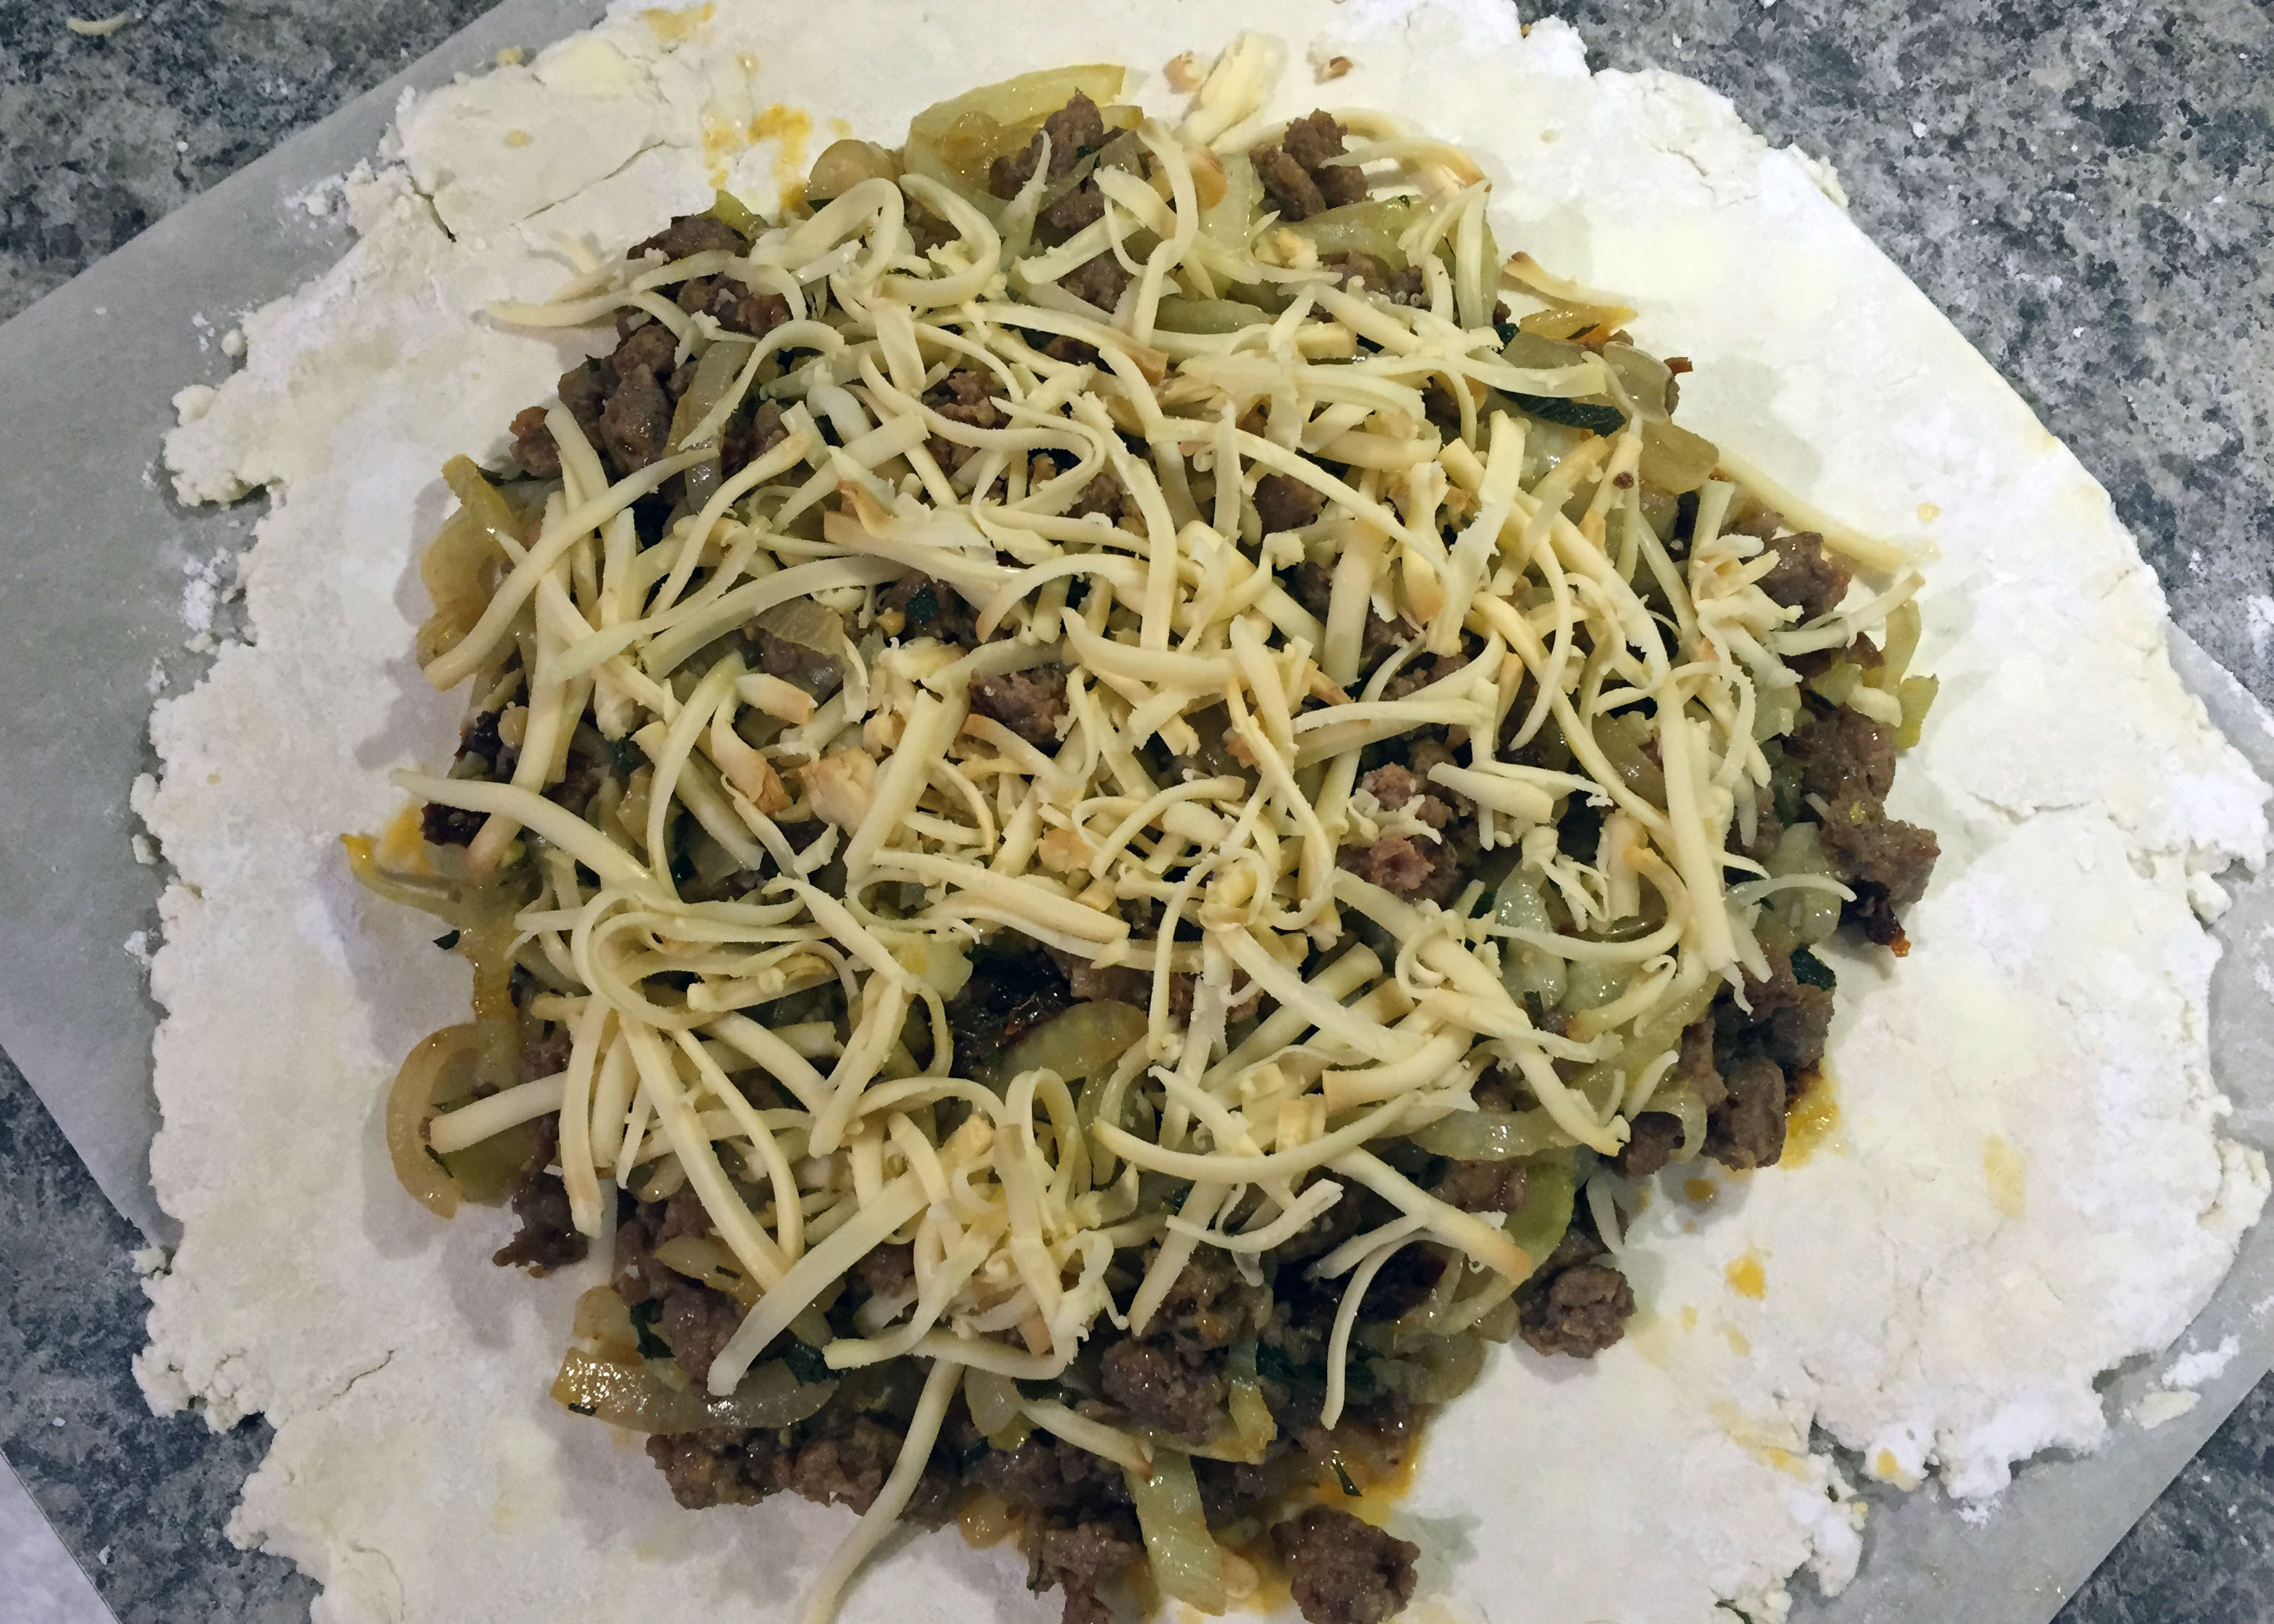
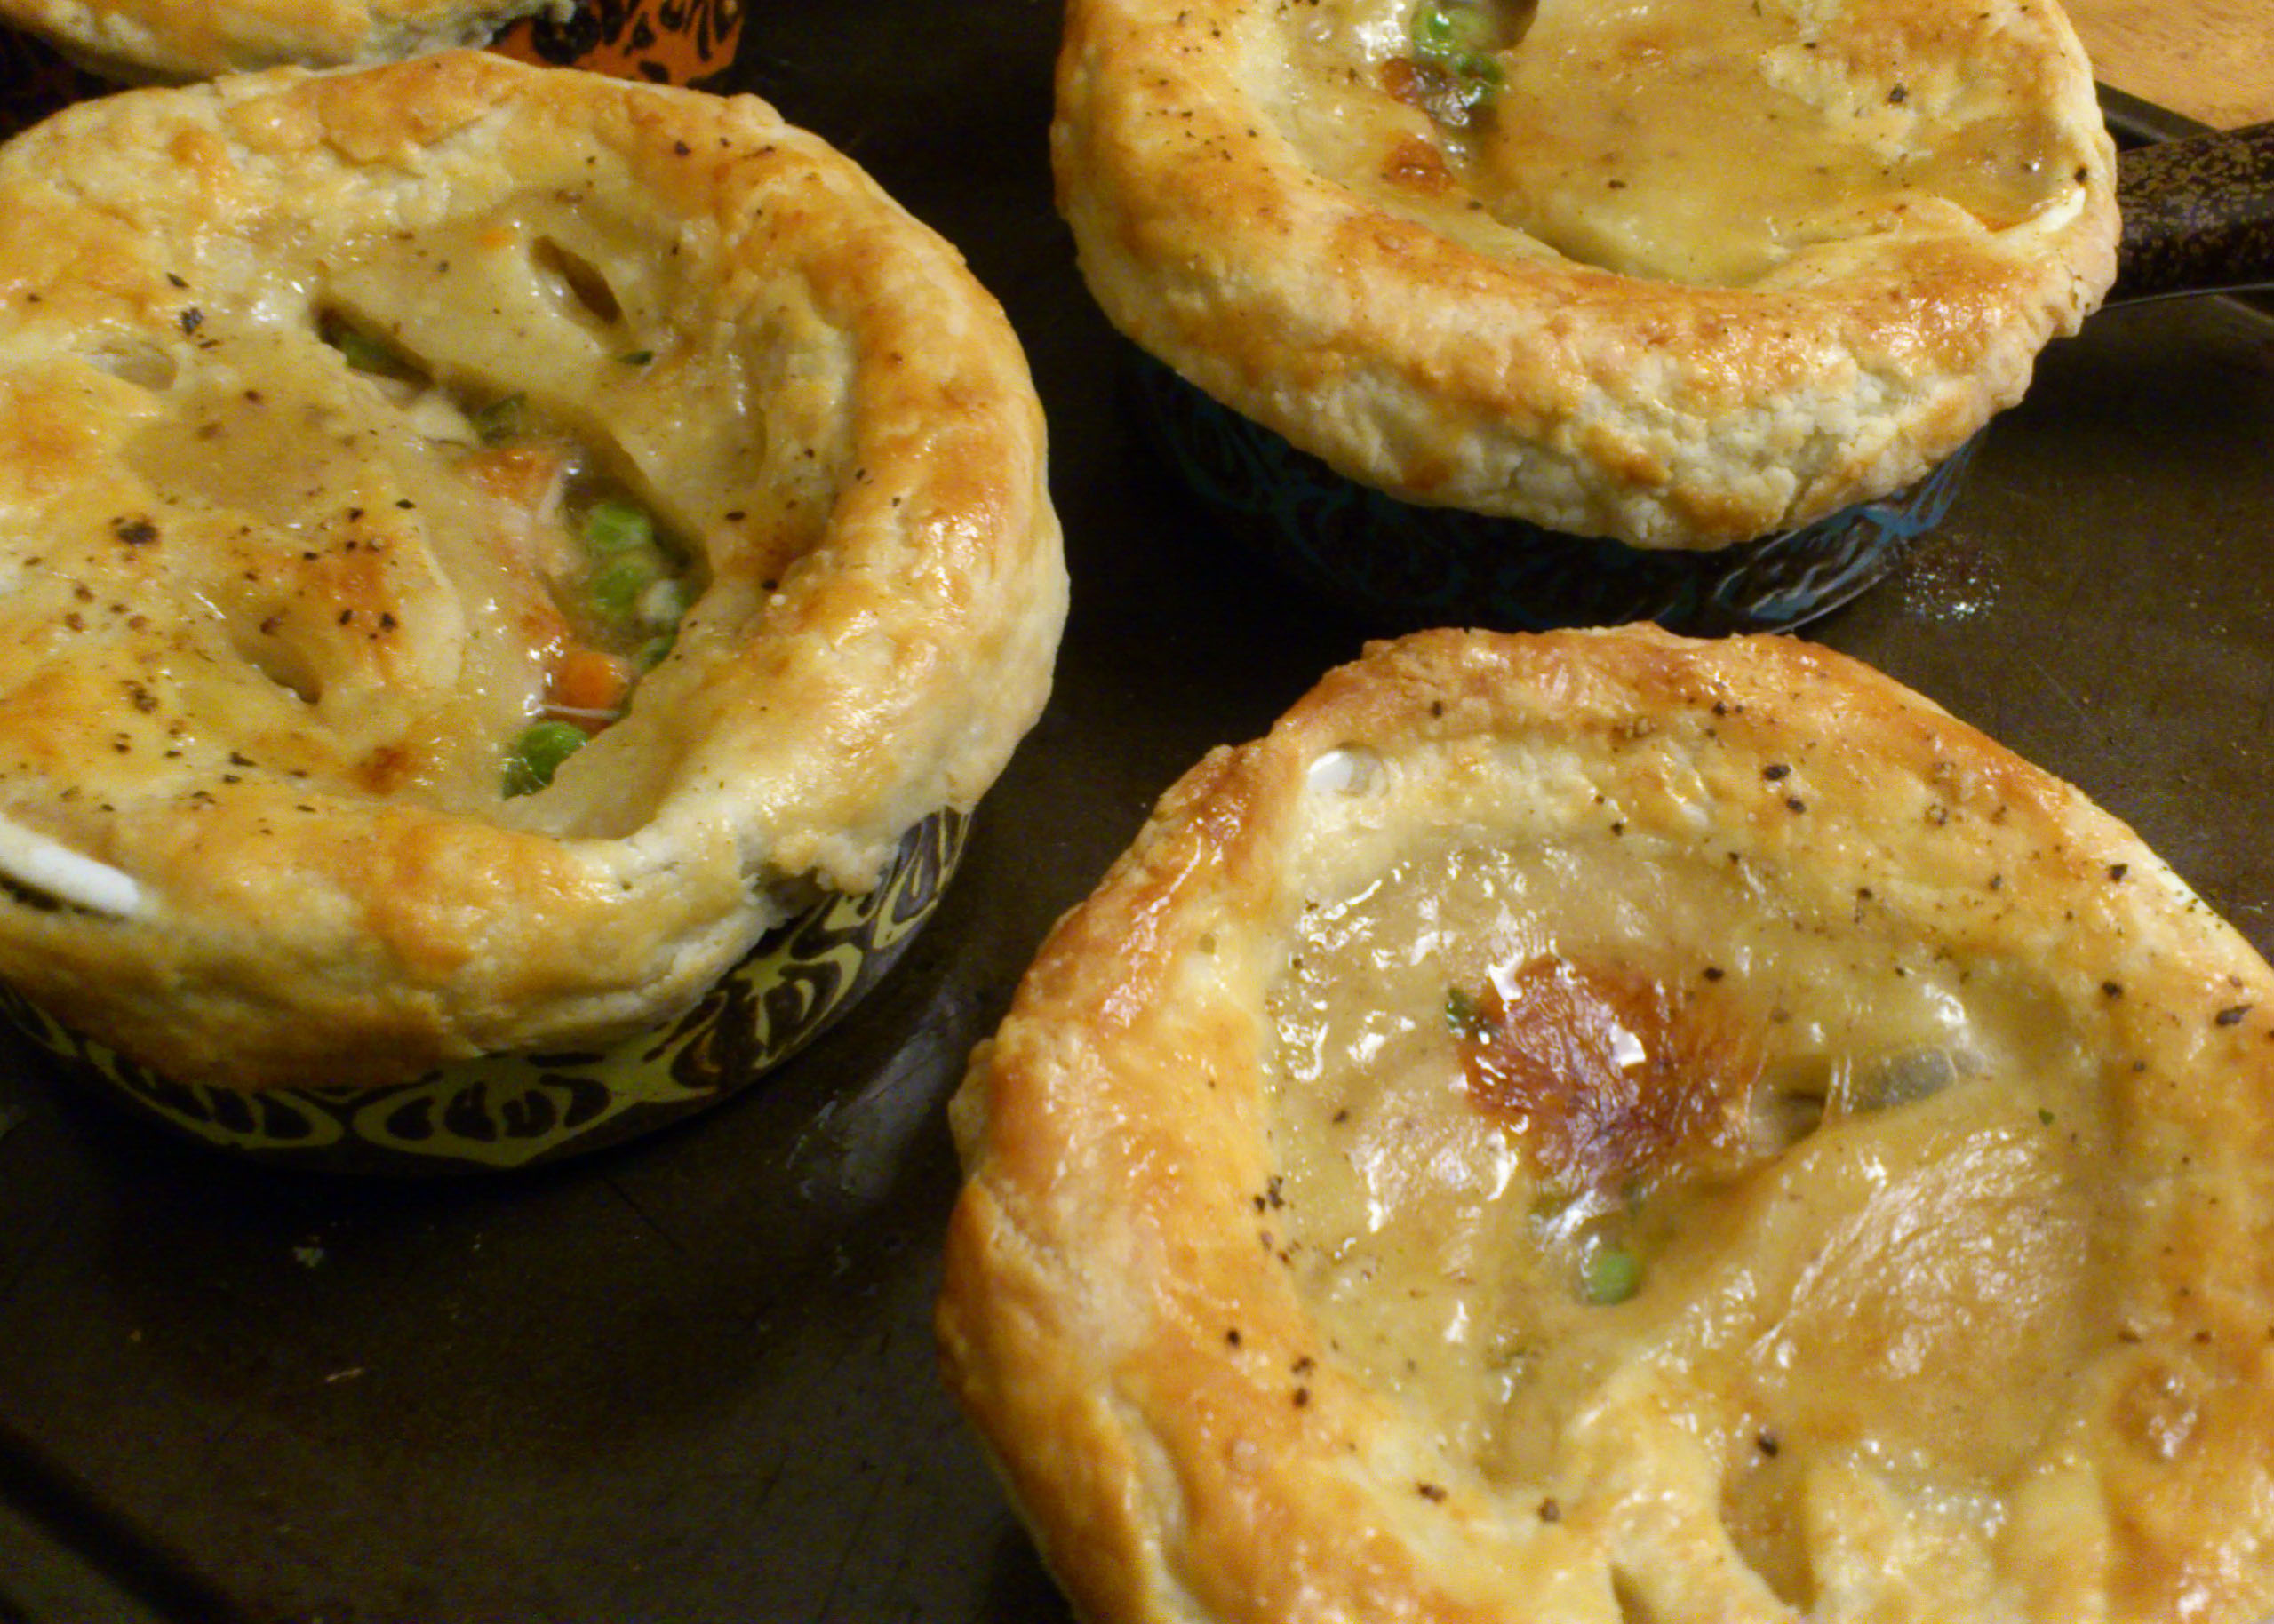
This is purpose-made chicken pot pie and I’m going to be honest with you; this is not the weekday dinner pot pie you throw together when you have leftover meat, gravy, and potatoes. This is a rainy-day-Sunday-I’m-going-to-spend-3-hours-in-the-kitchen kind of pie. If you don’t have to stop to take pictures or re-measure ingredients every time you adjust the recipe, it may take you a bit less. But this is cooking for enjoyment, don’t fight it. Put on some good music and just go with the flow. You won’t regret it.

I based this recipe on one from Smitten Kitchen here http://smittenkitchen.com/blog/2014/10/better-chicken-pot-pies/ but upped the measurements so it would feed us twice. I also cut back on the butter, added mushrooms, and amped up the flavour in the form of soy sauce, anchovy paste, pecorino cheese and of course, the obligatory shake of hot pepper. I can hear some of you now… “anchovy paste! Ewwwwwww!”. Will it add depth to the flavour of your filling? Yes. Will it make it taste fishy? No. Can you leave it out of the recipe? Yes. Do you want to be THAT person who is unwilling to try something new? No! :)

(For those of you who refuse, absolutely refuse, to try anchovy paste, I have a little trick for you. Marmite. You’re welcome.)

This recipe makes approximately 10 cups of filling and enough dough for 8 individual pies, depending on the size of your ramekins, of course. Use half the filling and dough today and freeze the other half for later. The frozen filling and dough will make an easy weeknight dinner if you remember to take it out of the freezer the night before.

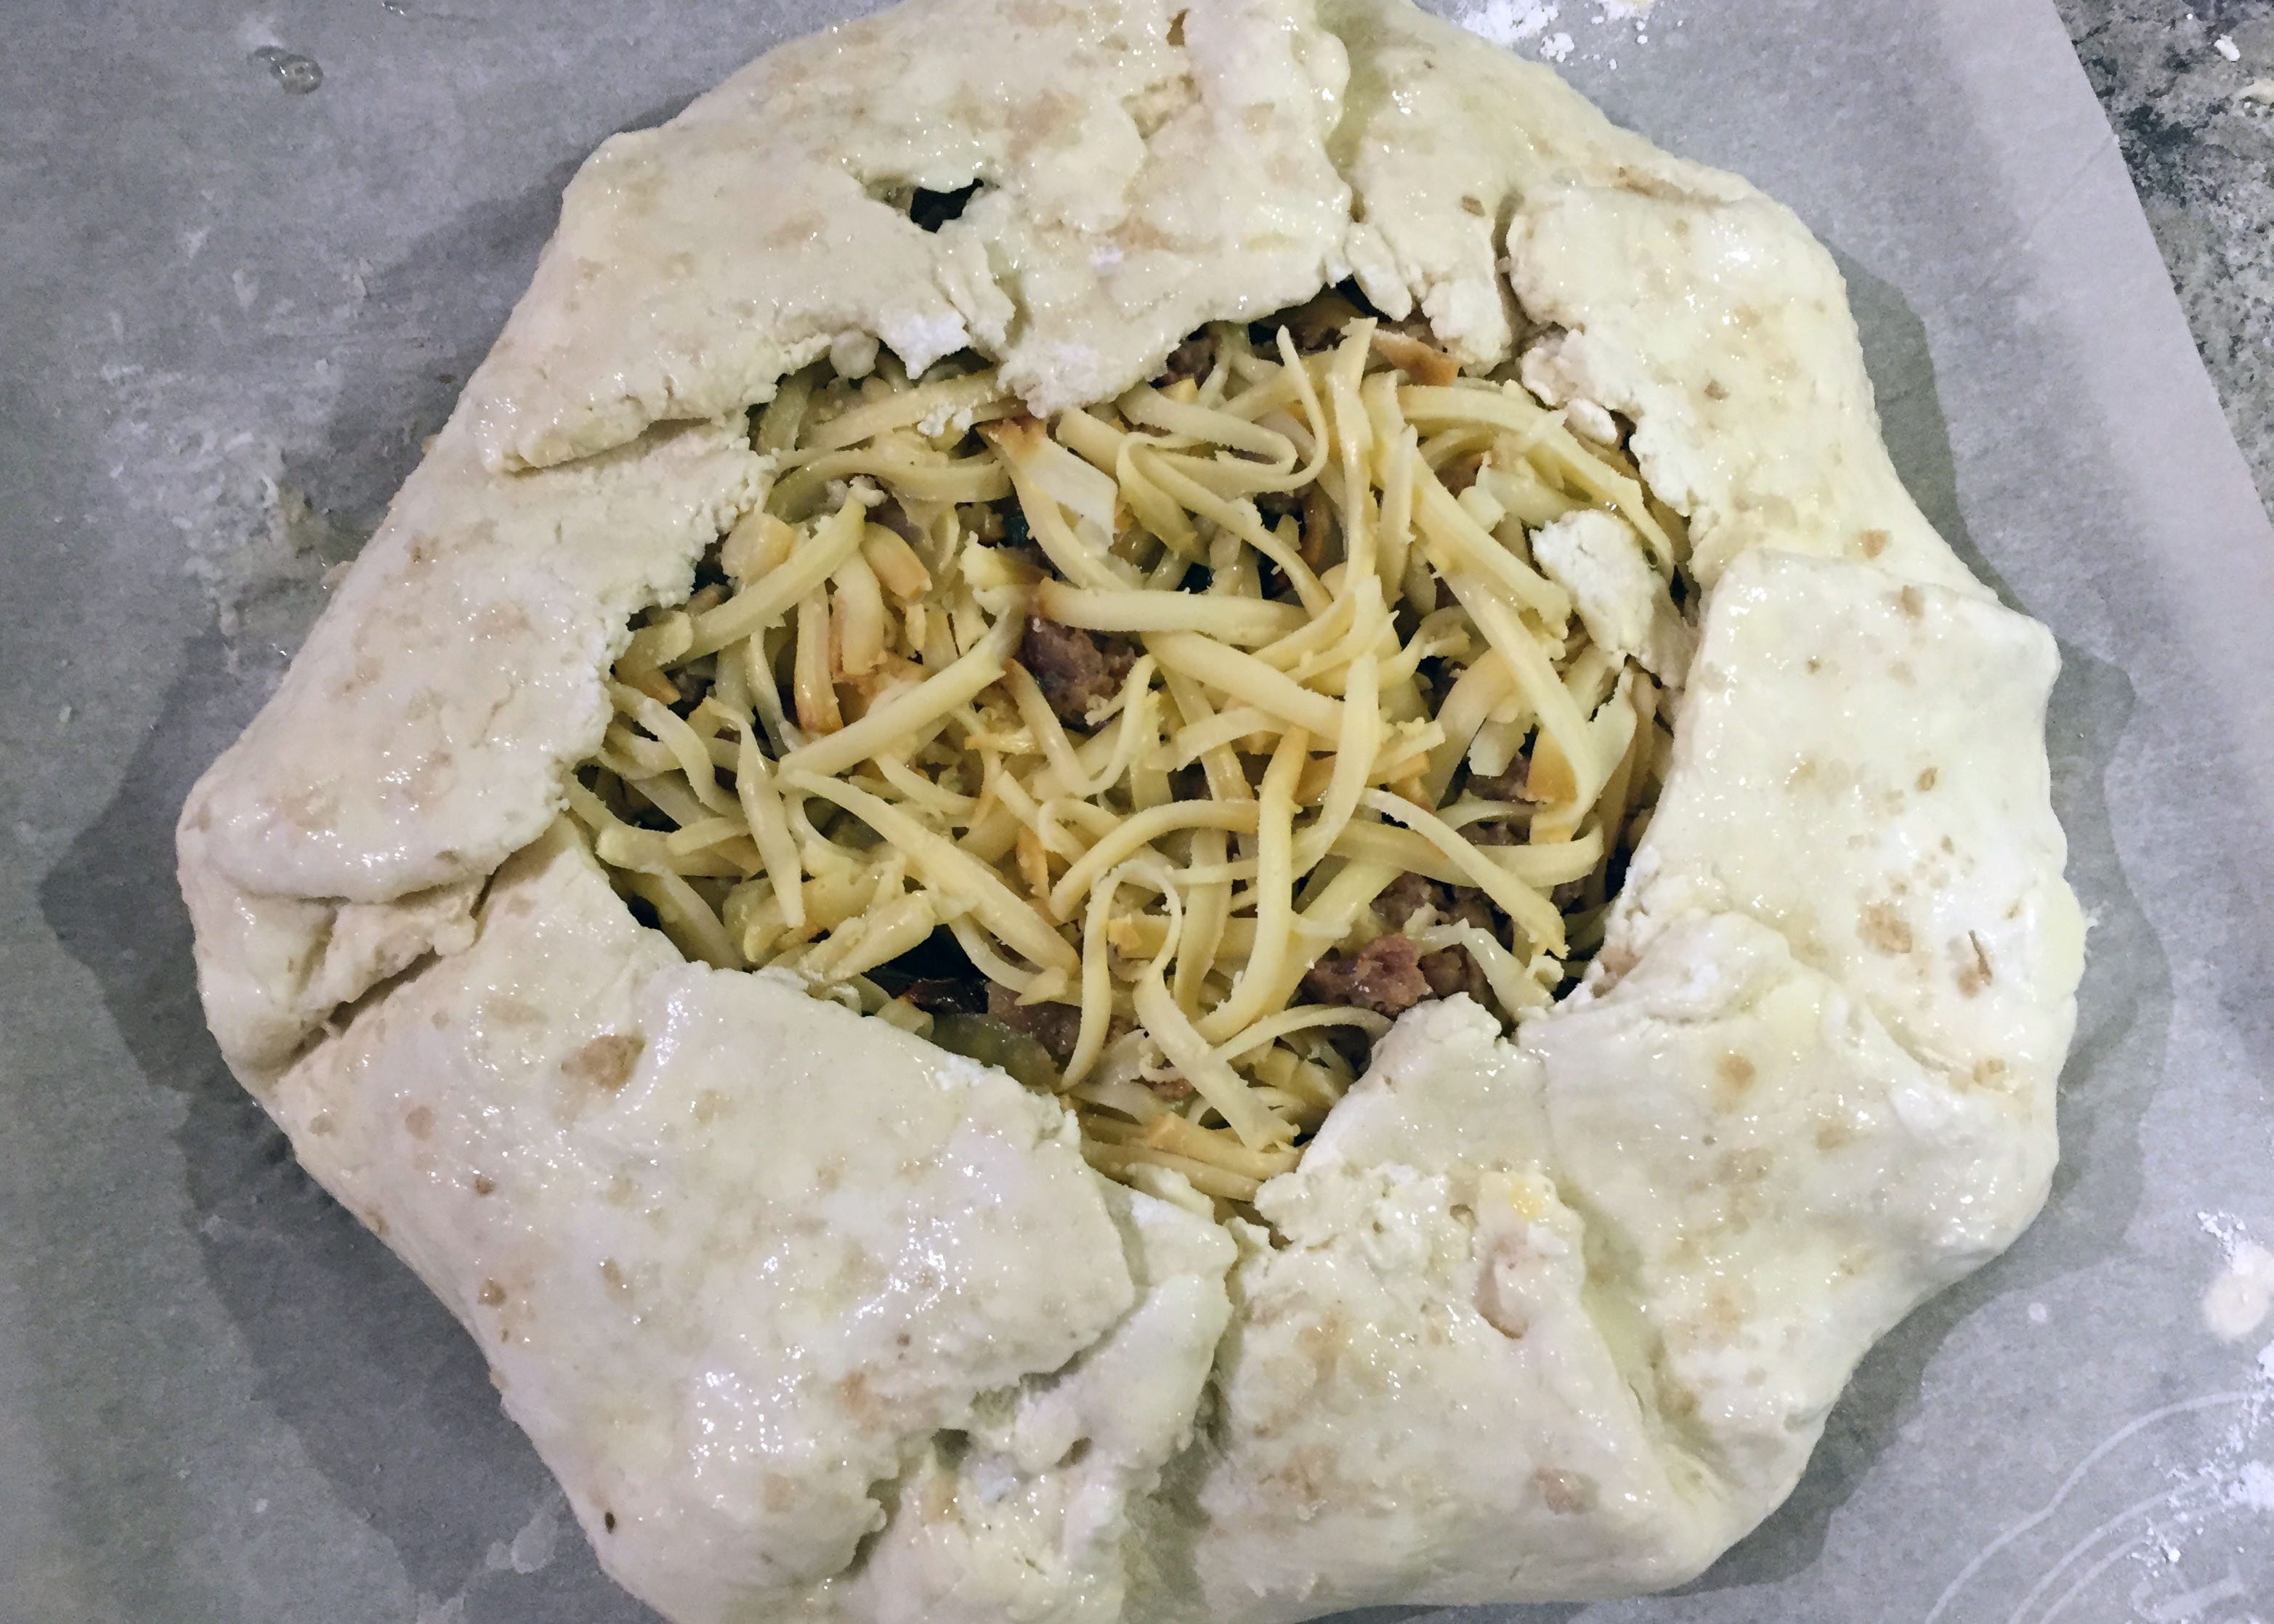
Don’t overfill your ramekins! When the filling starts bubbling up it will soak the dough and make the crust soggy if the ramekins are too full. Although I must confess I am a chronic “over-filler” and it’s still delicious.

For the dough:

2 cups (250 grams) all- purpose flour
1/2 teaspoon fine sea or table salt
13 tablespoons (6 1/2 ounces) cold butter, diced
6 tablespoons sour cream or Greek-style yogurt
1 tablespoon cider vinegar
1/4 cup very cold water
1 egg, beaten, for egg wash

For the filling:

Salt and freshly ground black pepper
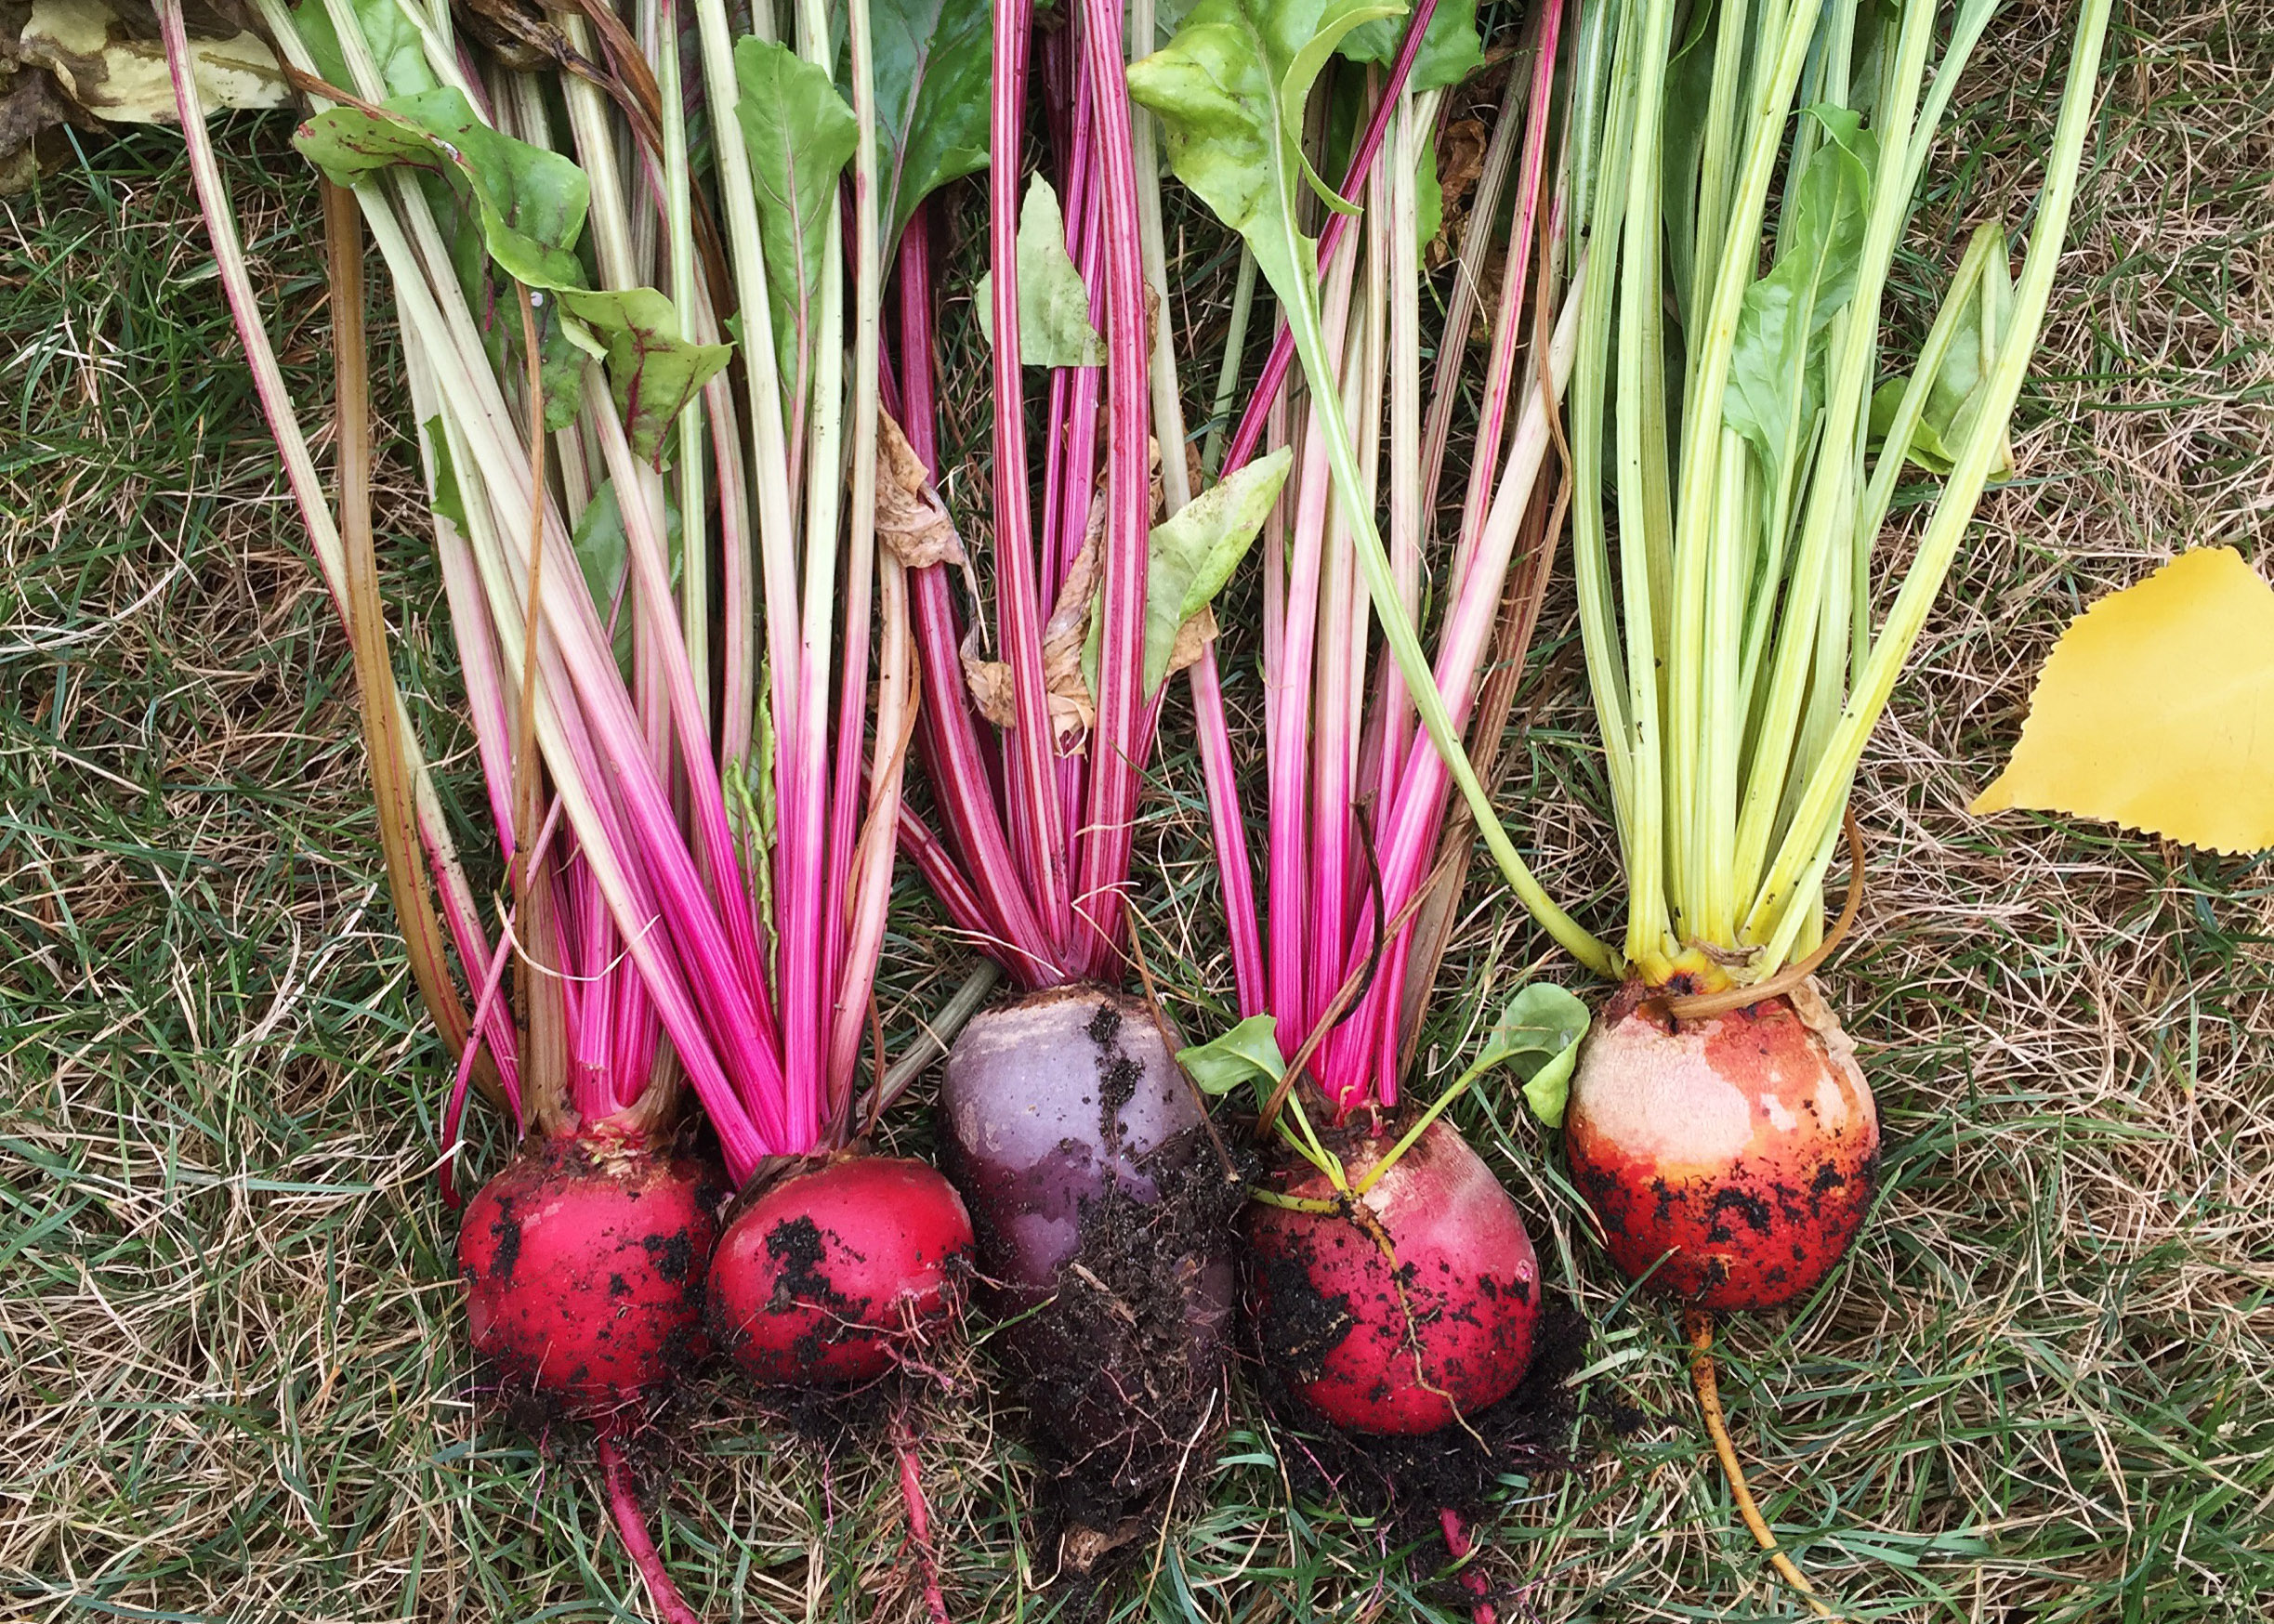
5 pounds bone-in, skin-on chicken thighs
1 to 2 glugs olive oil

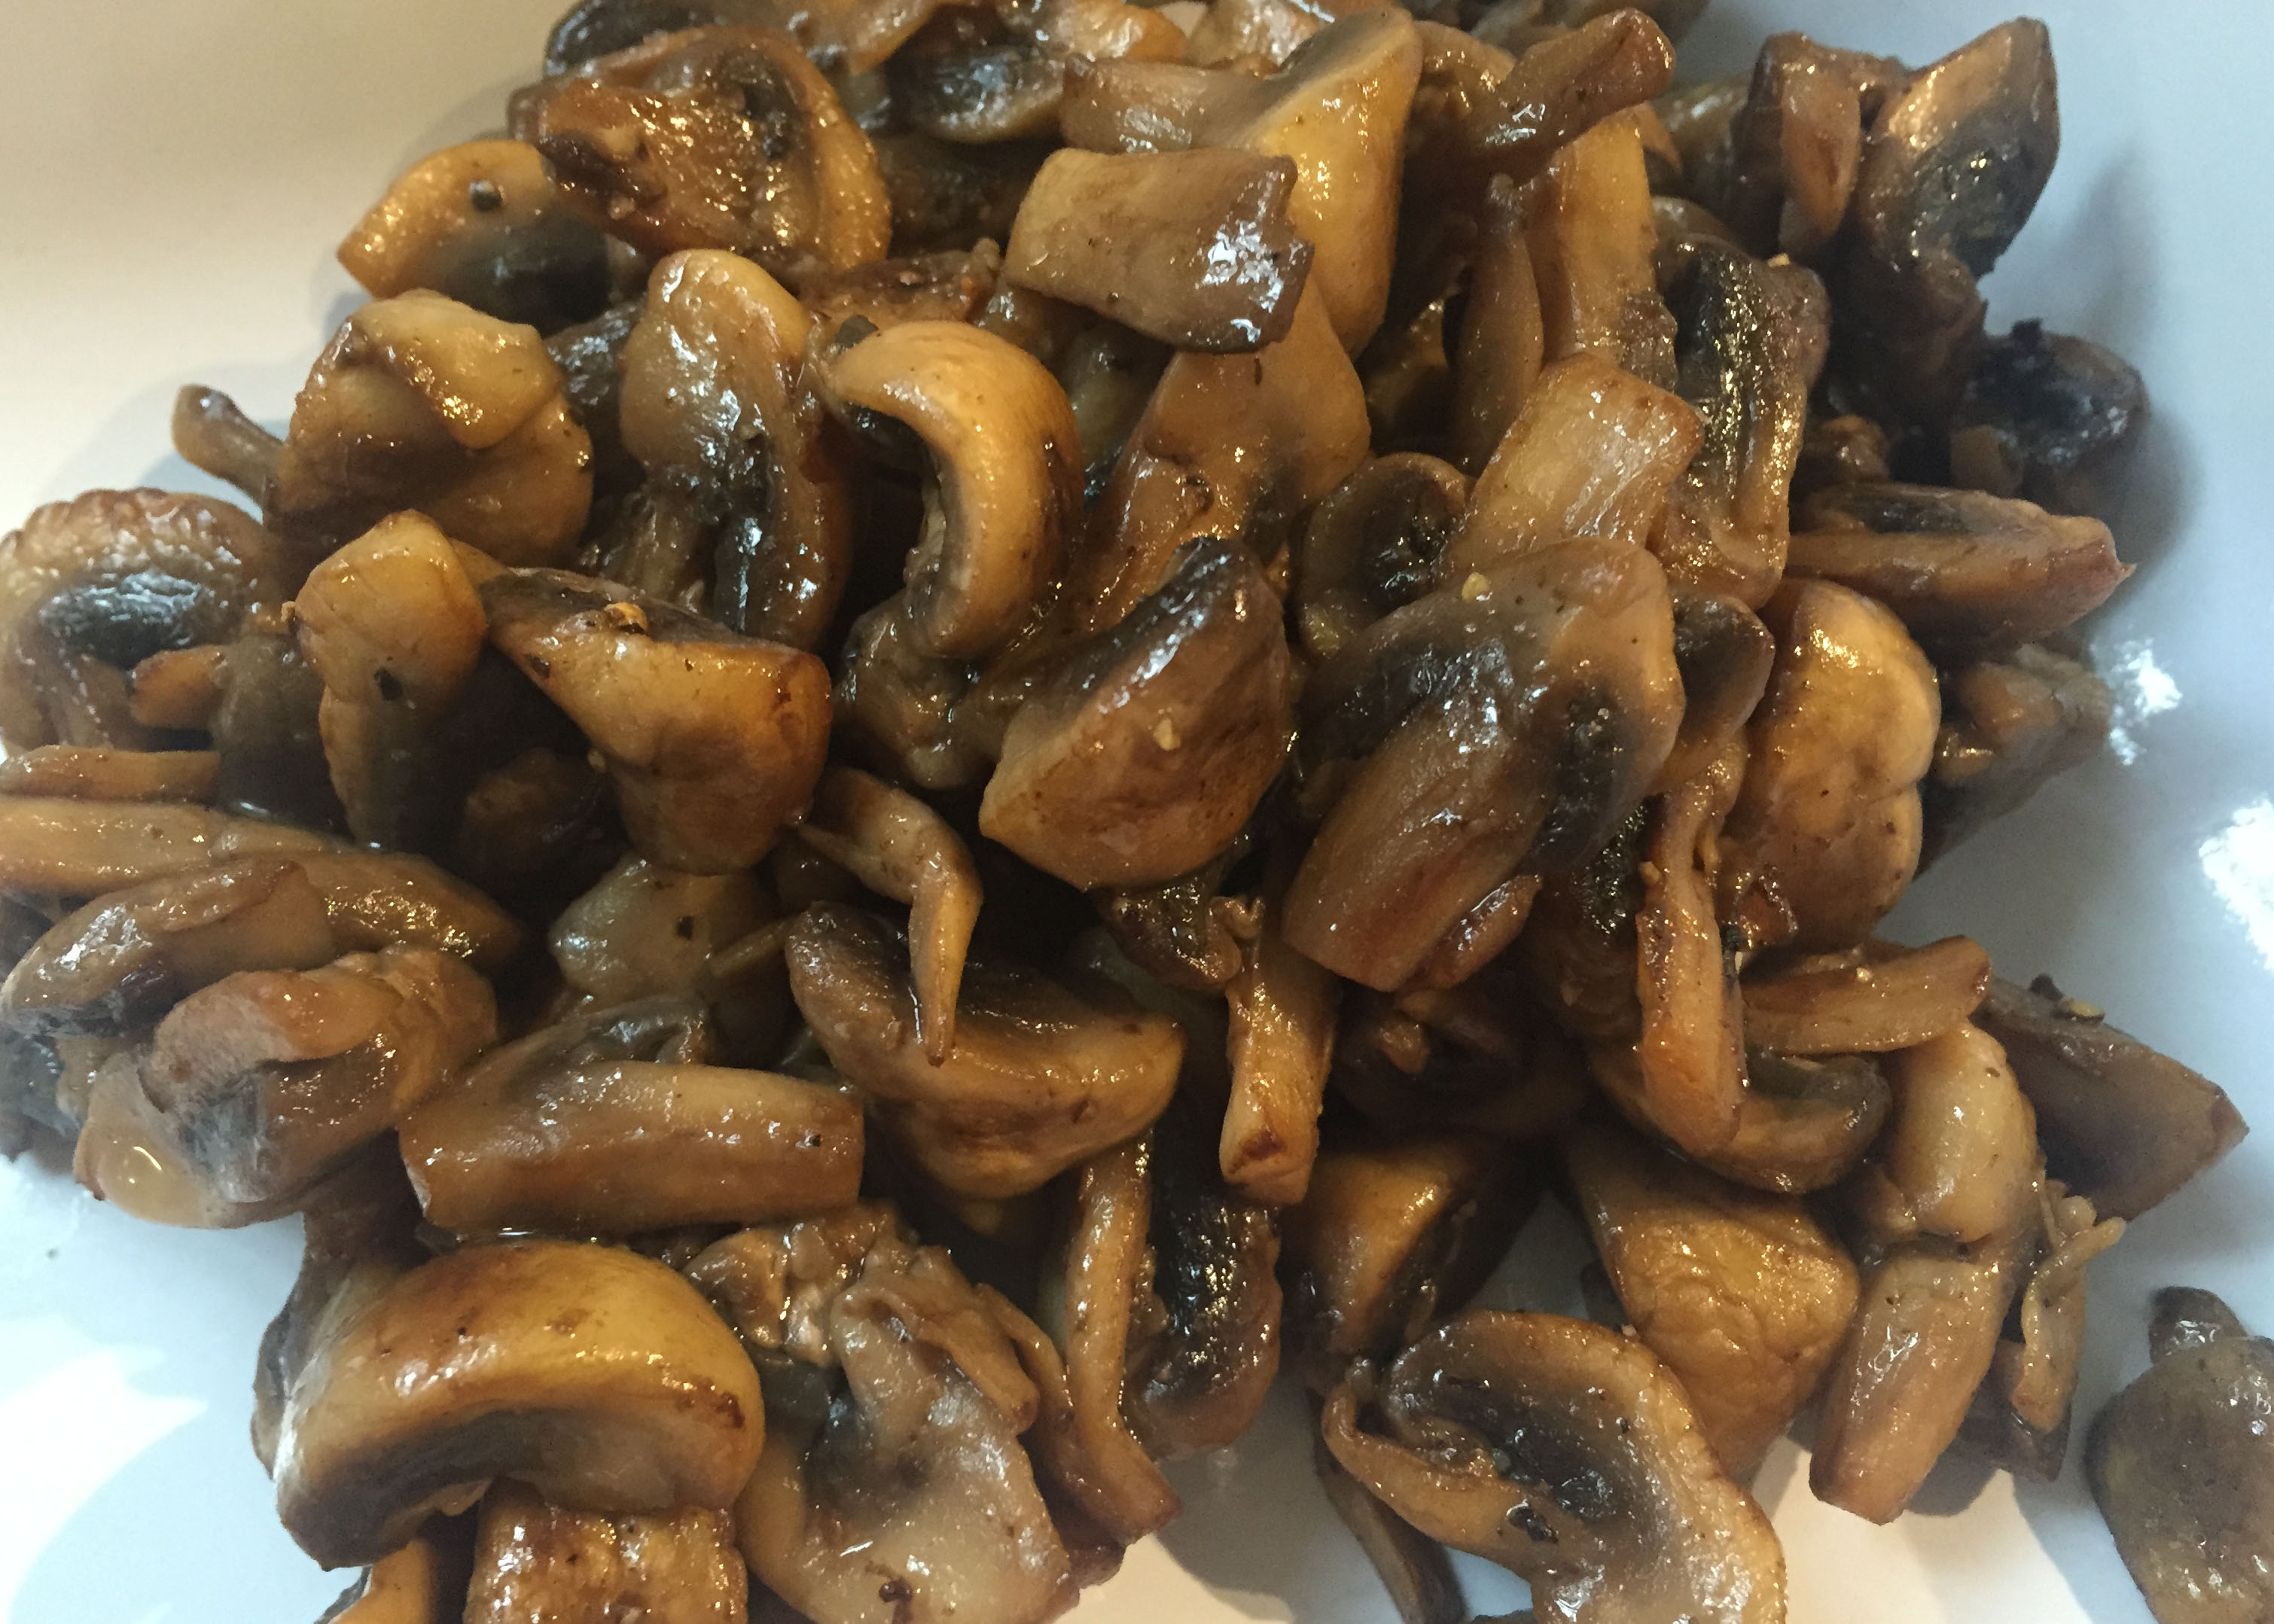
8 ounces mushrooms, cleaned and cut into bite-sized pieces

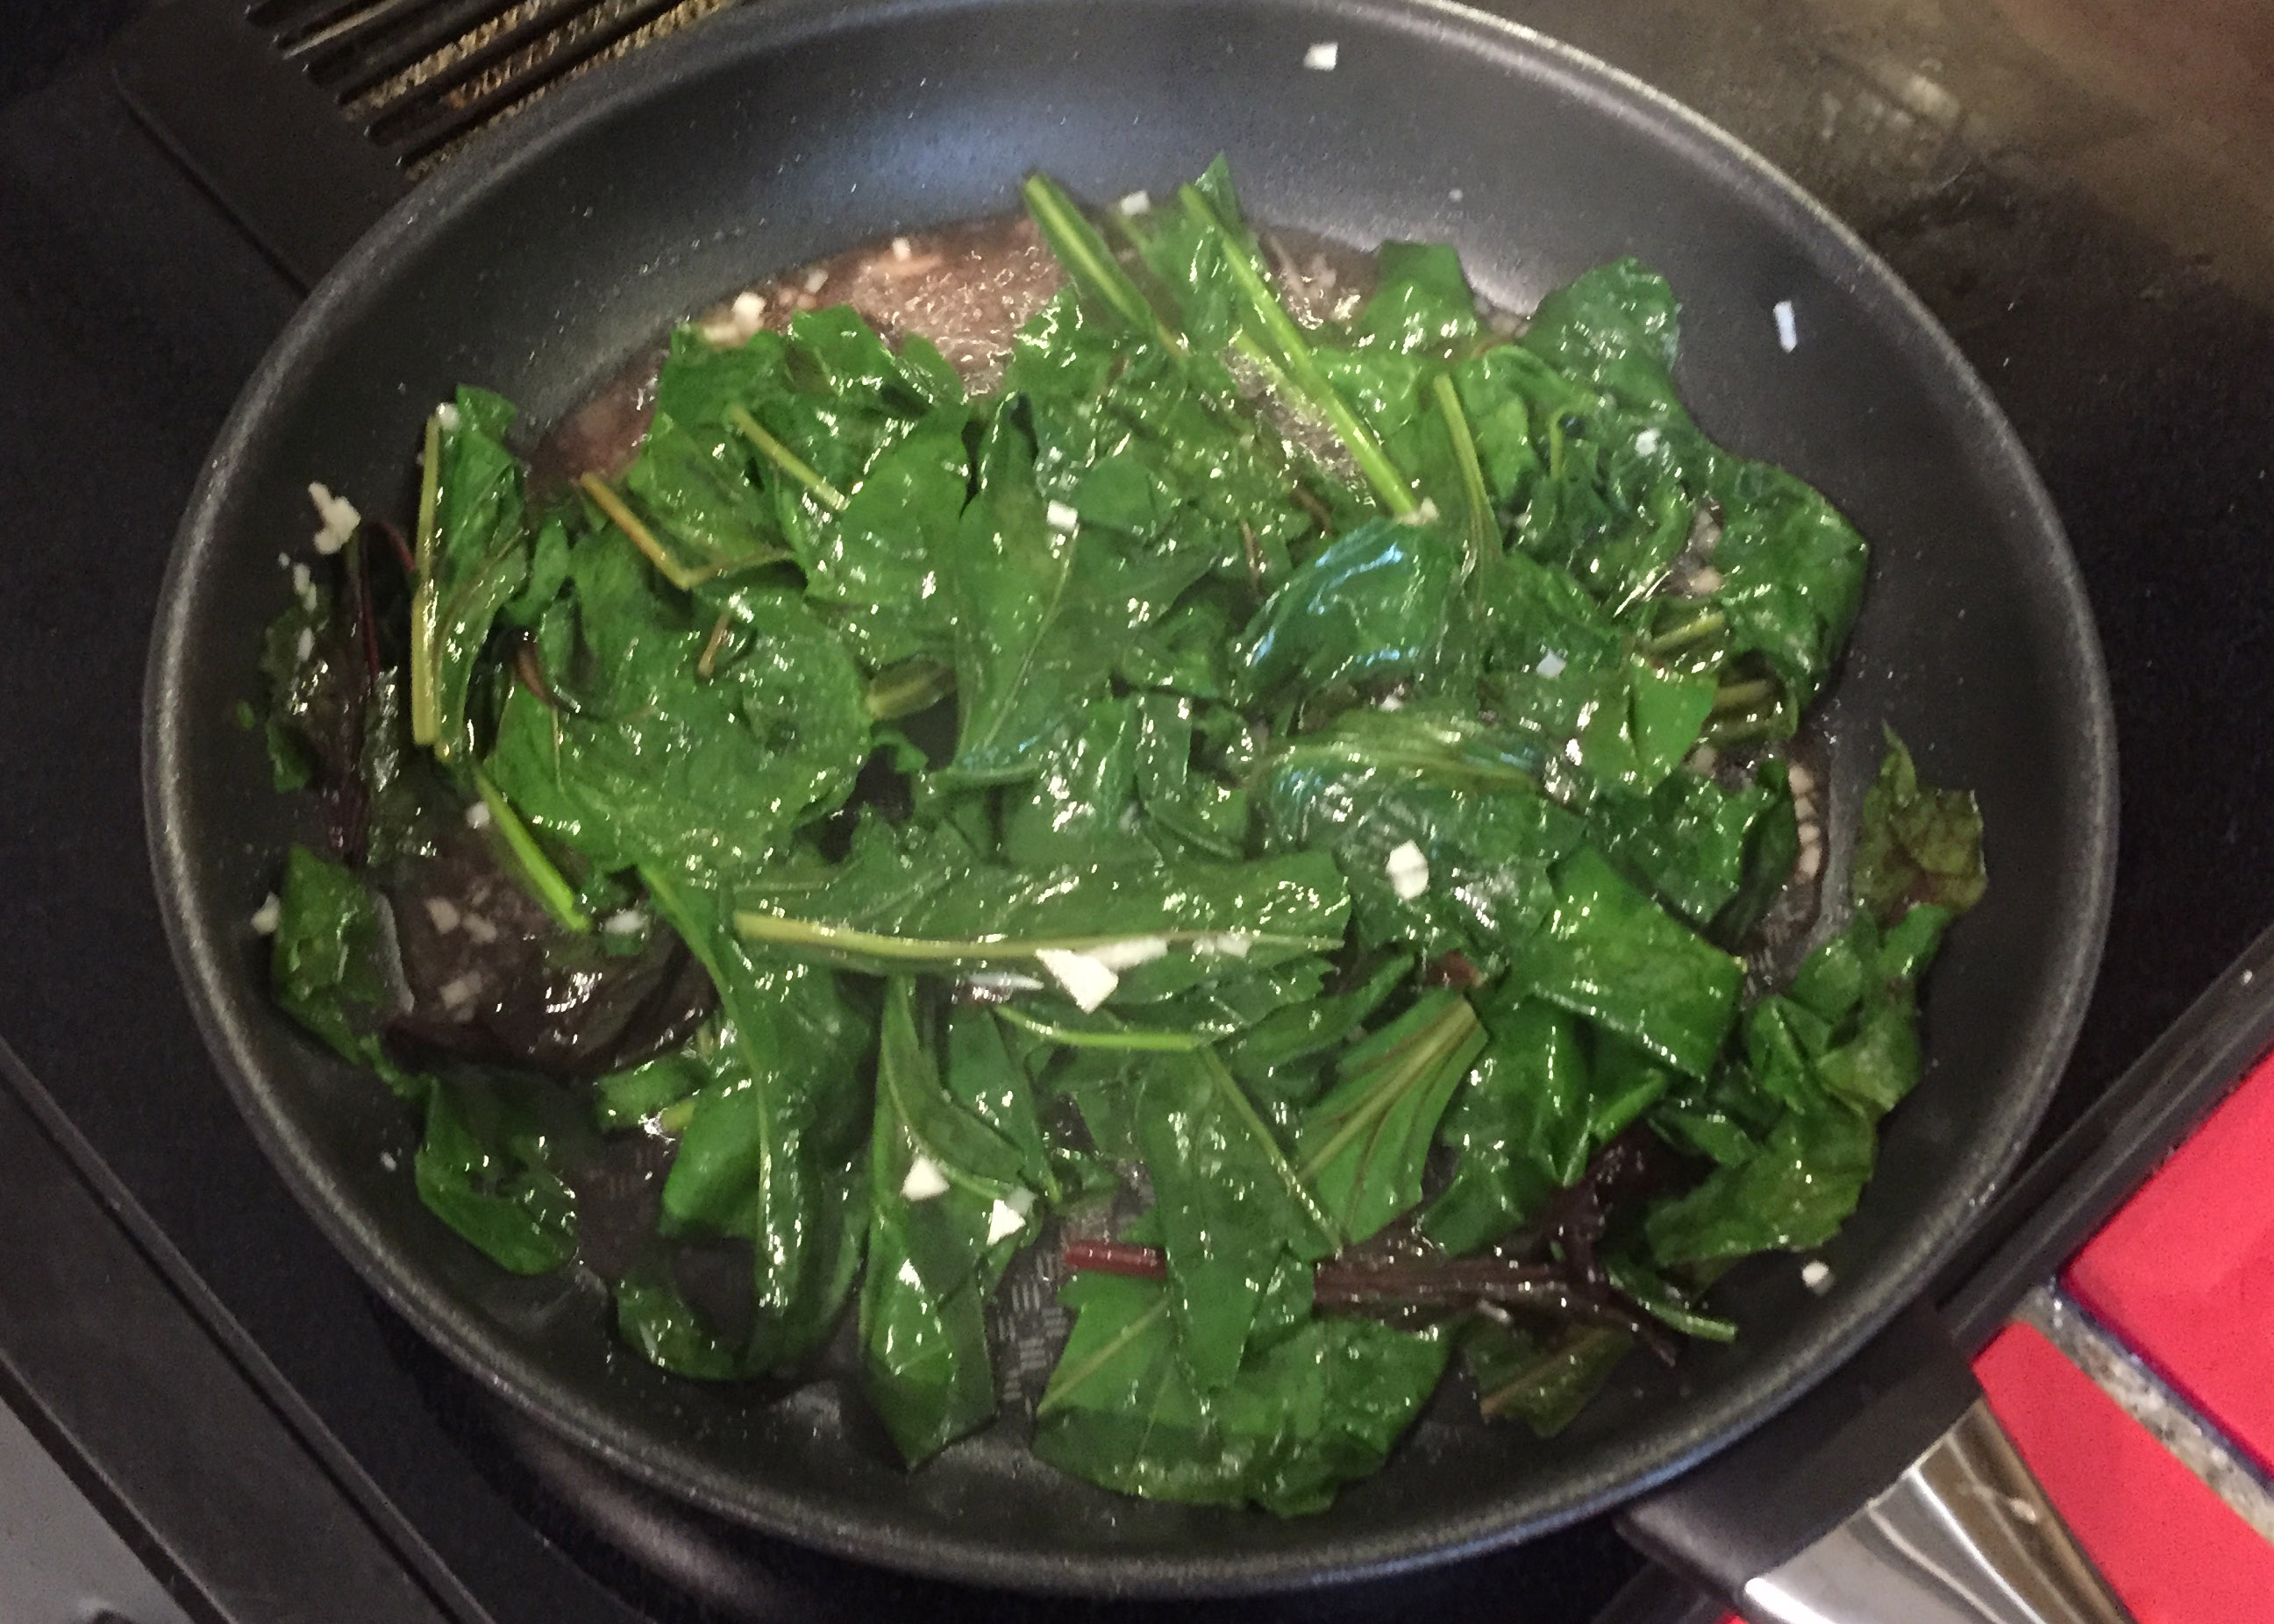
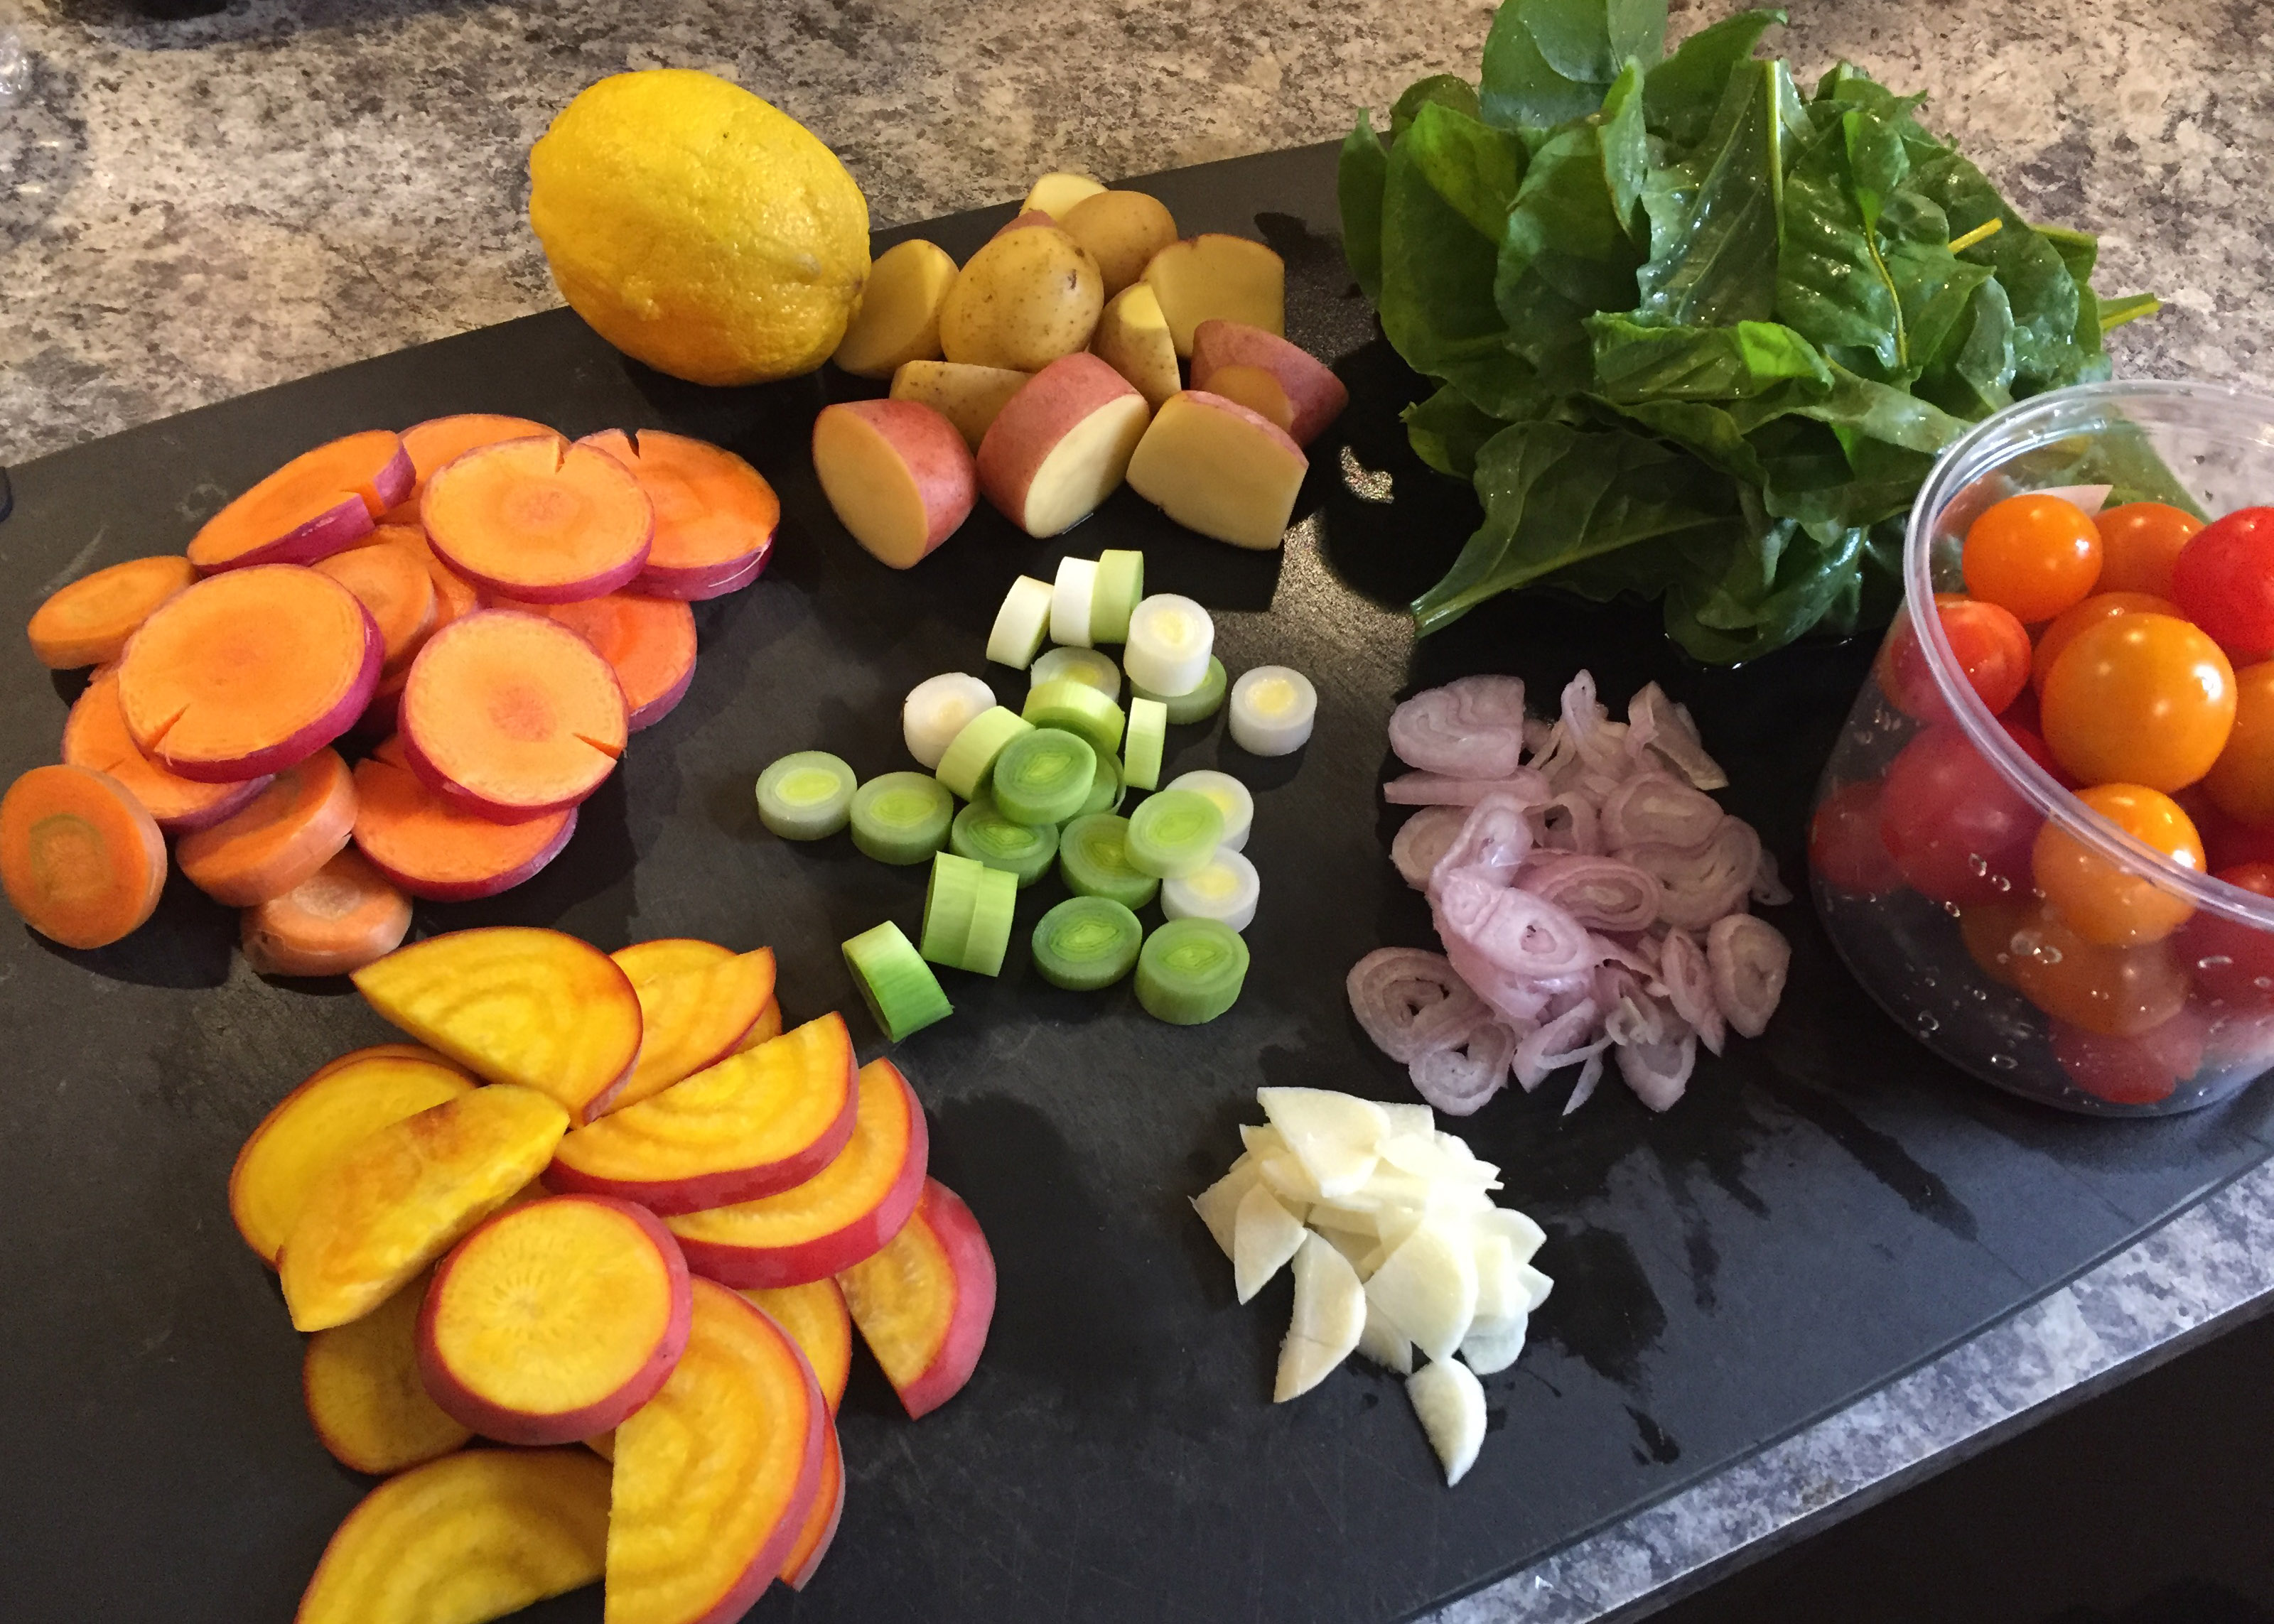
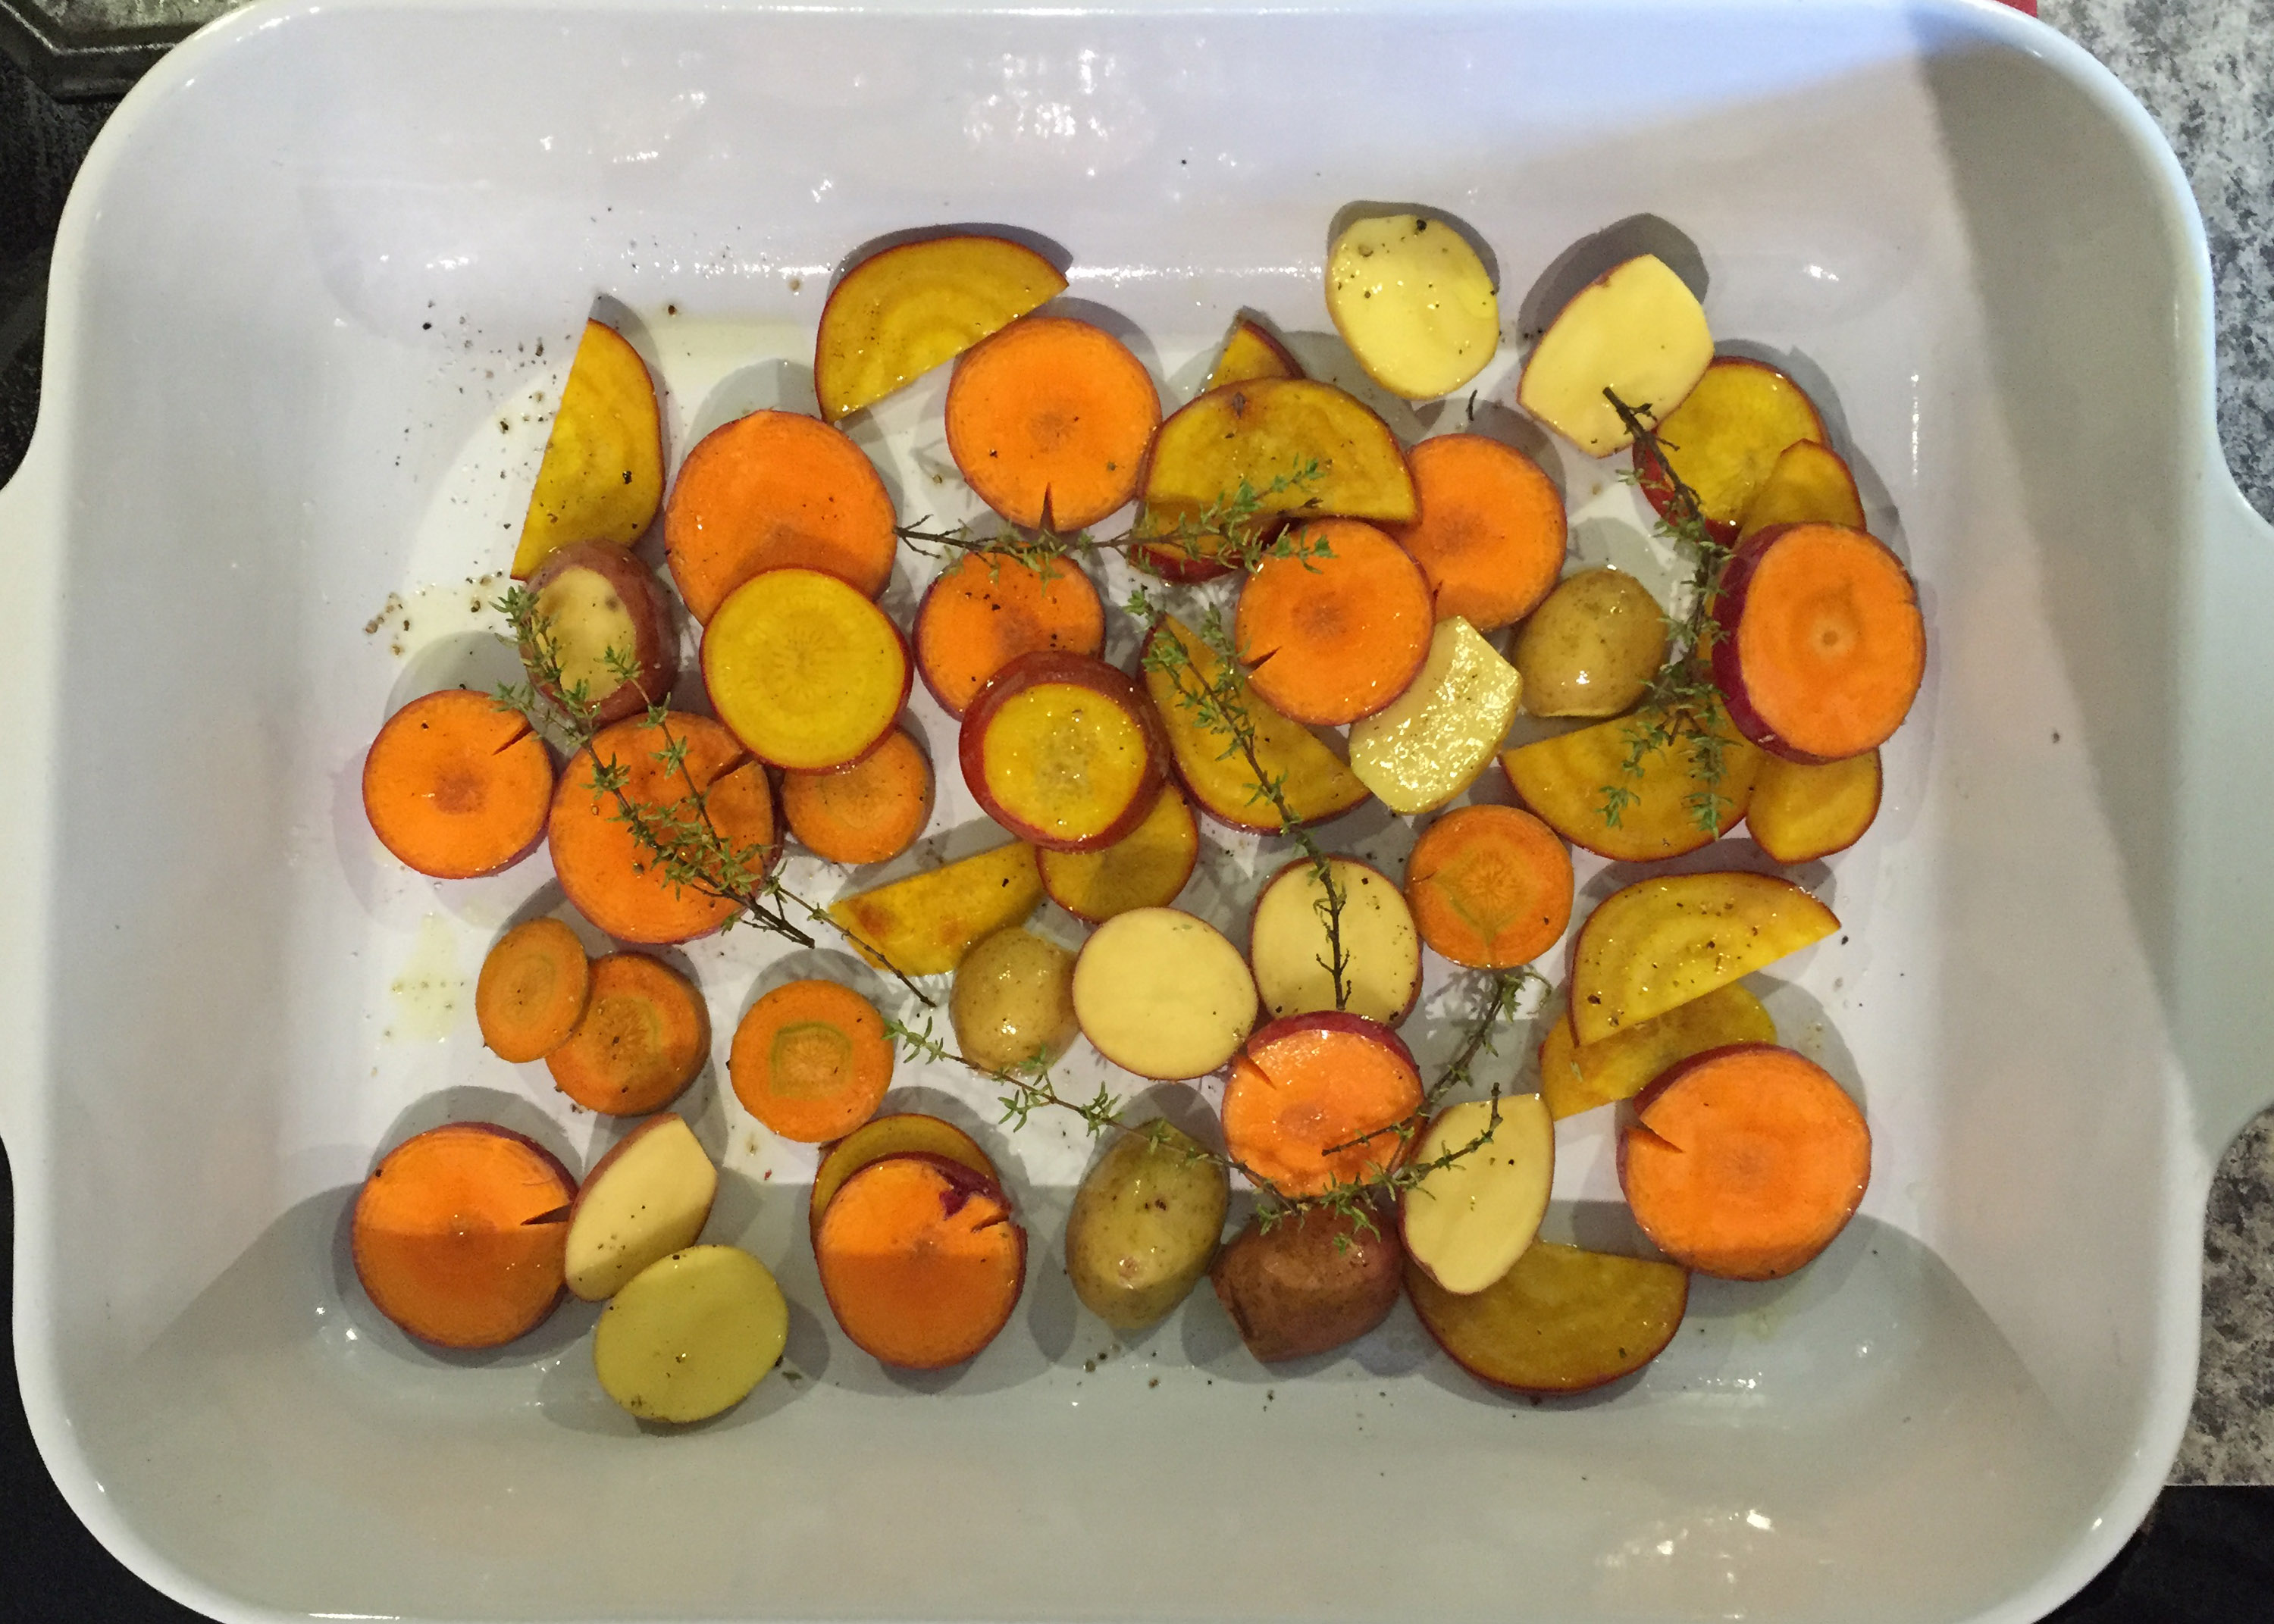
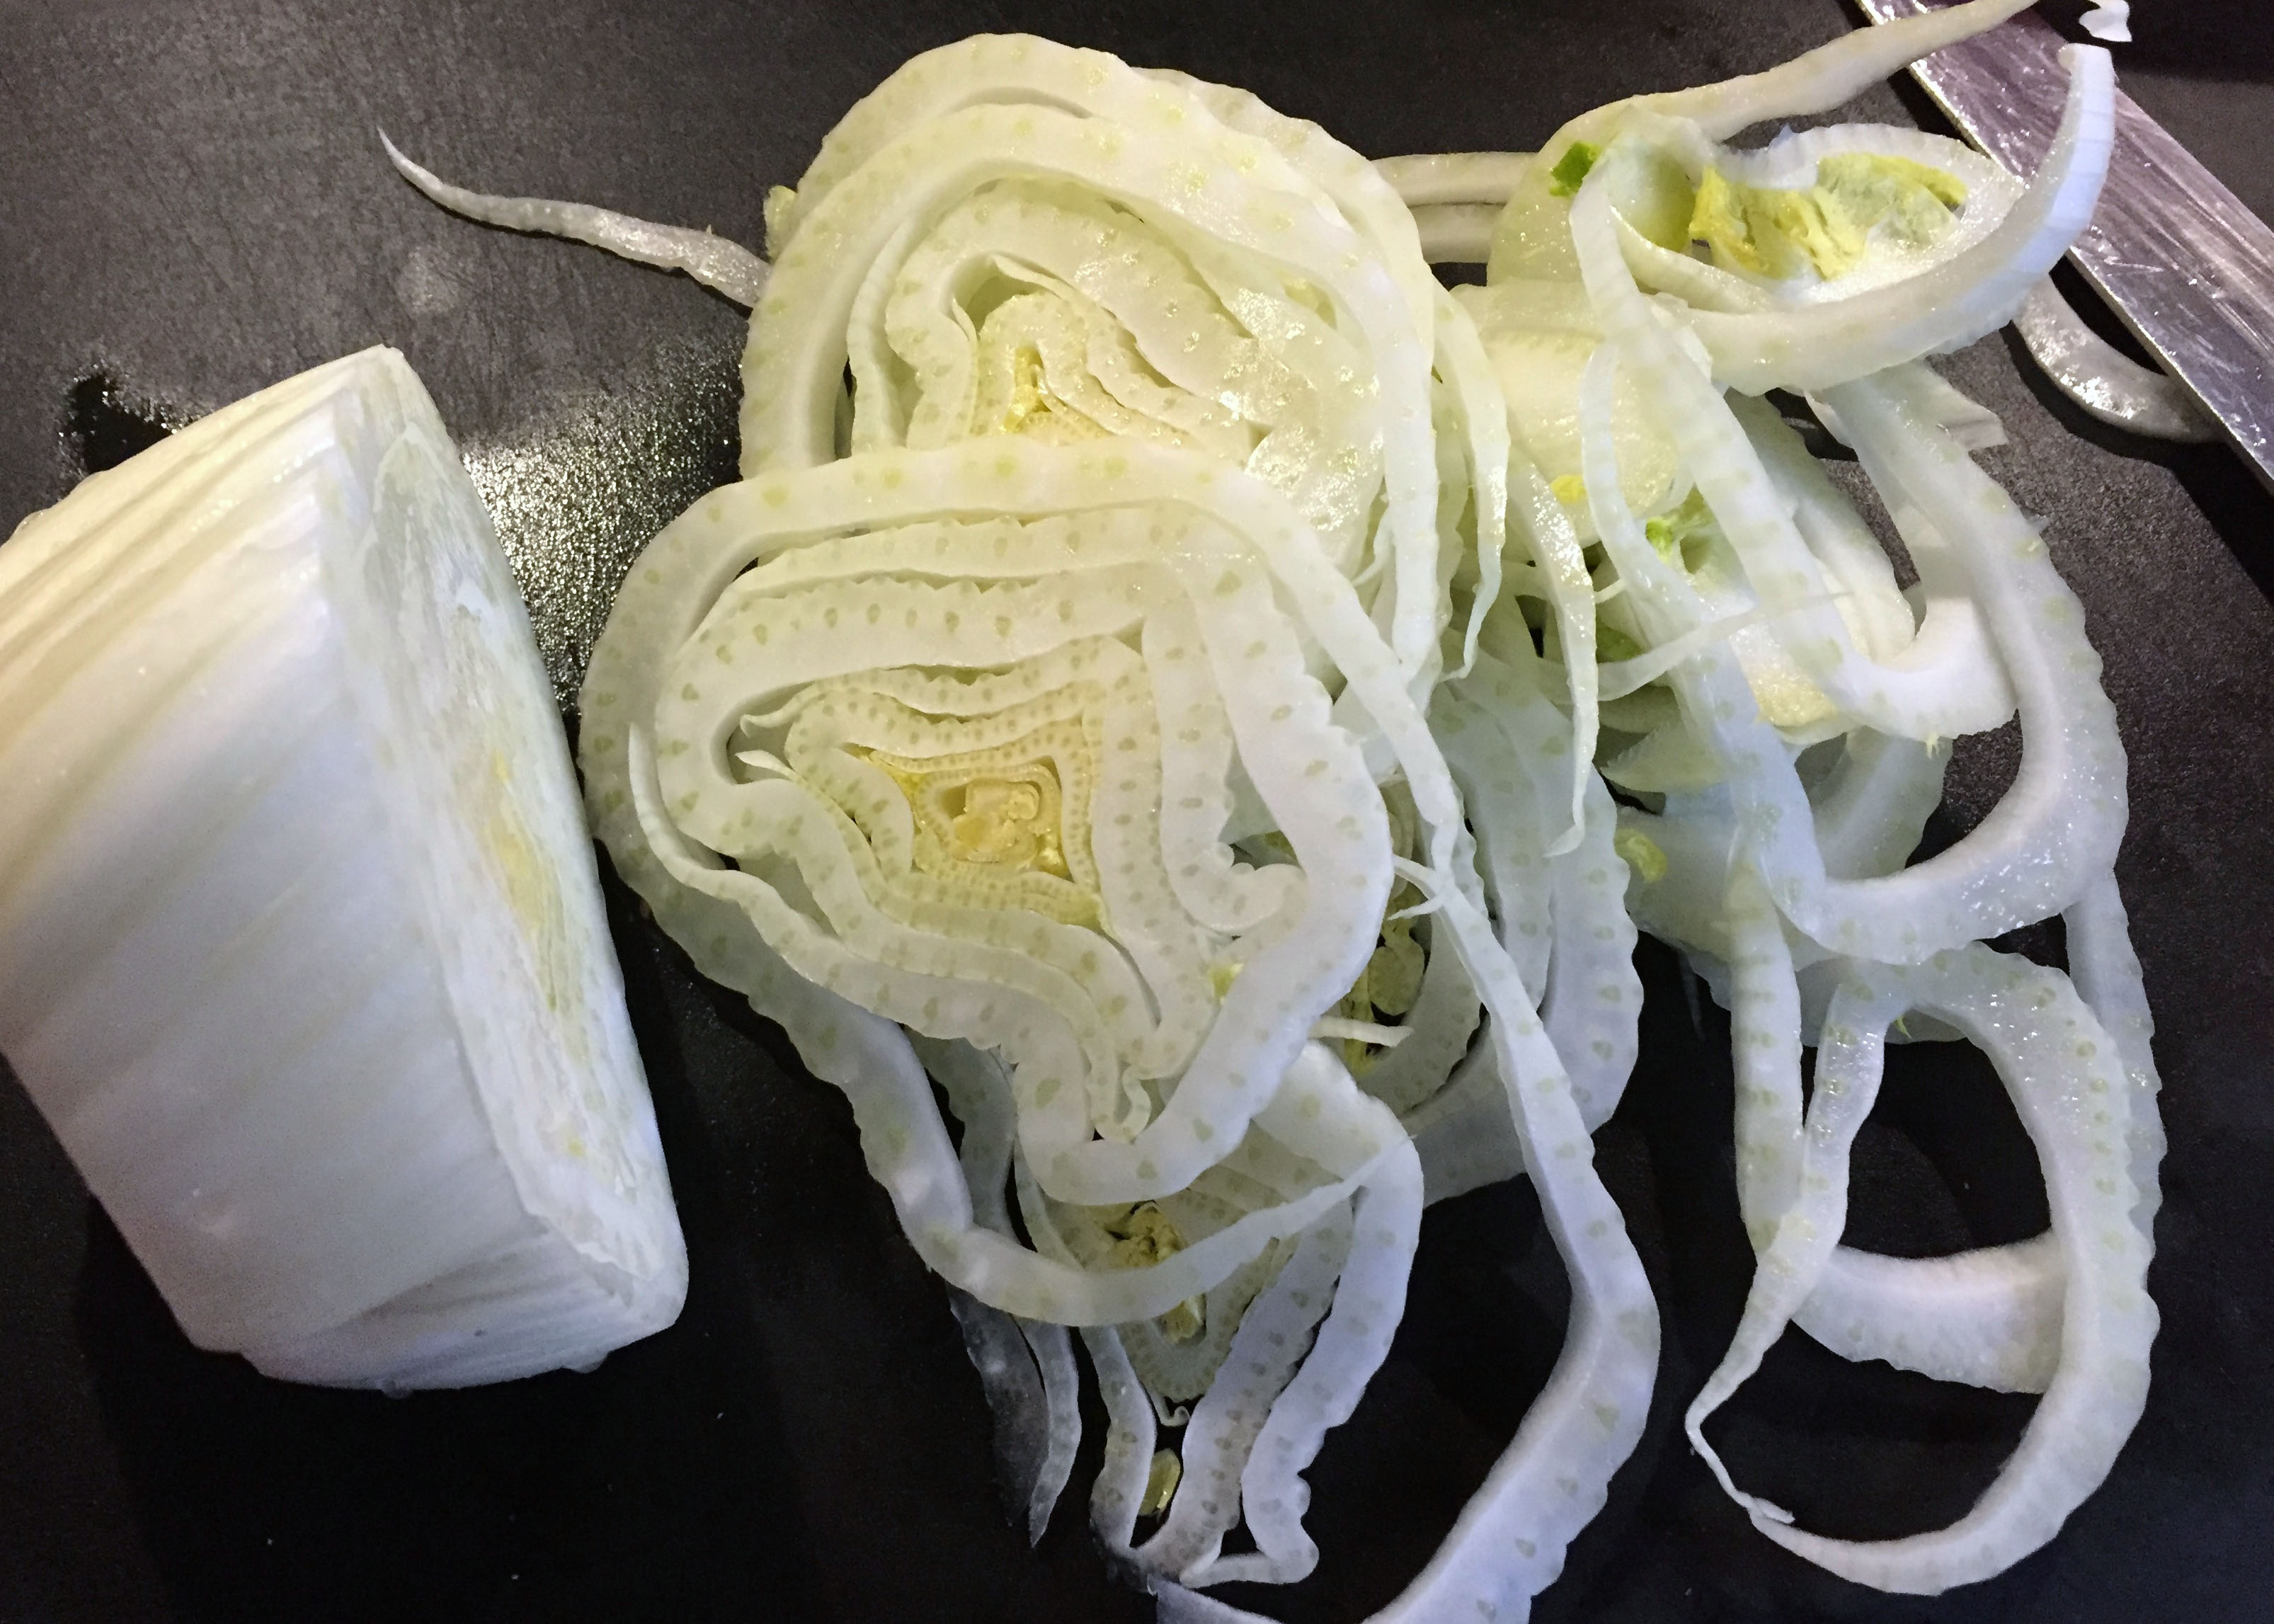
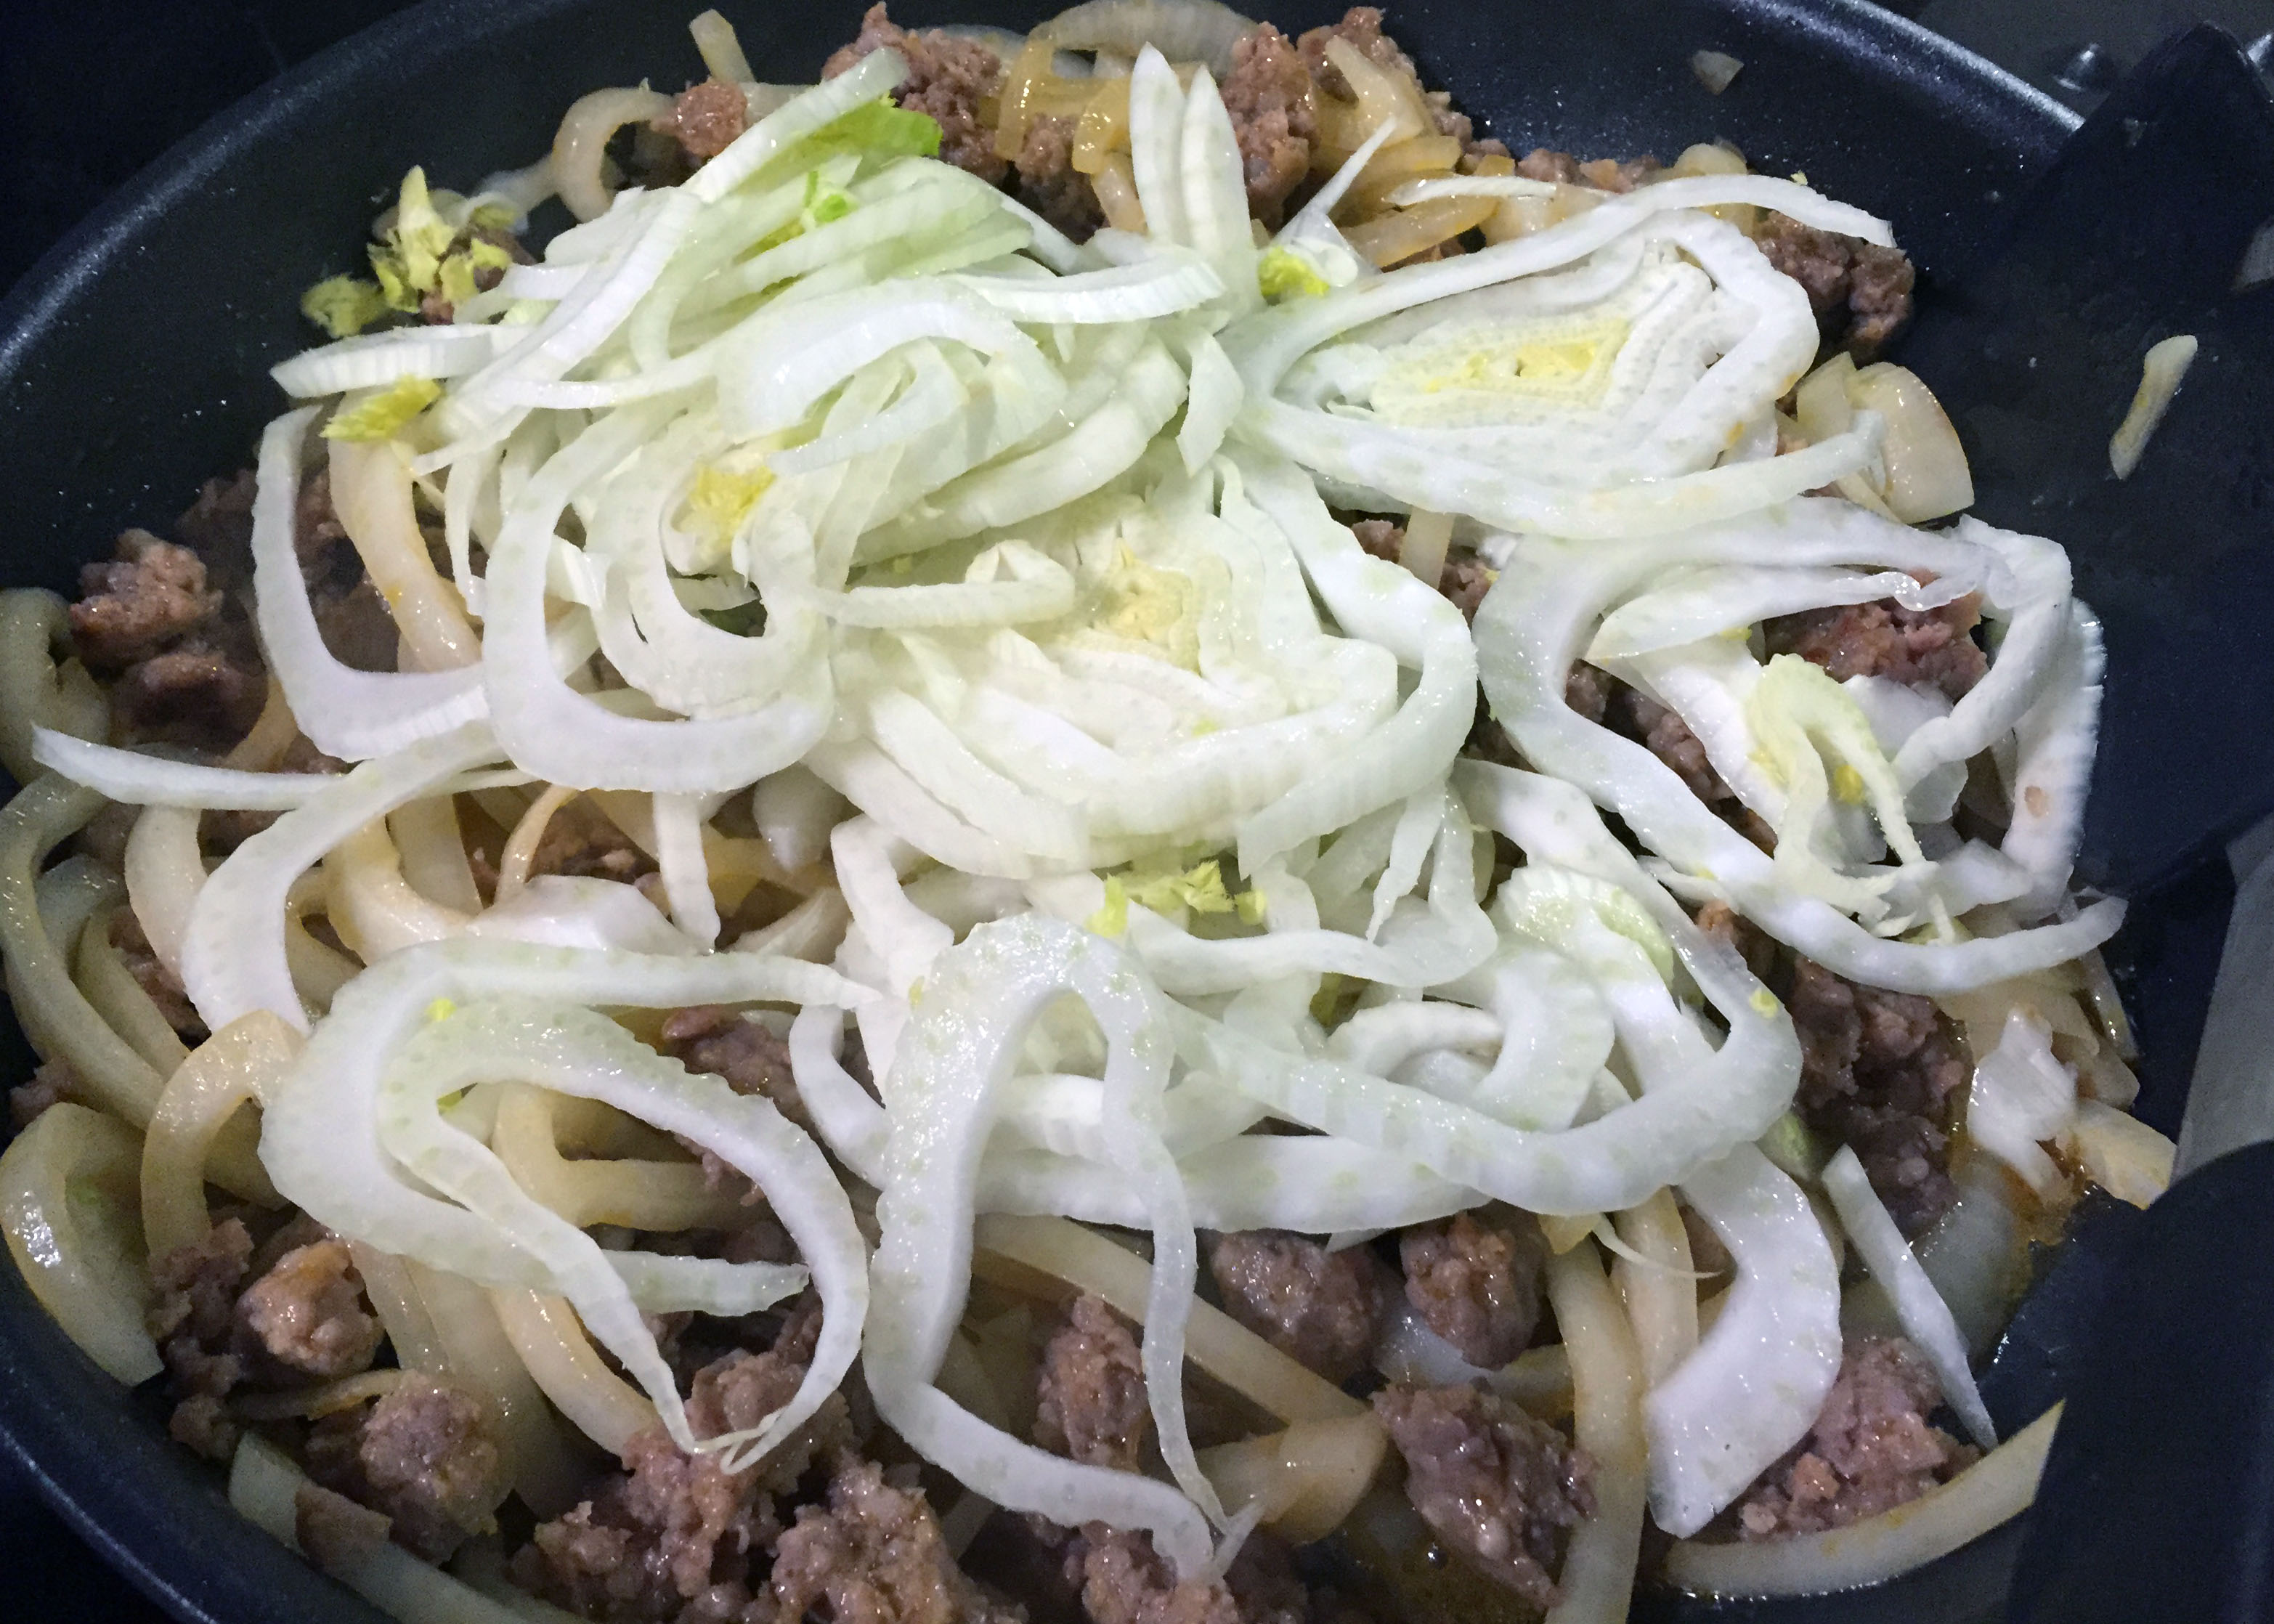
2 medium leeks, white and light green parts only, cut in half and then into 1/2-inch slices
1 large onion, diced small

1/2 cup white wine (optional)
3 cups chicken broth
1 cup milk (I used skim)
1 bay leaf
couple sprigs of fresh thyme

4 tablespoons of fat (schmaltz from your fried chicken or butter at room temperature)
7 tablespoons all-purpose flour

2 tsp soy sauce
1 tsp anchovy paste (or Marmite)
1 cup frozen green peas
2 large carrots, diced small (about 1 1/2 cup carrots)
couple shakes of hot pepper flakes, to taste
1 1/2 ounces finely grated pecorino or parmesan cheese

To make the dough,

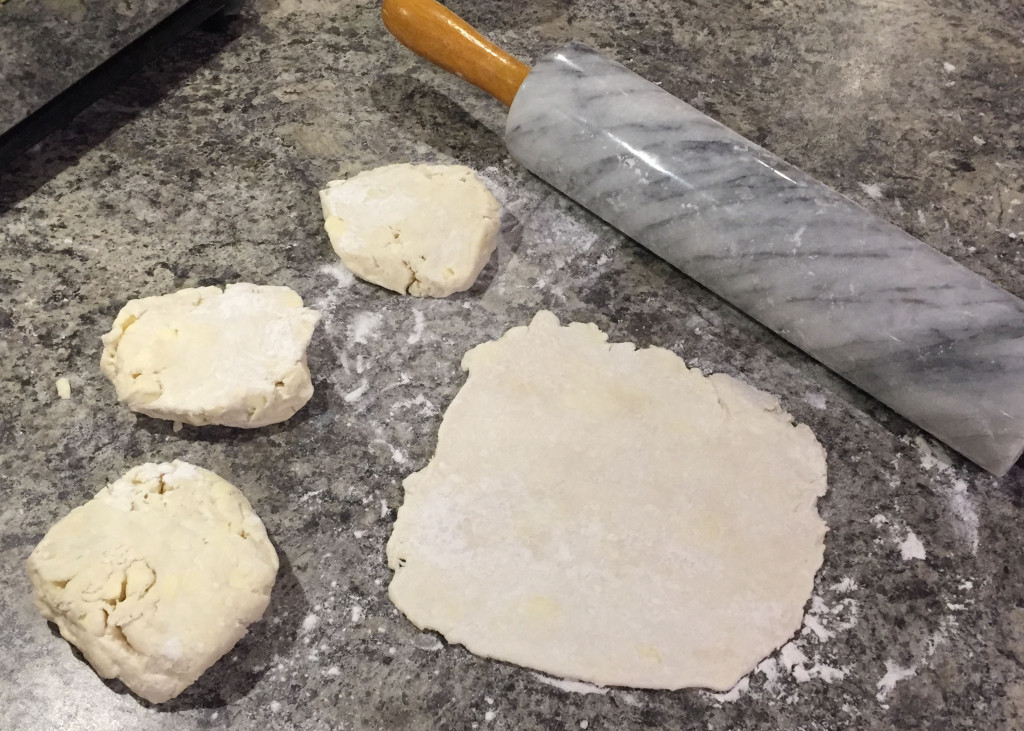
combine the flour and salt in a large bowl. Add the butter and using a pastry blender or your fingertips, cut them up into the flour until the mixture resembles coarse meal with some remaining butter chunks the size of small peas. In a small bowl, mix together the sour cream, vinegar, and water and add it to the butter/flour. Using a spatula, stir until a craggy dough forms. Use your hands to gather it into a ball. Don’t overwork the dough and if it starts to become warm, put it in the fridge for 10 minutes. You want those little chunks of butter to stay whole for a flaky crust. Form the dough into a disk and wrap it in plastic wrap. Chill it in the fridge for 1 hour or up to a couple days.

To make the filling,

season the chicken with salt and pepper. Heat a glug of olive oil over medium-high heat in the bottom of a Dutch oven or large heavy pot. Brown chicken thighs skin-side down until golden, flip and brown the other side. You will want to do this in two batches because crowding the chicken will steam it rather than fry it. Transfer to a plate and set aside.

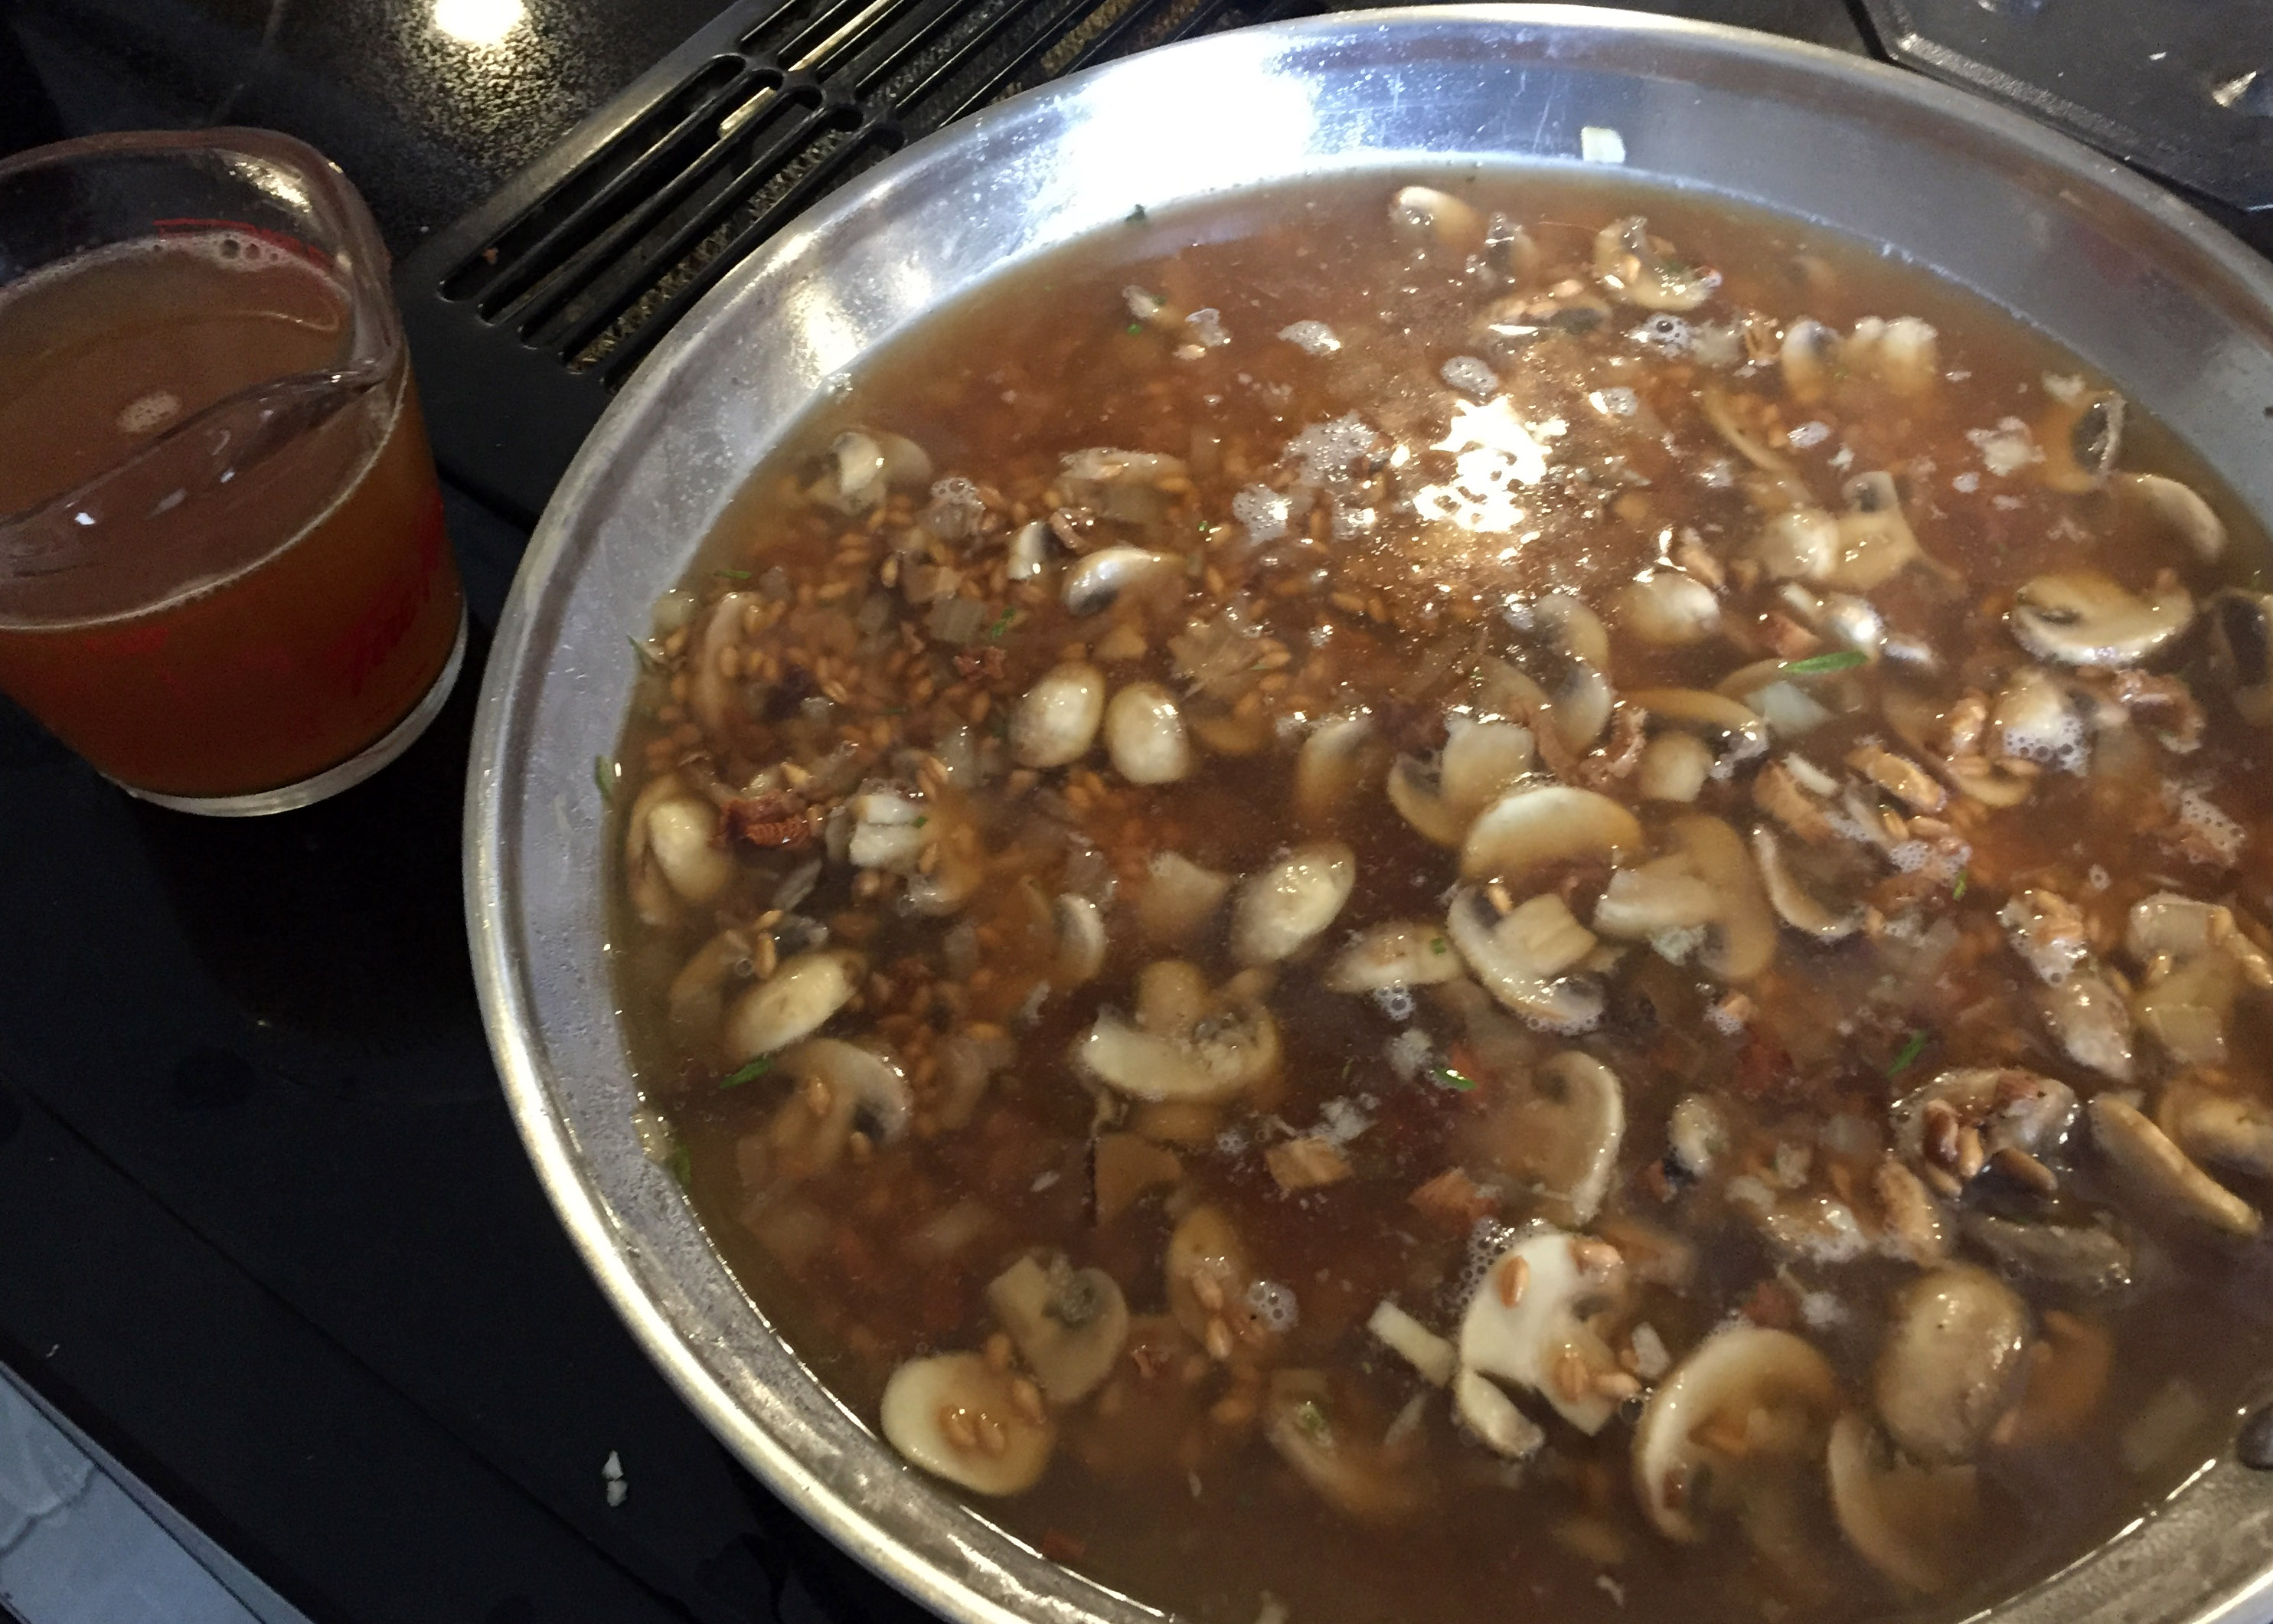
Pour off most of the fat (reserving it to use later in this recipe) leaving enough to coat the bottom of the pan . Add the mushrooms and fry until they release their liquid and start to brown, about 5-6 minutes. Set aside.

chicken pot pie mushrooms

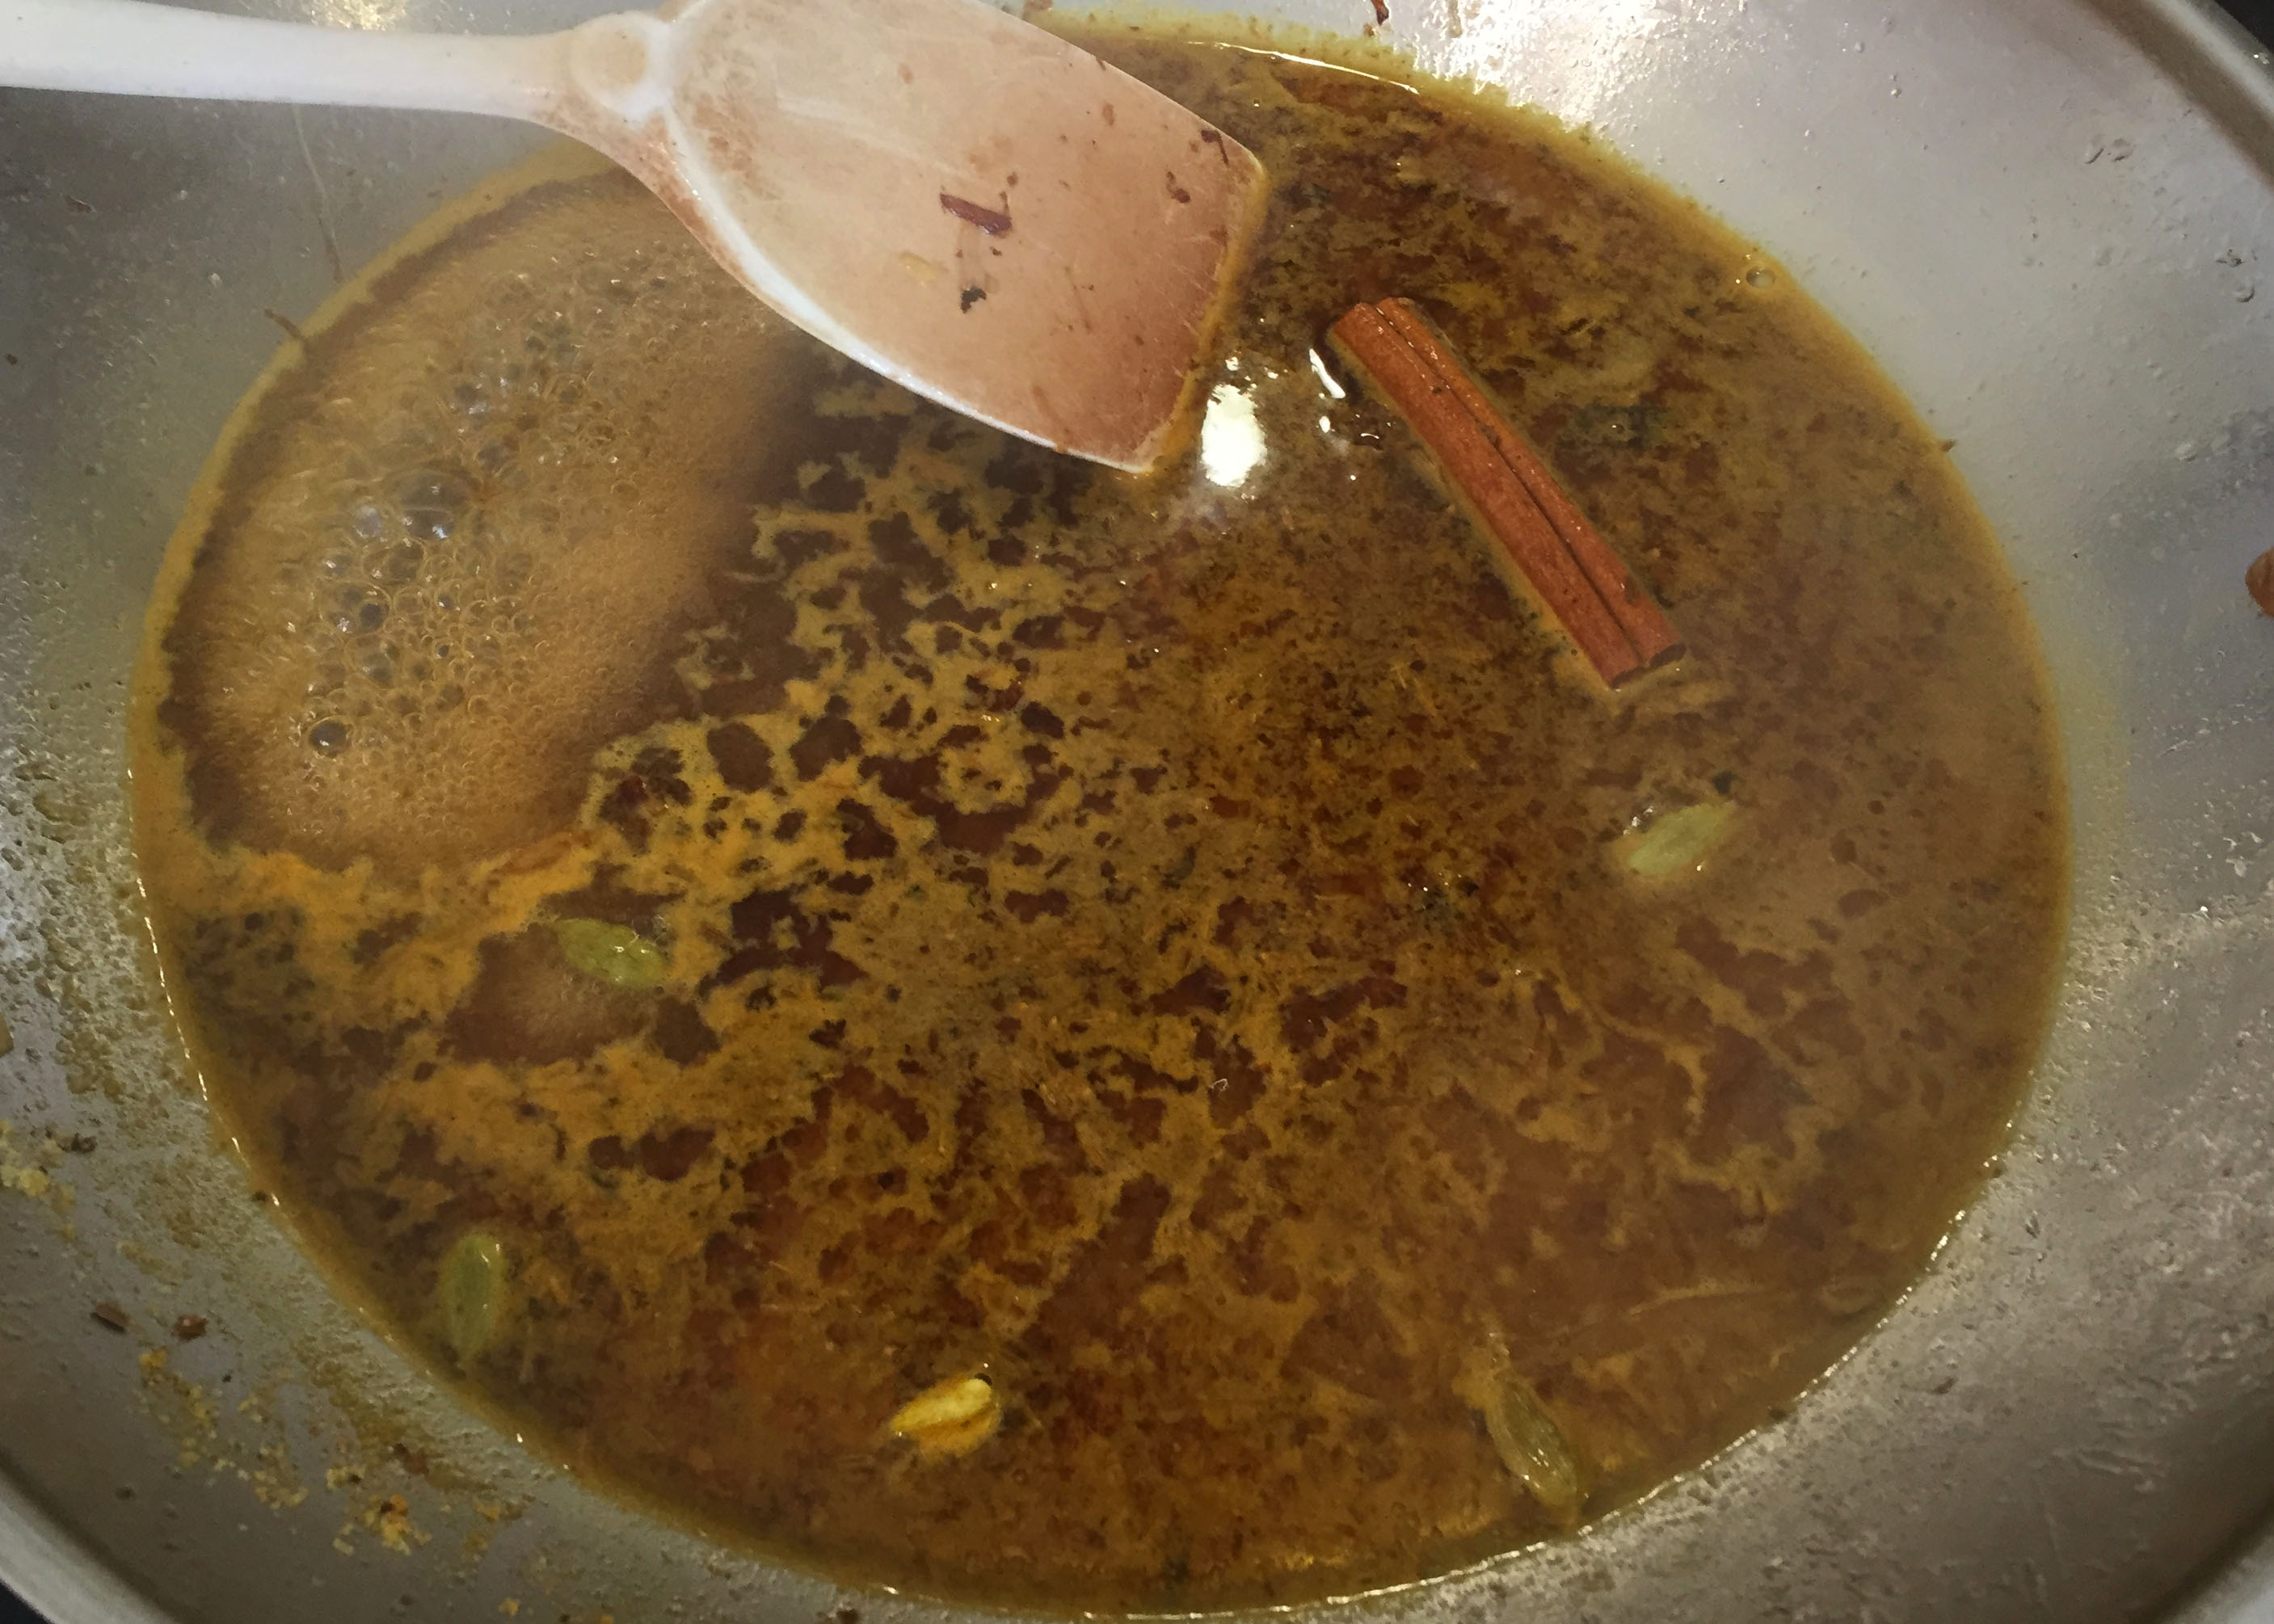
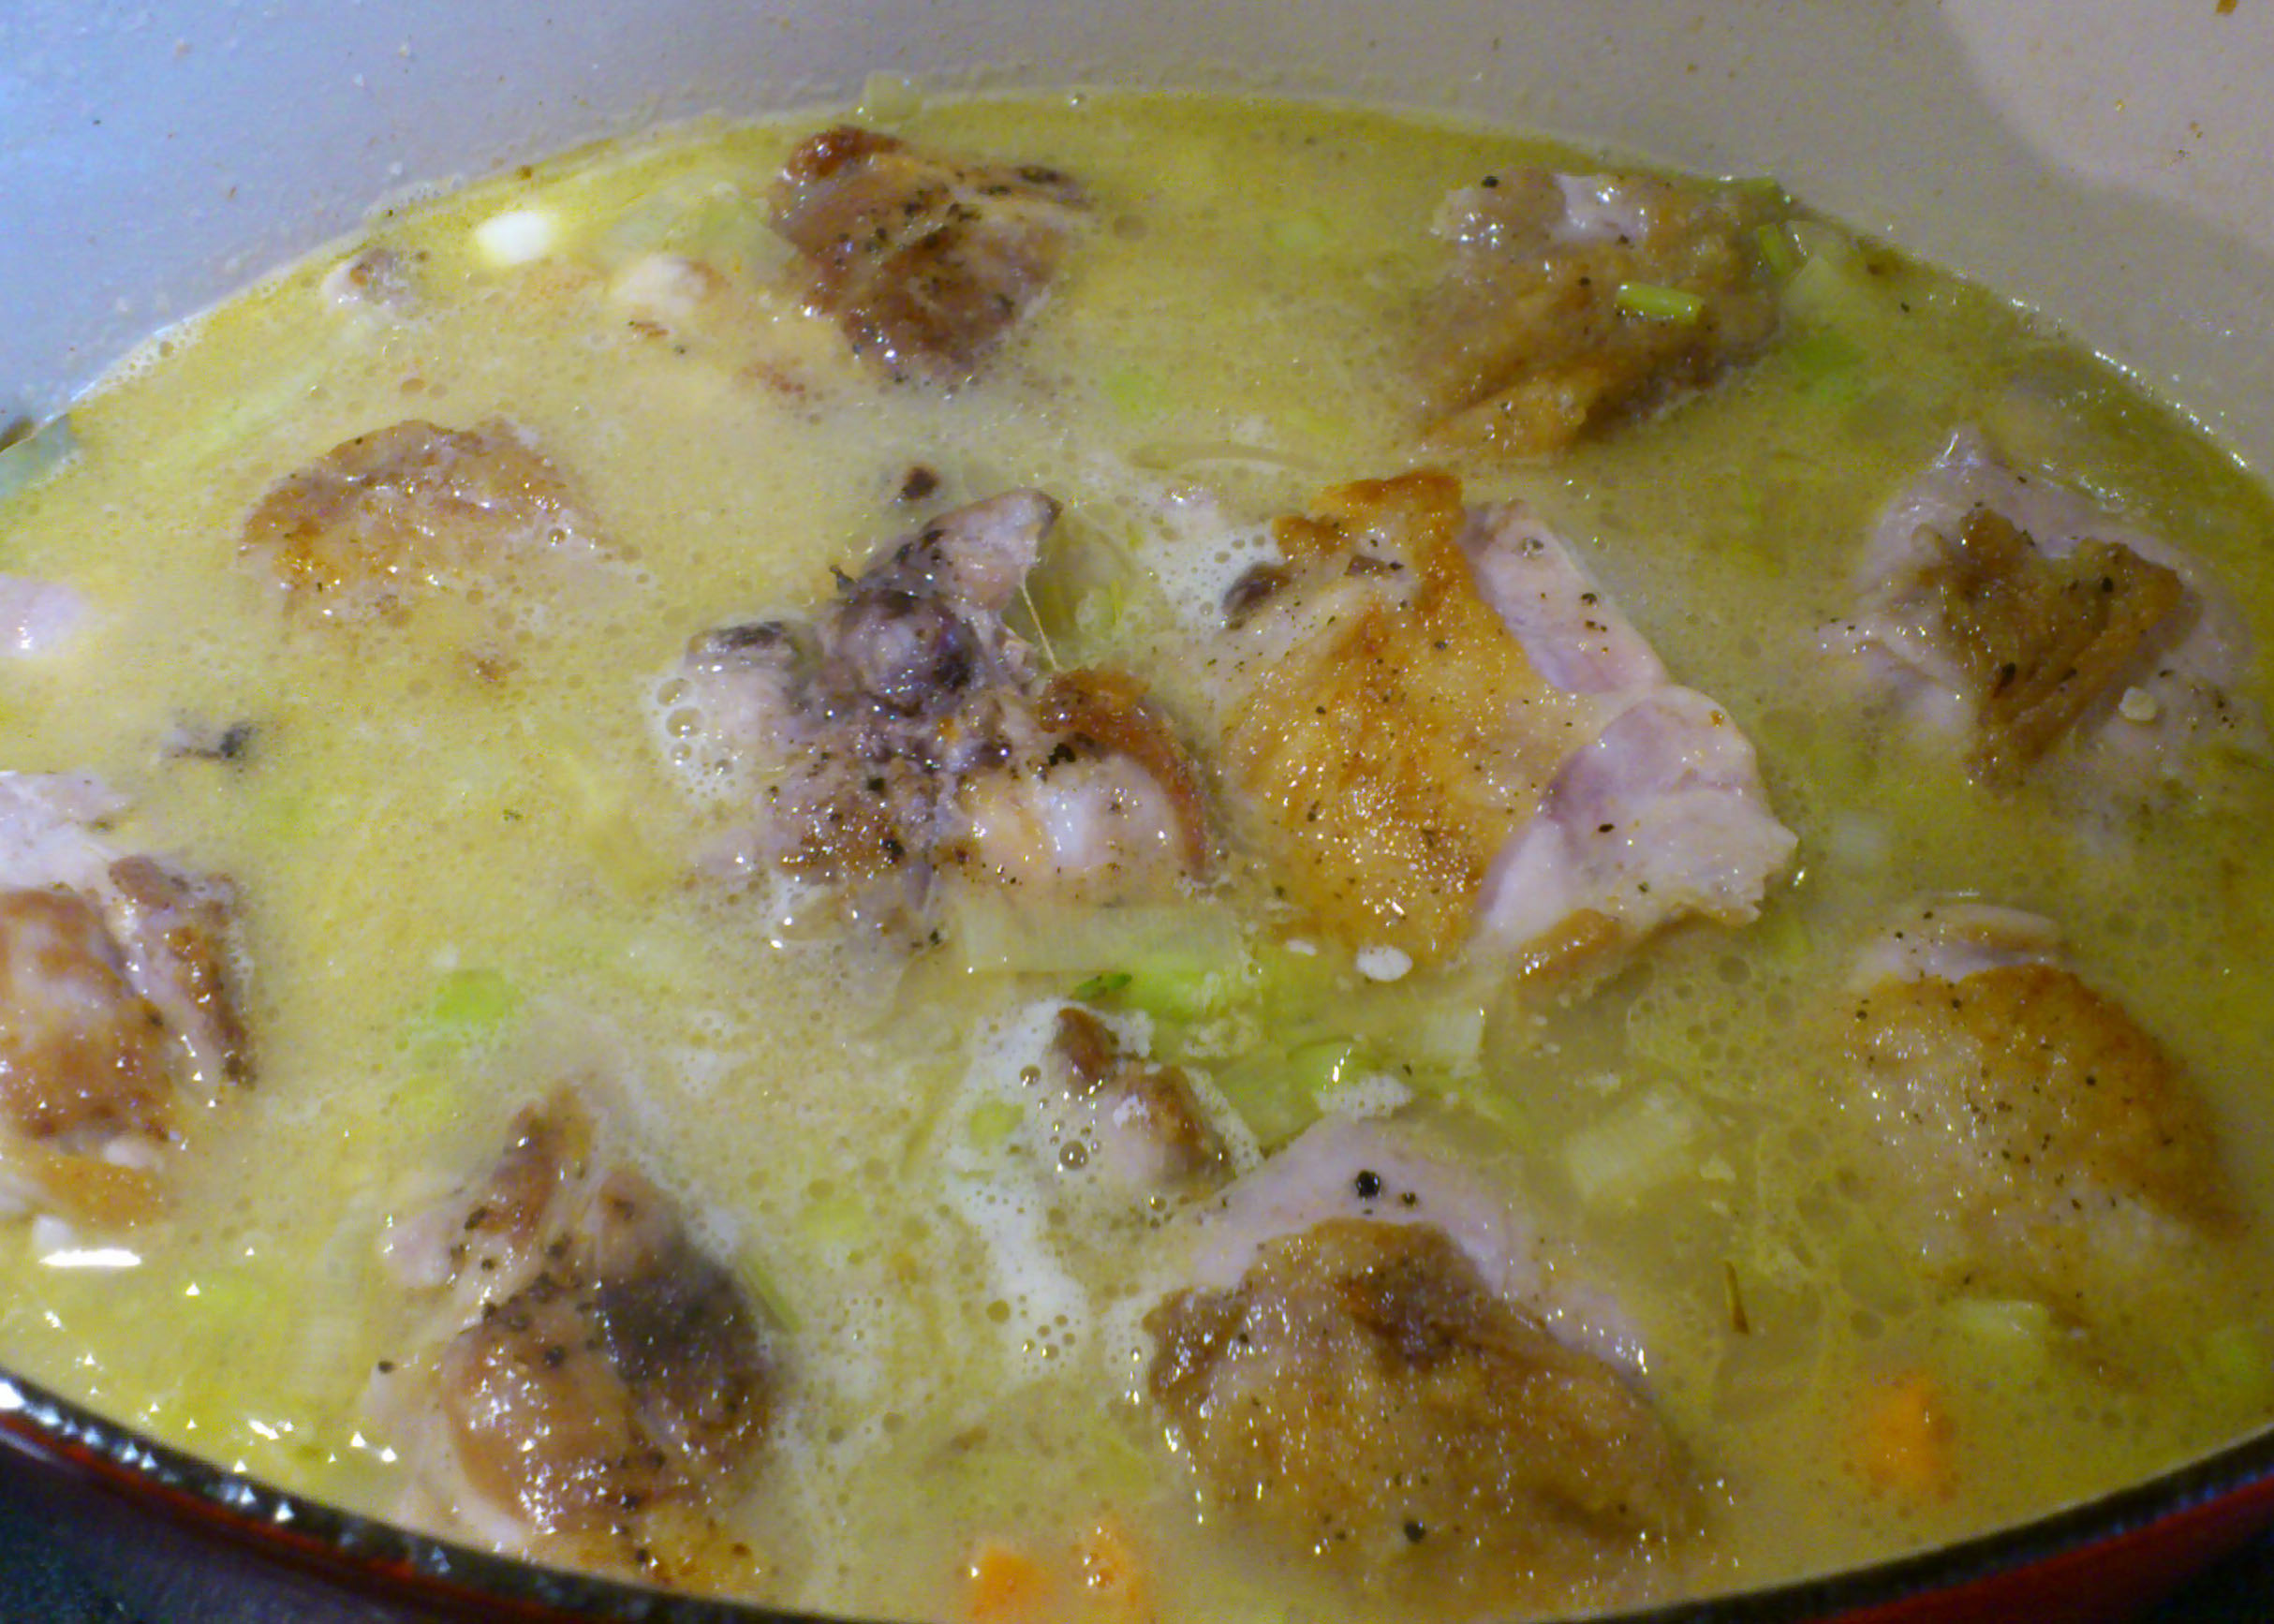
Use some of the fat you poured off the chicken or heat another glug of olive oil in the same pot. Add onions and leeks, season with salt and pepper, and saute them until softened, about 7 minutes. If using, pour in the wine and use it to scrape up any bits stuck to the bottom of the pan. Simmer until most of the wine has cooked off and then add milk, chicken broth, thyme and bay leaf and bring to a simmer. Nestle the browned chicken and any accumulated juices into the pot. Cover and GENTLY simmer to 30 minutes, after which the chicken should be fully cooked and tender.

chicken pot pie simmer

Transfer the chicken to a cutting board to cool slightly. Discard the bay leaves and sprigs from the thyme (leaves should have fallen into the sauce by now). Allow the sauce to settle for a few minutes, then skim the fat from the surface using a wide spoon and set aside.

In a medium bowl, using a fork, mash 4 TBS of the chicken fat from frying the chicken (replace any or all of it with butter if you prefer) with the flour into a paste. Ladle some of the warm liquid over it, and stir until smooth. Add a second ladle and stir again. Return this flour mixture to the larger pot, stir to combine, and bring back to a simmer for 10 minutes. The sauce should thicken to a gravy-like consistency.

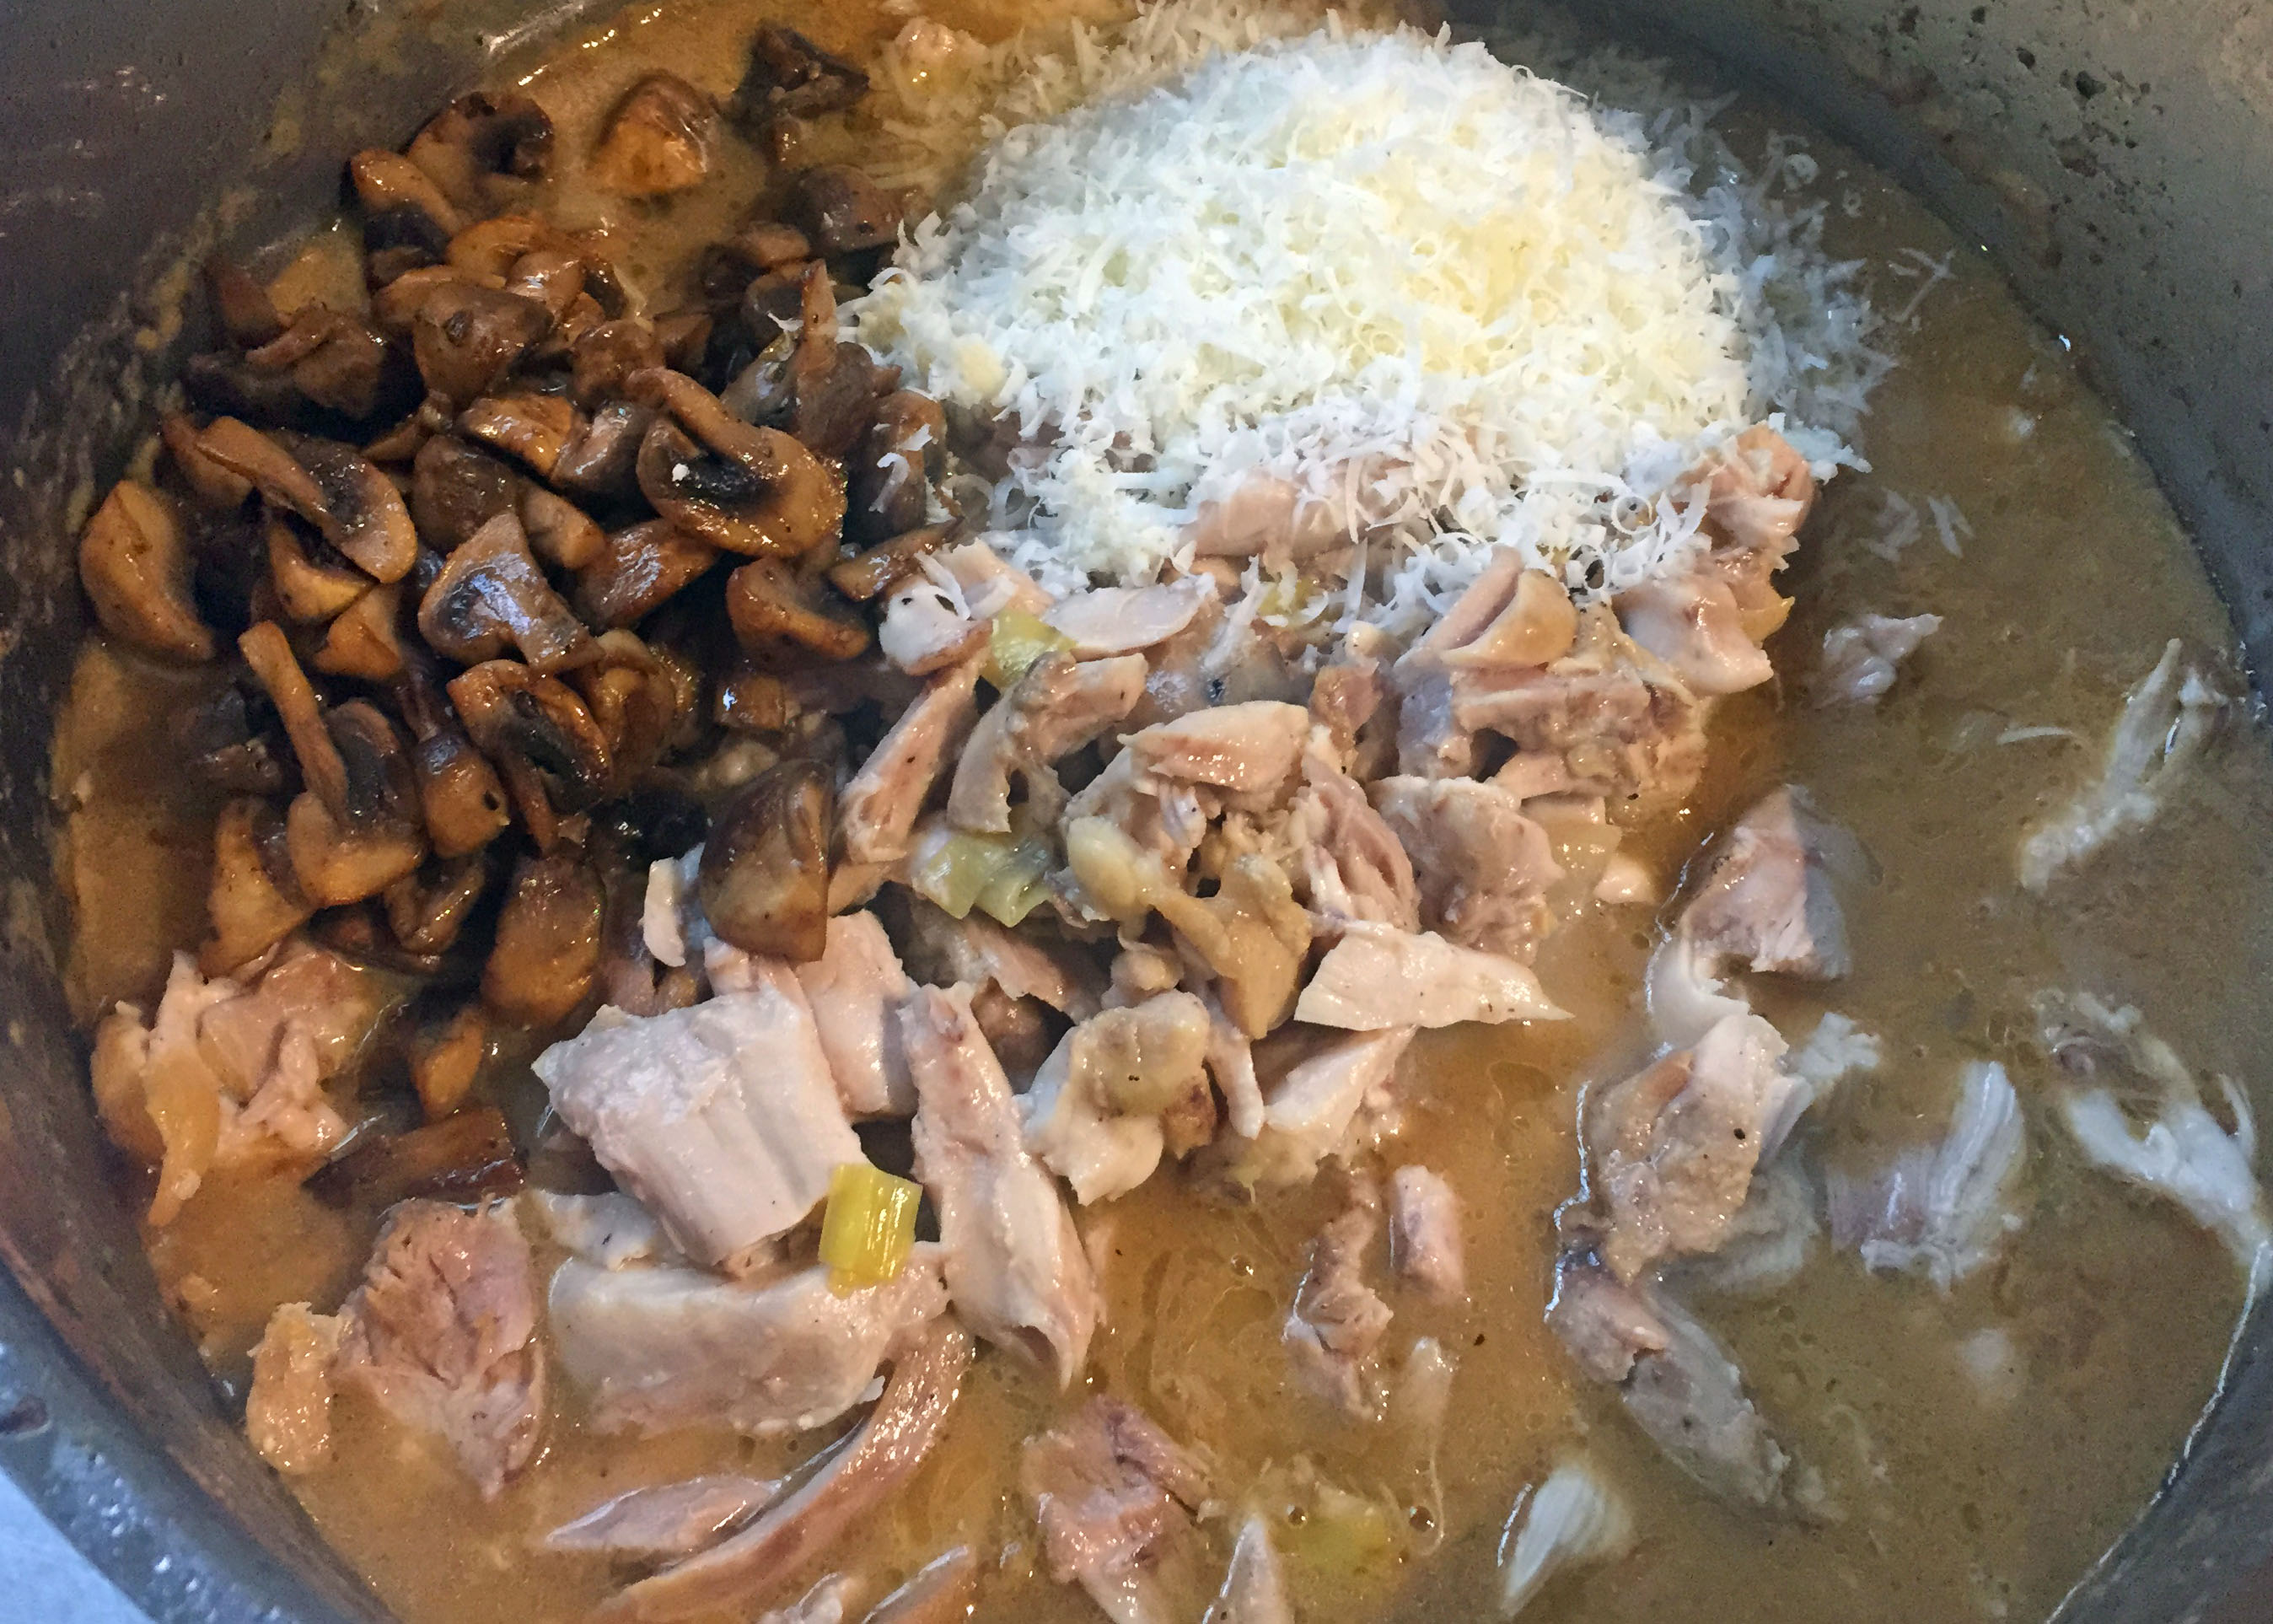
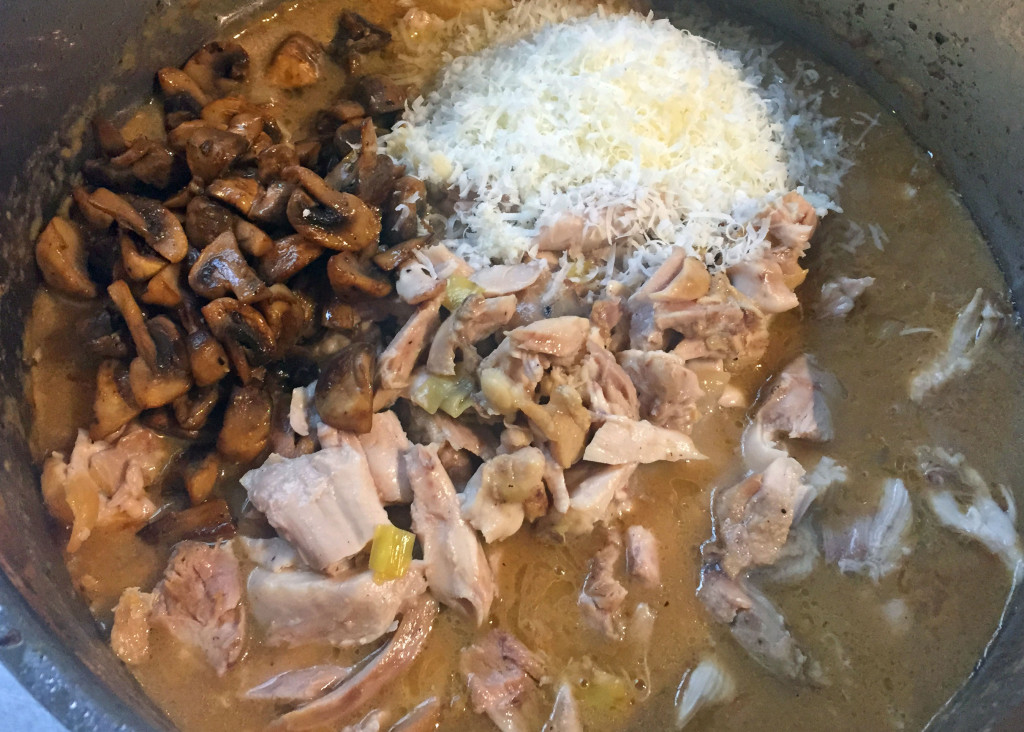
Add soy sauce, anchovy paste, carrots and peas to stew and simmer for a few minutes to soften the vegetables. Shred or dice the chicken, discarding the bones and skin and return the meat to the pot along with the reserved mushrooms. Stir in a shake of hot pepper flakes and the grated pecorino. Taste and adjust seasoning, adding more soy sauce, anchovy paste, salt and pepper, and/or hot pepper flakes to your liking.

chicken pot pie end additions

This is where I divide my filling and dough, freezing half of each (wrap the dough in cling wrap and put in freezer bag) and continue making 4 pies with the other half.

Assemble and bake pies: Heat your oven to 375F.

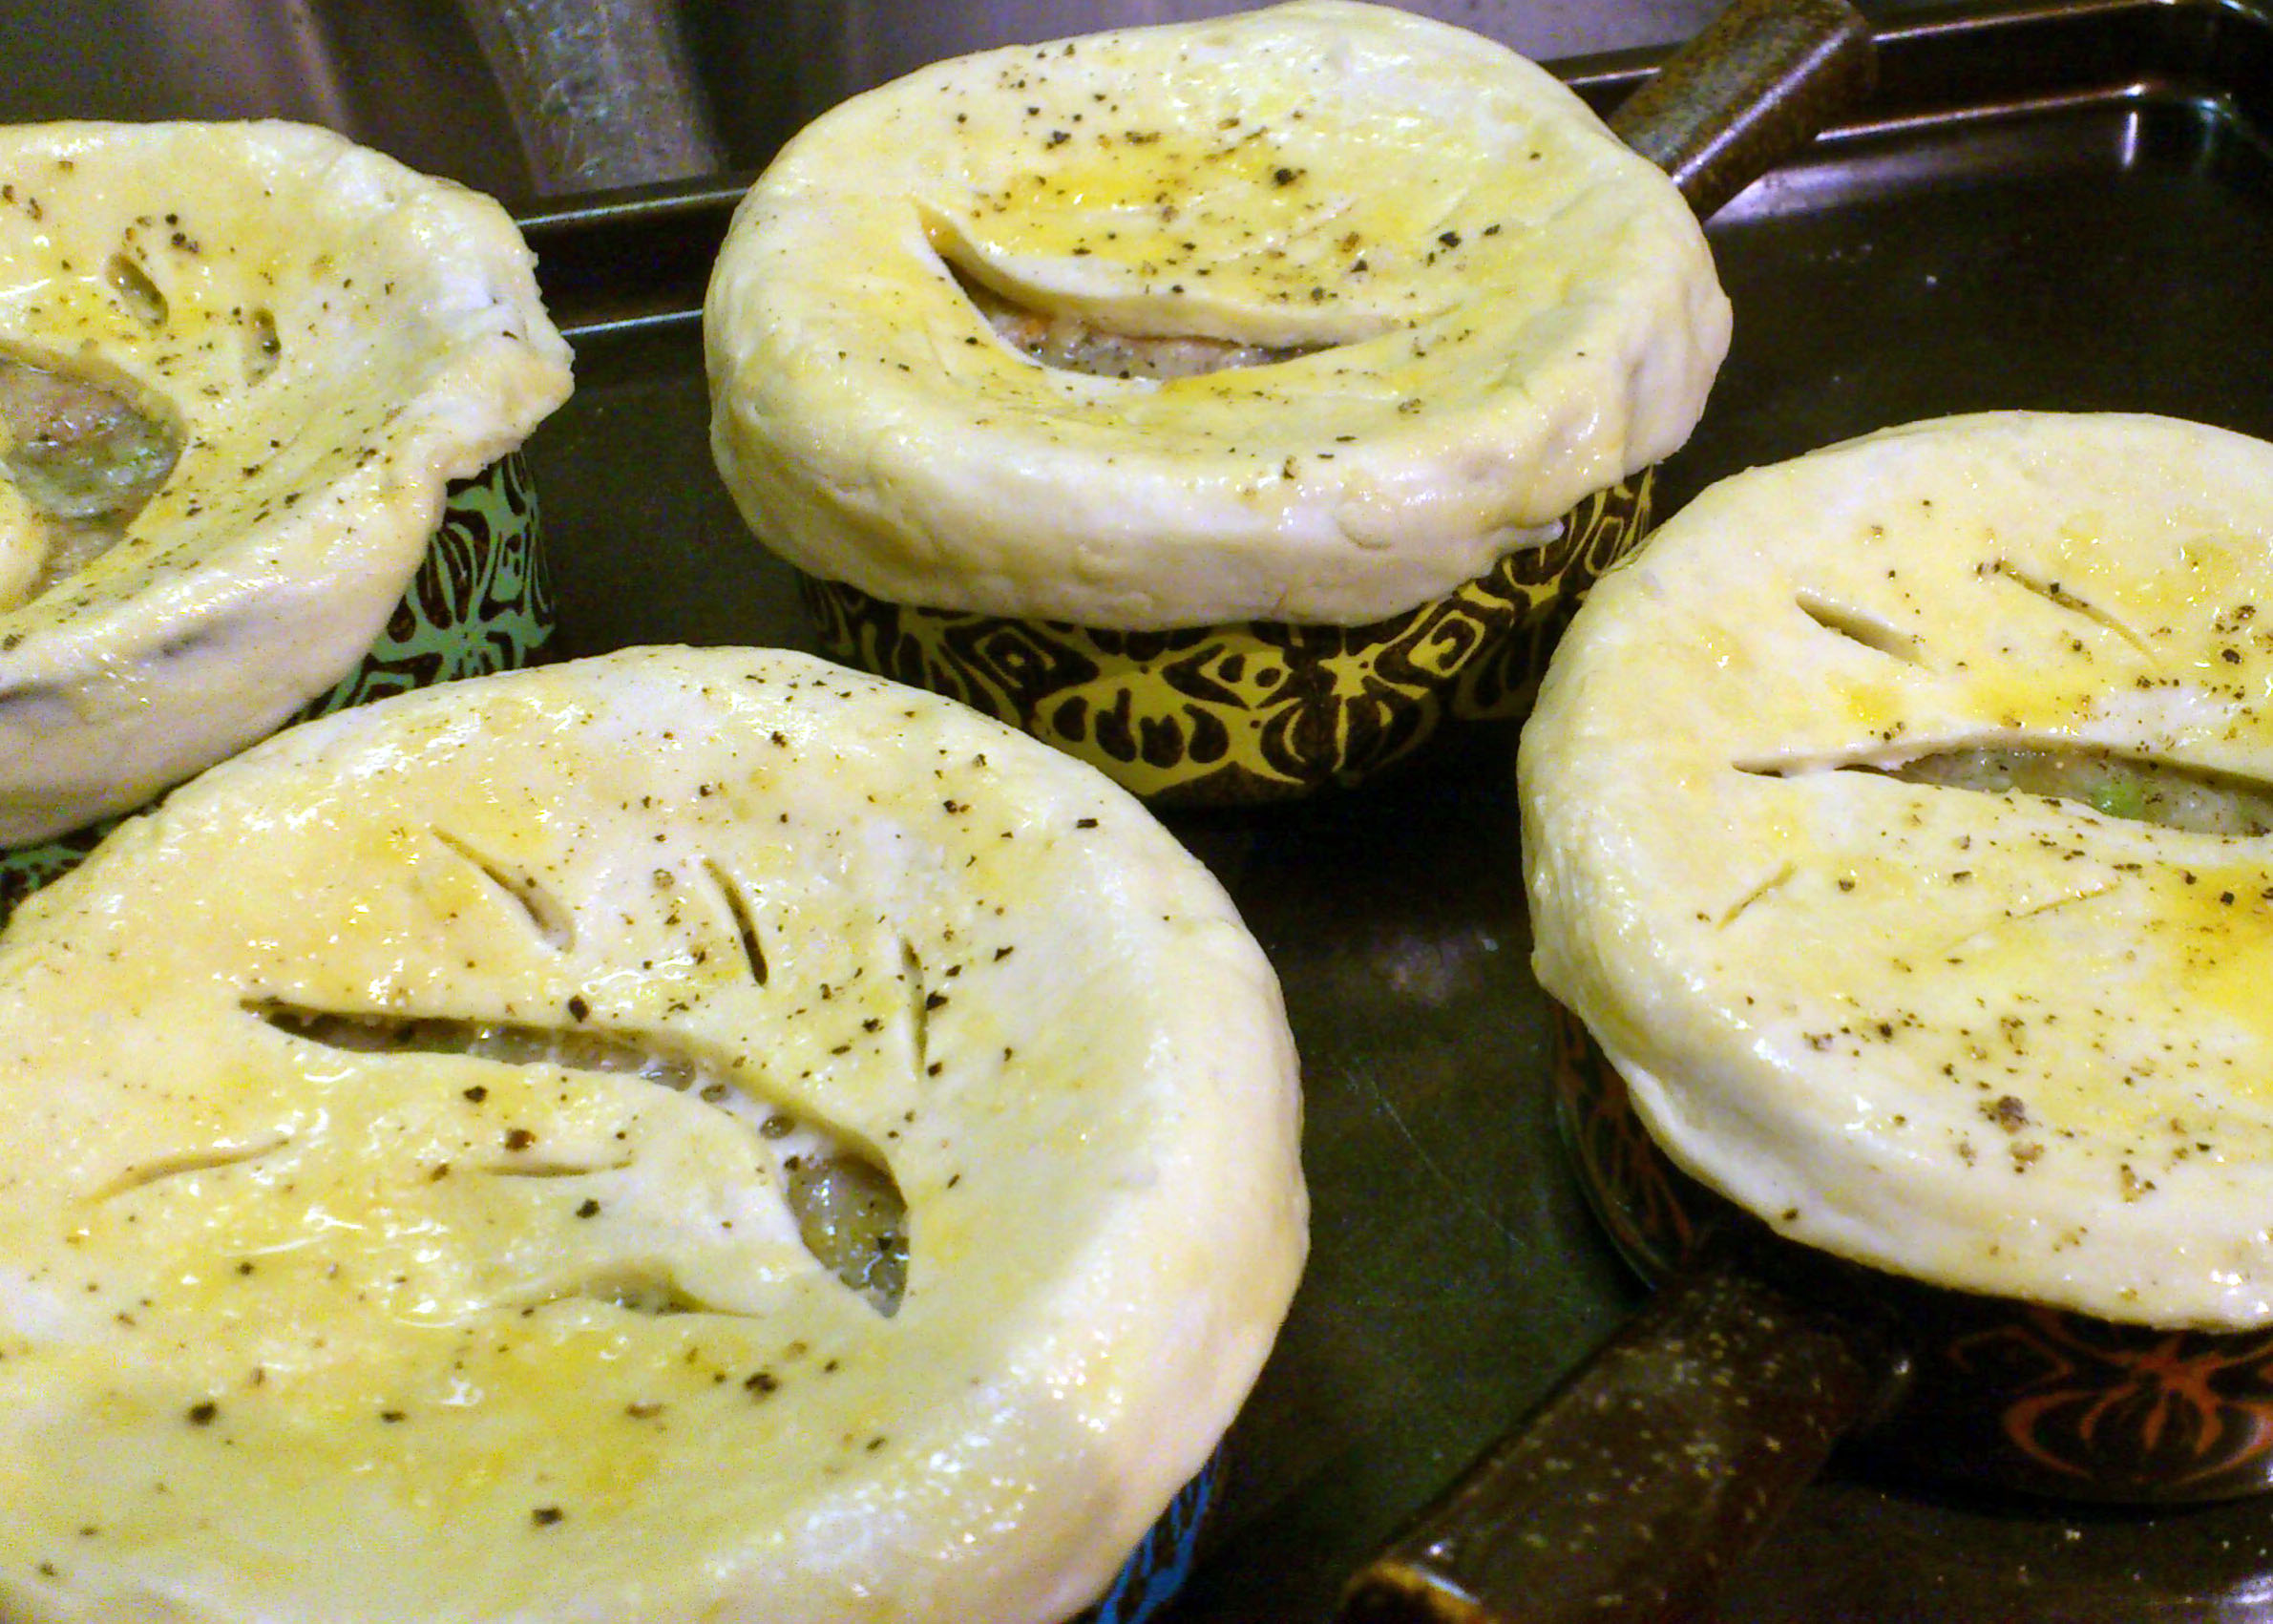
Divide remaining chilled dough into quarters. Roll each portion into rounds that will cover your ramekin or baking dishes with a 1-inch overhang. Cut vents into rounds.

chicken pot pie dough roll

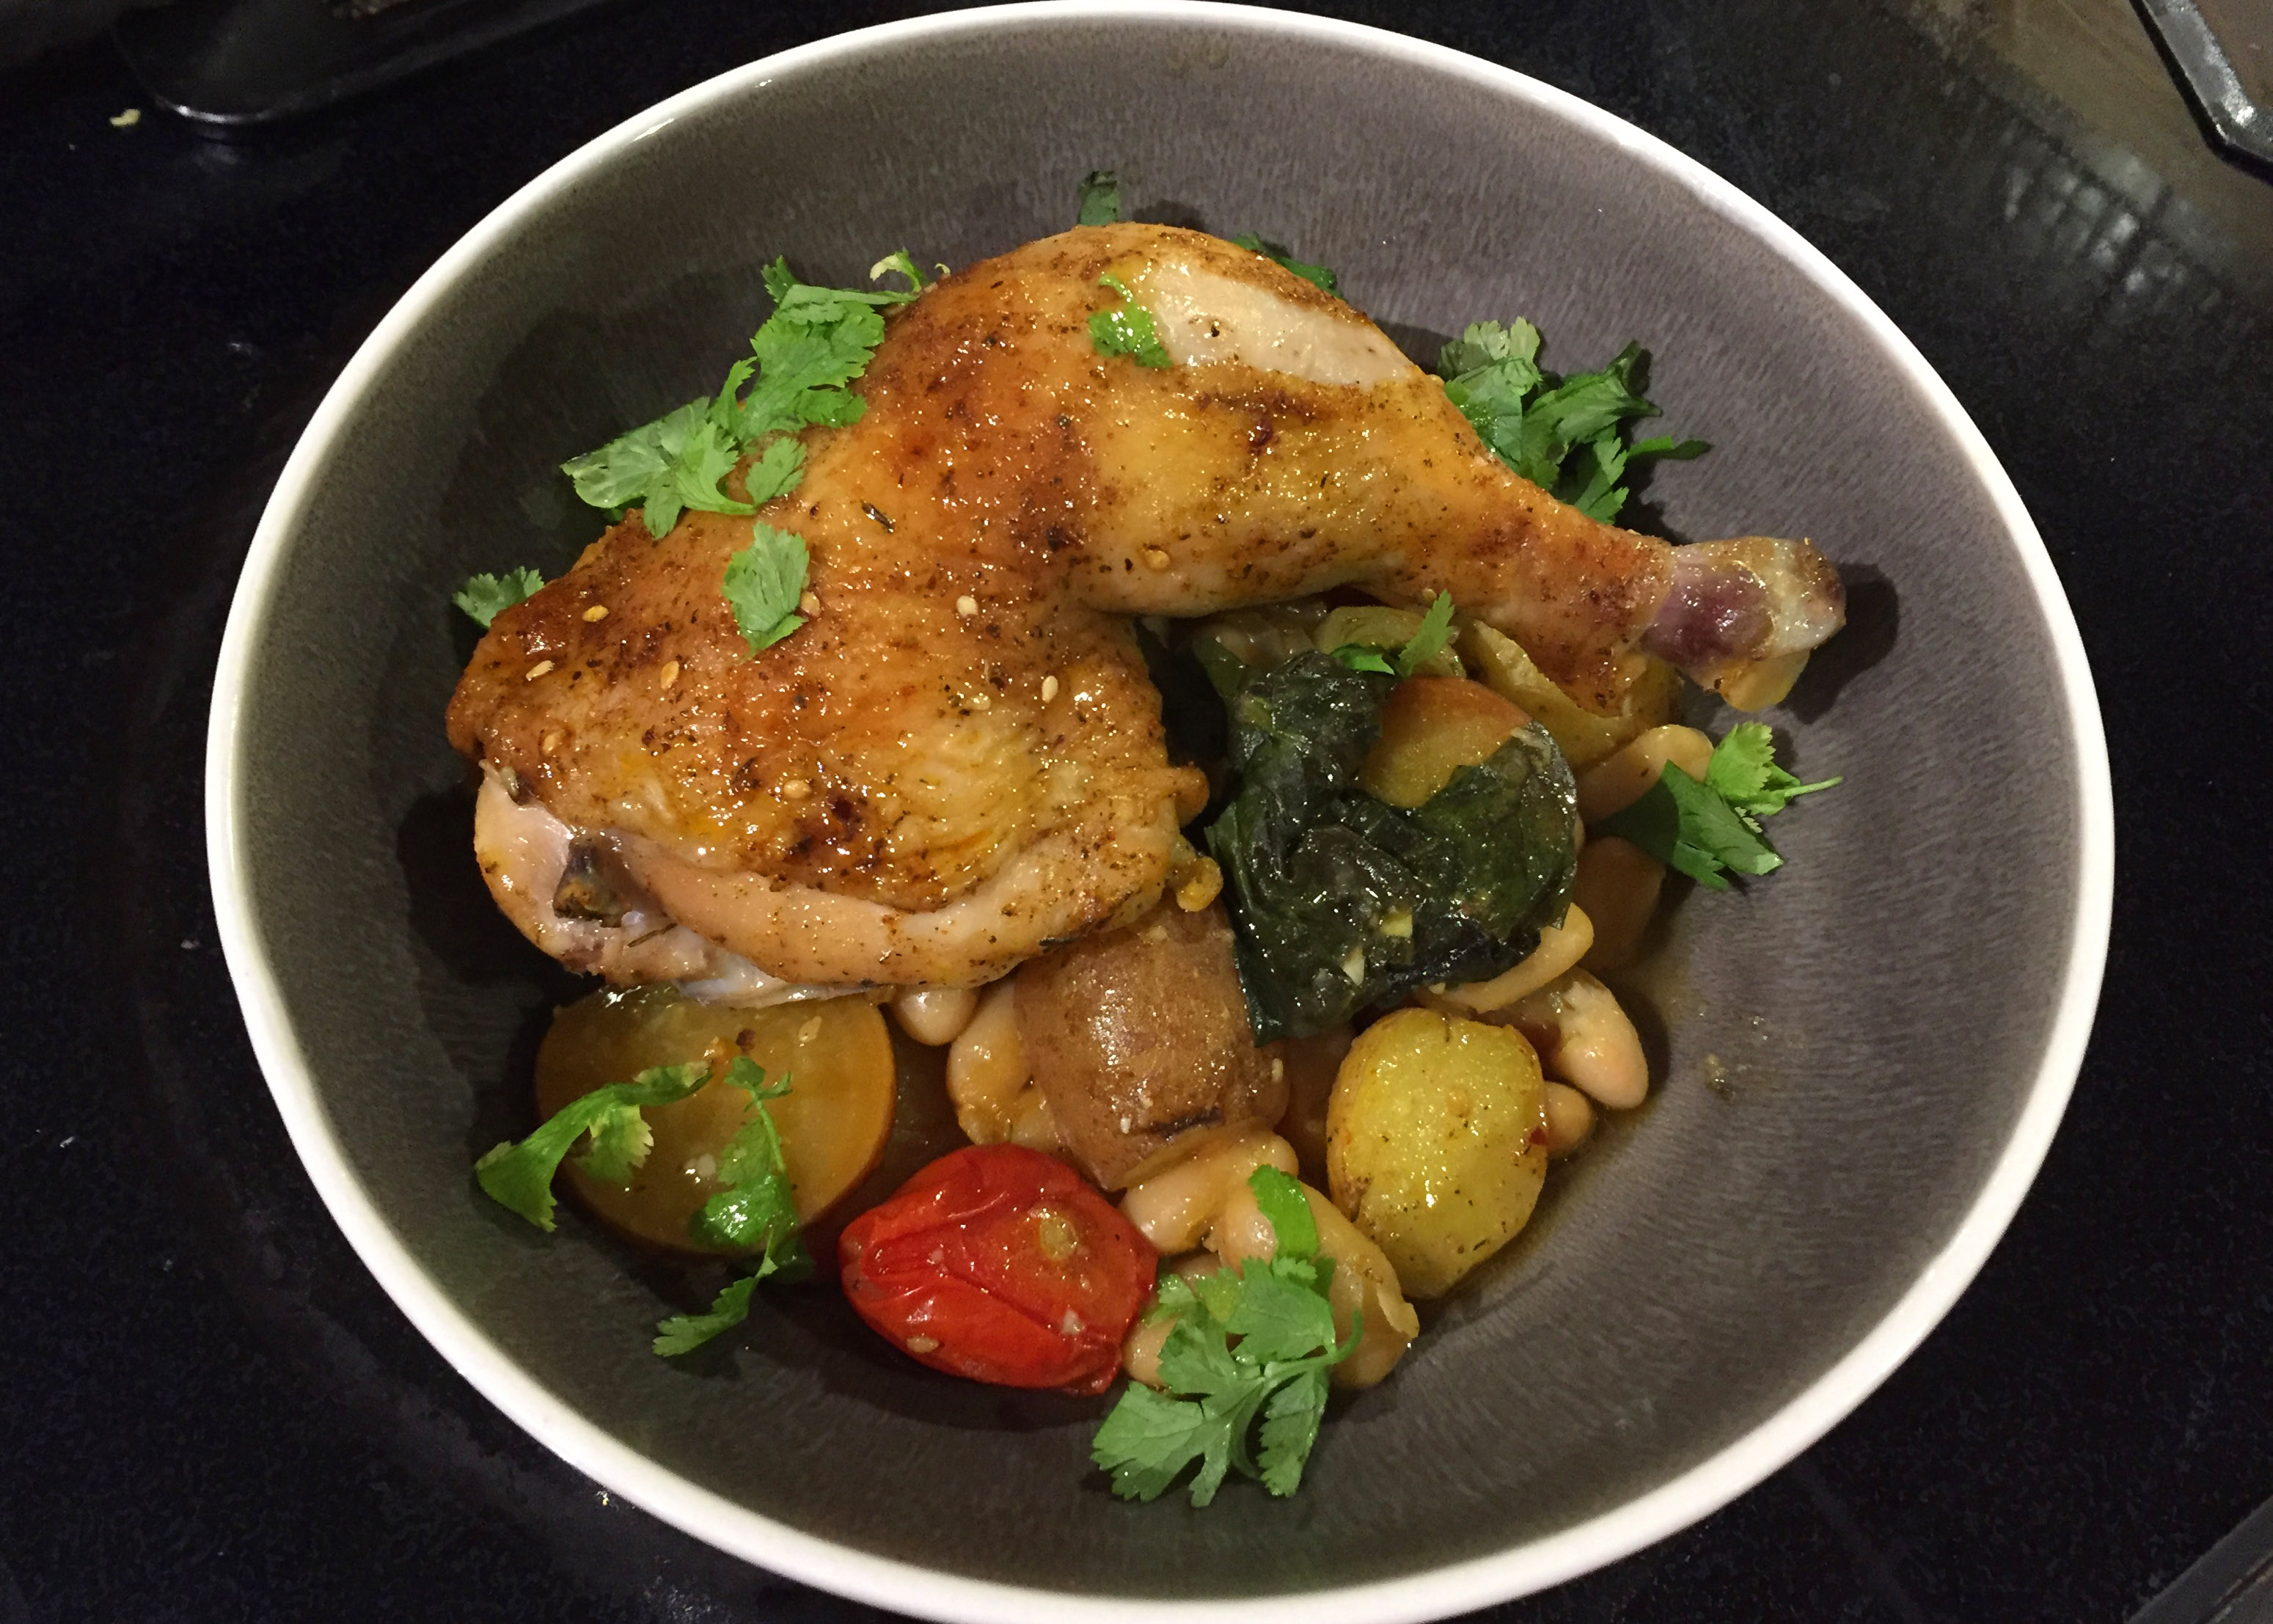
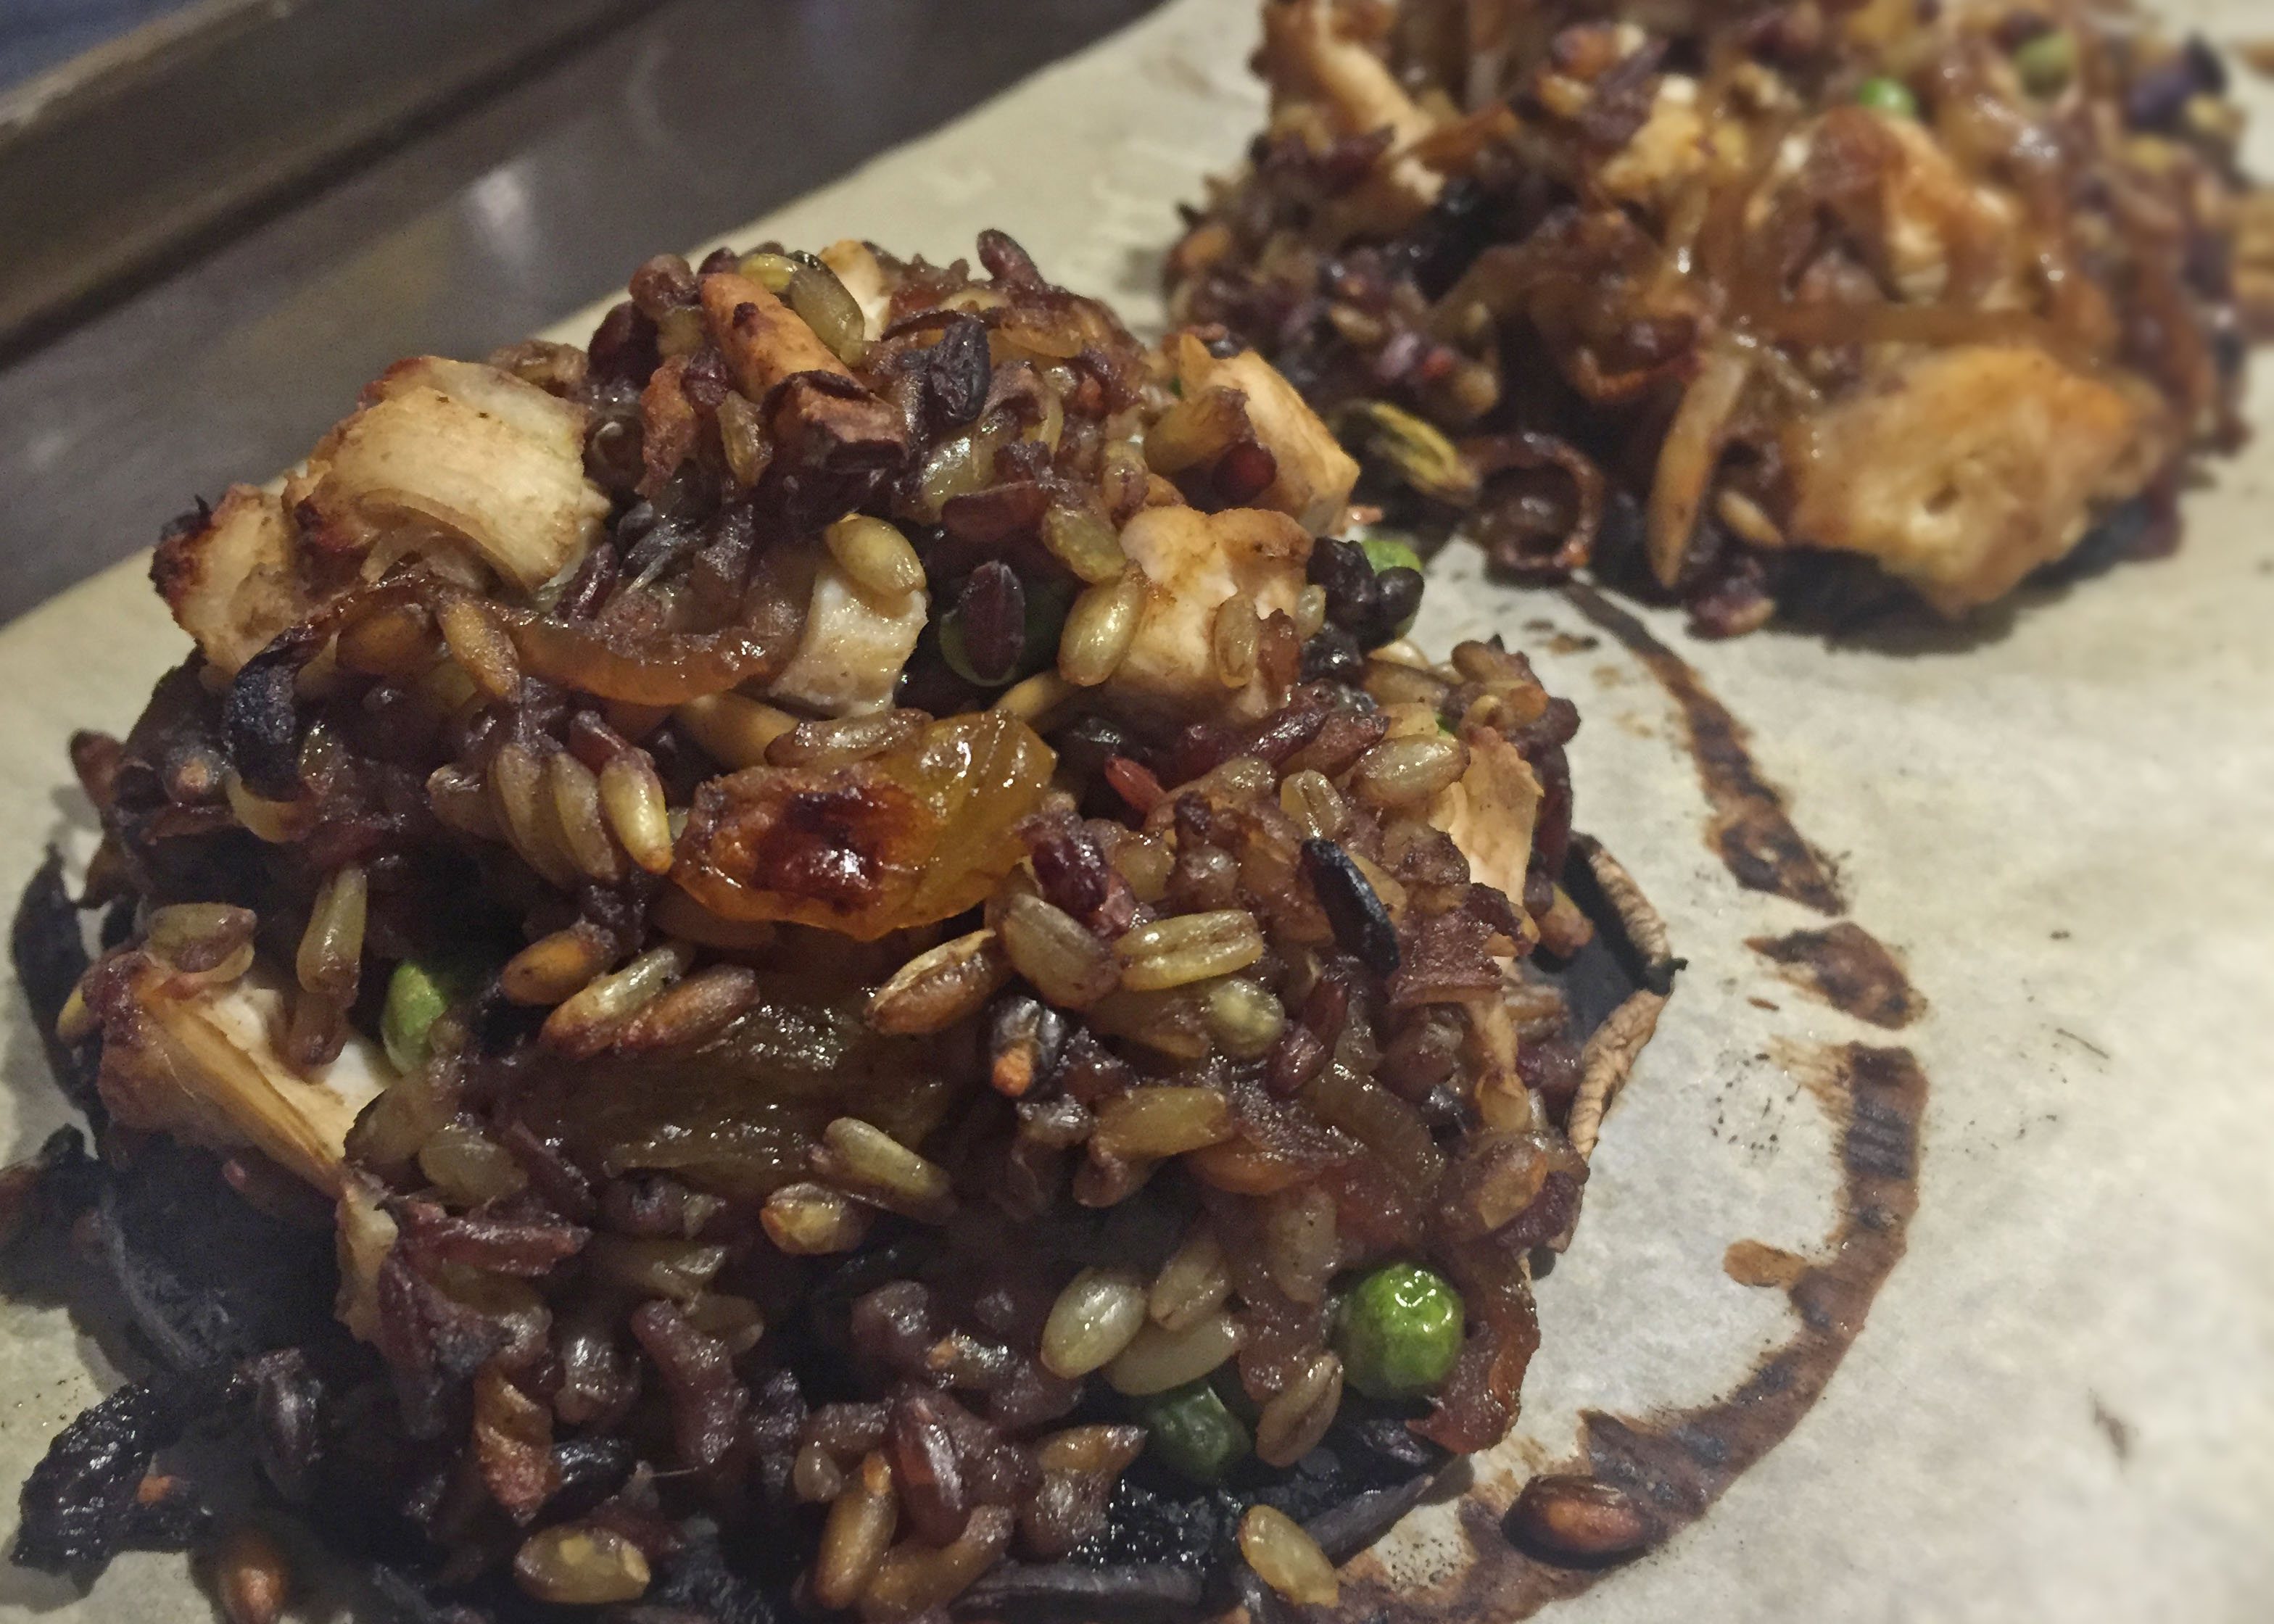
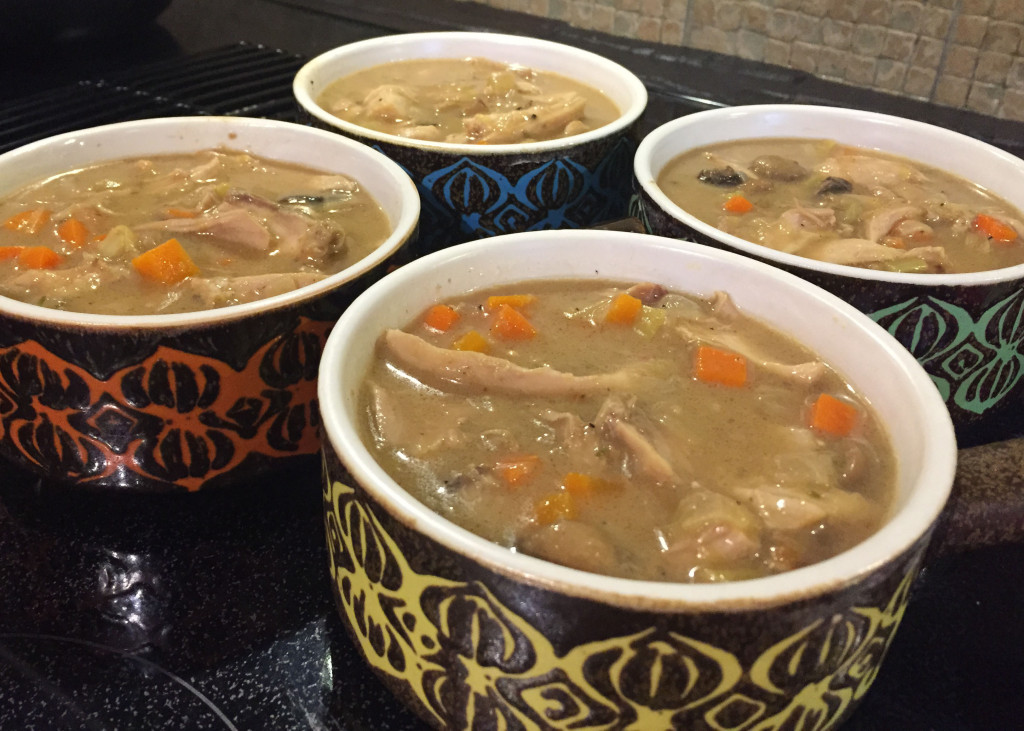
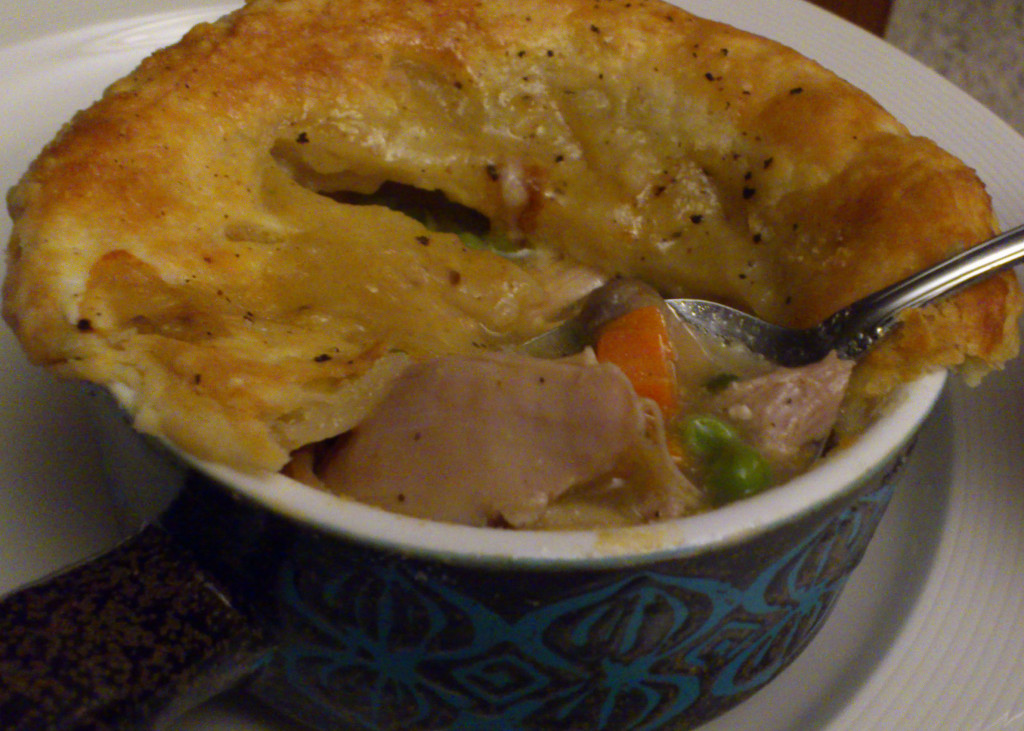
Ladle filling into four bowls, filling only to an inch or so below the rim to leave room for simmering (see what I did there? I didn’t leave enough room for simmering. Oh well, still delicious). Whisk egg with water to make an egg wash. Brush edges of bowls with egg wash and place a lid over each bowl, pressing gently to adhere it to the outer sides of the bowl. Brush the lids with egg wash. Place the ramekins on a cookie sheet and bake until crust is bronzed and filling is bubbling, 30 to 35 minutes.

chicken pot pie ramekins

chicken pot pie pre bake

Serve with a tangy salad.
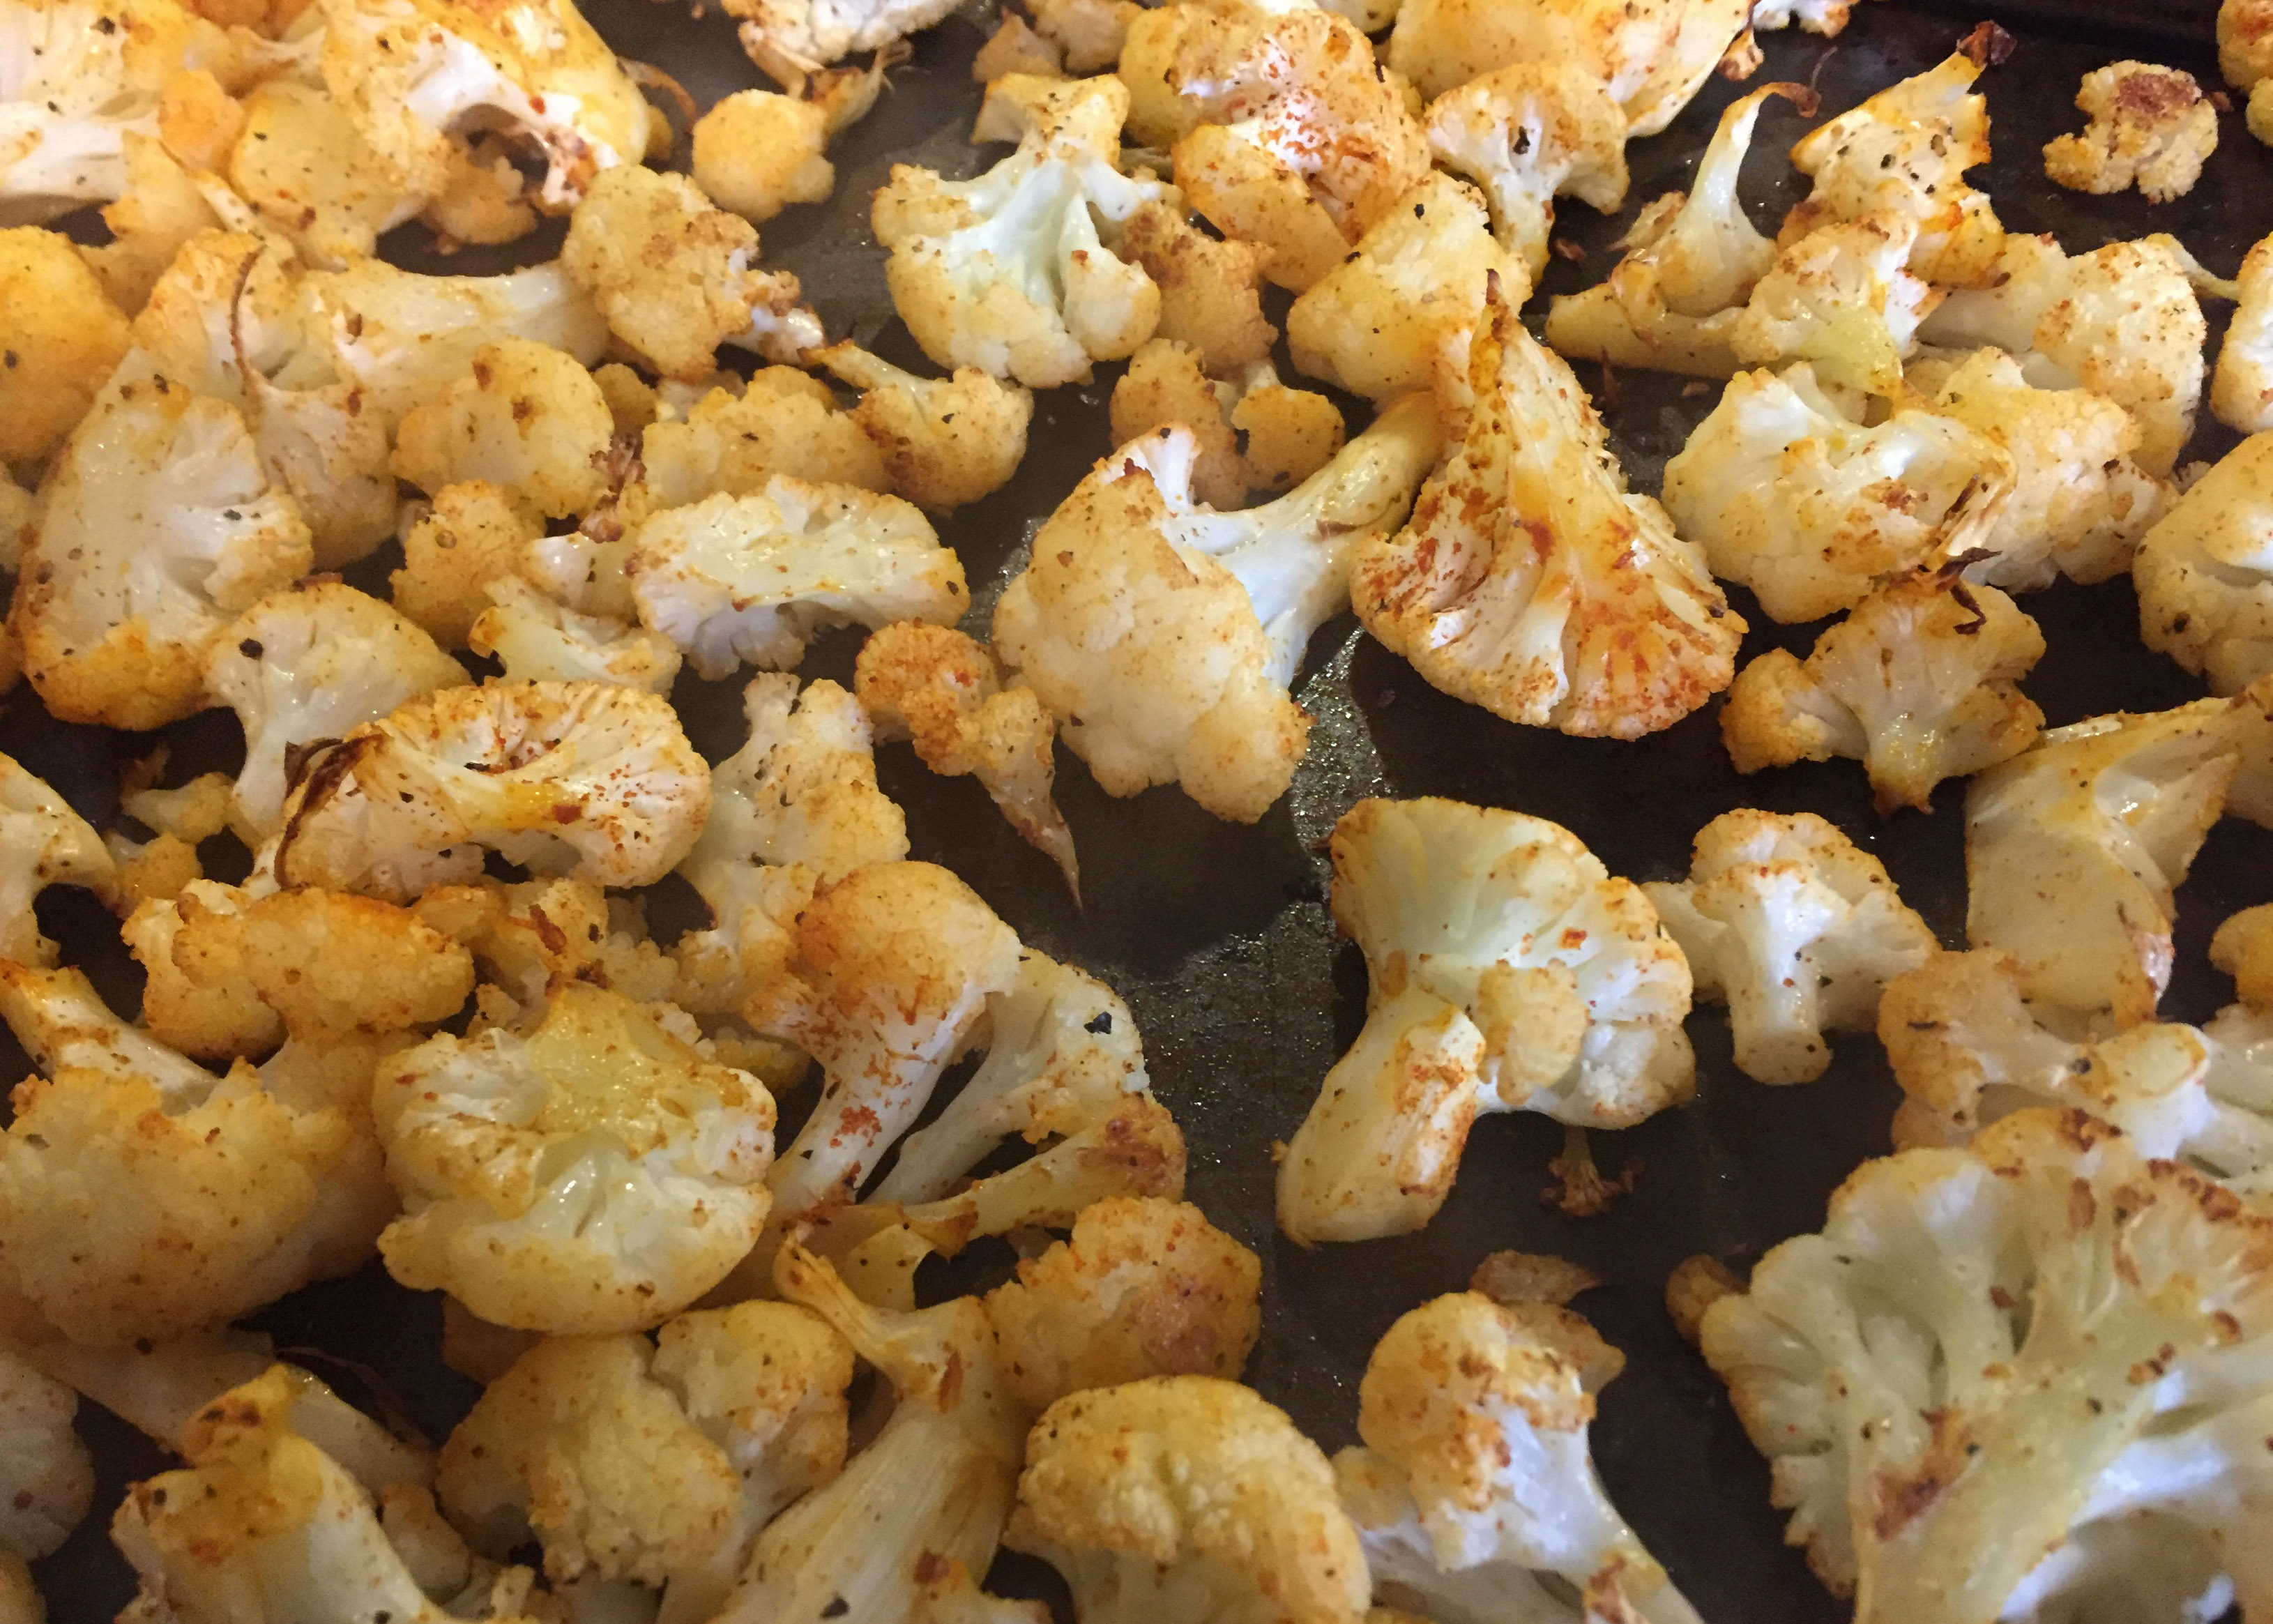
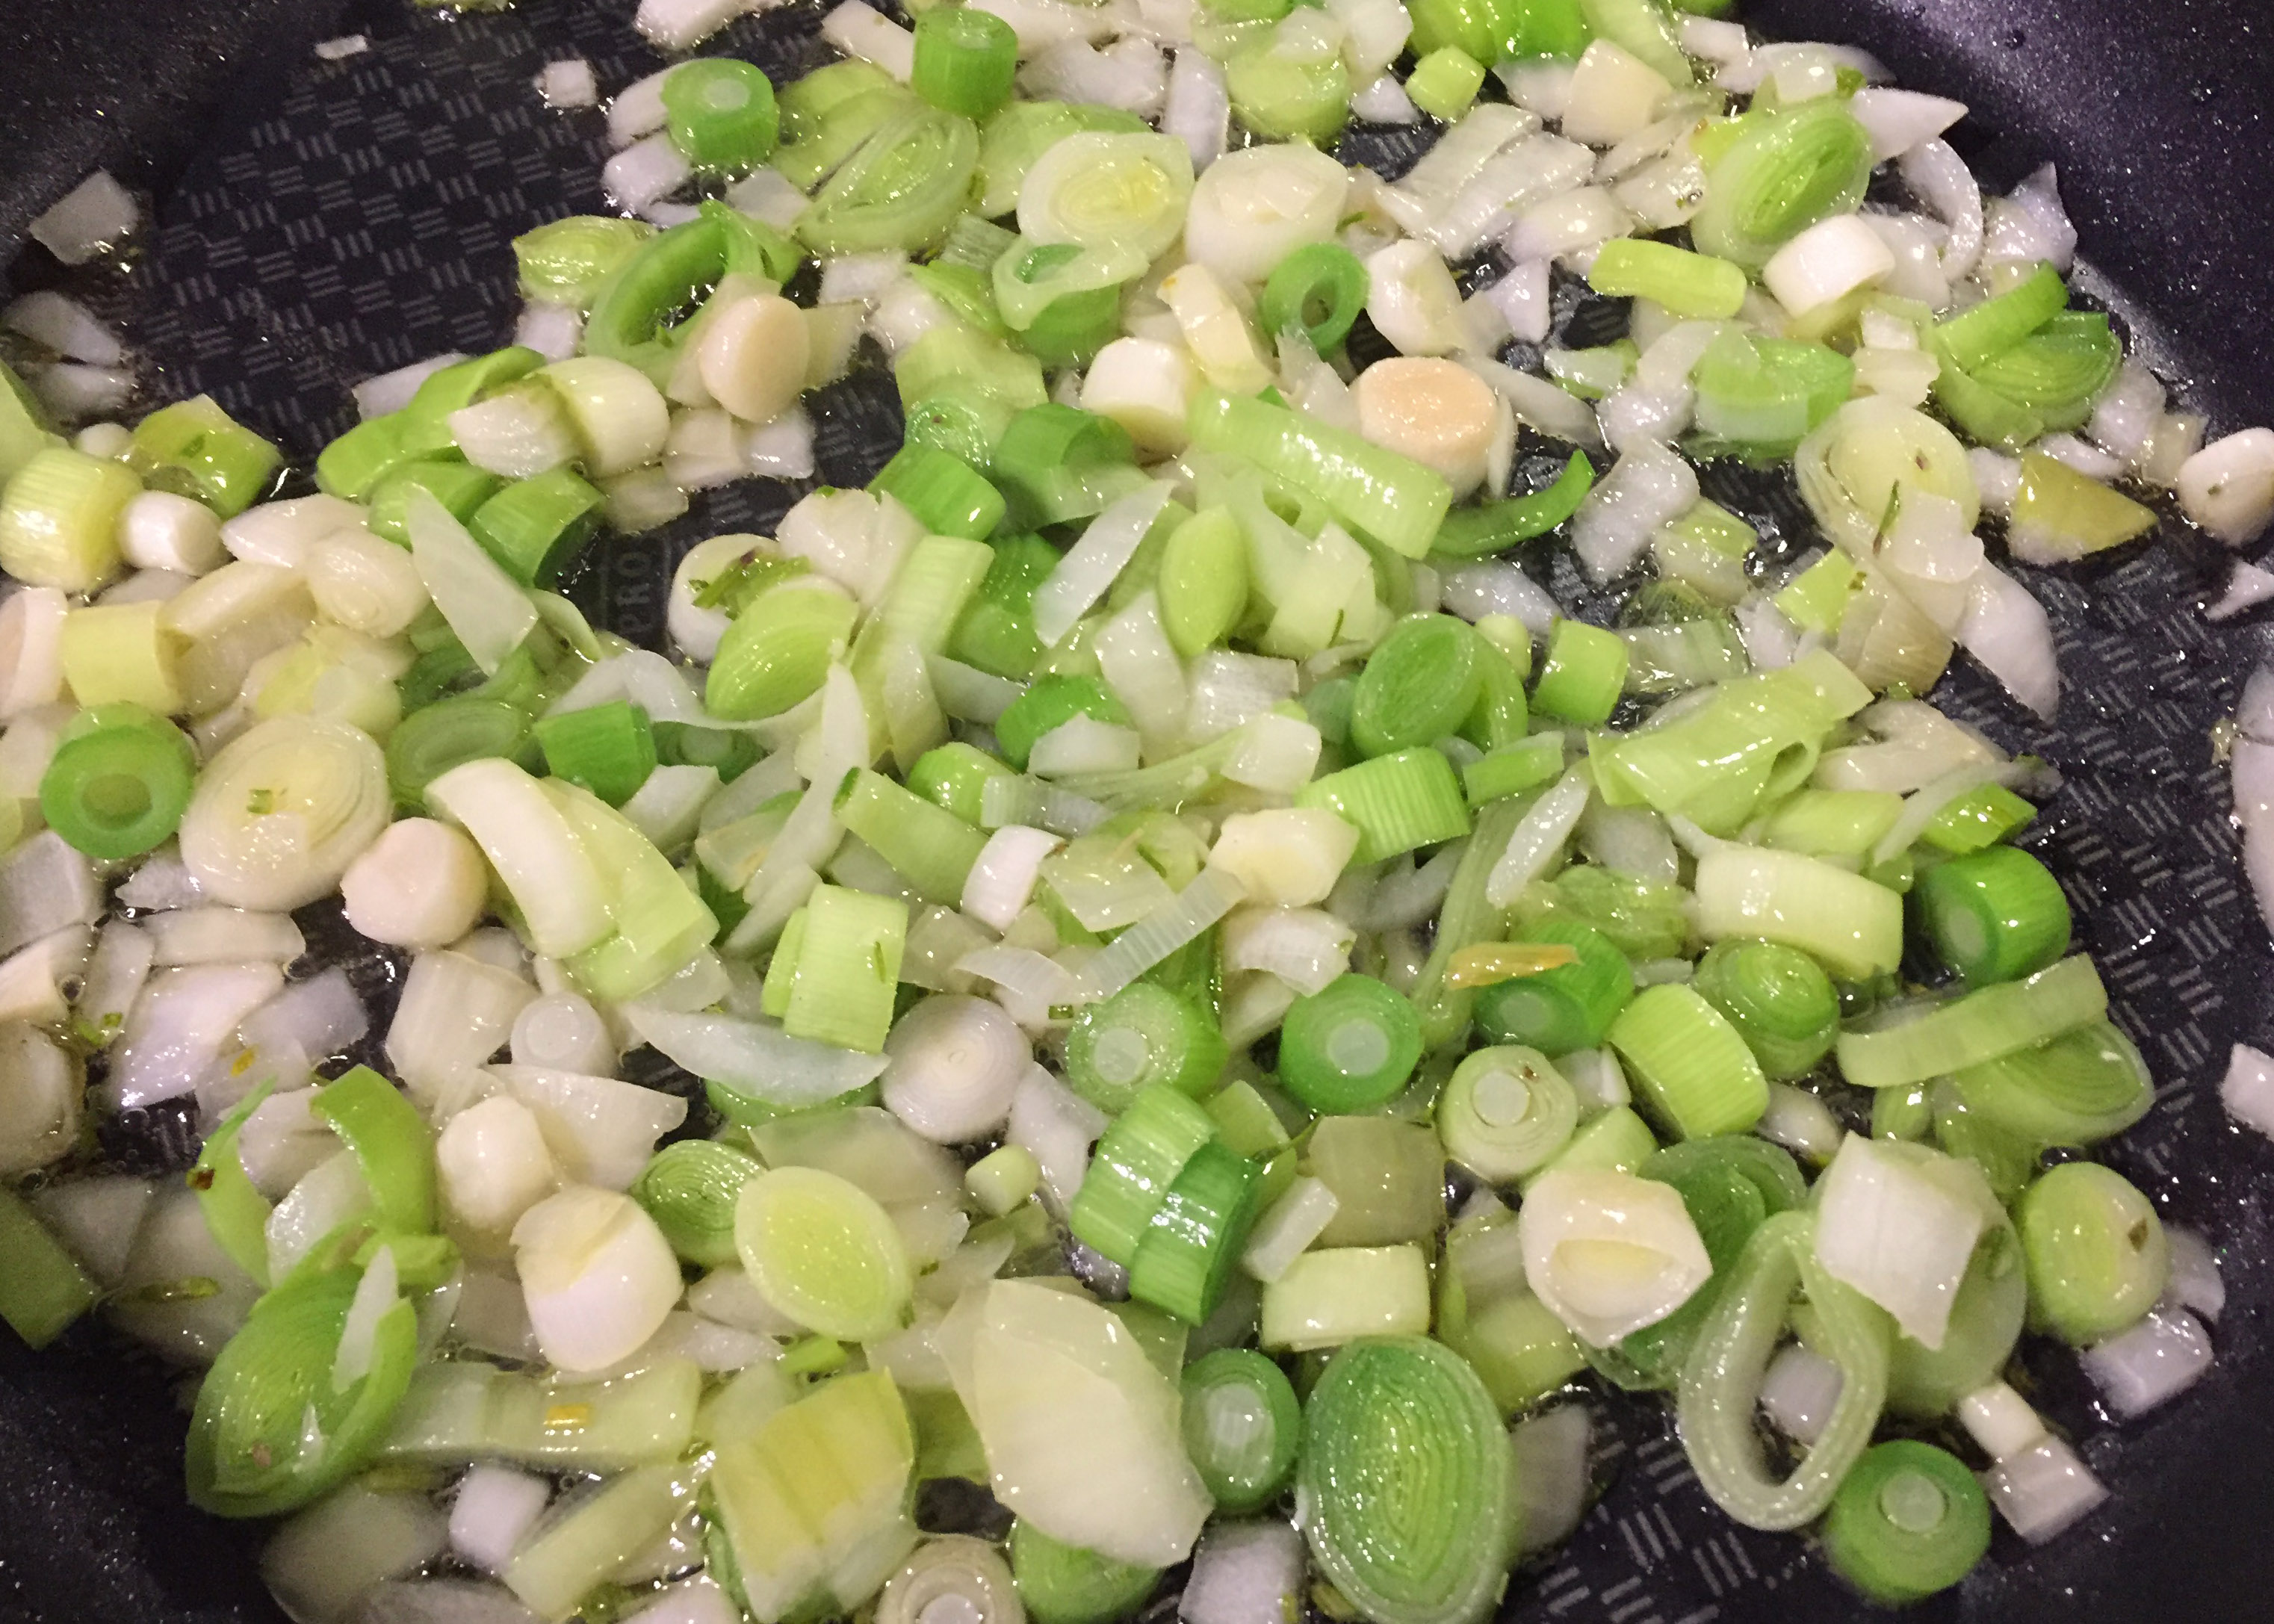
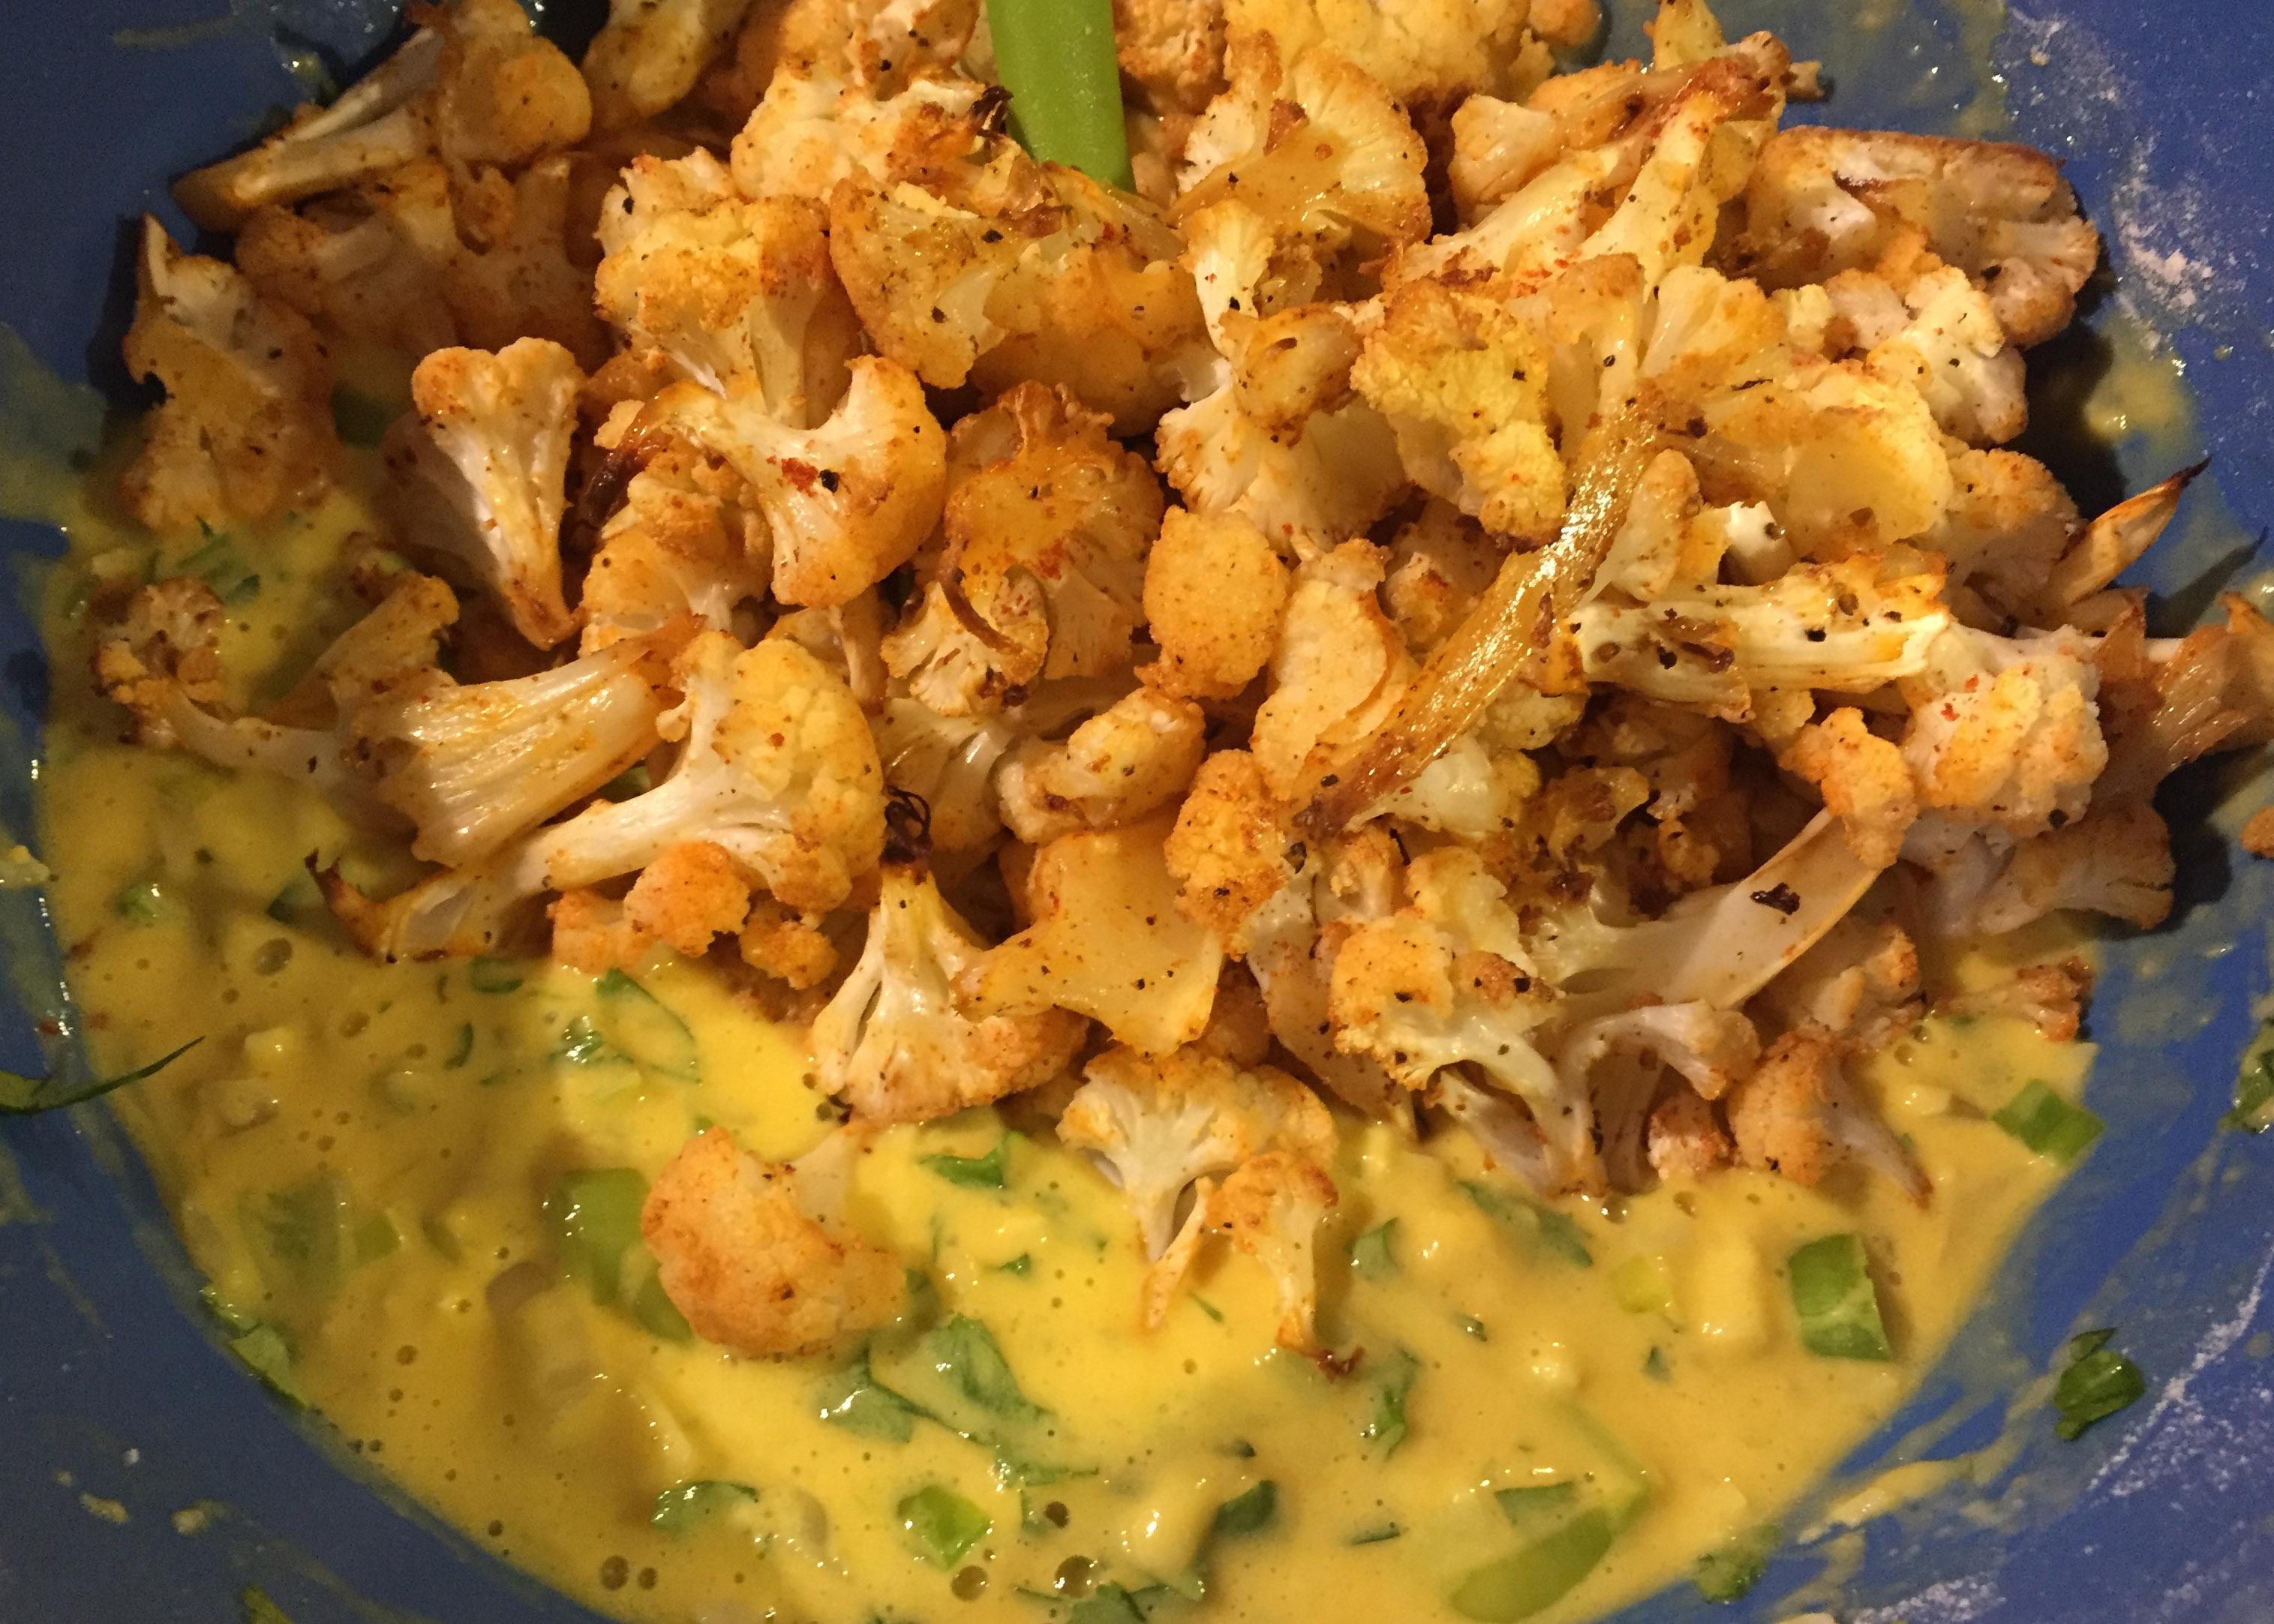
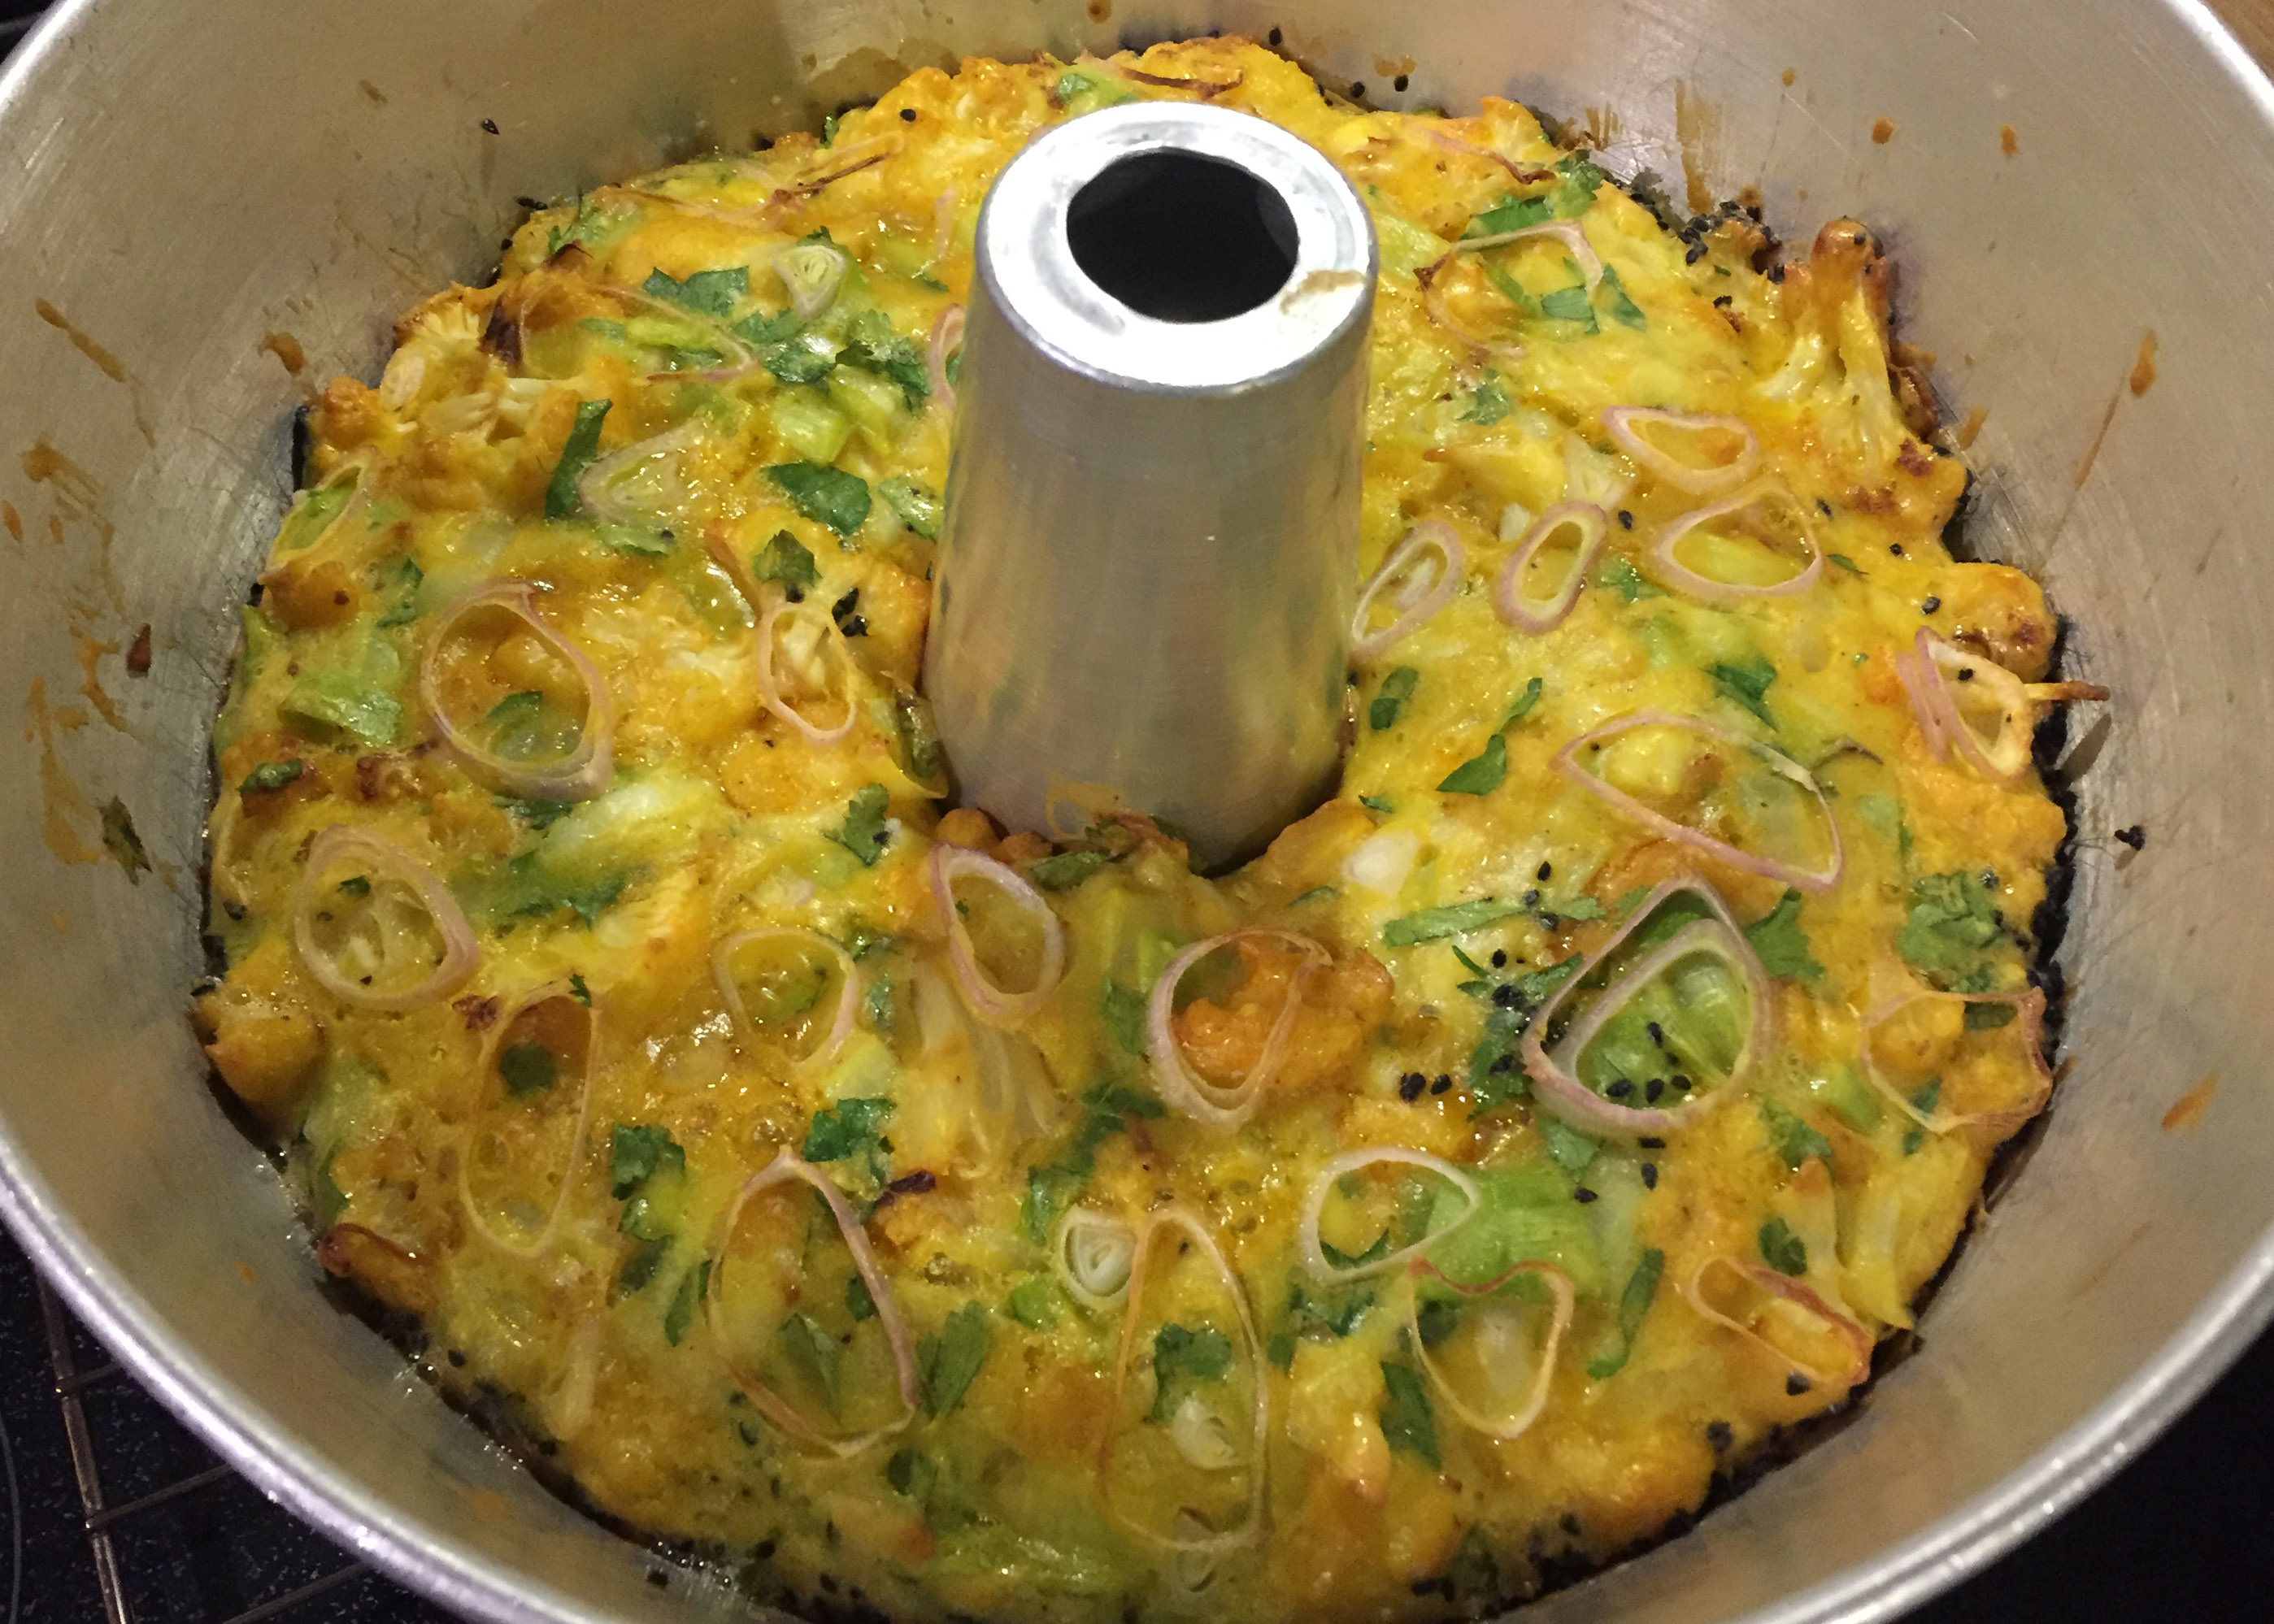
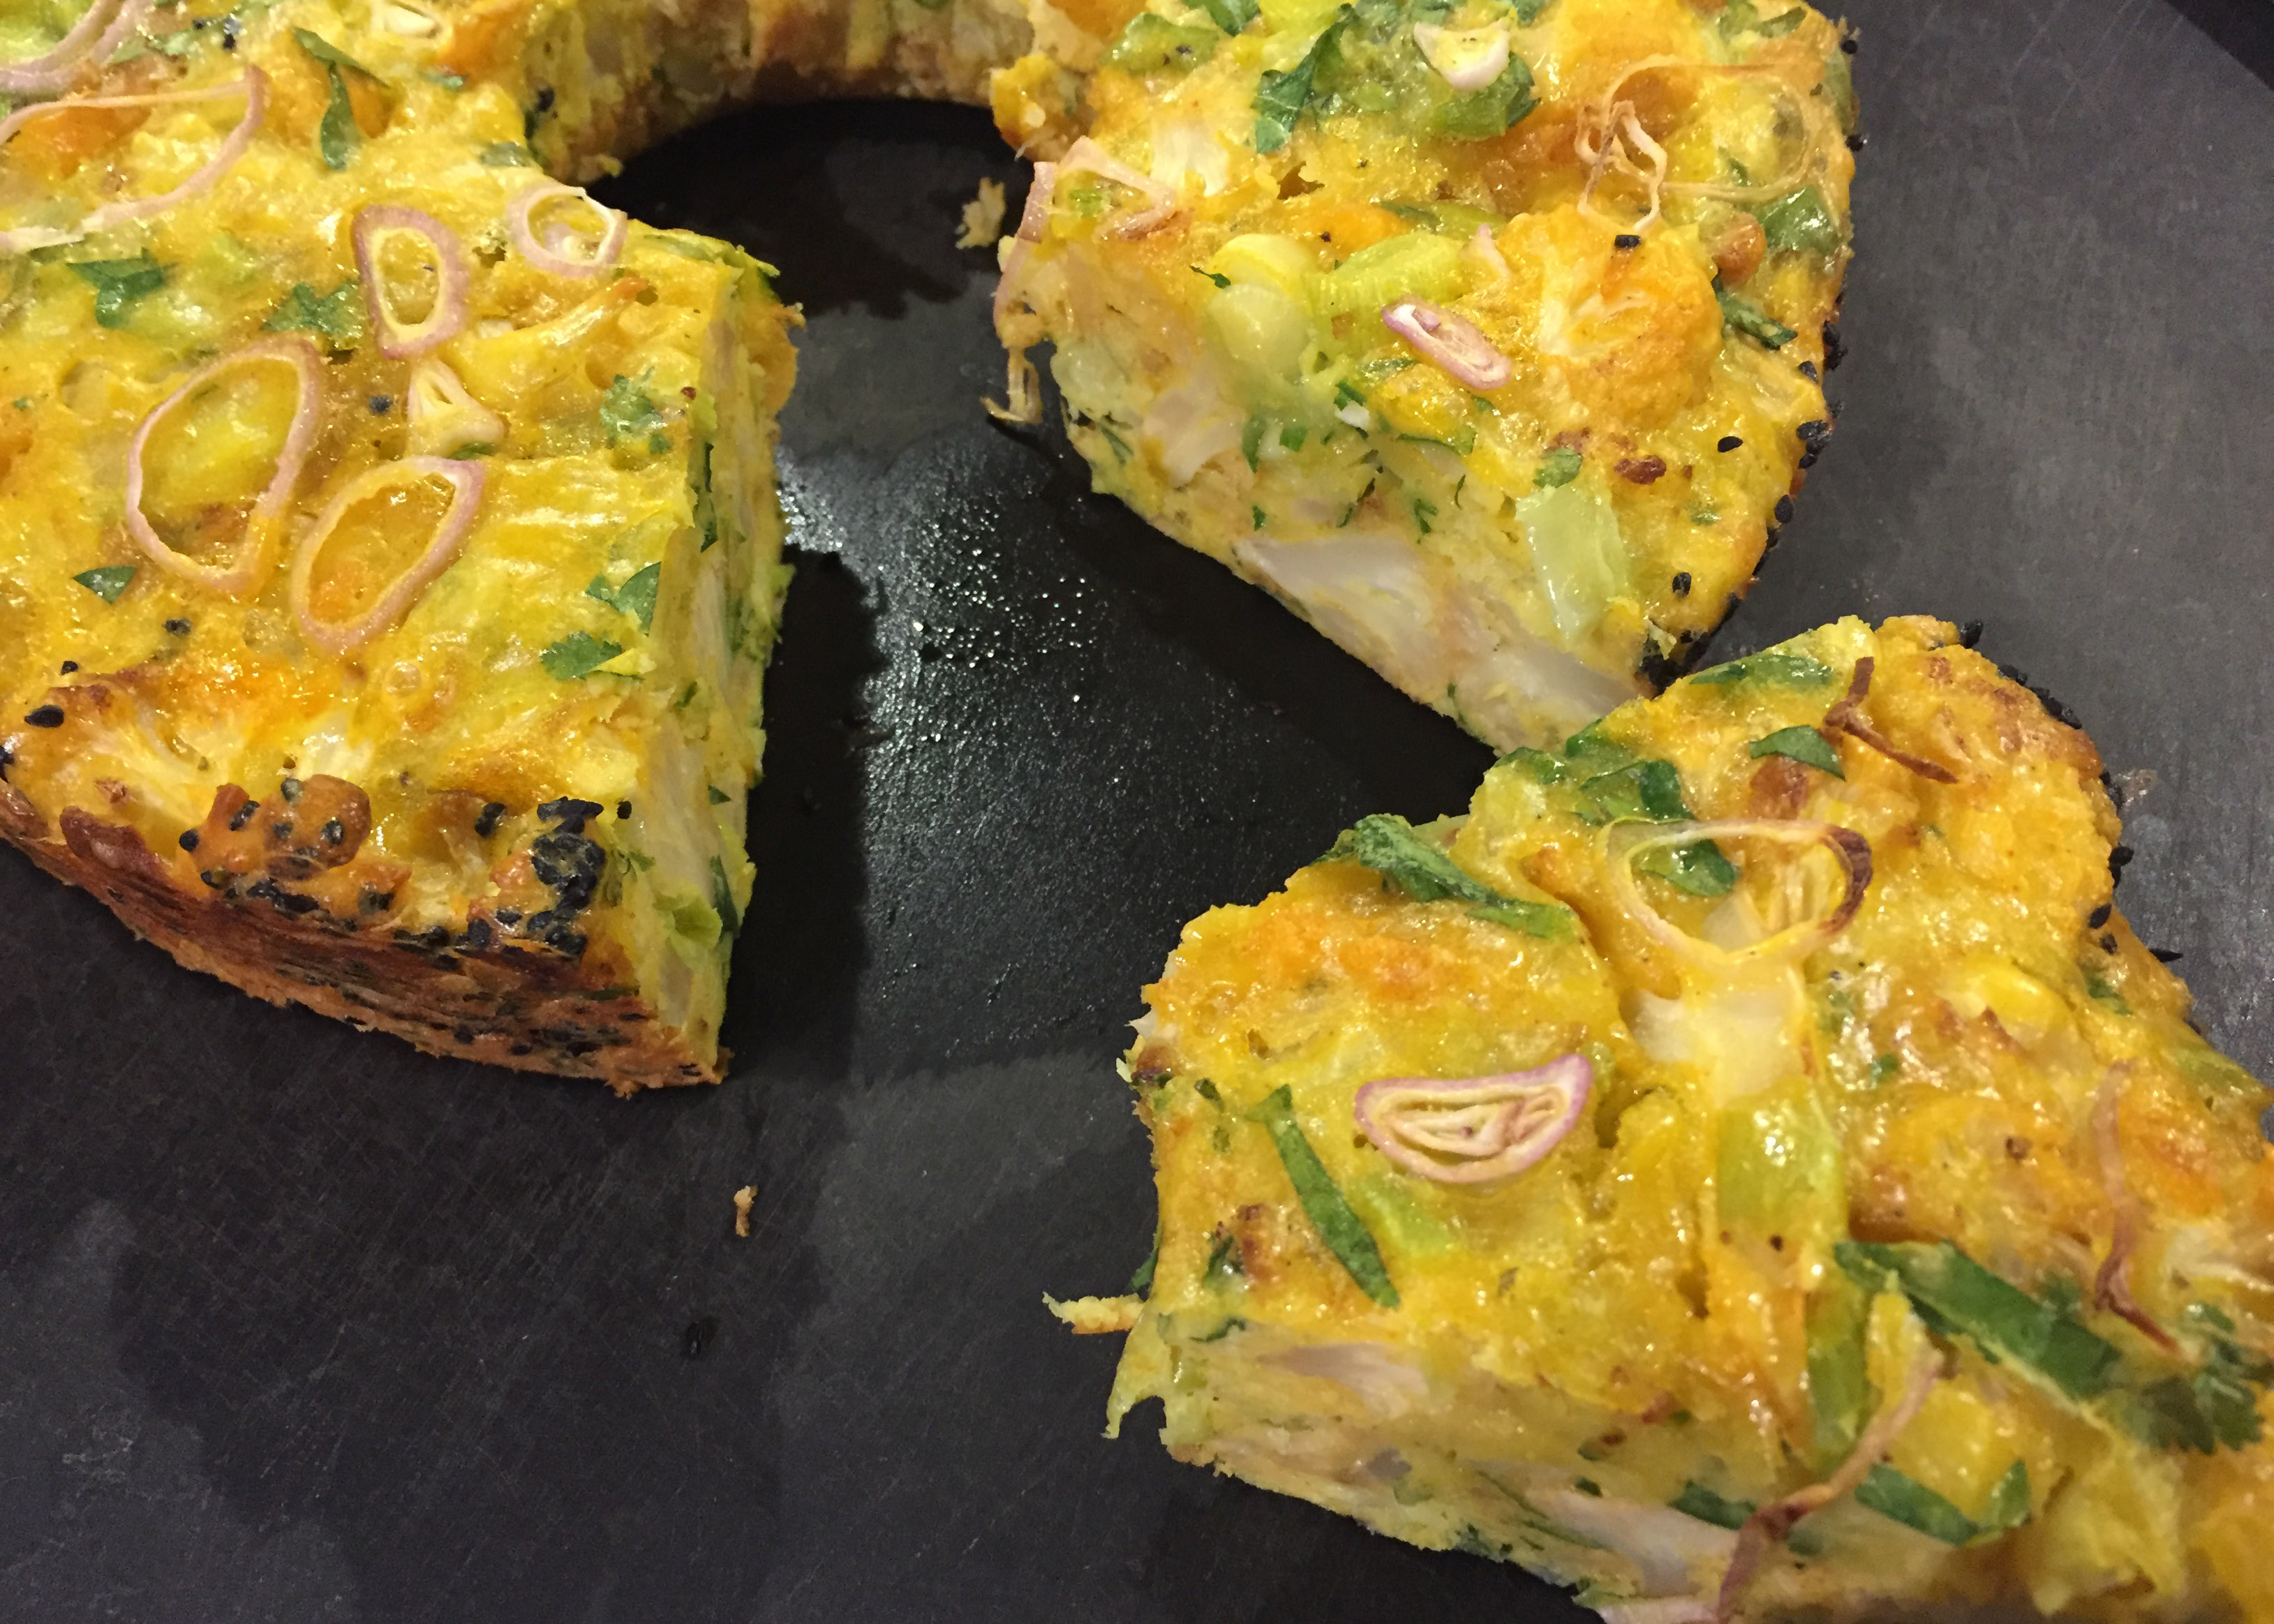
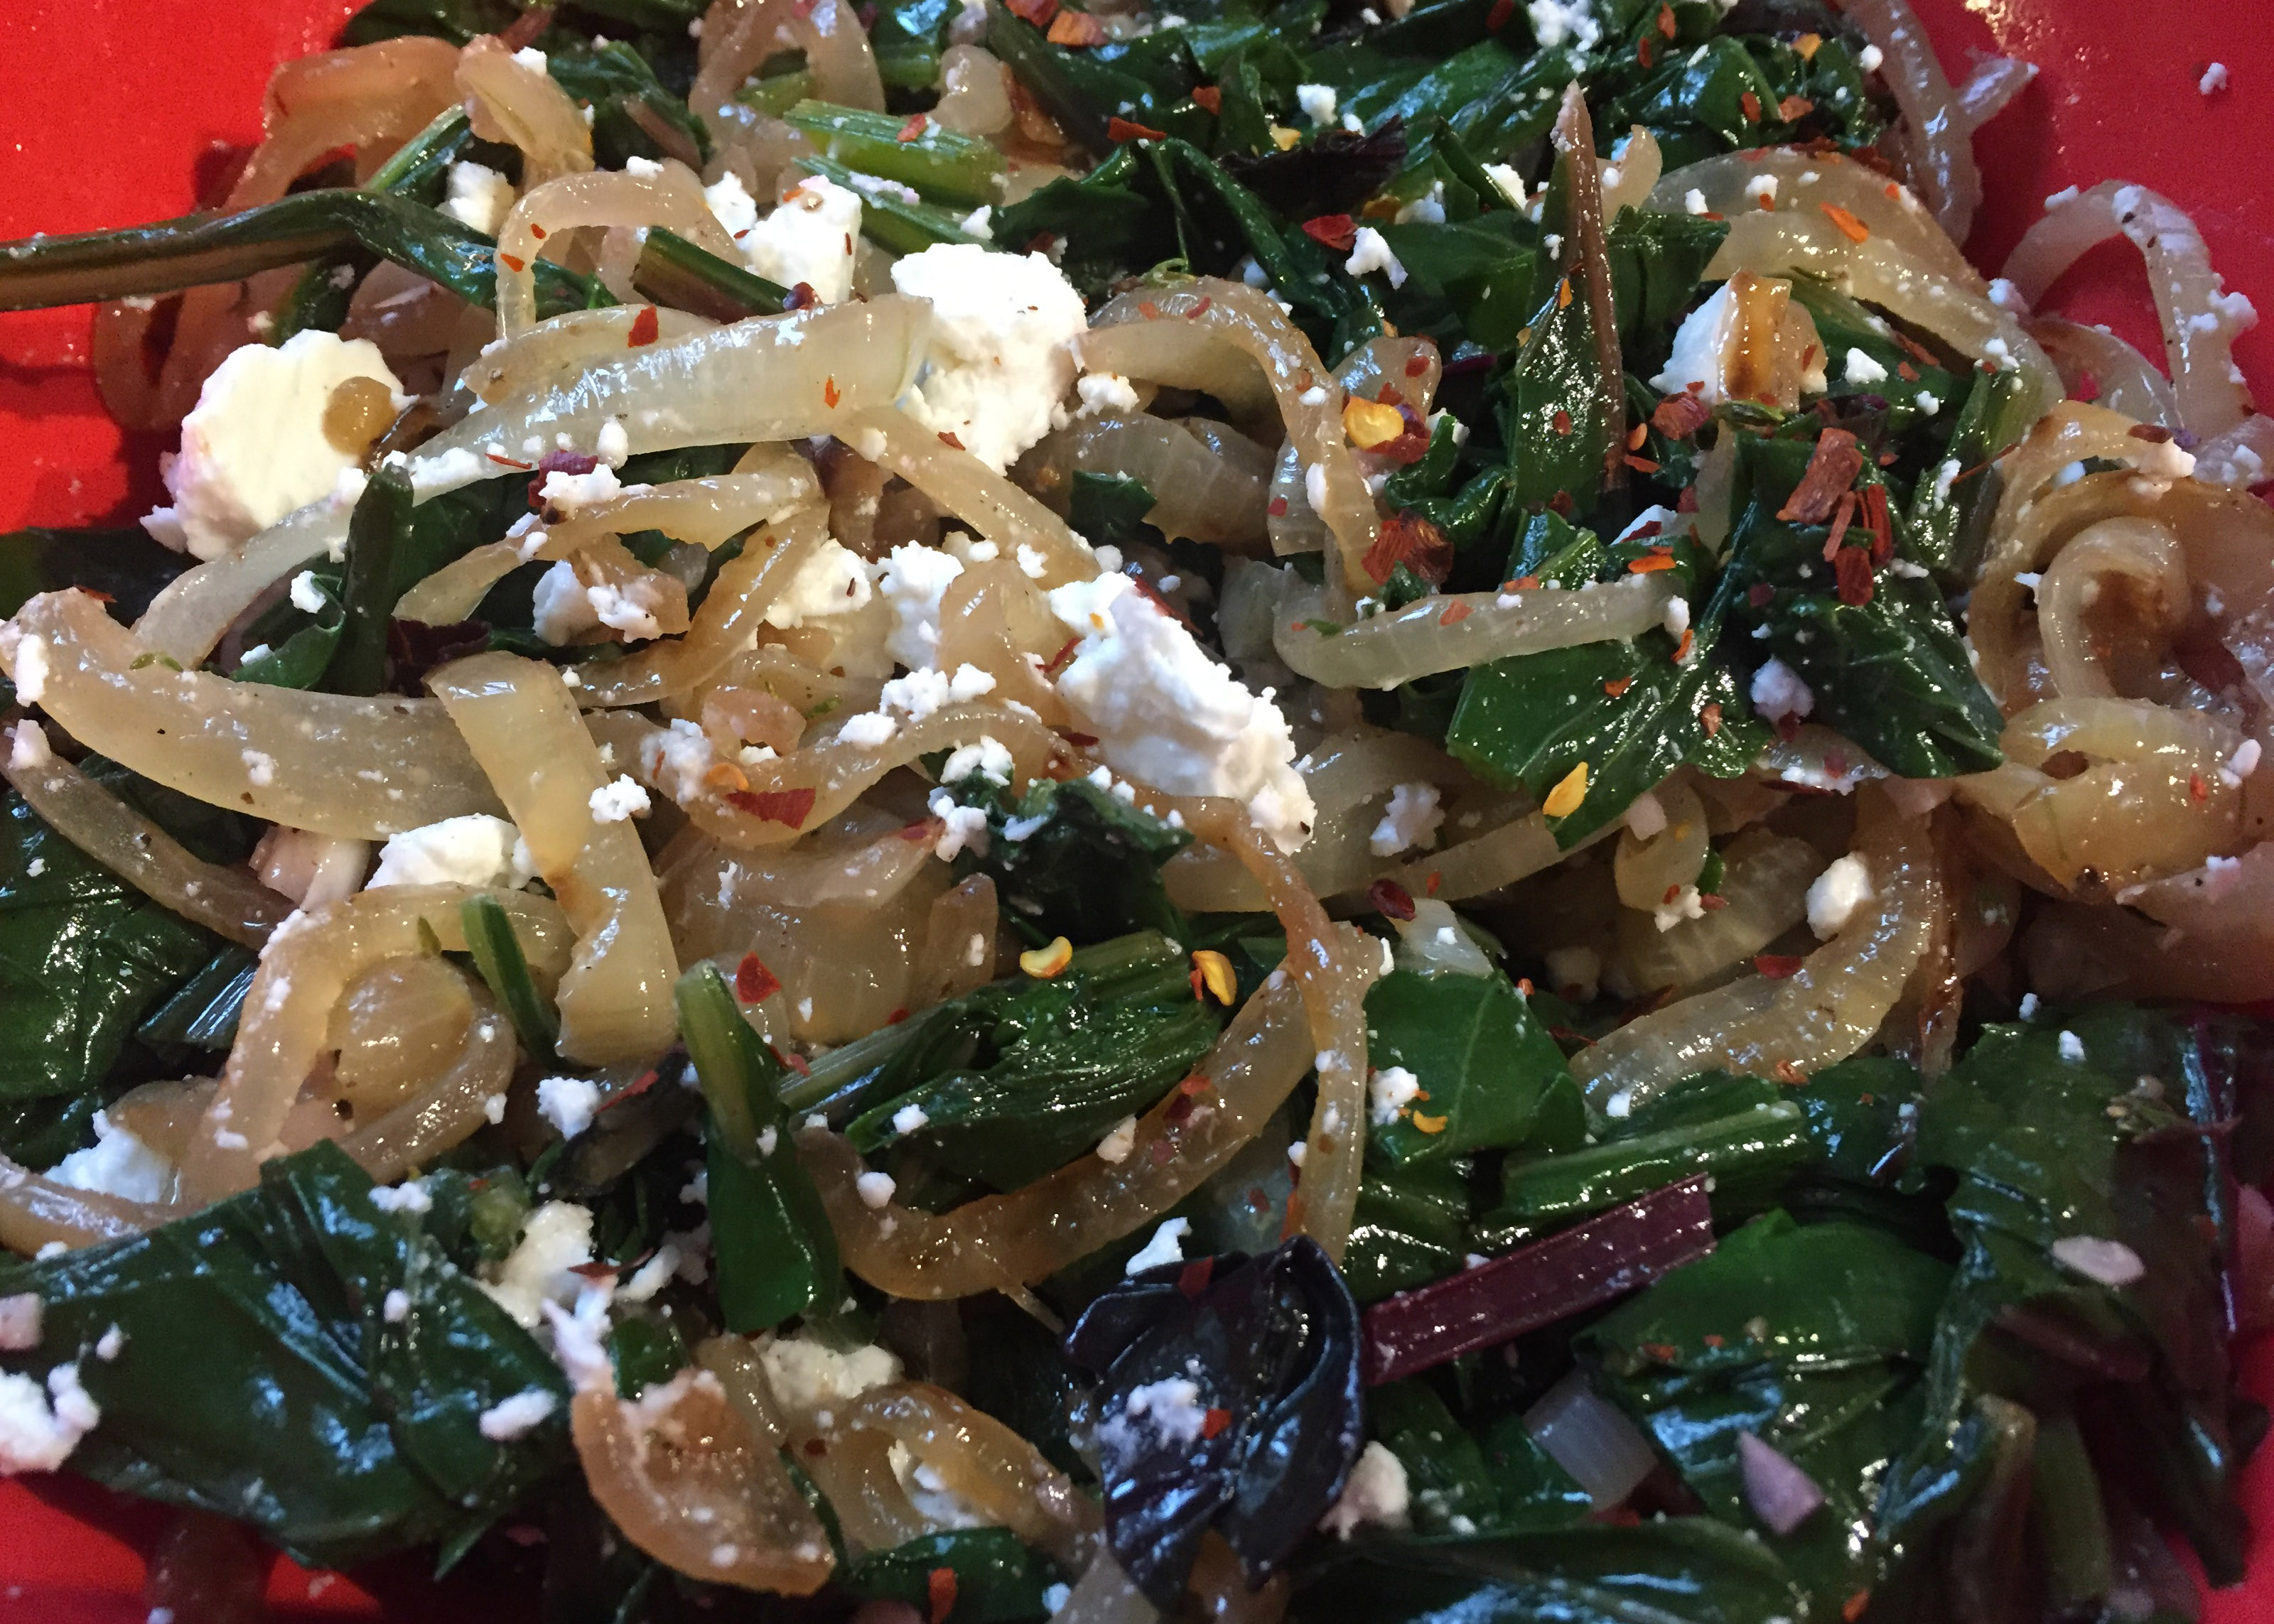
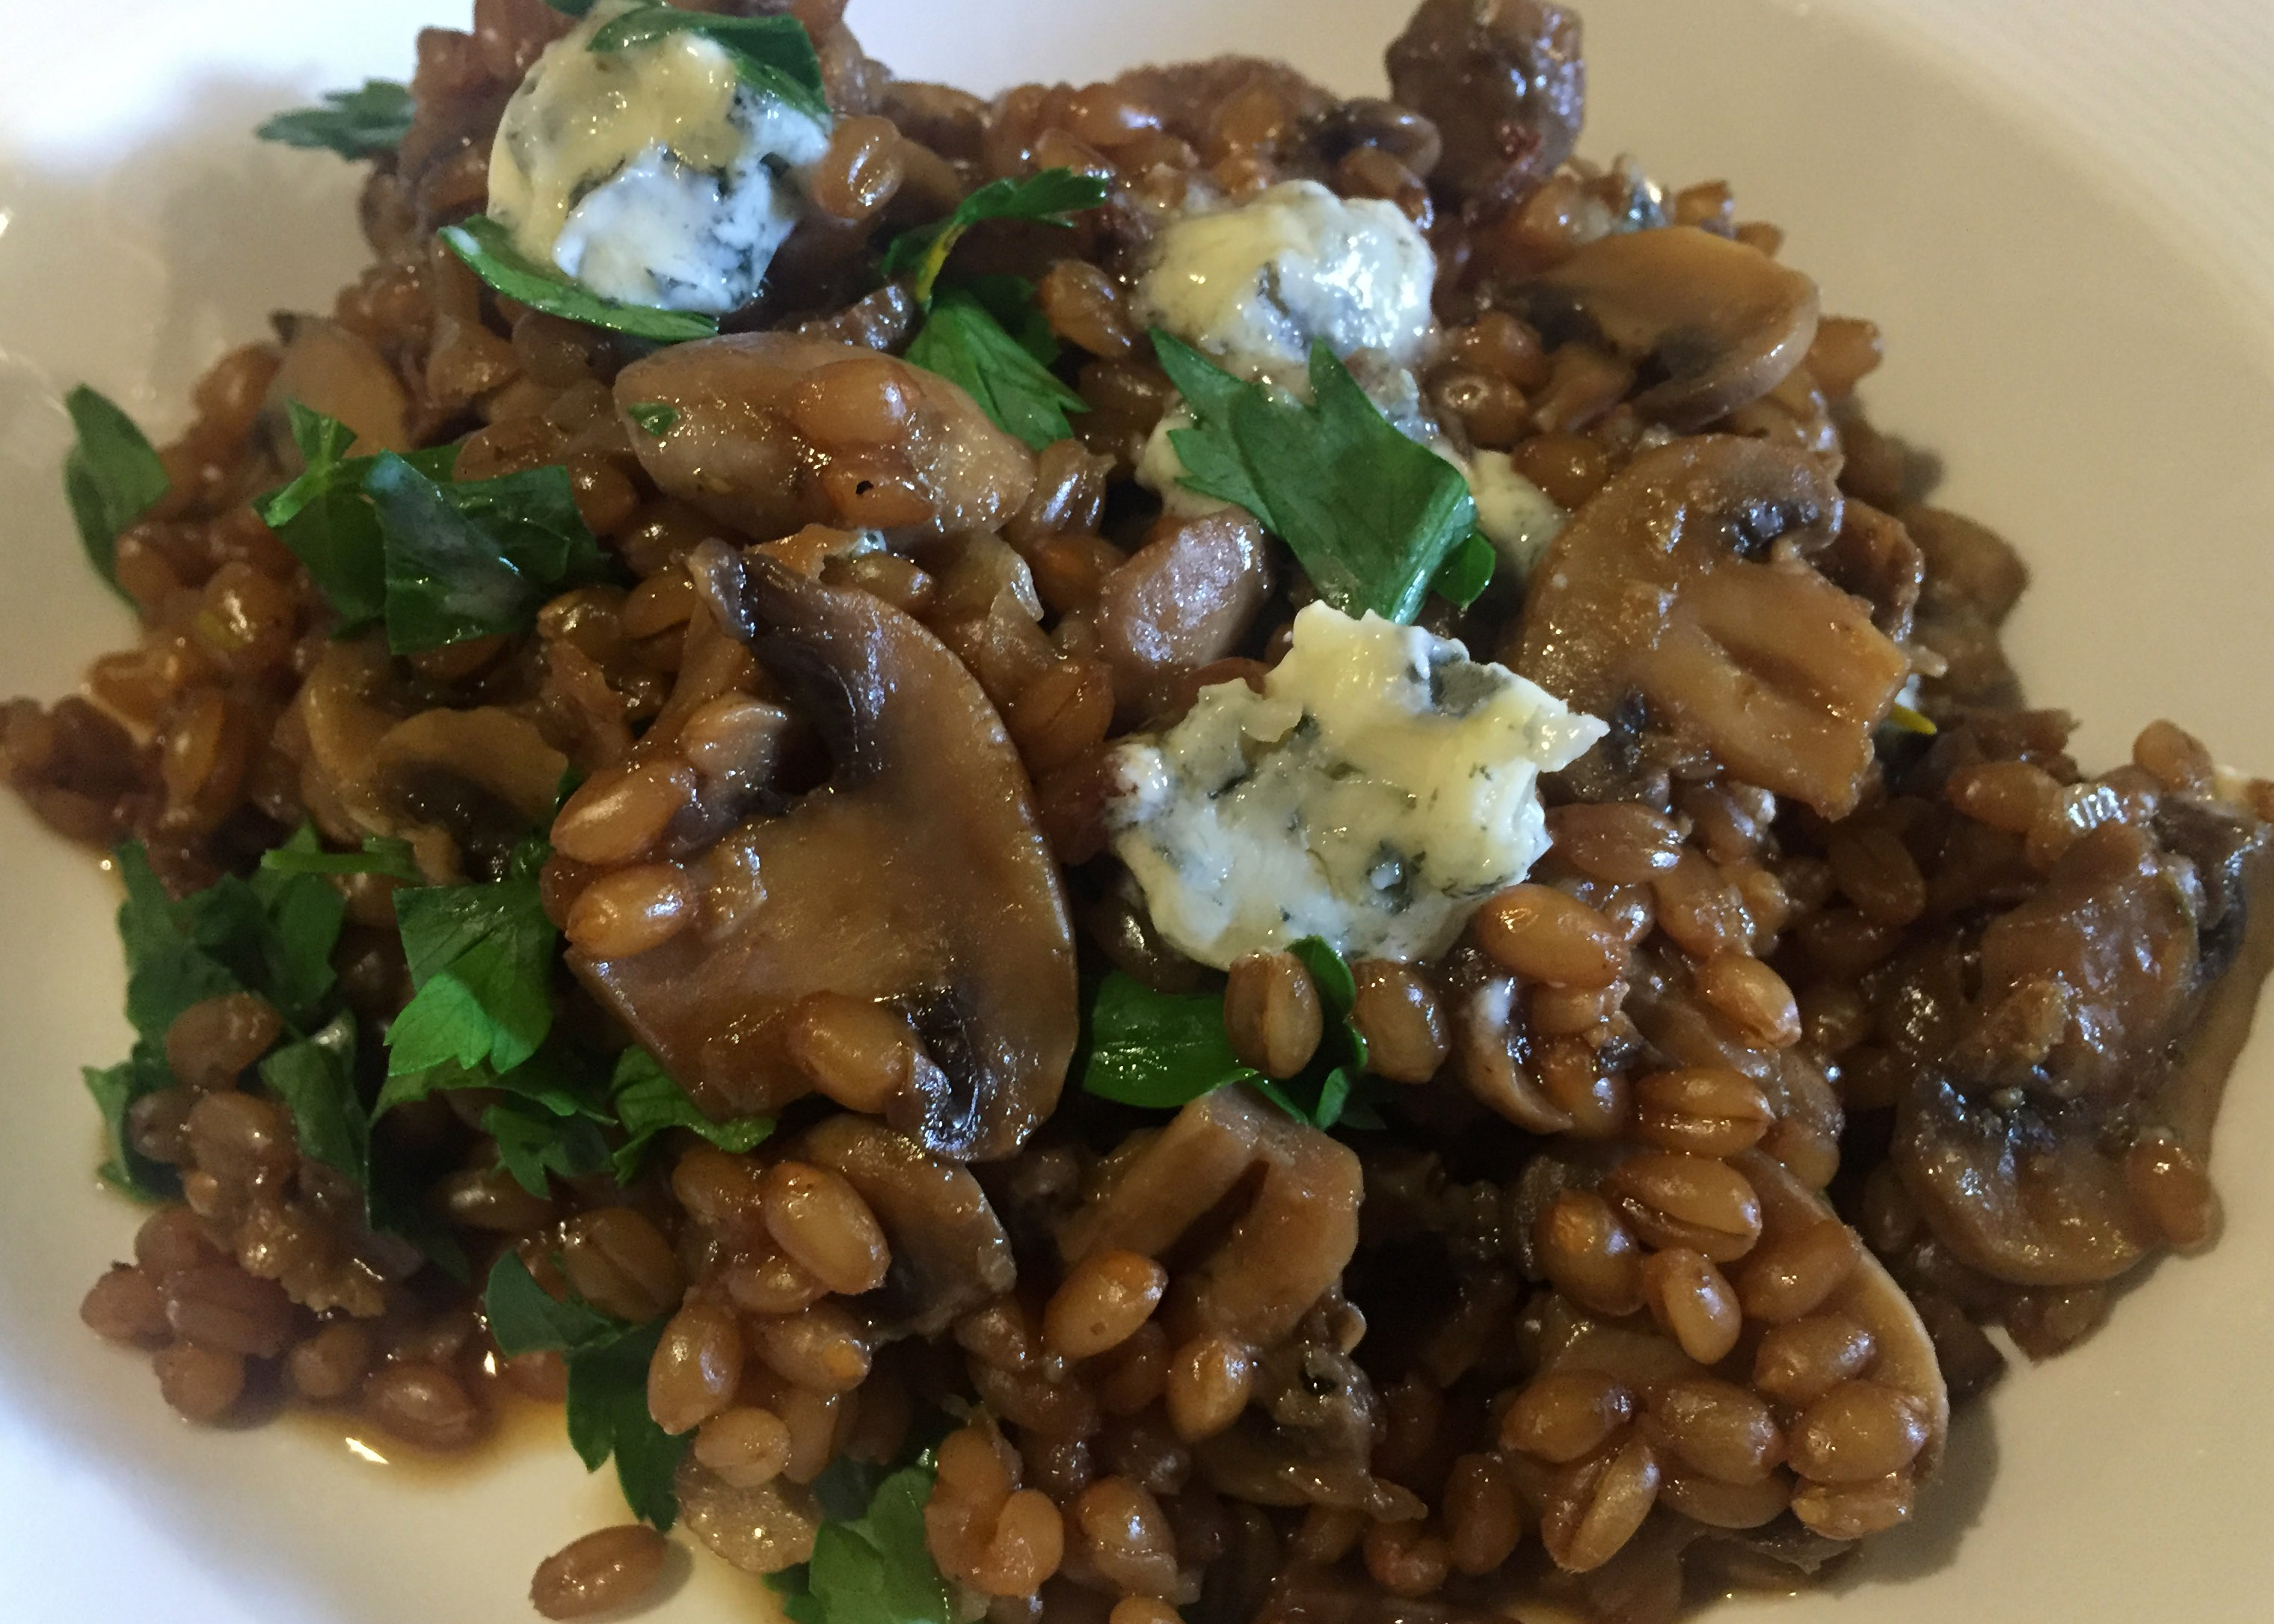
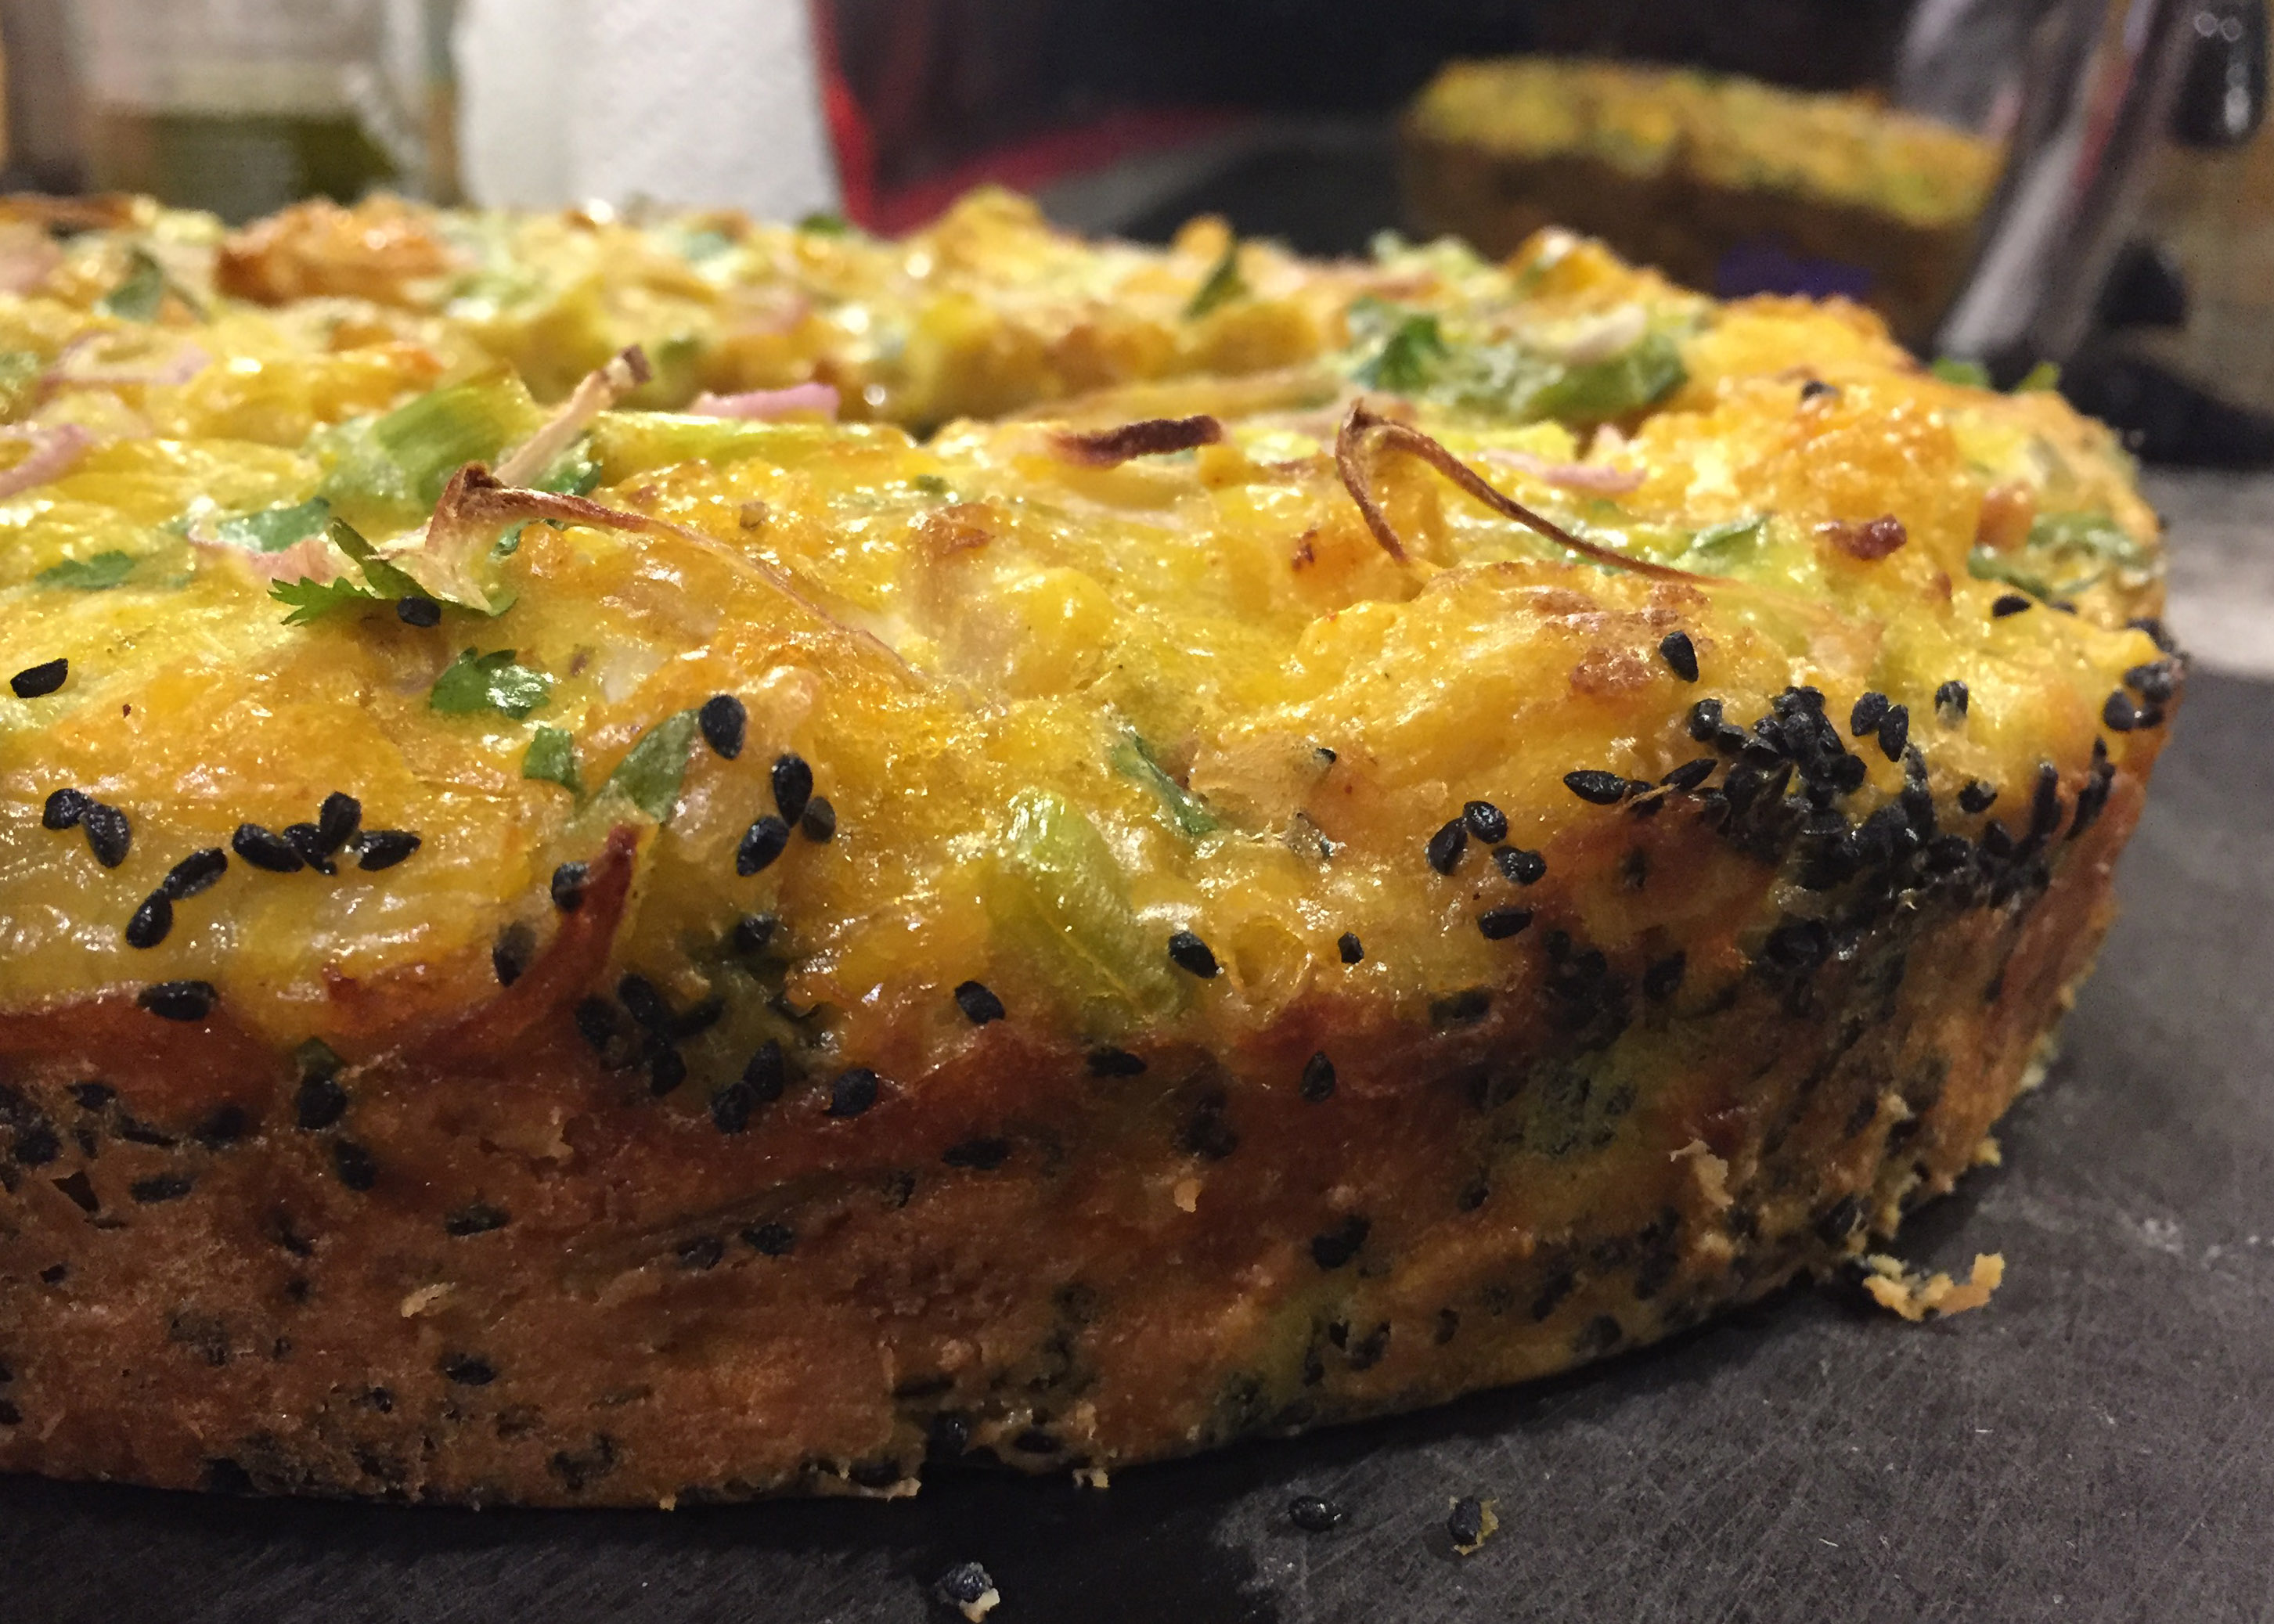
chicken pot pie end

White Bean Soup

bean soup finishI’m baaaaack! I had an amazing time in Paris with my best friend and then in Venice and Rome with Husband. I saw my favourite painting again (I will never tire of sitting in front of it), found the third Statue of Liberty, explored two new (to us) cities, and walked until we thought our feet would fall off. We had some incredible food (that minted pea soup in Paris… I will never be the same), and ate in a 3-star Michelin restaurant. I have tons of new recipe ideas but, today, I am seeking comfort food. Fall somehow arrived while we were away… how did that happen?!?! I need a food hug to help get over the jetlag, my disappointment that summer is over (wahhh), and the fact that I have to go back to work (blechh).

I’m not using a recipe… just winging it with some basics picked up on our 7:00am trip to the grocery store (one thing about jetlag, it does make you efficient) and what I have at home.

This is your chance to use whatever herbs you have growing in your garden as well as that parmesan rind you have sitting in the freezer. If you don’t have a parmesan rind, you can substitute 2 TBS of finely grated parmesan into the soup at the end (but, Lordy, please not the stuff in the green can).

1 pound dry cannellini beans
12 cups water
1 meaty smoked ham hock (mine was so big, 3 pounds, I had the butcher cut it in half, but you can use a 1-2 pounder)
Fresh herbs to taste (I used several small sprigs of thyme, 3-4 sage leaves and a small handful of oregano. Use whatever you have in the garden. Fresh Italian parsley would also be good.)
2 medium carrots, medium dice
2 medium stalks of celery (I like to peel mine to get rid of the strings), medium dice
1 medium union, medium dice
4 cloves garlic, peeled and crushed
1-2 bay leaves
1 parmesan rind or 2 TBS finely grated parmesan cheese (optional)
1 tsp sea salt, plus more as needed
pepper
1/4 tsp hot pepper flakes (optional)
juice from 1/2 lemon to finish

Place the beans in a large bowl and cover with cold water. Allow to soak overnight. Alternatively, you can boil a pot of water, remove from heat, add the beans and allow to soak 1 hour. Drain and set aside.

Put ham hock and 12 cups of water in a large, heavy-bottomed pot on high heat. Bring to a slow boil and reduce heat to simmer gently for 1 hour.

After 1 hour, add the soaked beans, the fresh herbs and bay leaf to the pot. Continue to simmer until the beans are almost tender (they will cook more later), approximately 45 minutes. During this time, skim the surface with a spoon if any scum forms.

bean soup simmer

Add diced carrots, celery, onion, garlic, red pepper flakes, and salt to the pot (add the parmesan rind here as well, if using). If it looks like too much water has evaporated, feel free to add another cup to the pot at this point. Continue to cook, stirring occasionally, until the beans and vegetables are tender and the meat is falling off the bone. Approximately another 30 minutes. Remove from heat.

bean soup simmer2

Remove the ham hock to a cutting board and let sit until cool enough to remove and dice the meat from the bones. Discard the skin and bones. Remove the thyme stems, bay and other leafy greens, and parmesan rind from the soup. If you didn’t use a parmesan rind and want that wonderful, deep umami flavour, add a couple tablespoons of finely ground parmesan cheese at this point.

Using a potato masher, lightly mash some of the beans and vegetables to thicken the soup to the consistency you want. Stir in the diced pork. Squeeze in juice from 1/2 lemon. Taste and re-season with salt and pepper.

bean soup with meat