Category: Main

Count Stroganoff’s Chicken

I love beef stroganoff. I loved it 20 years ago made with a can of mushroom soup, I loved it a couple years ago when I started making a “deconstructed” version with beautiful rare steak set upon a golden mushrooms and cream, and I loved it last night when I decided to try it with tender chicken thighs and a deeply flavoured mushroom sauce amped up with marsala, Dijon mustard, and tomato paste.

In doing my research for this recipe I found out that Stroganoff was a real guy! A Russian noble, Count Stroganoff was born into a wealthy family in the late 1700’s and was a General in the Napoleonic Wars. The original recipe was named after him by a French cook who, trying to combine his traditional cooking with a taste of Stroganoff’s homeland, invented the dish using French mustard to season beef and adding a dollop of Russian sour cream. Voila! (or вуаля! in Russian).

And, I mean, what doesn’t taste better with a bit of sour cream?!?! Can you imagine eating a perogie without it? Or borscht? (Wow, it really is an Eastern European thing, isn’t it?!) I even add it to my favourite savoury pie crust here!

The best tip I can offer, don’t rush frying the chicken or the mushrooms. Make sure the chicken has a golden crust on both sides and the mushrooms have a nice sear. I did my mushrooms in two batches and each batch took 7-8 minutes. Crowding the mushrooms in the pan just steams them and the golden browning on the mushrooms really adds to the flavour of the dish.

Prijatnogo appetita!

1 pound boneless, skinless chicken thighs, each cut into 2-3 large chunks

1 pound mushrooms, cleaned and sliced (I used brown)

1/2 large onion, diced
1 large clove garlic, minced
2 tsp tomato paste
1 1/2 TBS flour

1/4 cup marsala or dry vermouth (or white wine, or extra chicken stock)

1 1/2 cups chicken stock
1 tsp Dijon mustard
1 tsp worcestershire
1/2 tsp mild paprika
1 tsp kosher salt (or 1/2 tsp sea salt) and pepper to taste
couple sprigs of fresh thyme (or 1/2 tsp dried)

1/2 cup sour cream
fresh chopped parsley or other fresh herb for garnish, I used basil because it’s what I had (optional)

Mix chicken stock with mustard, worcestershire sauce, paprika, salt and pepper. Set aside.

Heat large saute pan with a glug of oil or some sort of fat (I used schmaltz) over medium high. Salt and pepper chicken thighs and fry 4-5 minutes per side until they have a nice golden brown crust. Don’t worry if they are not cooked through, they will cook more later. Remove to side plate.

Add another glug of oil if necessary and fry mushrooms until they lose their liquid and turn a lovely golden brown. This will take 7-8 minutes. Remove to the same side plate as the chicken.

Add another glug of oil if necessary and add onions, fry for a couple minutes then add garlic (garlic tends to burn so I give the onions a head start). Fry until just starting to brown. Stir in tomato paste for 1 minute and then sprinkle flour over mixture and stir for another minute.

Deglaze with marsala until the alcohol is almost gone. Then add chicken stock spice mixture and fresh thyme. Tip in the chicken thighs, mushrooms, and any liquid that has collected. Turn heat to low and simmer for 5-10 minutes until chicken is cooked through.

Remove from heat and stir in sour cream. Taste and re-season. We enjoyed this over pasta but it would be delicious over white or wild rice.

Instant Pot Beef Bourguignon

I have an Instant Pot. Yes, I do. For the past couple years I have been using it to cook dried beans, some long-cooking vegetables such as beets, and I make yoghurt on a regular basis. I also tried an “all in one” meal with mashed potatoes, beets, and meatloaf… yes, cooked together ALL IN ONE POT. And do you know what?!… it was pretty good! I have been quite happy with my Instant Pot but people online can’t seem to stop talking about how amazing it is to cook almost ANYTHING (seriously… cheesecake?) so I need to branch out.

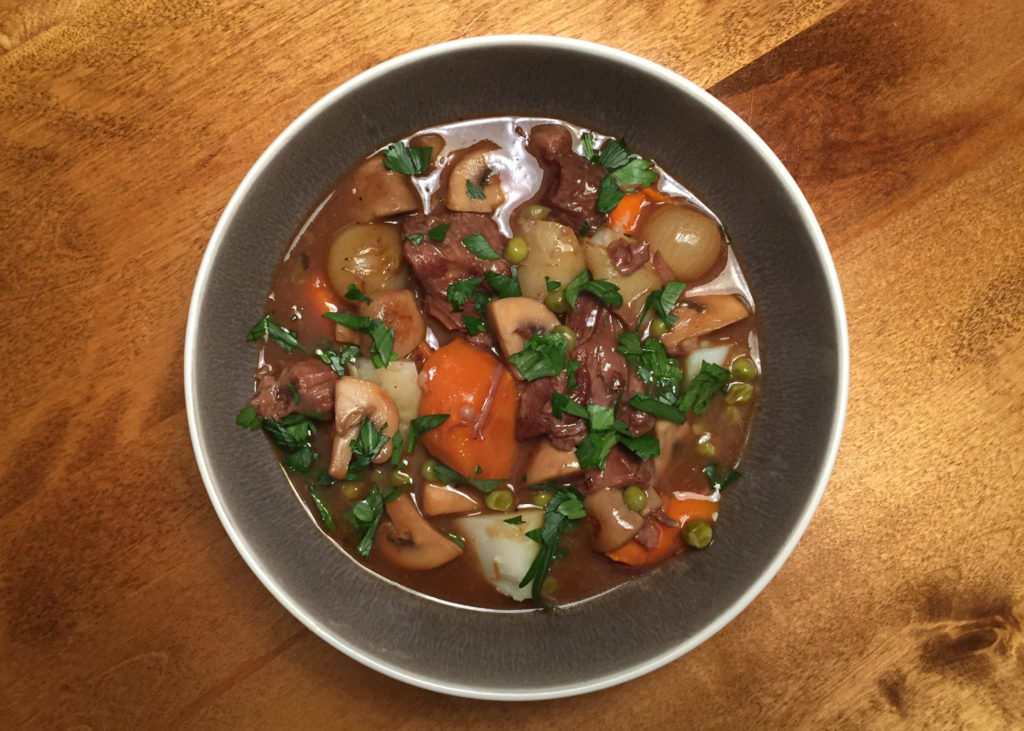
Some time ago I spotted this recipe for pressure cooker beef stew and it got me thinking about beef bourguignon with the wine and pearl onions and mushrooms. Mmmmmmmm, rich comforting flavourful beef stew in about half the time? Count me in, man! (Did I just say “man”?!?!).

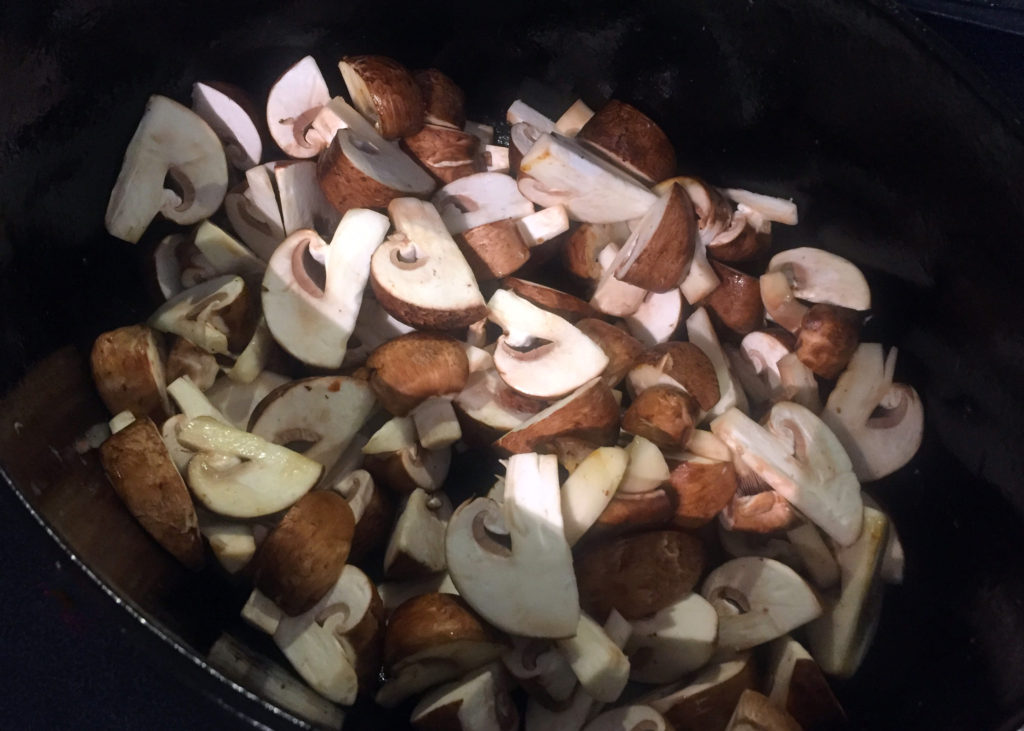
The inspirational stew made (almost) according to the recipe was very good but I have continued to fiddle with it because I wanted something much closer to traditional beef bourguignon and I still don’t COMPLETELY trust the “dump and go” method in most Instant Pot and slow cooker recipes. I think flavours need to be layered. My favourite part of beef bourguignon are the little onions braised in dark stock and the mushrooms fried in butter so instead of simply cooking them in the stew I used Julia Child’s recipes for Oignons Glaces a Brun (brown braised onions) and Champignons Sautes au Beurre (sauted mushrooms in butter) and add them in at the end to re-heat. Granted it does take extra work, but not extra time because you do it while the beef is cooking.

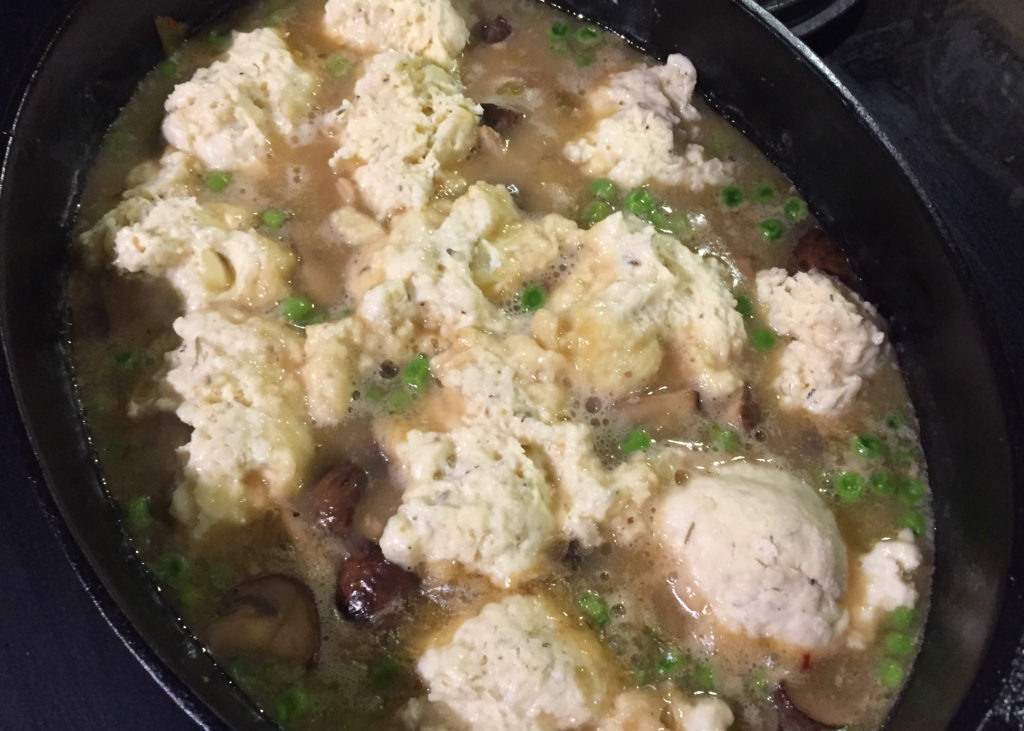
The inspirational recipe calls for 4 packets of gelatin which gives body to the stew but I cut this down to one packet because my stock is homemade and already has the velvety mouth-feel. You can increase this if your stock is store-bought. I also nixed the extra carrots, potatoes and celery because those are not traditional in beef bourguignon but I did keep the soy sauce, anchovy paste and fish sauce… also not traditional but I think they really add to the umami quality of the stew. I also threw in some frozen green peas just because I like them. :)

Despite failing to jump on the whole “all in one” bandwagon, I think my recipe is now pretty close to traditional beef bourguignon while streamlining the process to use only one additional saute pan (with no washing in between) for all the searing, braising of onions, and frying of mushrooms. I have divided the ingredient list below into the separate cooking steps to help you organize better as you cook. It’s still probably not a weeknight meal but it will definitely cut your weekend beef bourguignon down to at least half the time letting you arrive home mid-afternoon (after a day of skiing? mountain climbing? parasailing? reading a good book that you can’t put down?) and still deliver a meal to the table that looks and tastes like you cooked all day… win, win!

2 cups homemade or store-bought chicken stock
1 packet powdered unflavored gelatin (7 g) (you can use up to 4 packets if your stock is store-bought)
2 TBS tomato paste
1 TBS soy sauce
2 tsp anchovy paste, or 2 mashed anchovies, or 1 TBS Asian fish sauce (I used both anchovy paste and fish sauce)
1 TBS Worcestershire sauce

2 TBS vegetable oil
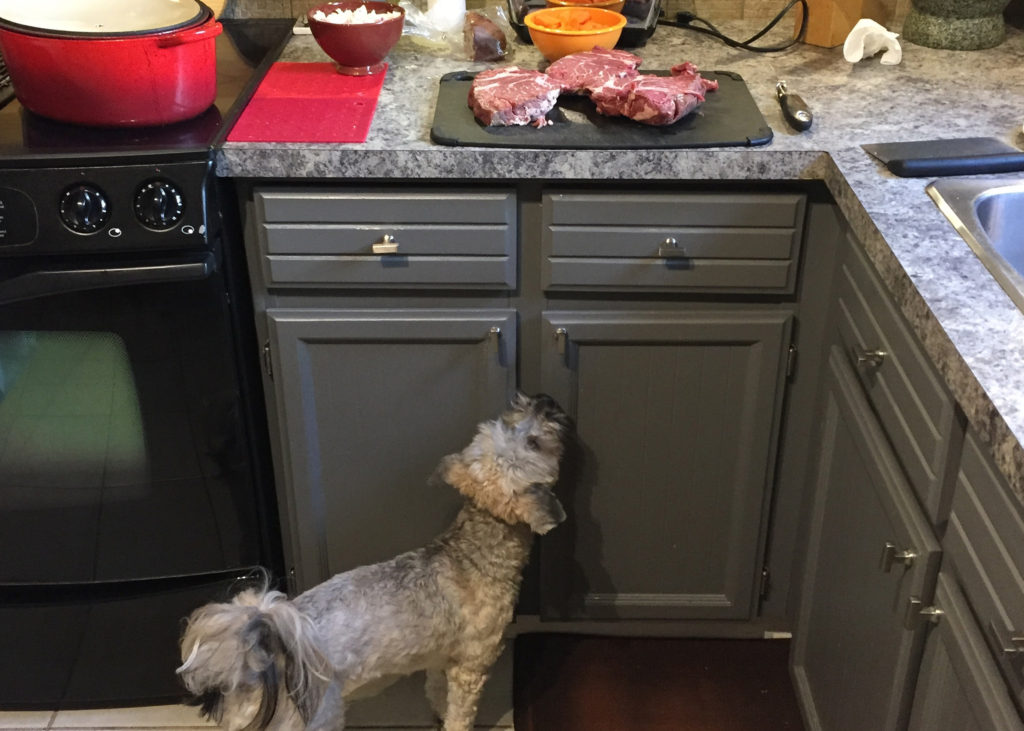
3 pounds whole boneless beef chuck roast, cut into 3 steaks
salt and freshly ground black pepper
2 TBS flour

1 large or 2 medium carrots, cut into 1″ pieces
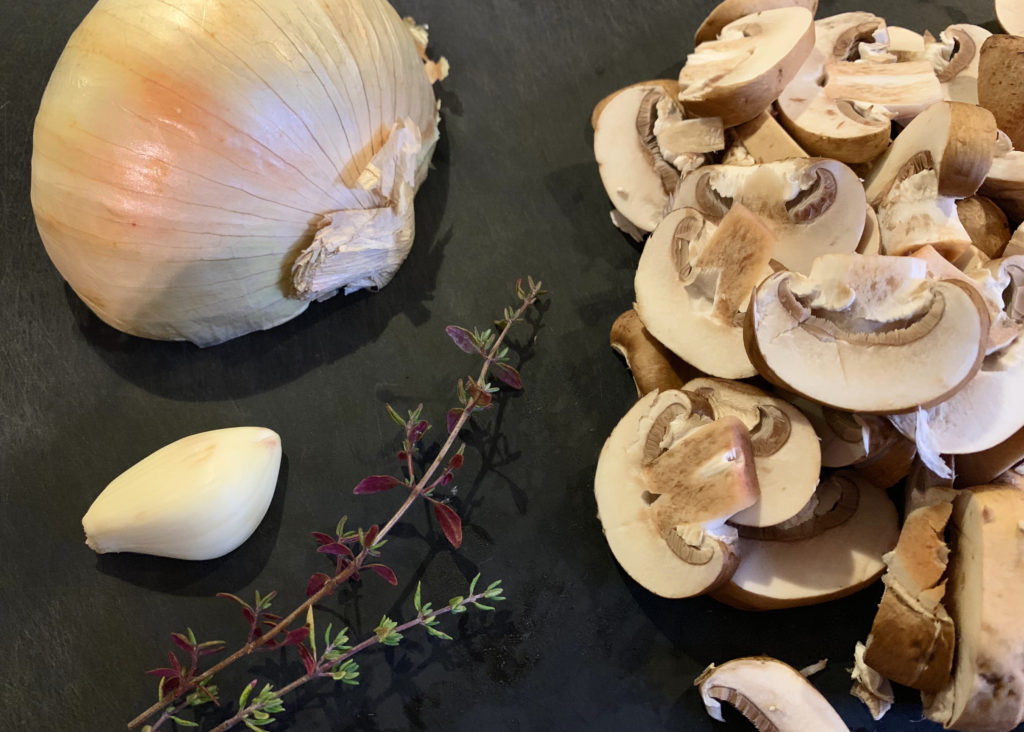
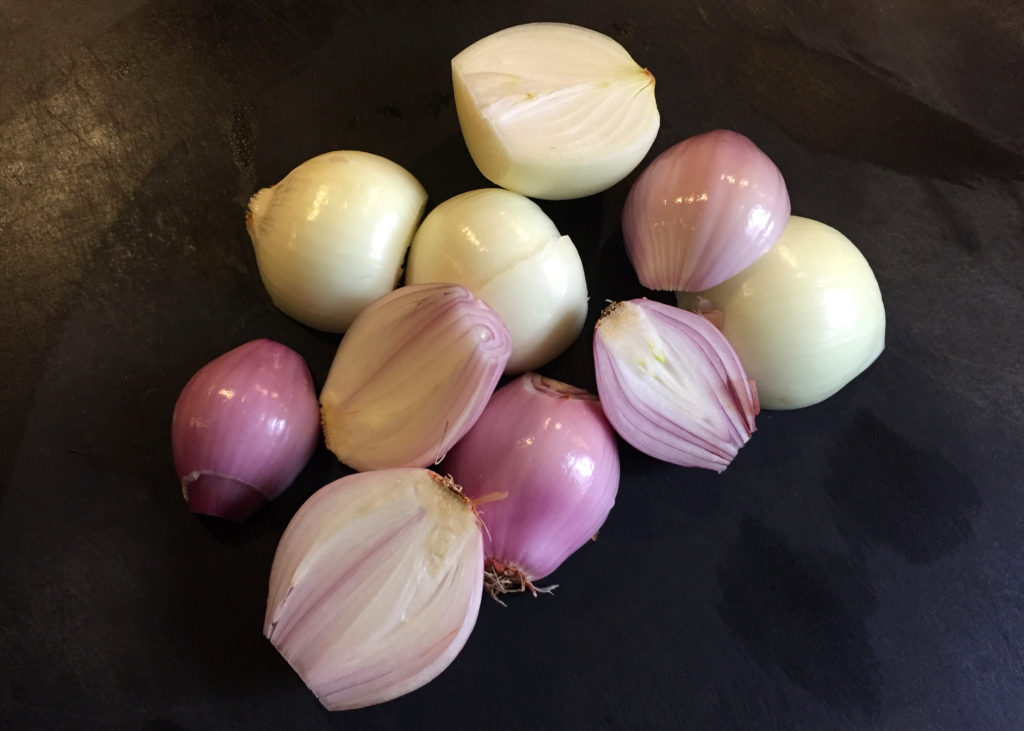
1/2 large or 1 medium yellow onion, cut in half pole to pole
3 medium cloves garlic, unpeeled

1 cup red wine or sherry (or a mix of both)
2 bay leaves
4 sprigs thyme

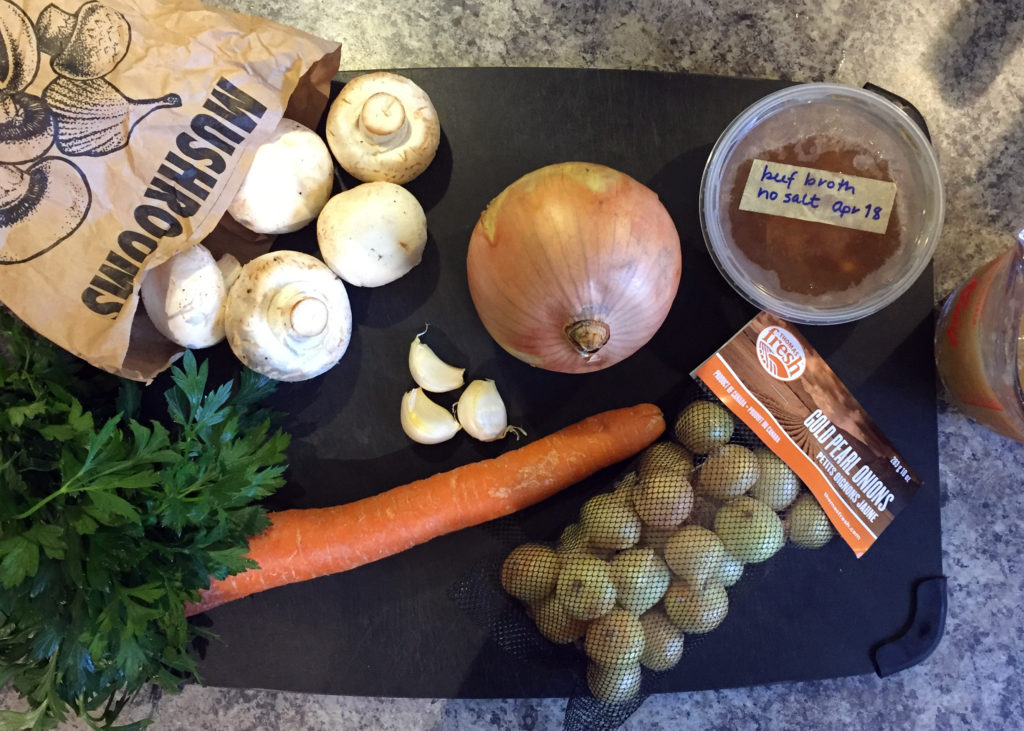
1 cup (about 6 ounces) frozen or fresh pearl onions (thawed if frozen, peeled if fresh)
1 TBS butter
1 TBS vegetable oil
1 cup beef stock (ok to be made from good bouillon)

10 ounces white button mushrooms, quartered (or in sixths if large)
2 TBS butter

1 cup (about 4 ounces) frozen peas (optional, but I like them)

Fresh chopped parsley to garnish (optional)

Put stock, gelatin, tomato paste, soy sauce, anchovies and worcestershire sauce in a bowl or large measuring cup and whisk to combine. Set aside.

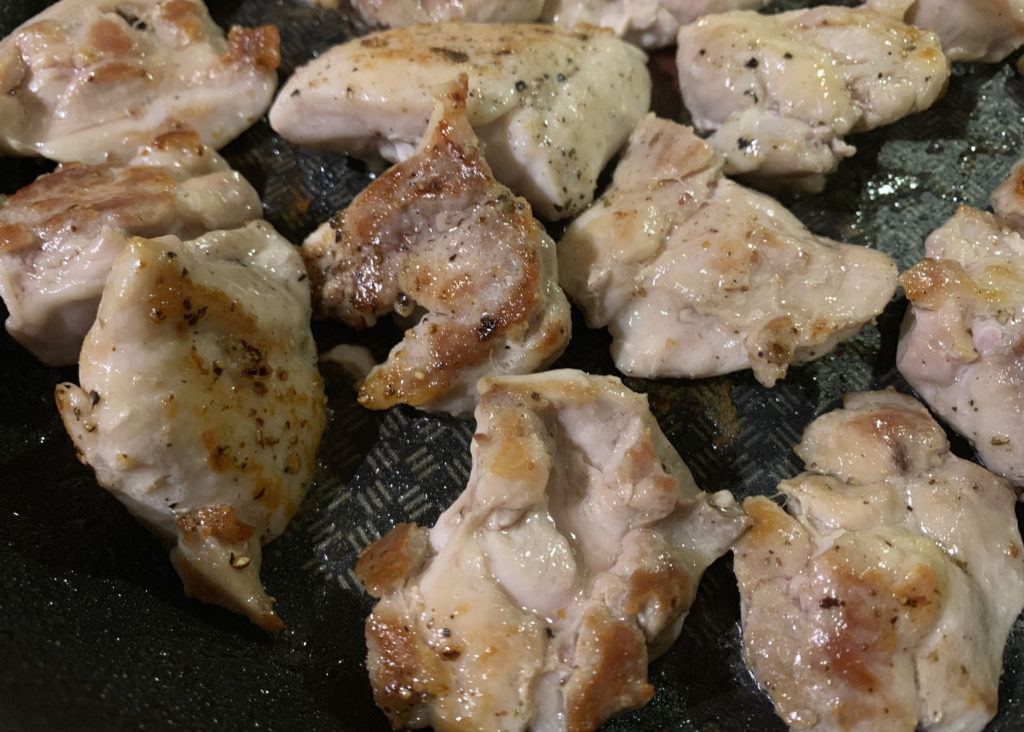
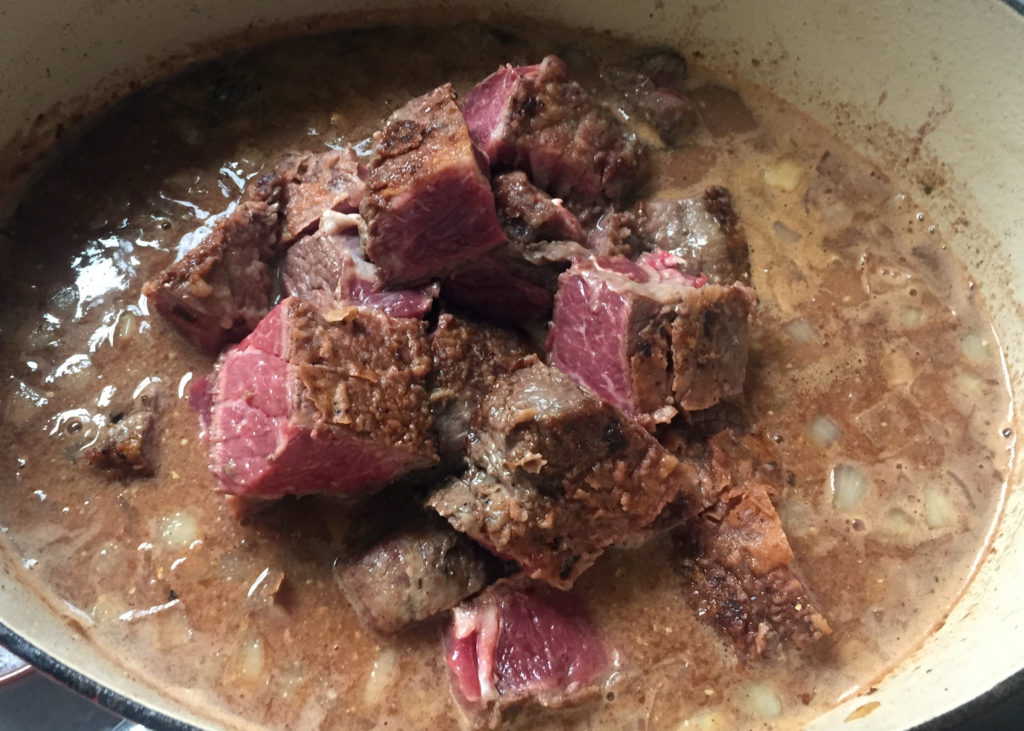
In a skillet, heat 2 TBS vegetable oil over medium-high heat. Season beef on both sides with salt and pepper and sear on each side until a nice dark brown crust forms, about 5-6 minutes per side. Remove from skillet into large bowl. Sprinkle with 2 TBS of flour, stir and set aside.

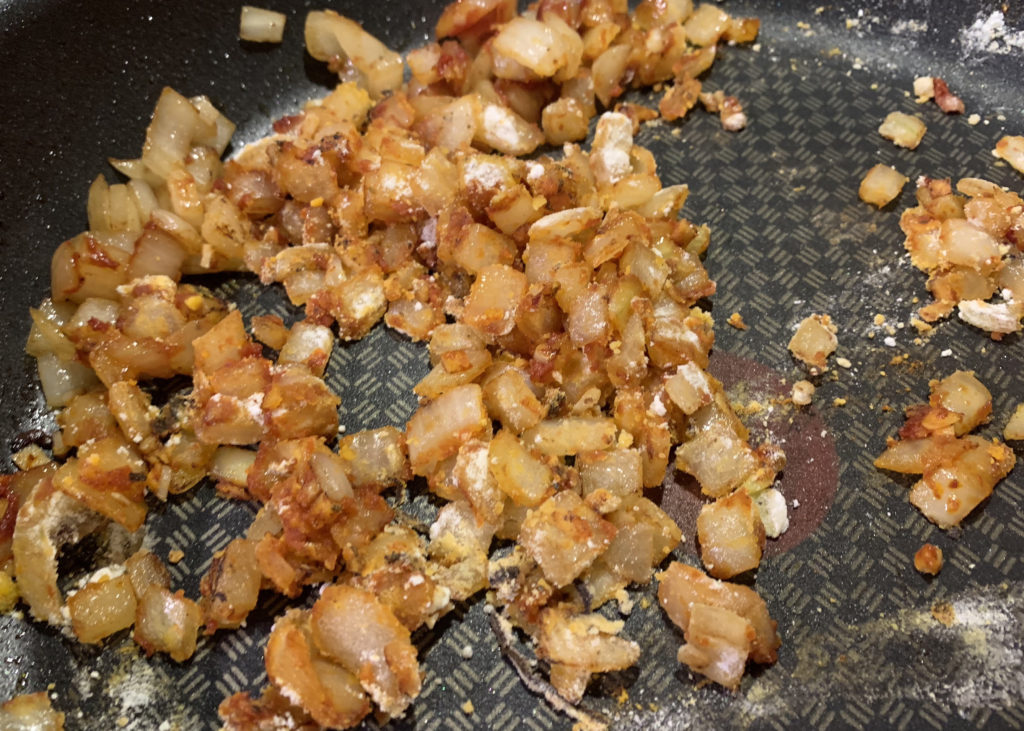
In the same skillet (add another splash of oil if necessary), add carrots, onion (cut side down), and garlic cloves. Turn vegetables as they start to brown. Once they are browned on a couple sides, remove and set into Instant Pot.

Add sherry and or wine to skillet. Scrape up any fond and let alcohol reduce about one-third. Pour into Instant Pot over vegetables. Set skillet aside without cleaning… you’re going to use it again soon.

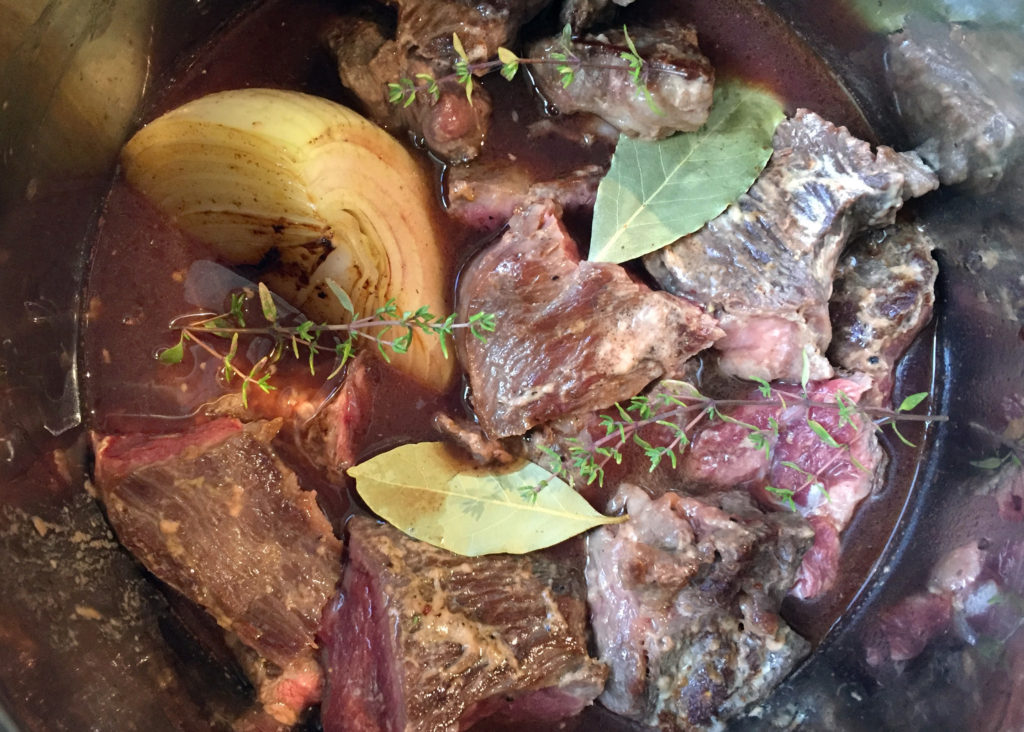
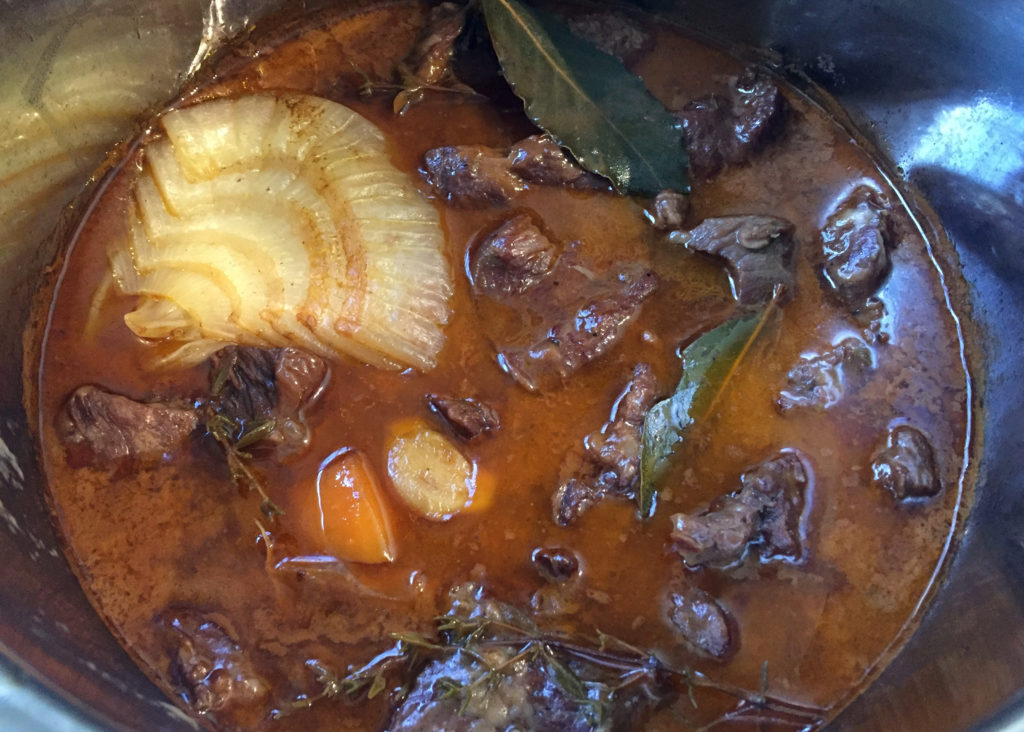
Cut seared beef into largish chunks (about 2 inches) and add to Instant Pot along with any beef drippings. Pour stock mixture into Instant Pot and add bay leaves and thyme. Set on manual high pressure for 35 minutes. (If you are using a stovetop pressure cooker, process for 30 minutes).

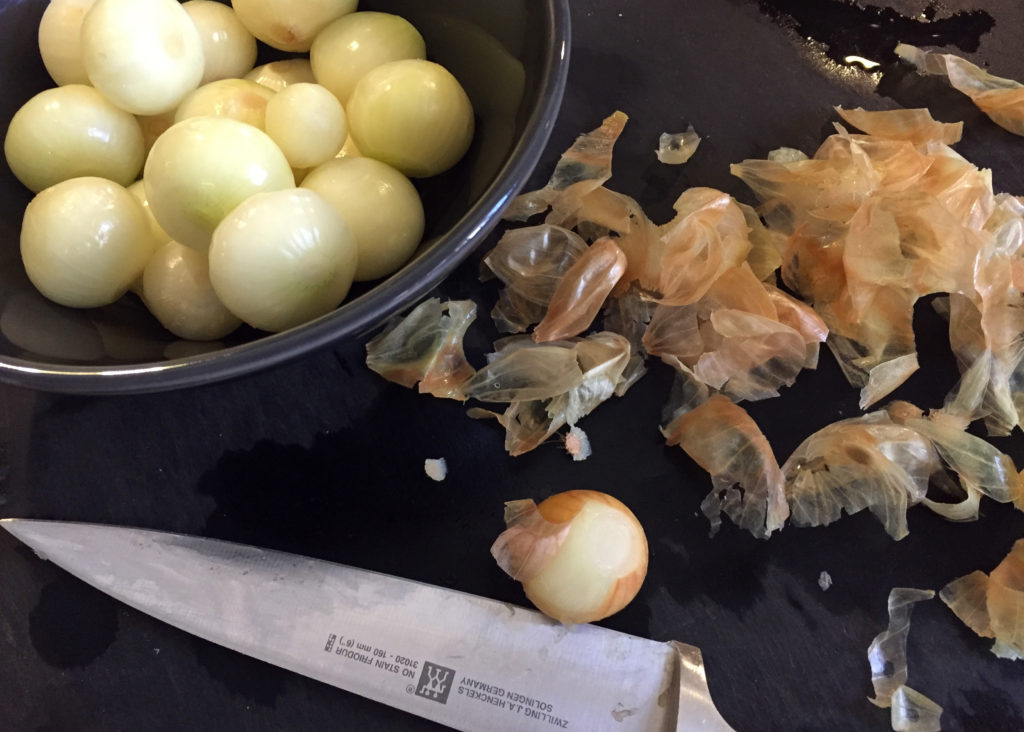
While the meat is cooking, make your pearl onions. If you are using fresh I have found the easiest way to peel is to blanch for 1 minute, then run under cold water until they are cool enough to peel. Melt 1 TBS each butter and oil in your skillet over medium-high heat until foamy. Add onions and let cook, tossing every couple minutes until they have started to brown. Add in beef stock and let simmer until the onions are tender and most of the liquid has evaporated. If you are using frozen this takes about 10 minutes, fresh can take 20-30 minutes depending on their size. Scrape onions and any leftover liquid into bowl and set aside.

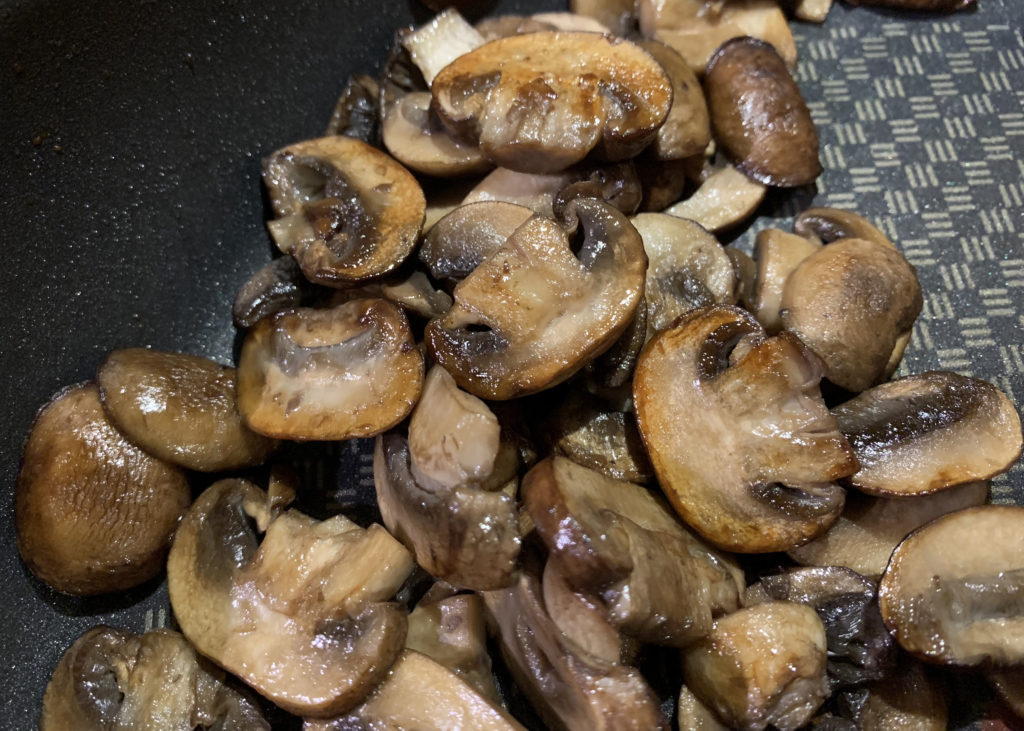
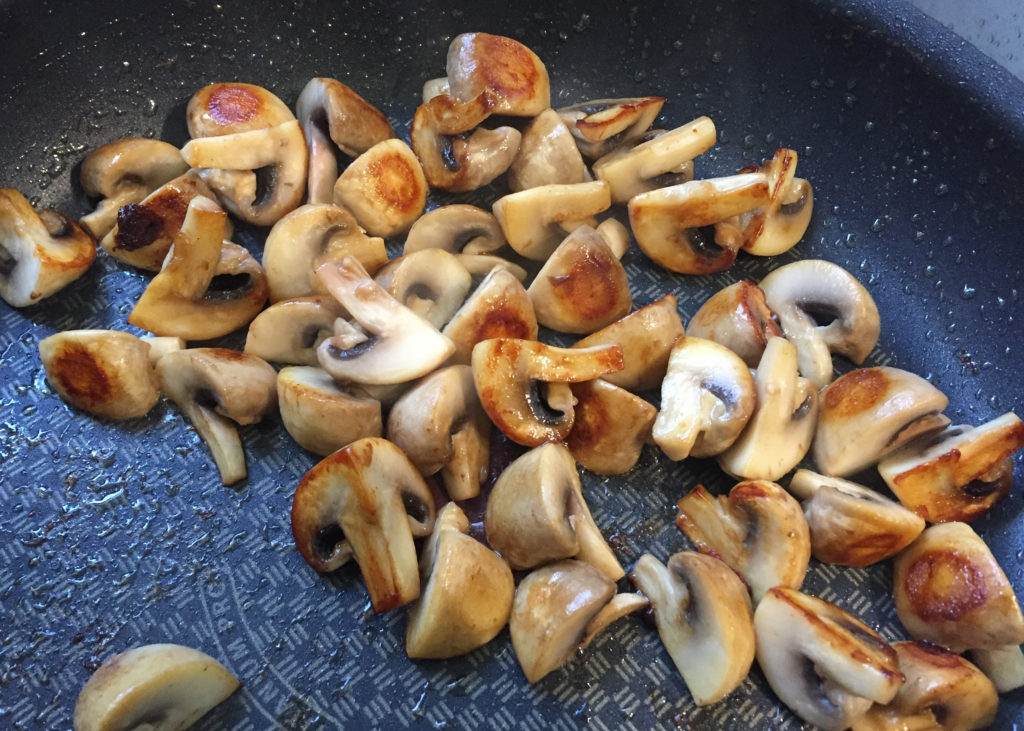
In the same skillet add 2 TBS butter and let melt until foamy. Add mushrooms and toss every couple minutes. They will first absorb the fat, then let go of their liquid and become quite wet, and finally the liquid will evaporate allowing the mushrooms to brown. This takes about 10-15 minutes for me. Set mushrooms aside.

When the beef has finished in the Instant Pot allow the pressure to naturally release for at least 15 minutes, after which you can manually release if the pin hasn’t dropped. If you have time, you can let sit up to a couple hours until you’re ready for dinner.

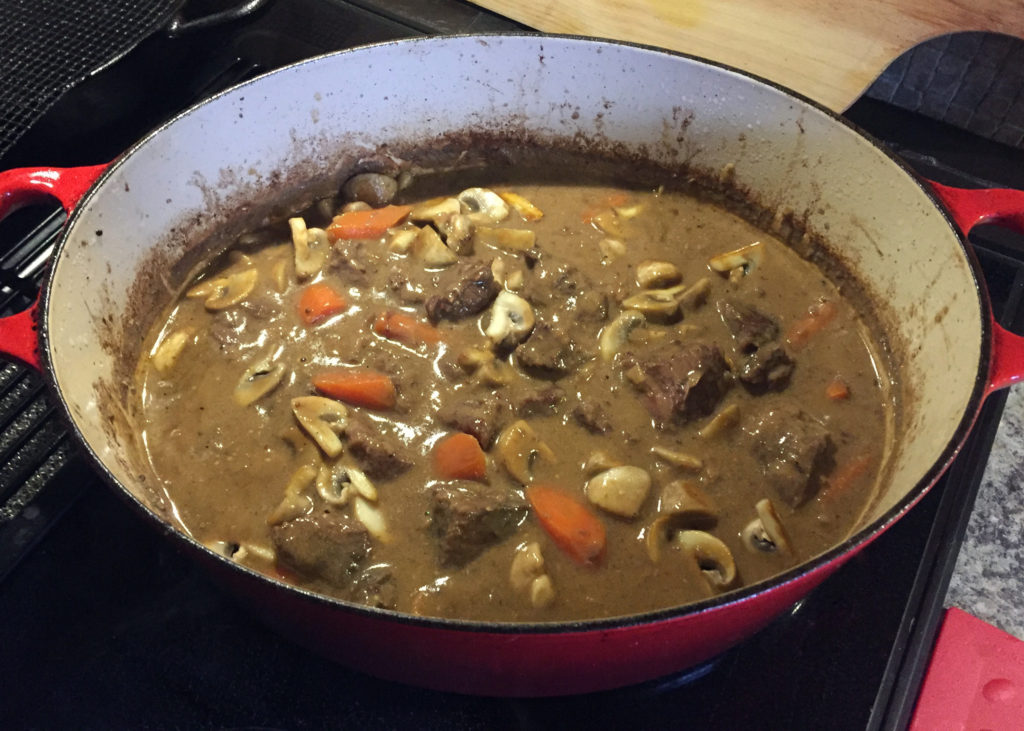
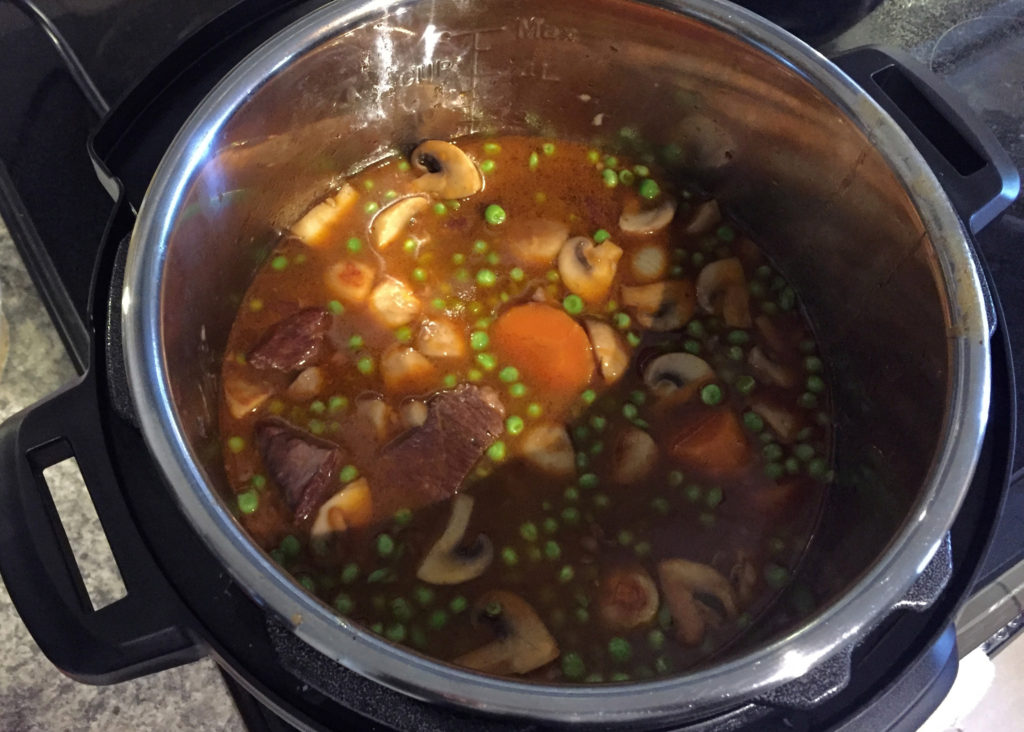
Remove the whole onion, bay leaves, and garlic cloves from stew and discard. Let sit for a couple minutes to let the fat rise to the top and skim. (Tip: If you find the thin layer of fat on top hard to skim because those pesky vegetables are getting in the way, just lay a paper towel across the top of the stew and it will soak up the fat!) Turn on saute function and add reserved mushroom, pearl onions, (and green peas, if using) to heat through. At this point you can also adjust the thickness of your stew if desired by making a slurry of flour or corn starch and water and stirring into the stew. Now is also the time to taste and re-season. I find a TBS each of fish sauce and balsamic vinegar really brighten the flavour and add depth to the final dish.

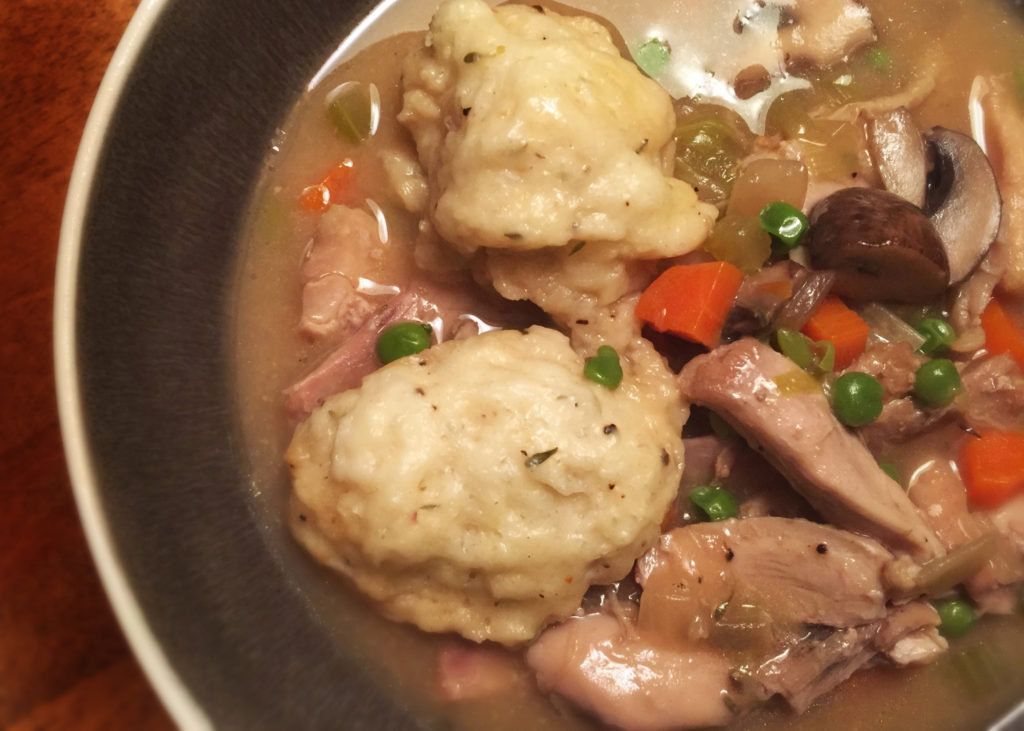
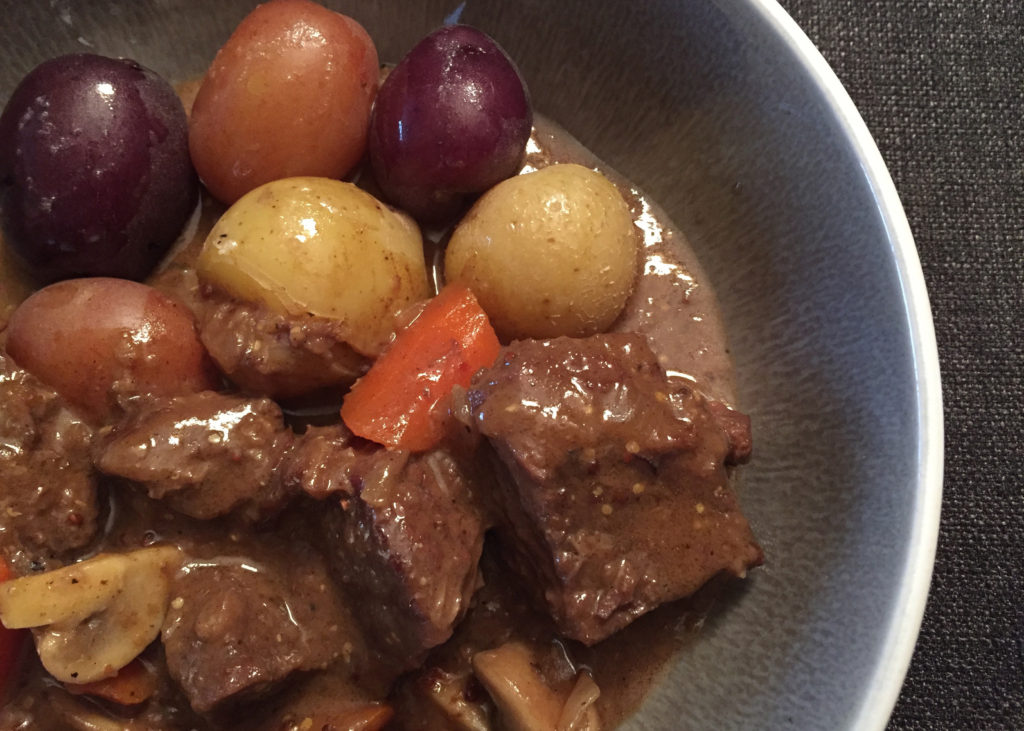
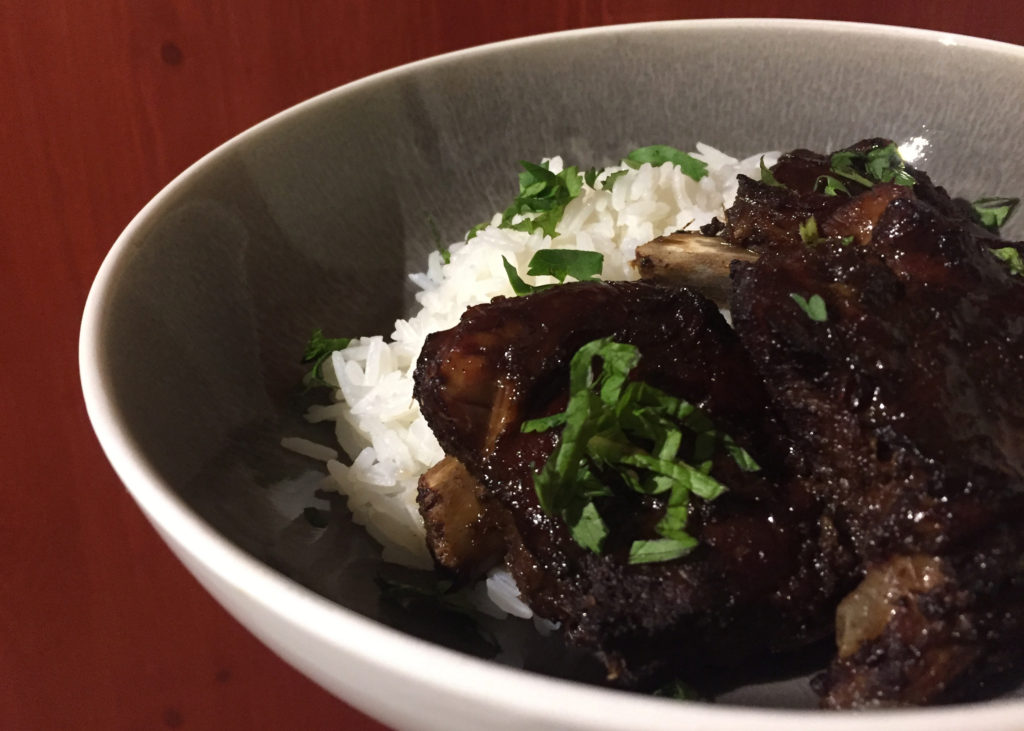
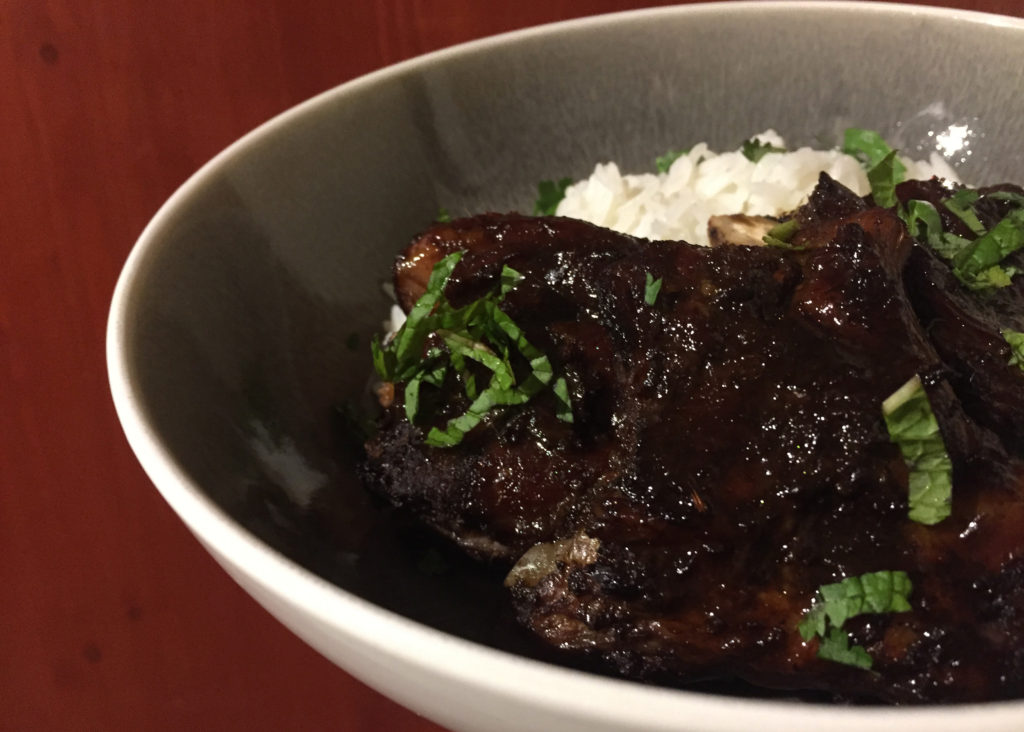
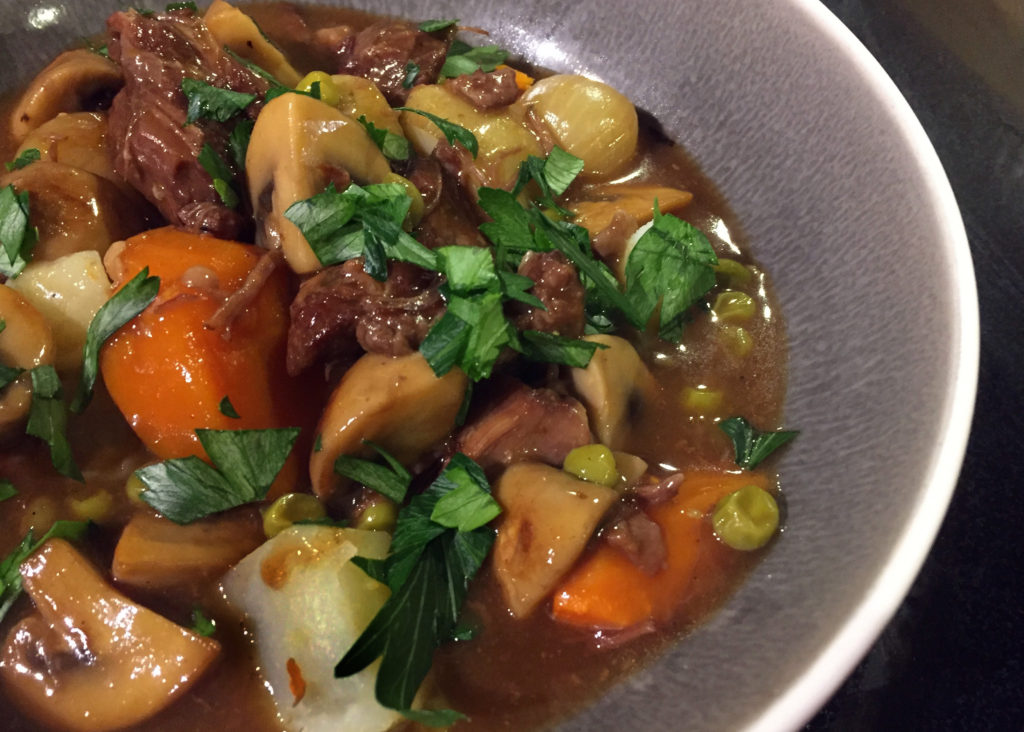
Garnish with fresh parsley and serve with crusty bread and a salad or over potatoes or pasta. Leftovers are even more delicious. Yum!

Chicken and Dumplings

Have I complained enough about mentioned the rain? Here on the west coast we usually enjoy mild, albeit somewhat soggy winters but spring arrived a couple weeks ago and along with it, the beautiful clear blue sky, the sun creeping under my skin and making me feel all warm and fuzzy inside, the flowers bursting forth, the…

ummm, what? That didn’t happen?

That pitter-patter on my roof are not birds dancing in the sun? The sound of gushing water is not my washing machine? (I DID wonder how my clothes made it from the bedroom to the laundry room without me). The wet ground is not because my lovely neighbour watered my yard?

Dammit.

Ok. Well, the only way I can see to combat a late spring is to revel in the last few weeks of eating comfort foods. If I’m not warm on the outside I can be warm on the inside.

This is one of my faves and because I know much of the country is still experiencing some winter it may become a new favourite of yours as well. It is is based on my chicken pot pie but I got lazy and decided that making the pastry was waaaay too much work so I opted for dumplings. Soft, fluffy pillows of goodness.

I think we should eat this every day until the REAL spring arrives and I think we should start now!

The stew is on the thinner side (but not watery) which I like with the dumplings. The flavours and method are much like the filling for my chicken pot pie, the perfect thing to let bubble and brew on a chilly afternoon. The dumpling recipe is compliments of Joy the Baker, who uses them in her chicken soup recipe here.

Go forth and… ummmm… stay dry (insert rolling eyes here).

Stew:

Salt and freshly ground black pepper
2 1/2 – 3 pounds bone-in, skin-on chicken thighs (about 8 pieces)
couple glugs of vegetable oil

12 ounces mushrooms, cleaned and cut into bite-sized pieces

2 small or 1 large leek, white and light green parts only, cut in half lengthwise and then into 1/2-inch slices
1 large onion, diced small
1 stalk celery, diced small

1/4 cup sherry (optional)
3 cups chicken broth (you know I prefer homemade but whatever you have will be enhanced by simmering the chicken in it)
1/2 cup milk (I used skim)
1 bay leaf
couple sprigs of fresh thyme or 1/2 tsp dried thyme

3 TBS of fat (schmaltz from your fried chicken, or butter at room temperature)
4 TBS all-purpose flour (use 6 TBS if you like a thicker, more gravy-like consistency)

2 tsp soy sauce
1 tsp anchovy paste or white miso
1 cup frozen green peas
1 or 2 carrots, diced small
couple shakes of hot pepper flakes, to taste

Dumplings:

1 cup all-purpose flour
1 1/2 tsp baking powder
1/2 tsp salt
1/4 tsp dried thyme
1/4 tsp fresh ground black pepper
1 TBS butter, cold
1 large egg, beaten
1/4 cup buttermilk, cold

To make the stew:
Season the chicken with salt and pepper. Heat a glug of oil over medium-high heat in the bottom of a Dutch oven or large heavy pot. Brown chicken thighs skin-side down until golden, flip and brown the other side. You will want to do this in two batches because crowding the chicken will steam it rather than fry it. Transfer to a plate and set aside.

Pour off most of the fat (reserving it to use later in this recipe) leaving enough to coat the bottom of the pan. Add the mushrooms and fry until they release their liquid, it evaporates and they start to brown, about 5-6 minutes. Set aside.

Use some of the fat you poured off the chicken or heat another glug of oil in the same pot. Add onions, leeks and celery, season with salt and pepper, and saute until softened, about 7 minutes. If using, pour in the sherry and use it to scrape up any bits stuck to the bottom of the pan. Simmer until most of the sherry has cooked off and then add chicken broth, milk, thyme and bay leaf and bring to a simmer. Nestle the browned chicken and any accumulated juices into the pot. Cover and GENTLY simmer 30 minutes, after which the chicken should be fully cooked and tender.

Transfer the chicken to a cutting board to cool slightly. Discard the bay leaves and sprigs from the thyme if you used fresh. Allow the sauce to settle for a few minutes, then skim the fat from the surface using a wide spoon and set aside.

In a small bowl, using a fork, mash 3 TBS of the fat from frying the chicken and what you skimmed from the stew (replace any or all of it with butter if you prefer) with the flour into a paste. Ladle some of the warm liquid over it, and stir until smooth. Add a second ladle and stir again. Return this flour mixture to the larger pot, stir to combine. Add the diced carrots, soy sauce, anchovy or miso paste, and hot pepper flakes. Shred or dice the chicken, discarding the bones and skin and return the meat to the pot along with the reserved mushrooms. Bring back to a simmer for a few minutes to thicken. Taste and adjust seasoning.

To make the dumplings:
In a medium bowl, whisk together flour, baking powder, salt, thyme, and pepper. Add the butter and use your fingers or a pastry cutter, break it down into the flour mixture creating small flecks of butter throughout. Add the beaten egg and buttermilk and stir until just combined. Do not to over-stir or the dumplings will be tough.

Bringing it together:
Make sure your stew is at a VERY gentle simmer. Drop generous tablespoon-sized dollops of dumpling dough on top of the stew, about a half inch apart. Cover the stew and continue to let simmer very gently for 10-12 minutes. By that time the dumplings should have risen to double their size and be completely cooked through.

Spoon into bowls and enjoy!

Dijon Mustard Stew

Well apparently Spring arrived last week but she’s sure taking her sweet time showing it. We had a couple sunny days where the crocuses and daffodils finally showed their pretty faces and I did manage to get one gardening box planted with radishes and peas but the weather had turned rainy and chilly again. Cue the comfort food. I wanted something that would warm up the house with its delicious aroma all afternoon but have a bit of pizzazz.

I’ve been eyeing this recipe for at least a month or so. Originally published in the New York Times here many years ago, it’s been written about by various food bloggers since then. It appealed to me because of the copious amount of Dijon mustard. Have you ever really tasted good Dijon? Go grab a spoon and take a taste. It’s smooth and creamy, bold and thick, a little bit salty and tart, with a subtle spicy wasabi-horseradish thing going on. It’s delicious and adds a lovely depth and warmth when braised in a stew.

I’ve switched up the original recipe quite a bit by almost doubling the meat, adding a cup of wine to the braise (really, no red wine in a stew?), adding things like tomato paste, and finishing with fish sauce and balsamic vinegar to give more layers of flavour. I also played around with the method by braising in the oven instead of the stovetop. As well, I brown my meat by cutting a chuck roast into steaks and browning those, letting them rest, and then cutting into 1-2″ chunks. It just works better. This is why.

3-4 pounds beef chuck, cut into steaks
2 tablespoons flour (optional, your preference whether you brown steaks with flour or not)
Salt and freshly ground black pepper
1 large onion, diced
3 shallots, chopped
glug of oil (I used leftover fat from frying various meats I keep in my fridge)
1 TBS tomato paste
2 TBS flour
1/2 cup Cognac or Brandy
1 cup red wine
2 cups beef stock (preferably homemade)
1/2 cup Dijon mustard
2 TBS grainy (ancient) Dijon mustard, divided
4 carrots, peeled and cut into bite-sized chunks
1/2 – 3/4 pound mushrooms, stemmed, cleaned and quartered
2 TBS butter
1 TBS fish sauce (optional)
1 TBS balsamic vinegar (optional)

Give your steaks a light dusting of flour mixed with a bit of salt and pepper if you like. This will help a nice crust to form on the meat but isn’t necessary. Heat oil (or other fat) in dutch oven over medium-high heat. Add meat in a single layer. Let the meat brown without moving until a nice dark crust forms. Flip and brown the other side. Set aside to let let rest. You may have to do this in two or three batches.

Preheat oven to 300F.

Add onions and shallots to the pot adding a bit more fat if necessary. Turn down heat to medium and let cook until softened but not browned, about 10 minutes. The moisture from the vegetables will also help to gently scrape and lift the fond from the pot. Once the vegetables are soft, add tomato paste and sprinkle with 2 TBS flour and stir for a minute or two. Pour in the Cognac or Brandy and gently finish deglazing the pan. Add the red wine and let simmer for a couple minutes.

Add stock, Dijon mustard, and 1 TBS of grainy mustard. Stir to blend. Cut beef into 1-2″ chunks and add to the pot. Bring to a simmer and place in oven.

At the 2 hour mark, check the beef. If it is on it’s way to being tender, add in the carrots. If it’s still quite tough, give it another 30 minutes then add the carrots.

While the carrots are cooking, melt butter to a frying pan over medium-high heat and saute mushrooms until liquid has been released and the mushrooms are brown and tender.

At 3 hours, check to ensure the beef is tender and carrots are cooked. Stir mushrooms and last TBS of grainy mustard into the stew and taste for seasoning. At this point I add about 1 TBS of fish sauce and 1 TBS balsamic vinegar (layers of flavour!).

We enjoyed this with some new boiled potatoes but it’s equally as good over pasta. Enjoy!

Instant Pot Vietnamese Pork Ribs


If you’ve been following me at all you know that I have been experimenting with my Instant Pot. I have been using it for about a year to make chicken and beef stock, cooking dried beans and legumes, and for some long-cooking vegetables such as beets. But a couple months ago I wanted to branch out, see what all the fuss was about. So I tried my first “pot in pot” meal of meatloaf, mashed potatoes, and beets (good), chili (very good), beef bourguignon (excellent! Recipe coming!), and last week, pork ribs. I was planning to do them BBQ style but made the mistake of asking Husband. “Asian!” he said. Oh for Christmas sake!

So I started researching. My original plan was do to them in the traditional Vietnamese style of making a pungent caramel and braising them in it which I have done in the oven a few times but I quickly realized the caramel sauce thing doesn’t really lend itself to pressure cooking. So I checked out a bunch of other pressure cooker “Asian rib” recipes but none of them contained the flavours I was imagining… primarily soy sauce, fish sauce, ginger, garlic, and some sweetness. Then I ran across a recipe in the New York Times that had the flavours, I just needed to convert it to make in an Instant Pot.

And I’m going to reeeeeeach around and give myself a pat on the back because these ribs were delicious. I used side riblets which I can easily find at my local grocery store but if you can’t find them ask your butcher to cut side ribs in half lengthwise. I love baby back ribs for smoking but I think side ribs are better for this recipe because they are meatier (and cheaper!). Husband and I ate the entire 2 1/2 pounds of ribs in one sitting. Gluttons! Double the marinade for 4 pounds (or more!) of ribs but don’t double the amount of water (1 cup) when adding to the Instant Pot or you will be reducing the final sauce forever!

Ribs:
2-3 pounds pork side riblets (get your butcher to cut rib racks in half lengthwise if you can’t find pre-cut riblets)

Marinade:
1 medium shallot (finely diced)
1 stalk of lemongrass, outer layer removed, finely minced or grated (I find it very easy to grate if you freeze it first)
2 TBS soy sauce
1 TBS fish sauce
1 TBS hot chili paste (I used sambal oelek)
1 tsp kosher salt
1 TBS brown sugar
1 tsp Chinese five-spice powder
3 cloves garlic, minced or grated
1 TBS fresh ginger, finely minced or grated

Garnish:
chopped fresh cilantro, mint, and green onion

Cut riblets into 2-bone portions and place in large ziplock freezer bag. Combine all marinade ingredients in a bowl and pour over ribs. Seal the bag and marinate overnight in the fridge or at least 4 hours.

When ready to cook, empty the contents of the freezer bag (ribs and marinade) into the Instant Pot. Pour in one cup of water along the side of the pot so you don’t wash the marinade off the ribs. Seal the pot and pressure cook using the manual button on high for 25 minutes. If using baby back ribs or if you prefer a bit of chew rather than falling off the bone, 20 minutes should be fine. When finished, let the pressure naturally release (this should take about 15 minutes).

Preheat oven to 400F.
Once the pressure has been released, open pot and use tongs to remove ribs to cookie sheet lined with tinfoil. Cover to keep warm. At this point I like to pour the marinade and pork drippings into a large measuring cup and let sit for a few minutes so I can skim off most of the fat. Return liquid to Instant Pot and turn on saute. Heat to a vigorous simmer to reduce liquid to approximately half the volume. I had 2 cups of drippings and it took about 15 minutes to reduce to 3/4 of a cup. Using a pastry brush, generously brush ribs with reduced marinade. Place in hot oven, uncovered, until nicely browned and caramelized, about 15 minutes.

Drizzle with remaining sauce and garnish with chopped herbs. I served with Jasmine rice.

Quick & Dirty: Fennel Orange Salad

I haven’t always been a fan of fennel. The thought of that licorice-y flavour in my food just seemed, well, weird. In the past year, though, it has not been uncommon to find it in my crisper. Why? Because I tried it. Yep, me who preaches about trying everything really didn’t try fennel. I really started using it regularly after I made this… then this. Last week I made a yummy sausage, fennel and white bean spring stew. And last night instead of cooking the sucker I made a salad that I know will become a regular around here… fennel orange salad. I dare you.

This is a Quick & Dirty recipe so I didn’t measure exactly. And except for the two main ingredients (fennel and oranges) I really just tossed in what I had in the fridge. I had a large bag of oranges sitting on the counter but you could even substitute canned if that’s what you have. And I forgot to sprinkle the couscous over the first serving of the salad (Husband going up for seconds: “What’s in the pot?”… arghhhhhh) so I’m calling that optional. You can switch out the the arugula for another salad green, change the pepitas (pumpkin seeds) to another seed or nut, sub in a different cheese, and/or switch the grain to farro or quinoa. Whatever floats your boat.

I had planned on serving this with grilled squid for some protein but ended up searing a sous vide smoked pork shoulder steak that I had in my freezer and adding a couple slices on the side. Sausage would be yummy as well.

Throw the fennel, oranges, arugula, mint and cilantro into a large bowl. Toss with about half the vinaigrette, adding more to your liking. Sprinkle over pepitas, feta, and couscous. Serve with a protein to make a meal.

handful of cilantro leaves
TBS or so chopped fresh mint
2 large handfuls of baby arugula
3 oranges, zested (set aside to add to vinaigrette) then peeled and sectioned, each section cut in half
1 fennel bulb, halved and thinly sliced
1/2 cup pepitas
1/2 cup crumbled feta
1 cup cooked couscous (about 1/3rd cup from dry)

Orange Lime Vinaigrette
juice from whole juicy lime (2-3 TBS)
1 TBS orange zest, more or less to taste
1-2 tsp honey, more or less to taste
1 tsp dijon mustard
salt & pepper, to taste
pinch of red pepper flakes (I used Korean gochugaru which has a lovely fruity element)
good quality olive oil to emulsify (about 1/3rd cup)

Put all ingredients except oil in a bowl, whisk in oil in a thin steady stream until dressing starts to thicken. Taste and adjust seasoning.

Quick & Dirty: Warm Fried Chickpeas With Tons of Herbs

Welcome back to Q&D! After eating meat a couple nights in a row I had a craving for something fairly healthy and lighter tasting. I love cooking up dried beans in my pressure cooker so I whipped up a batch of chickpeas. When I cook my chickpeas I add a teaspoon of Better than Bouillon to the water along with a couple smashed garlic cloves and a bay leaf. It adds a bit of flavour to the chickpeas and the extra broth drained from the chickpeas at the end is delicious. I freeze it and use in place of stock or broth for soup, stew, cooking grains and rice, etc.

Sooooo, quick & dirty! Make sure your beans are well dried. I put mine on a sheet pan lined with a clean tea towel and let them sit for a couple hours, shaking the pan a couple times to move them around. They won’t crisp up in your frying pan if they are wet. Wash your herbs and green onion, chop ’em up and toss them in a big bowl. Melt some sort of fat in a non-stick frying pan. I used leftover fat drained from the beef ribs I smoked the other night which added a nice flavour. Add your cooked or canned chickpeas (or other beans!) to the frying pan and fry over medium to medium-high heat for about 15 minutes (tossing every few minutes) until they start to get crispy. I had a lot of beans. If you have less it may not take 15 minutes. Stir in garlic, lemon zest, chili flakes and salt to taste. Tip the beans into your bowl with the herbs and squeeze over the lemon juice. Toss and re-season to taste. We ate these “as is” but if you want to make a real meal of it top with a fried or poached egg. I wouldn’t say no to a nice big piece of soft bocconcini or burrata torn over the top either, or even crumbled feta. Go for it :)

1½ cups dried chickpeas, soaked overnight in water then simmered until tender
– OR 2 cans of drained and rinsed chickpeas, WELL DRIED
2 cups (more or less) chopped mixed herbs such as parsley, cilantro, basil, mint
1-2 green onions, sliced diagonally
1-2 garlic cloves, minced
couple shakes of chili flakes
1 lemon, zest and juice
Salt
about 1/4 cup vegetable or olive oil or some other sort of fat (schmaltz would be yummy as well)

Chicken and Zucchini Meatballs over Butternut Squash “Spaghetti”

Guess what?!?! I have another meatball recipe and this one is healthy healthy! Not just healthy, but healthy (lean chicken and zucchini meatballs), healthy (over BUTTERNUT SQUASH NOODLES!). Seriously, unless you’re going to eat grass for dinner, you’re not going to get much healthier than this. It is ridiculously delicious for an almost “normal” meal. Unlike those “zoodles” that are all over the internet (yes, I’m talking about you, limp and wet zucchini noodles), spiralizing butternut squash (or one of those huge carrots you get in an Asian market) and roasting at a high heat for 7-10 minutes to bring out the sweetness is an almost perfect stand-in for real spaghetti, without the calories and carbs. I dare you to try it! Go ‘head… I DARE you. :)

I’m dissing the wet, limp zucchini noodles but adding grated zucchini into the lean chicken meatballs helps keep them tender and moist and adds an extra helping of invisible vegetables. And spooning them over more vegetables?… pffft, I feel like I should be given a medal.

Read more

Spaghetti with Ricotta Herb Meatballs

ricotta-meatballs-4I love any pasta you put in front of me but rarely eat it because, carbs (insert sad face here). However, we have had an unusual amount of snow in the past couple days and I still went for a pretty lengthy walk, slipping and stumbling over the icy, uneven ground, and that deserves a treat. And if I’m going to indulge, this is great way to do it. It is delicious and not too unhealthy (no cream!). Adding ricotta to the meat helps keep it tender and the copious amount of herbs give a flavour and freshness that you don’t usually find in a meatball. I used my lovely frozen confit tomatoes but good quality canned tomatoes (San Marzano if you can find them) work just as well. Don’t use ones that are pre-diced. They contain an additive to help them keep their shape and who wants to eat that?!

Read more

Cumin Chicken with Squash, Fennel and Grapes: Another One Pan Miracle

miracle-chicken2-4Remember this from a couple months ago? It was my spatchcock chicken “one pan miracle” dinner and I have another one for you! I followed the latest inspiration recipe pretty closely except I used a whole spatchcock chicken instead of just thighs (I am LOVING the spatchcock chicken) and I added leeks (how many forking leeks did I plant this year?!?!).

The roasted fennel adds a lovely unique flavour and the grapes soften into little pillows of yummy-ness (technical term). If you don’t have leeks I suggest adding wedges of onion or shallot to the veggies to balance the sweetness of the fennel and grapes. Next time I think I will also throw a teaspoon of smoked paprika into the rub to deepen the flavour just a touch.

It’s important to use a pan big enough so the vegetables can be spread out in a single layer to ensure they brown and caramelize rather than just steam. I had more vegetables than I needed so into the fridge they went and the next morning I used the saved chicken bones, the wings and the excess veggies to make a chicken vegetable stock. Shazam! (Sorry, I’ve been watching too many superhero movies…).

1 small 2 1/2-3 1/2 pound chicken, spatchcocked
1 TBS brown sugar
1 TBS ground cumin
1 TBS kosher salt (or 2 tsp table salt)
1 tsp freshly ground black pepper
1/4 tsp cayenne pepper
1 acorn or delicata squash (about 1 1/2 pounds), halved lengthwise, seeded, cut into 1/4″ half moons
1 fennel bulb (about 1/2 pound), cut in half lengthwise, sliced into 1/4″ wedges with core intact
3 or 4 leeks, white and light green part only, sliced in half lengthwise
1/2 pound seedless red grapes (a very generous cup)
1 tablespoon olive oil
small bunch torn fresh mint leaves

Make your rub by combining the brown sugar, cumin, salt, pepper and cayenne.

Just in case you’ve forgotten how to spatchcock, place the chicken breast side down on a work surface. Starting at the thigh end, cut along one side of backbone with kitchen shears. Turn chicken around and cut along other side. Discard backbone or save for stock. Flip the chicken, open it like a book and press firmly on the breastbone to flatten (before flipping, I sometimes help the chicken breast crack by using my knife to make a cut in the thickest part of the bone). Sprinkle both sides with half your rub and refrigerate for at least an hour, or overnight.

Preheat oven to 400F.

miracle-chicken2-1

Toss vegetables with olive oil and the other half of the rub and place on a large rimmed baking sheet, arranging in a single layer. Place the chicken, skin side up, on top of the veggies and fruit and roast for 20 minutes. At this point I like to gently lift the chicken with some tongs and give the vegetables a stir to ensure they are all getting nicely browned. Return the pan to the oven for another 20-30 minutes, until the chicken is cooked through (internal temperature should be 165F).

miracle-chicken2-2

Remove chicken from oven and let rest 5-10 minutes. I like to keep the veggies warm during the resting period by turning off but leaving them in the oven. Cut up the chicken and serve family style or in individual bowls garnished with torn mint. I served this with wild rice and it was delicious.

miracle-chicken2-3