Category: Appetizer or Snack

Quick & Dirty: Roasted Grapes and Goat Cheese

Hey, remember that time I invited people over for drinks and all I had to eat in the fridge were some old grapes and goat cheese?…

Well, it turns out you can make a mighty fine appetizer with almost nothing. The first time I made this I used pepitas instead of walnuts (one of the guests had an allergy) and the second time I used the walnuts plus added in some fresh rosemary. Both times were delicious. I have also cut down on the oil from the original recipe significantly. And for the drizzling olive oil over the goat cheese, feel free to use flavoured oil if you have it. I used Persian lime olive oil and it was delicious. Next time I’m thinking a pinch of hot chili flakes would not go amiss. Happy appy!

1/2 cup toasted, chopped walnuts (or other nut)
3 cups red seedless grapes
2 tsp plus 2 TBS good, fruity olive oil (divided)
4 sprigs fresh thyme
1 sprig fresh rosemary (about 3″), leaves removed
1/2 tsp sea salt (divided)
1 log fresh goat cheese (250-300 grams or 8-10 ounces)

Preheat oven to 350F. Toss grapes, thyme sprigs and rosemary leaves with 2 tsp olive oil. Place on parchment covered baking sheet. Sprinkle with 1/4 tsp salt. Place in oven and roast for 45-55 minutes until grapes are soft and skins are bursting. This can be done a few hours ahead of time.

While grapes are roasting (or 45 minutes before serving), slice goat cheese in 1/4 inch rounds and arrange on serving dish. Drizzle with 2 TBS olive oil (flavoured if you wish).

When grapes are finished roasting, let sit until no longer hot (can be room temperature). Spoon over goat cheese and scatter with toasted, chopped walnuts. Sprinkle on remaining 1/4 tsp salt. I served this with crackers but you can also use a sliced baguette.

Bacon Orange Baklava Tarts

Oh yes, you read that correctly. And I’m not even going to try to convince you except…

Bacon.

Orange.

Baklava.

That is all.

1/2 cup walnuts
1/2 cup pistachio nuts
4 ounces chopped bacon
1/3 cup brown sugar (lightly packed)
1/8 tsp red chili flakes

1/3 pckg filo dough (6 sheets)
1/2 cup (4 ounces) melted butter
1/2 tsp ground cardamom
1/4 tsp ground ginger

1/4 cup orange marmalade
1/4 cup honey
1 TBS orange flavoured liqueur, such as Cointreau (optional)

Fry bacon until crisp. Drain and let cool. Set aside a small handful to decorate the top of your tarts, the main portion will be added to the nut mixture below.

In a food processor pulse the nuts until they are broken up, but not turned into meal. Add the larger portion of bacon, brown sugar, and chili flakes and pulse a few more times until the nut mixture is finely chopped and evenly blended.

Preheat oven to 350F.
Butter or oil muffin tins (I used the fat leftover from frying the bacon… ooops ;) ).

Melt butter and whisk in ground cardamom and ginger. Place one sheet of filo pastry on a flat surface and brush lightly with butter. Set a second sheet of filo on top of the first and brush with butter. Repeat with a third sheet. Phyllo sheets are usually about 12 inches by 18 inches so cut sheets into 3 inch squares (3 cuts along the short side and 5 cuts along the long side) to make a total of 24×3″ squares.

Press one square (3 sheets thick) of filo into each muffin cup. Top with 2 scant teaspoons of the nut mixture. Press another square of filo into each cup over the nut filling. Top with another 2 scant teaspoons of nut mixture.

Repeat. 3 more sheets of filo brushed with butter and cut into 3 inch squares. Press into muffin cups on top of your last layer of nuts. Top with the remaining nut mixture and press in your last squares of filo.

Carefully (or not) with the tip of a sharp knife cut a cross into the middle of each tart, trying not to cut through the bottom layer. This may frustrate you but it’s really no biggie. Just make some cuts so that when you pour over the syrup after the tarts have finished baking it will soak through all the layers. No matter how messy your cuts are the finished baklava will still be gorgeous… trust me.

Place in oven for 25 minutes, turning halfway through to ensure even baking. Check your tarts regularly starting at the 15 minute mark. The edges of the filo are very thin and will darken quite quickly. If they are getting too dark for your liking simply tear off a big piece of tinfoil and throw it over the entire muffin tray in the oven to deflect the direct heat.

While the baklava is baking, heat the marmalade, honey, and liqueur (if using). At about 25 minutes the baklava should be nicely dark golden and the tarts cooked through. Remove from oven and immediately spoon 2 teaspoons of warm marmalade honey sauce over each tart right to the edges. Let sit for at least an hour for the syrup to soak through.

Marinated Cheese (yes, you read that right)


Happy New Year (almost)! I have a little gift for you. Marinated cheese! Ummm, helluuuu?! MAR-I-NA-TED CHEEEEEESE! It’s like the best thing ever. Spices and aromatics steeped in silky goodness and poured over cheese? Are you with me??? YES? YAAAAAYYYYY!

You probably have the ingredients for this in your fridge right now! It takes just a couple minutes to throw together. Quick enough to include with your New Year’s appetizers tonight! Set this cheese out by itself alongside some slices of baguette, crackers or warm pita, or place on a cheese and charcuterie platter with lots of other goodies. Or, if you’re some people (ahem), it may not even make it out of the fridge before fingers are dipping into the jar. NOT ME!

Ok, me.

This is a great way to dress up inexpensive cheese. I used a plain old supermarket brand of soft goat cheese but I think almost any cheese would work. Something mild will let the marinade ingredients shine but I’m dying to try it with feta. I used canola oil as the base. You can use olive oil if you would like but I find the fruitiness of the olive oil clashes a bit with the Asian flavours here. However, you could do an olive oil marinade leaving out the Asian spices and instead add some sun-dried tomatoes to the jar. Oh oh OHHHH, and when you set it out sprinkle it with toasted pumpkin seeds!!! There you go, a new idea is born! Let me know how it turns out!

UPDATE: Sigh. Do you see what I did there??? While writing about my first batch of cheese I got all excited about doing an olive oil marinade and I just happen to have a big ol’ piece of pepper jack cheese in the fridge (mine is monterey jack with jalapeños but any pepper jack will work, or any other cubed cheese that you like), so I had to do a second batch of cheese. Yup. Sheesh. So, Part 1 and Part 2 below. You’re welcome. :)

PART 1

250 grams plain goat cheese

Marinade ingredients:
1/2 cup vegetable oil (I used canola)
1 tsp toasted sesame oil
1 small shallot, thinly sliced
3 garlic cloves, thinly sliced
2 star anise pods
10-15 whole peppercorns
1/2 – 1 tsp dried red pepper flakes
couple thin slices of fresh ginger
1 tsp Sichuan peppercorns

To finish marinade:
1/2 tsp kosher salt
1/2 tsp sugar
1 tsp white wine vinegar


To make the marinade, add all the ingredients together in a small saucepan and bring to simmer. Turn heat down keeping a very light simmer and let cook for 20 minutes. Remove from heat and add in kosher salt, sugar, and white wine vinegar. Let cool.

When the marinade is cool, break up cheese into bite size pieces and put in jar with a tight-fitting lid. Pour over marinade, cap and let sit in the fridge at least a few hours or overnight, turning once or twice. Will keep for a week (or more!).

PART 2

250 grams pepper jack cheese (or try it with your favourite cheese)
small handful sun-dried tomatoes, sliced
toasted pumpkin seeds to finish

Marinade ingredients:
1/2 cup olive oil
1 small shallot, thinly sliced
3 garlic cloves, thinly sliced
couple pieces of thinly sliced fennel
10-15 whole peppercorns
1/2 – 1 tsp dried red pepper flakes (optional, if your cheese is already spicy like mine, you can omit this)

To finish marinade:
1/2 tsp kosher salt
1/2 tsp sugar
1 tsp white wine vinegar
2 slices lemon peel (with as little pith as possible)

To make the marinade, add all the ingredients together in a small saucepan and bring to simmer. Turn heat down keeping a very light simmer and let cook for 20 minutes. Remove from heat and add in kosher salt, sugar, lemon peel and white wine vinegar. Let cool.

When the marinade is cool, cube cheese into bite size pieces and put in jar with a tight-fitting lid along with the sun-dried tomatoes (Ummm and wouldn’t olives be a great addition here as well???). Pour over marinade, cap and let sit in the fridge at least a few hours or overnight, turning once or twice. Will keep for a week (or more!). When you set this out a final sprinkle of toasted pumpkin seeds adds a very festive flair.

Quick & Dirty: Chickpea Dip


I have been making this dip for years and never thought to write it up because, well, I’ve always just thrown it together. People love it and always ask how to make it so I give them the 30,000 foot view “you take some chickpeas, mash them up, add some stuff, serve with nacho chips”. And I was asked again last night after serving it as an appy at a dinner party so now I’m going to actually write it down to share with you.

As with all my Q&Ds, it is infinitely adaptable. My version below is on the salty side and zesty enough for, in my opinion, the perfect burst of flavour on a cracker but you should adjust the recipe to your taste. I also sometimes sprinkle in some hot chili flakes. You could also add diced bell pepper, artichokes or fresh tomatoes. For a more “salad-y” route try diced carrot and celery. Smoky paprika would also be delicious. Shower with fresh grated Parmesan or Pecorino instead of feta. And I have to admit I have wondered about adding a sweet note… raisins? Cranberries? A touch of curry powder?

See?!?! Adaptable :)

One more thing… I’m a huge fan of preserved lemons. They add a salty, briny, intense “je ne sais quoi”. You should be able to buy them in almost any Mediterranean market but you can also easily make them at home like this! Fresh lemon, of course, works almost as well.

1 1/2 cups of dried chickpeas to make 3-4 cups, or 2 cans (rinsed and drained)
1/2 medium red onion, finely diced
1/2 – 1 cup Moroccan dried cured olives (the wrinkly black ones) or other olive of your choice, pitted and chopped
1/2 cup sun-dried tomatoes in oil, chopped
1 whole preserved lemon (peel only), finely diced (or use the zest and juice of a whole fresh lemon)
1/2 cup Italian parsley, chopped
1 clove garlic, minced
couple glugs of good fruity olive oil
salt & pepper to taste
2 ounces crumbled feta to garnish

Boil your chickpeas (I like to do mine in stock or add a whole smashed clove of garlic, bay leaf and a pinch of salt to regular water) until quite tender but not mushy, or rinse and drain 2 cans of chickpeas. Put the chickpeas in a large bowl and mash them into a nice chunky texture. I use a pastry cutter to do this but you could use a potato masher or a just a fork. Add in your other ingredients (except feta) and stir to combine. Taste and adjust with salt and pepper. Garnish with crumbled feta and serve with nacho chips or toasted pita.

Quick & Dirty: Warm Fried Chickpeas With Tons of Herbs

Welcome back to Q&D! After eating meat a couple nights in a row I had a craving for something fairly healthy and lighter tasting. I love cooking up dried beans in my pressure cooker so I whipped up a batch of chickpeas. When I cook my chickpeas I add a teaspoon of Better than Bouillon to the water along with a couple smashed garlic cloves and a bay leaf. It adds a bit of flavour to the chickpeas and the extra broth drained from the chickpeas at the end is delicious. I freeze it and use in place of stock or broth for soup, stew, cooking grains and rice, etc.

Sooooo, quick & dirty! Make sure your beans are well dried. I put mine on a sheet pan lined with a clean tea towel and let them sit for a couple hours, shaking the pan a couple times to move them around. They won’t crisp up in your frying pan if they are wet. Wash your herbs and green onion, chop ’em up and toss them in a big bowl. Melt some sort of fat in a non-stick frying pan. I used leftover fat drained from the beef ribs I smoked the other night which added a nice flavour. Add your cooked or canned chickpeas (or other beans!) to the frying pan and fry over medium to medium-high heat for about 15 minutes (tossing every few minutes) until they start to get crispy. I had a lot of beans. If you have less it may not take 15 minutes. Stir in garlic, lemon zest, chili flakes and salt to taste. Tip the beans into your bowl with the herbs and squeeze over the lemon juice. Toss and re-season to taste. We ate these “as is” but if you want to make a real meal of it top with a fried or poached egg. I wouldn’t say no to a nice big piece of soft bocconcini or burrata torn over the top either, or even crumbled feta. Go for it :)

1½ cups dried chickpeas, soaked overnight in water then simmered until tender
– OR 2 cans of drained and rinsed chickpeas, WELL DRIED
2 cups (more or less) chopped mixed herbs such as parsley, cilantro, basil, mint
1-2 green onions, sliced diagonally
1-2 garlic cloves, minced
couple shakes of chili flakes
1 lemon, zest and juice
Salt
about 1/4 cup vegetable or olive oil or some other sort of fat (schmaltz would be yummy as well)

Kuku Cauliflower Cake

cauliflower-cake5I have always loved breakfast for dinner so the other day when I was searching for a way to use up a head of cauliflower and ran across an Ottolenghi recipe for cauliflower cake (sort of an omelet/frittata with flour), it was a no-brainer to use that as a springboard recipe. There are a number of different versions on the internet and after reading some of the reviews (most complaints were about it being a bit bland) I decided to amp up the flavour by roasting the cauliflower with smoked paprika instead of simply boiling, and subbing in a bunch of parsley and cilantro for the basil as a nod to the “kuku” which is sort of the Persian version of an omelet with a ton of herbs. I also replaced part of the onion with leek because, fall garden cleanup. It’s a bit of a mess of different dishes but the end result is a somewhat dense, delicious… ermmmm… “thing” which fed us two nights in a row alongside a salad.

1 medium cauliflower (1 1/2 – 2 pounds)
glug olive oil
1 tsp smoked paprika
salt and pepper to taste

2 cups sliced leeks (white and light green part only) OR 1 large onion, peeled and diced, or a mix of both
4 TBS olive oil
1 tsp finely chopped rosemary or Herb de Provence mix
1 clove garlic, finely chopped

6 large eggs
1 cup flour (125 grams)
1 1/2 tsp baking powder
1/2 tsp ground turmeric
salt and pepper
1 cup grated pecorino cheese (or other hard strong cheese, such as parmesan or gruyere)
handful chopped parsley leaves
handful chopped cilantro leaves

Butter, for greasing pan
1 TBS kalonji or nigella seeds (or substitute white or black sesame or poppy seeds, or a mix of any of those)
1 shallot, peeled and thinly sliced (or reserve a couple slices from your onion above) for decorating the top

Preheat oven to 400F. Break cauliflower into smallish florets. Drizzle with a generous glug of olive oil and sprinkle with paprika, salt and pepper. Spread onto lightly oiled baking sheet and roast for 20 minutes, tossing a couple times during cooking. Remove from oven and let cool.

cauliflower-cake1

Heat 4 TBS olive oil in a frying pan over medium heat and fry onion and rosemary until very soft, about 8 minutes (it may seem like a lot of oil but this is also the oil you are adding to your cake, we are just nicely flavouring along the way!). Add chopped garlic and fry 1 minute more. Remove from heat and let cool.

cauliflower-cake2

Crack eggs into a bowl along with 1/4 cup of milk and whisk well. In a another large bowl blend the flour, baking powder, turmeric, 1 teaspoon salt, and plenty of pepper. Add egg mixture and whisk until fully incorporated and mostly smooth (don’t overmix or your cake will be tough). Stir in onion filling, herbs and cheese until well blended. Gently fold in the cauliflower, trying not to break up the florets.

cauliflower-cake3

If you are not using a non-stick pan, line the bottom of an angel food cake pan or 7-8 inch springform pan with parchment paper. Butter the sides generously and toss the kalonji seeds (or whatever you are using) in the pan so they stick to the sides. Gently spoon or pour in cauliflower batter and scatter shallot or onion slices on top. Bake in the centre of the 400F oven until the top is golden and the centre of the cake is set. This should take about 30 minutes if you are using an angel food cake pan or 40 minute for a springform pan.

cauliflower-cake4

Let cool to warm or room temperature. Run a knife along the sides of the pan to remove. We ate this alongside a cucumber and tomato salad tossed with a simple vinaigrette.

cauliflower-cake6

Smokin’ Good Granola Bars

granolabars4I started experimenting with granola bars because Husband needed a better snack on his long bike rides instead of just drinking nutritional gels (ewwwww) and I have learned a few things along the way. I learned that using small-sized muffin or cupcake tins make much better “bars” than baking the bar whole and then trying to slice it. I learned that you have to press the mixture down hard in the tin so when it bakes the ingredients really stick together and the bar doesn’t fall apart when you take a bite. And I learned that adding some bittersweet chocolate chips just makes everything, well… you know.

Read more

Asian Noodles with Pork and Prawns

asian noodle final2I LOVE noodles. Husband does not. He has been gone for almost a week on a business trip so it has been a regular noodle-fest around these parts. Spaghetti with bolognese, udon with stir fry veggies, and now… TA DA!

These noodles are based on a recipe by Jamie Oliver except I switched out a couple ingredients and have given more exact measurements and cooking instructions. It is not a quick “throw-together” recipe; there is a lot of washing and chopping. It’s best to prep everything before you begin to cook as it goes very quickly once you start… like 5 minutes quick! The vermicelli noodles can be prepared ahead of time and I like to
cut them in half or thirds just to make it easier to toss and eat.

Serves 2 as a main, 4 as a side. The recipe is easily halved or doubled but if you are going to double, you will need to cook half at a time as there are too many ingredients to properly cook in a regular frying pan.

4 ounces (100 grams) vermicelli noodles

A good glug olive oil
1/2 pound (8 oz) lean ground pork
2 TBS Chinese five-spice powder

1/2 pound (8 oz) shrimp or prawns, peeled and deveined, cut in half or thirds if large
3 cloves garlic, finely sliced
2 jalapeño peppers, thinly sliced with seeds (taste for heat and adjust to your liking)
1 TBS fresh ginger, grated or finely diced
2 teaspoon sugar
1/2 cup plain skinned peanuts, roughly chopped or crushed
pinch of salt

4 green onions, very thinly sliced on the diagonal
1/2 sweet red pepper, finely diced

1 large bunch (2 cups) cilantro, leaves removed and roughly chopped
1 small bunch (1 cup) mint, leaves removed and roughly chopped
2 limes, juiced
1 TBS soy sauce

asian noodle prep

Cook vermicelli noodles according to package directions. This usually means soak in very hot water for 3 minutes, rinse with cool water, drain and set aside. This can be done ahead of time.

Heat oil in large frying pan and add pork, breaking up with spatula until almost cooked through. Sprinkle over five-spice powder and stir to coat. Add prawns and toss for a minute to start cooking. Add garlic, jalapeno, ginger, sugar, peanuts, and a pinch of salt. Continue to toss and stir for another minute until prawns are almost cooked through.

asian noodle 1

Add vermicelli noodles, green onion, and sweet pepper to the pan. Continue to toss and stir for another minute or two until prawns are completely cooked and the noodles are warm. Remove from heat and add herbs, lime juice and soy sauce, stirring until herbs just start to wilt.

asian noodle 2
asian noodle 3

Pile all that beautiful spicy, fresh goodness into a bowl and enjoy.

That’s how it’s done when the cat’s away. :)

Vietnamese Salad Rolls

salad roll final What to do for lunch tomorrow?! This was my great dilemma this morning as I lay in bed listening to the rest of the world start their day. I didn’t feel like going shopping for salad ingredients. I had some carrots in the fridge, a half a pepper from the pineapple salsa I made the other night https://auntieeats.ca/2015/04/grilled-fish-tacos/, some cilantro, green onion, and not much else. My pantry is usually pretty well stocked with Asian ingredients and I always have prawns in the freezer. Sounds like salad rolls are on the menu.

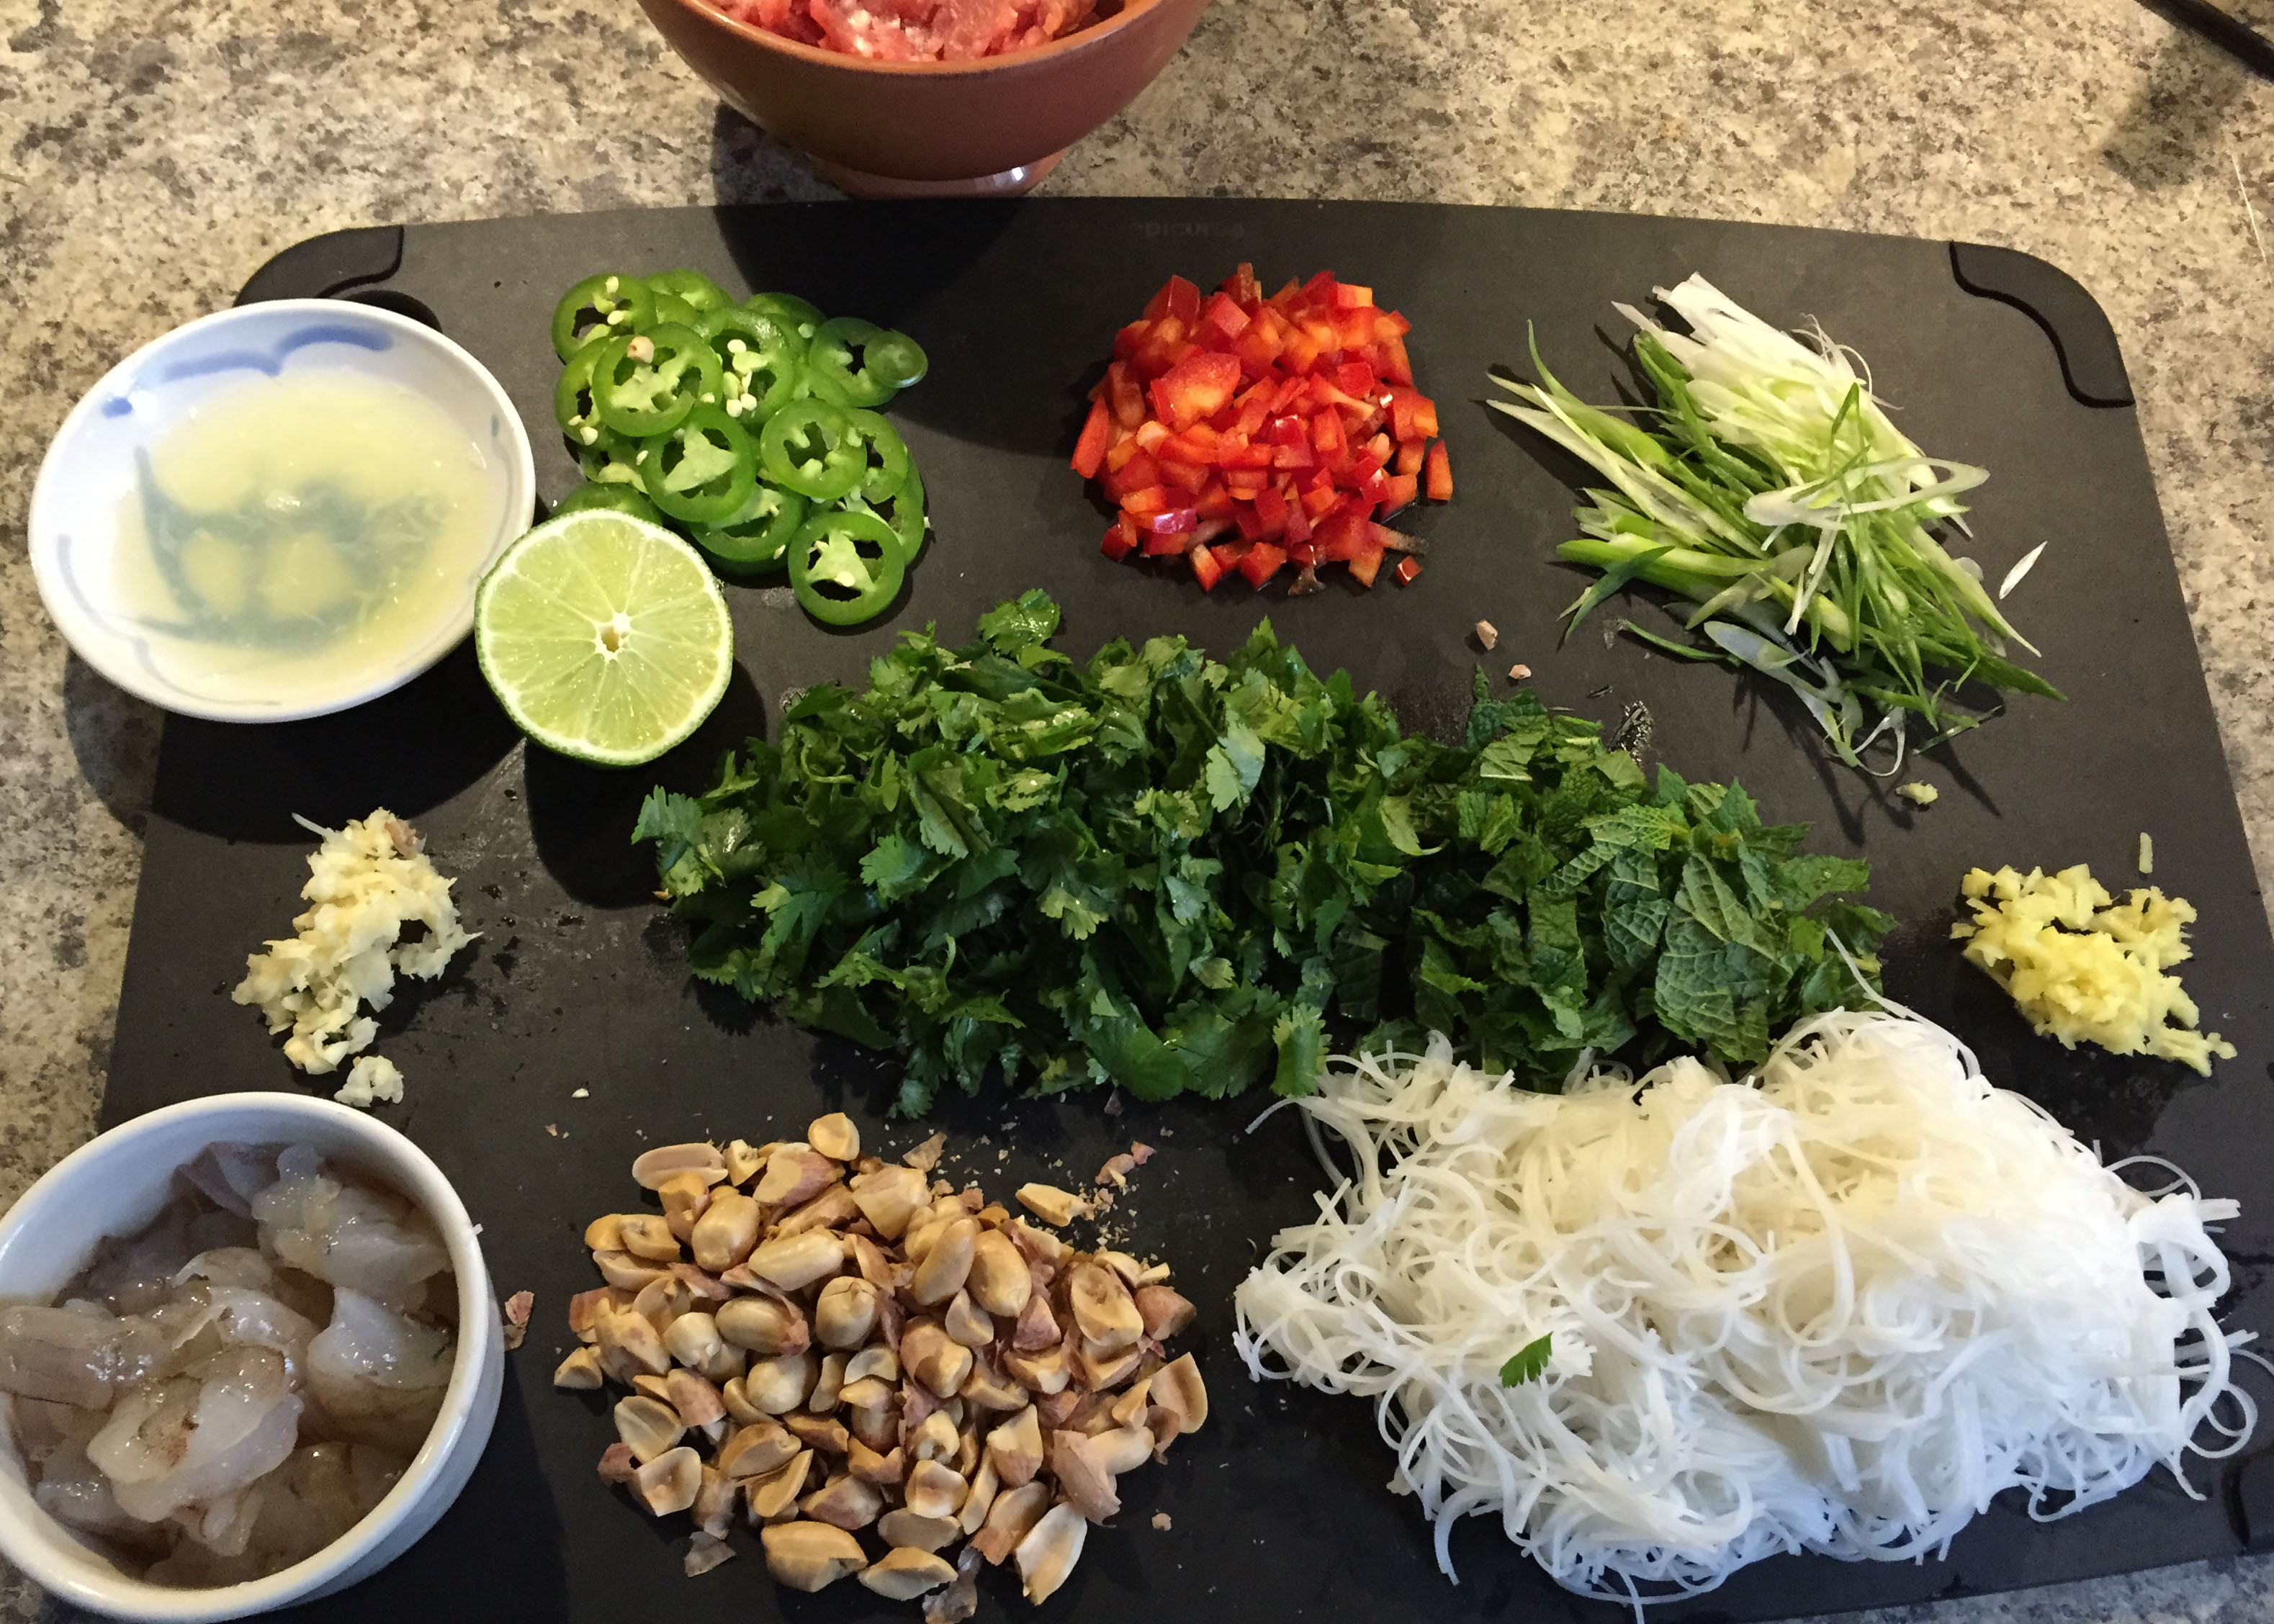
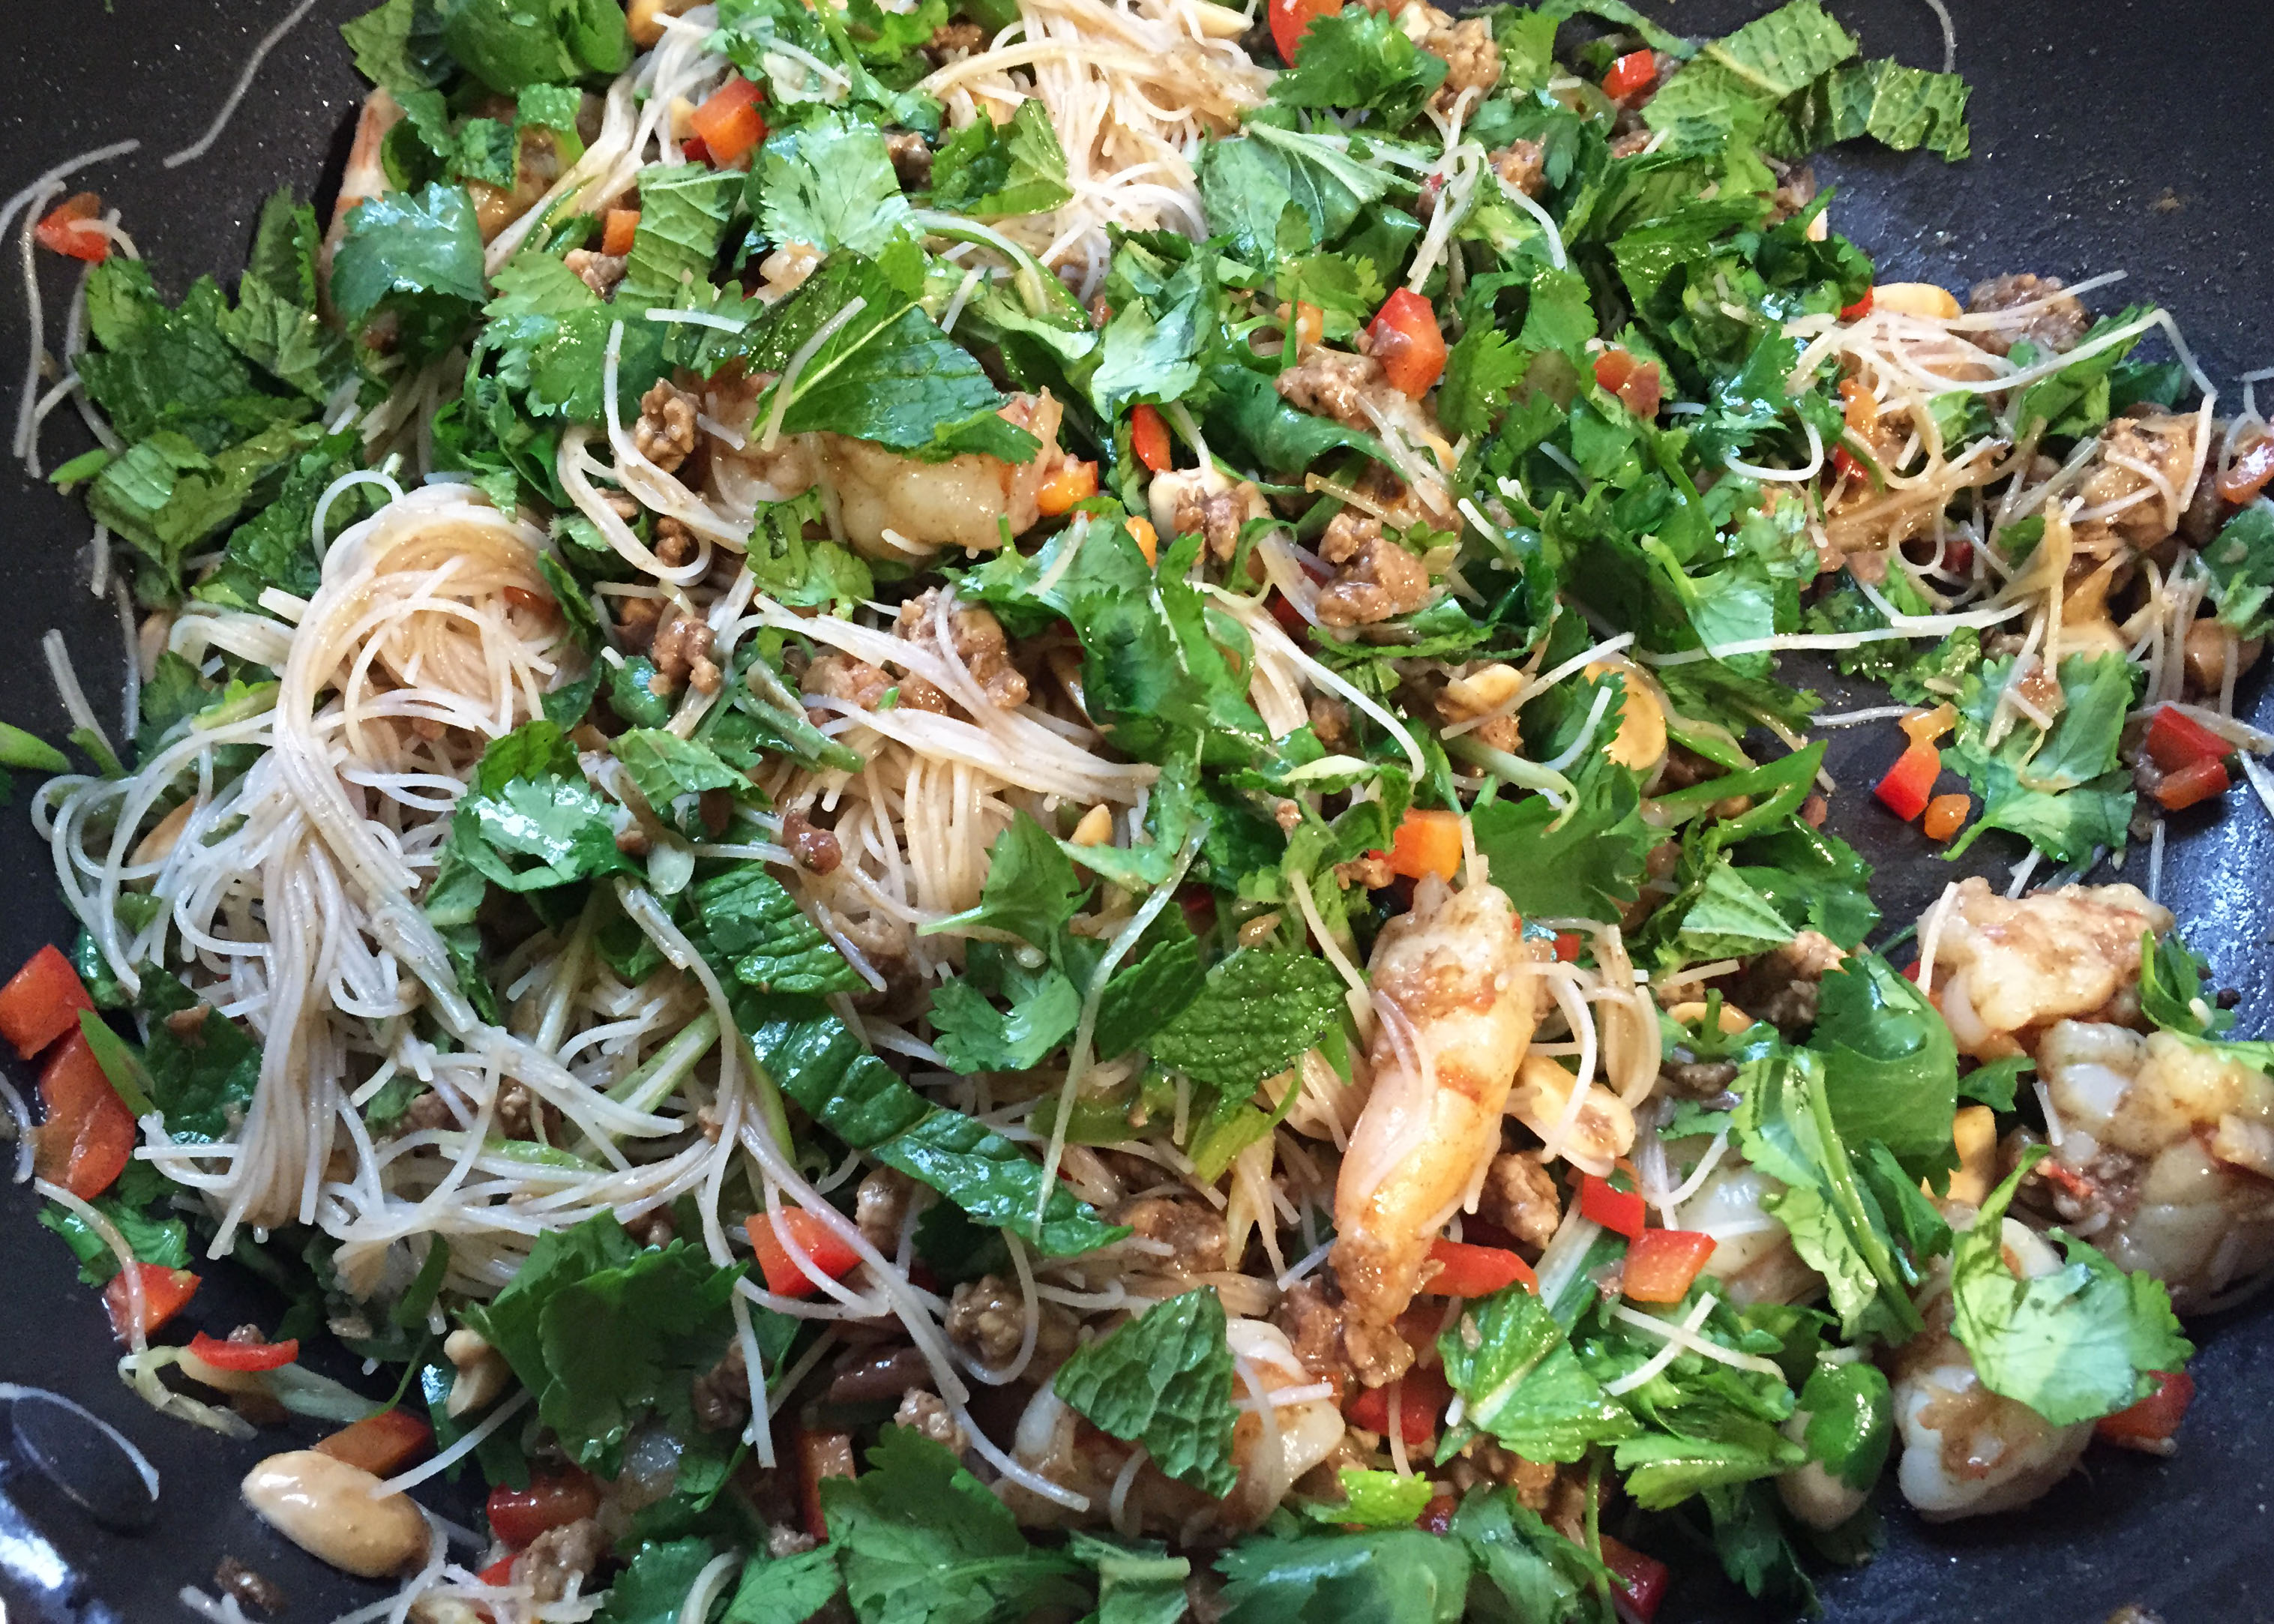
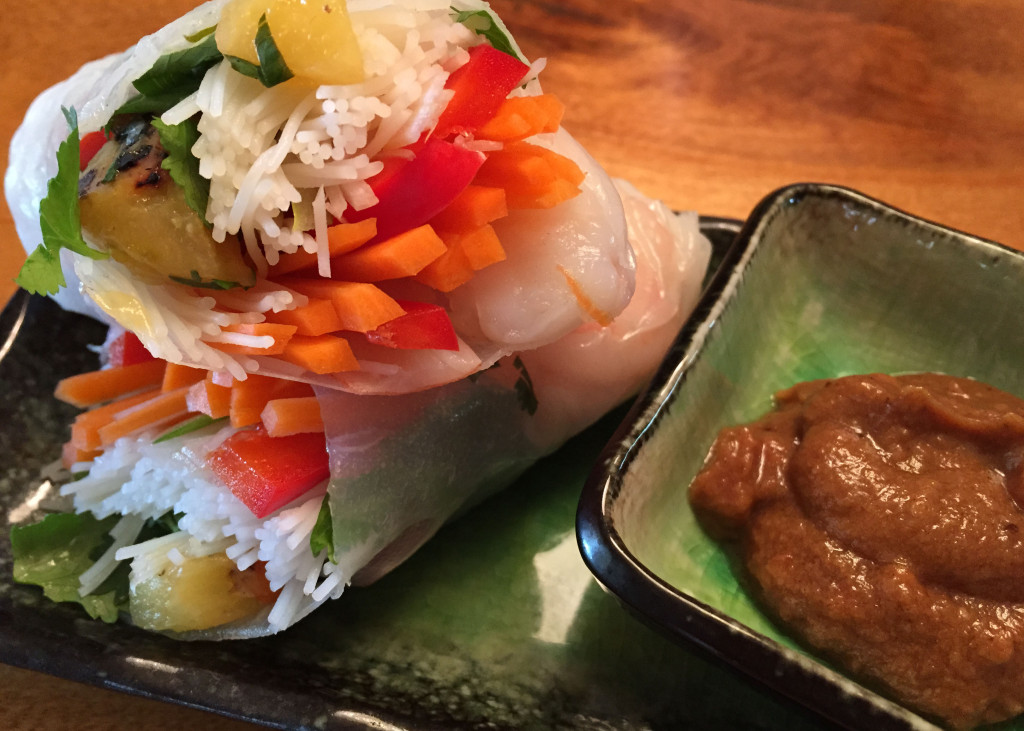
These rolls are very adaptable to whatever you have in the fridge. Other filling ideas are bean sprouts, matchstick cucumber or zucchini, basil or mint instead of cilantro, poached chicken instead of shrimp. I used very little green onion in mine because I’m taking them to work but feel free to use more.

Don’t worry about getting the vegetables cut perfectly. I’m a bit obsessed but even using a vegetable peeler to make strips of carrots would work just fine!

As far as the peanut sauce goes, it was very good but next time I might try adding some fish sauce. Sesame oil would be tasty as well.

For the rolls:
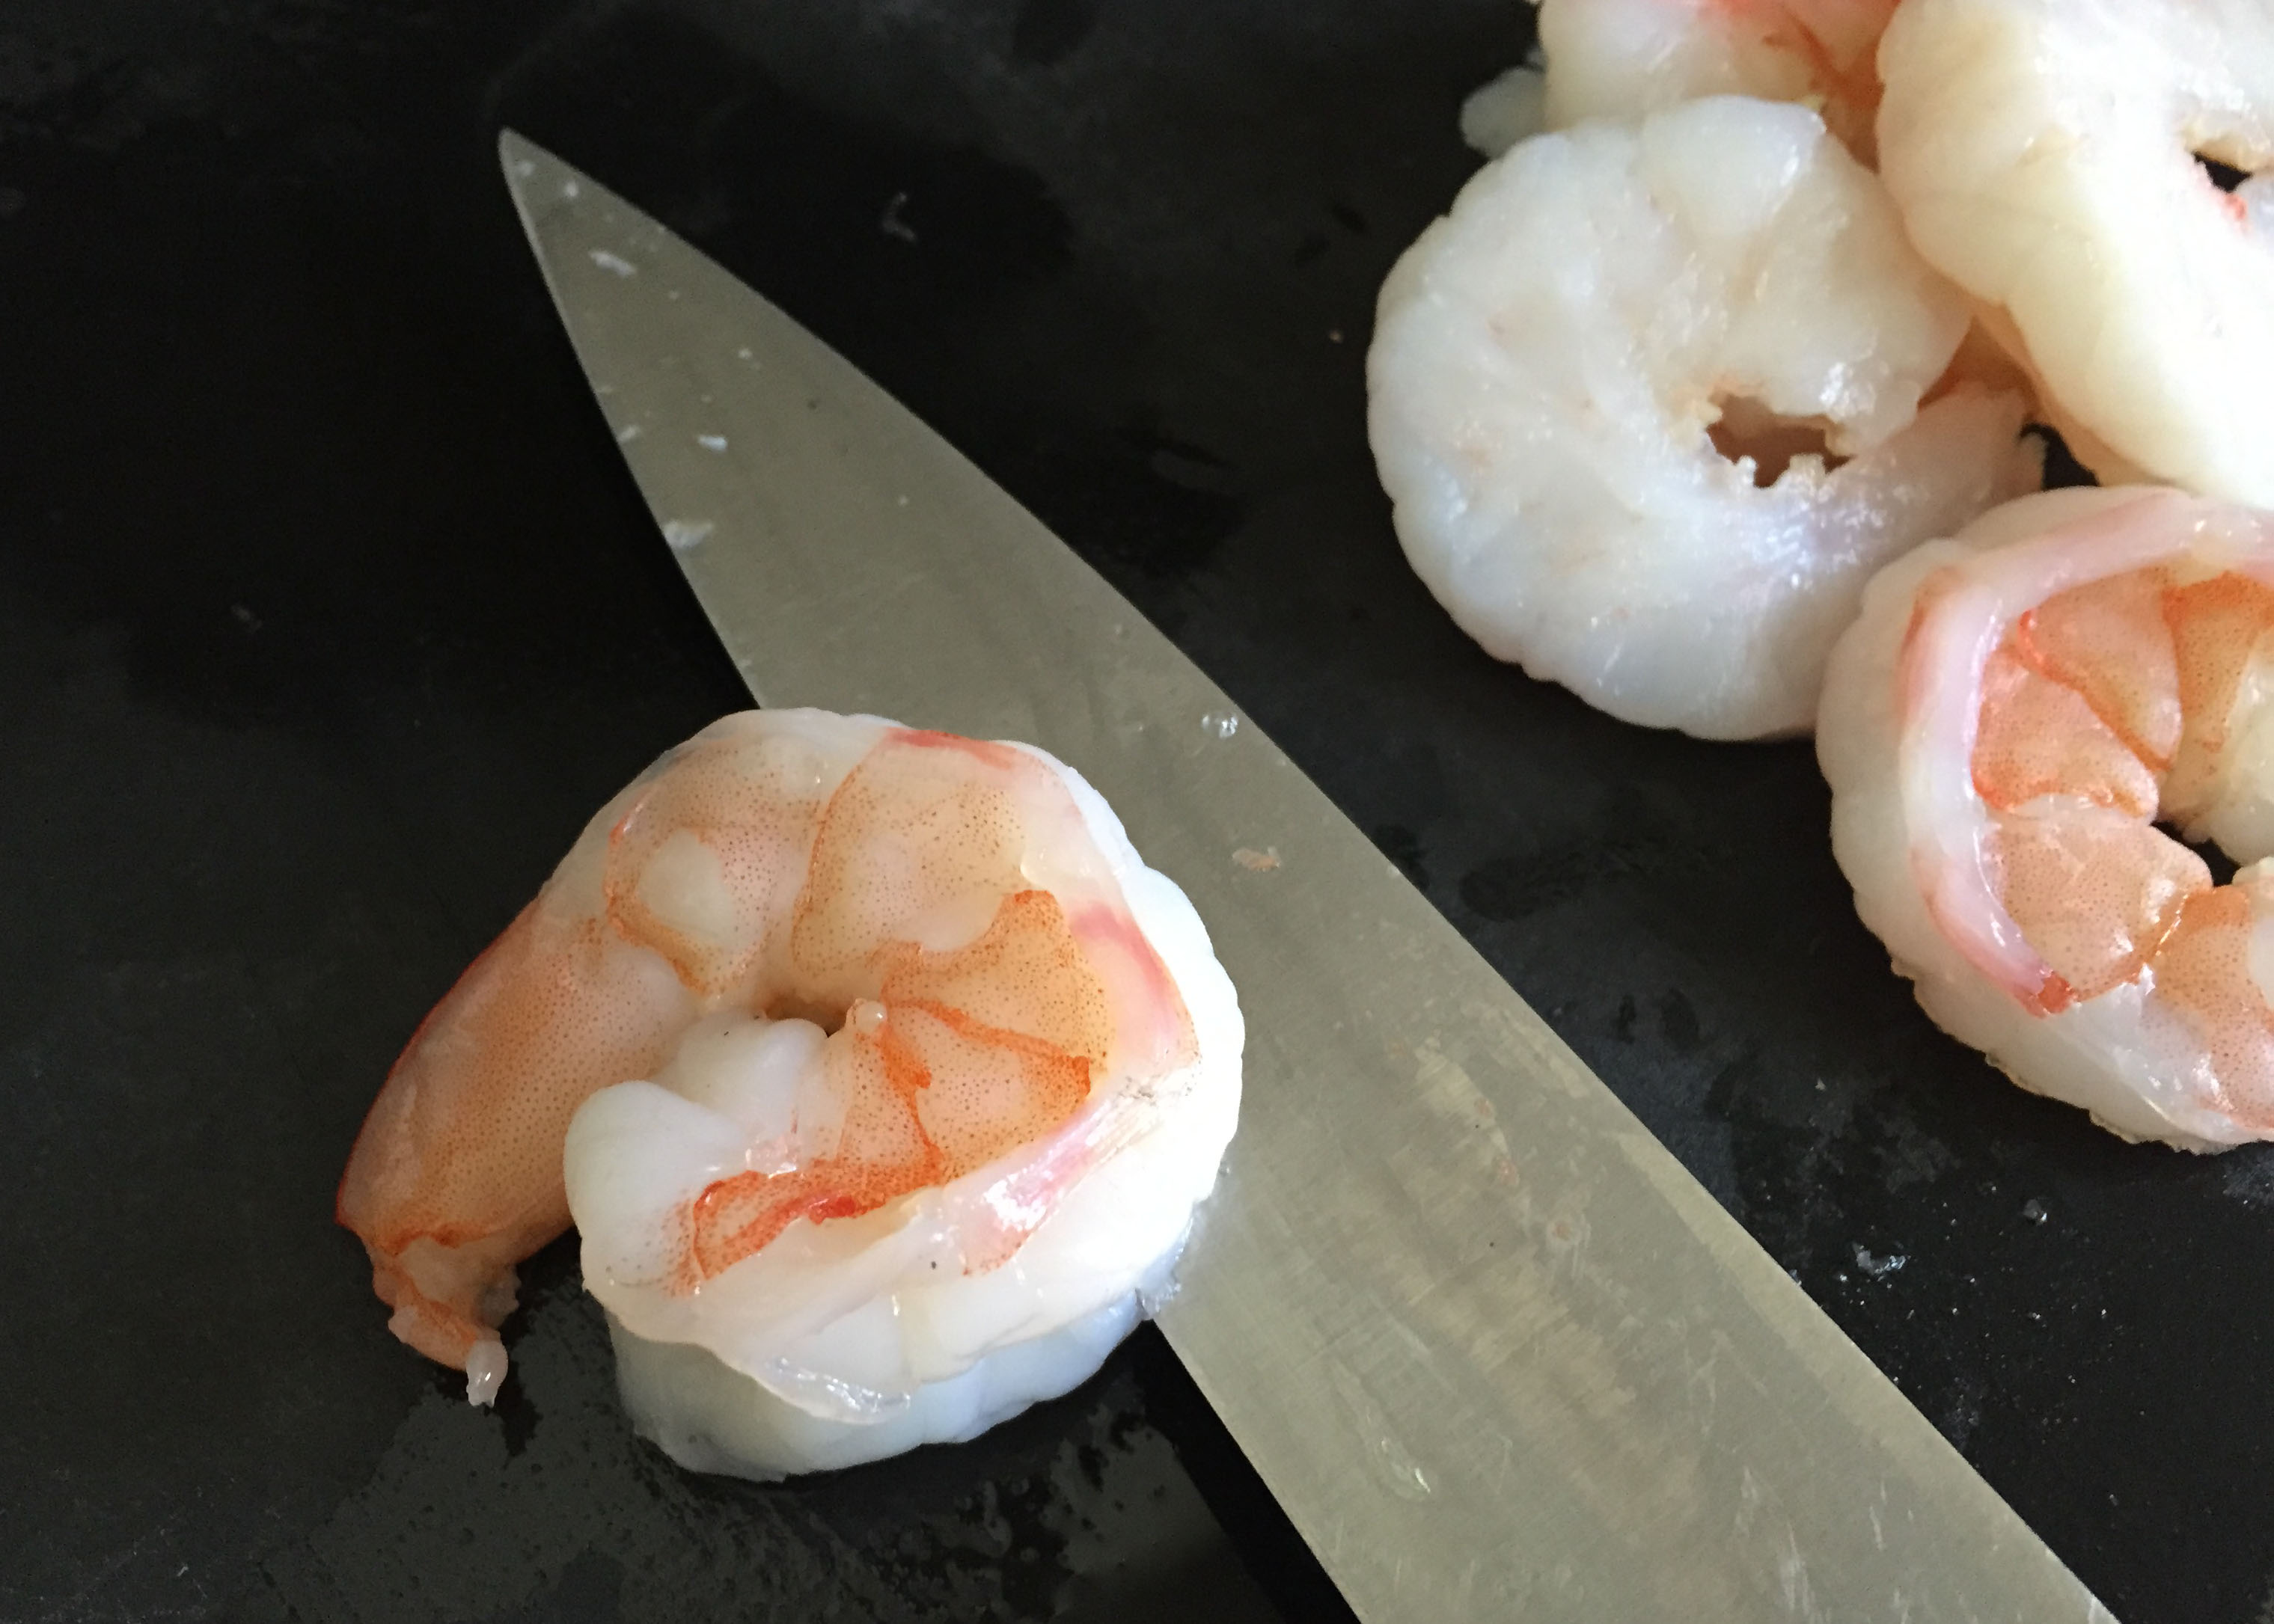
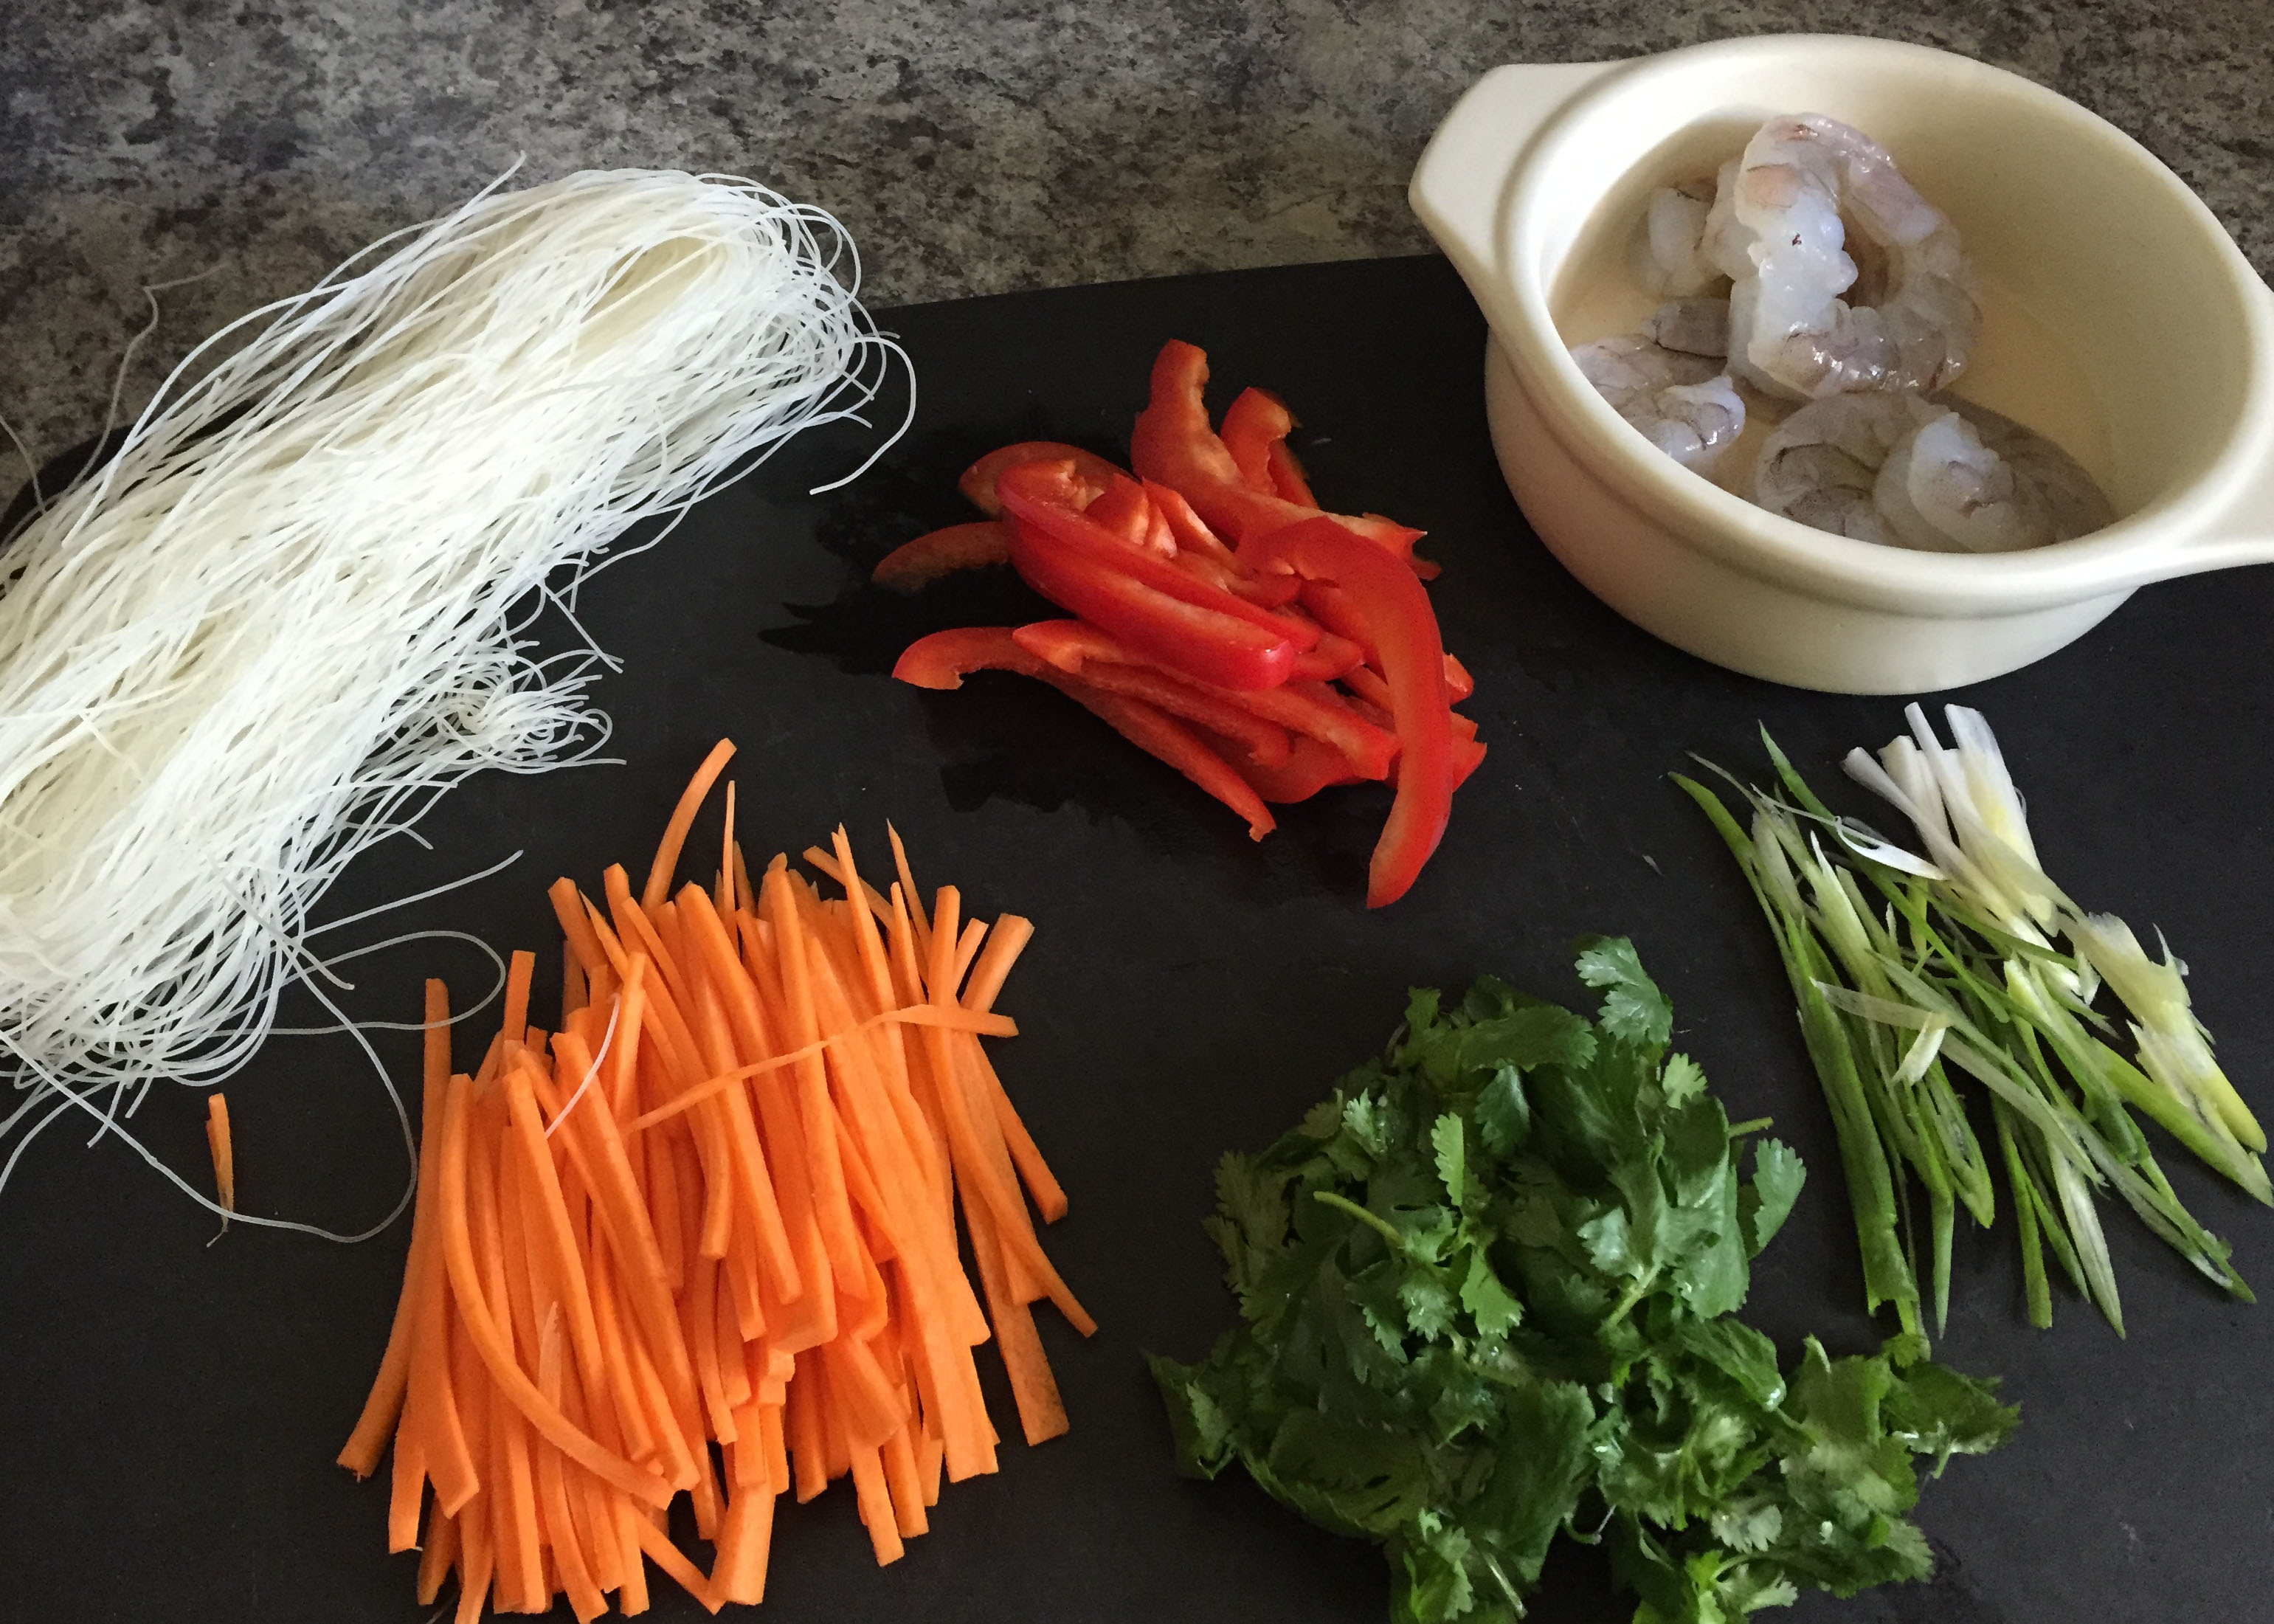
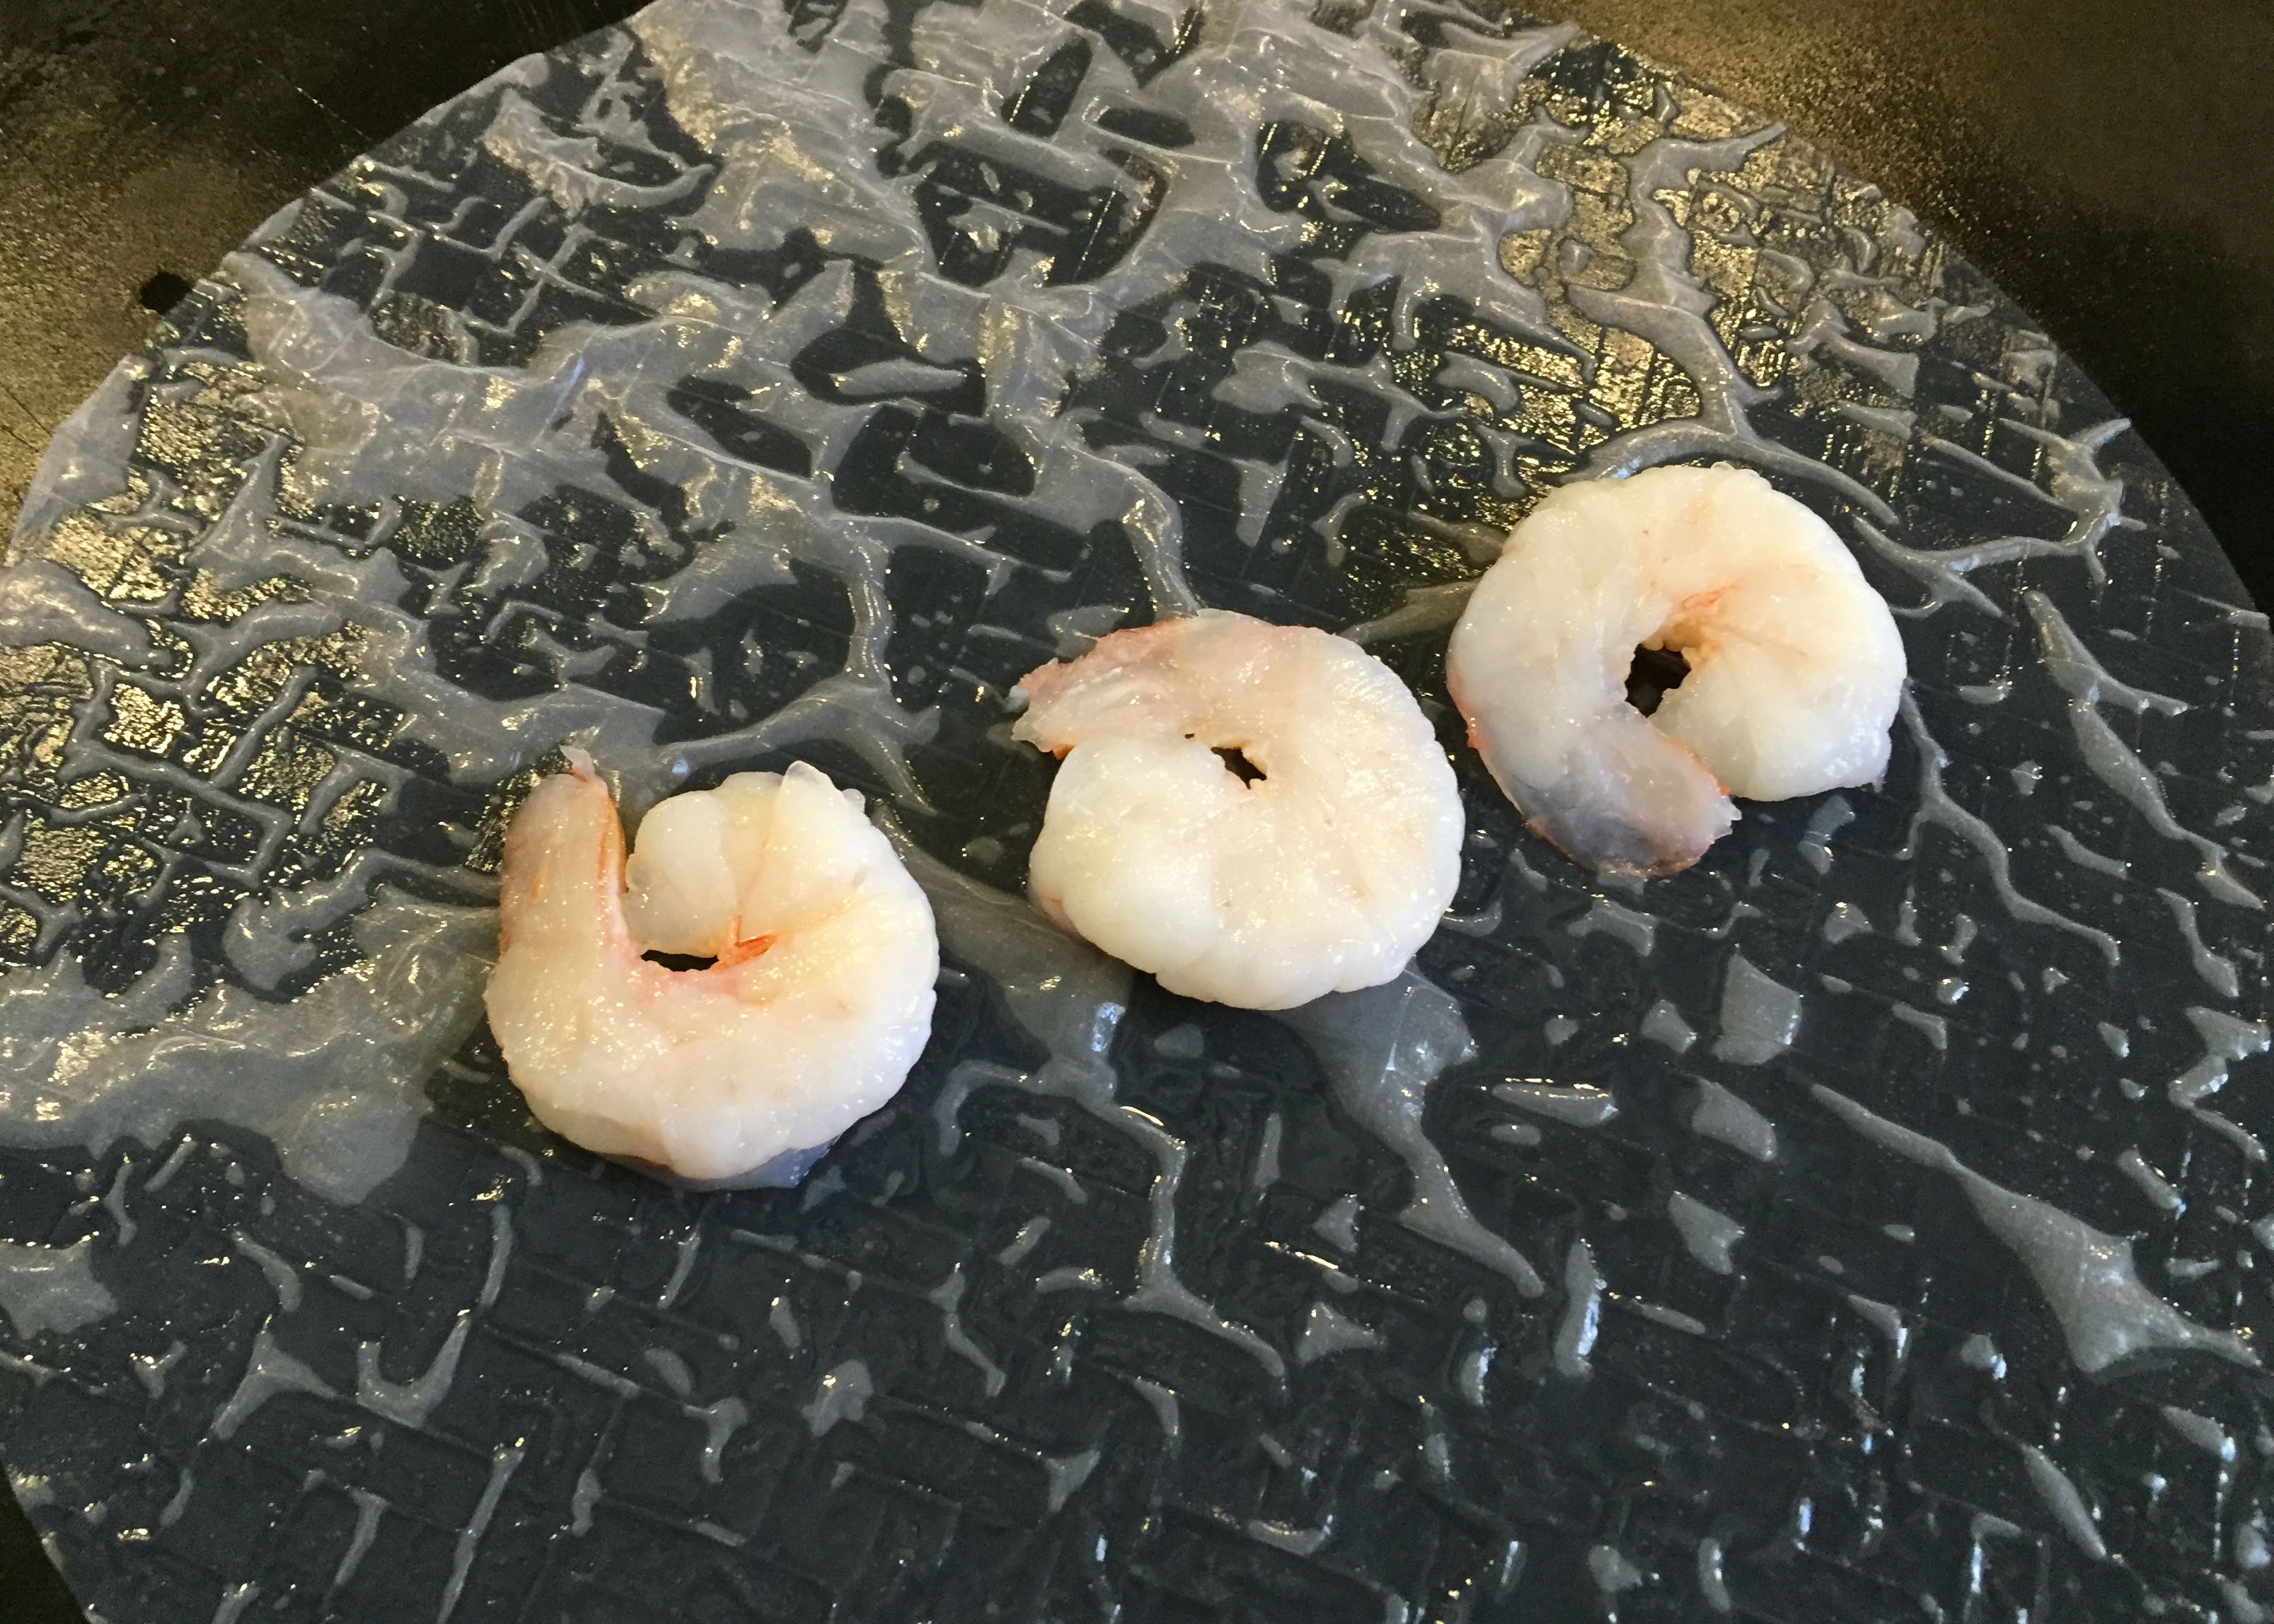
9 medium-size (I used 16/20 count) prawns, shelled
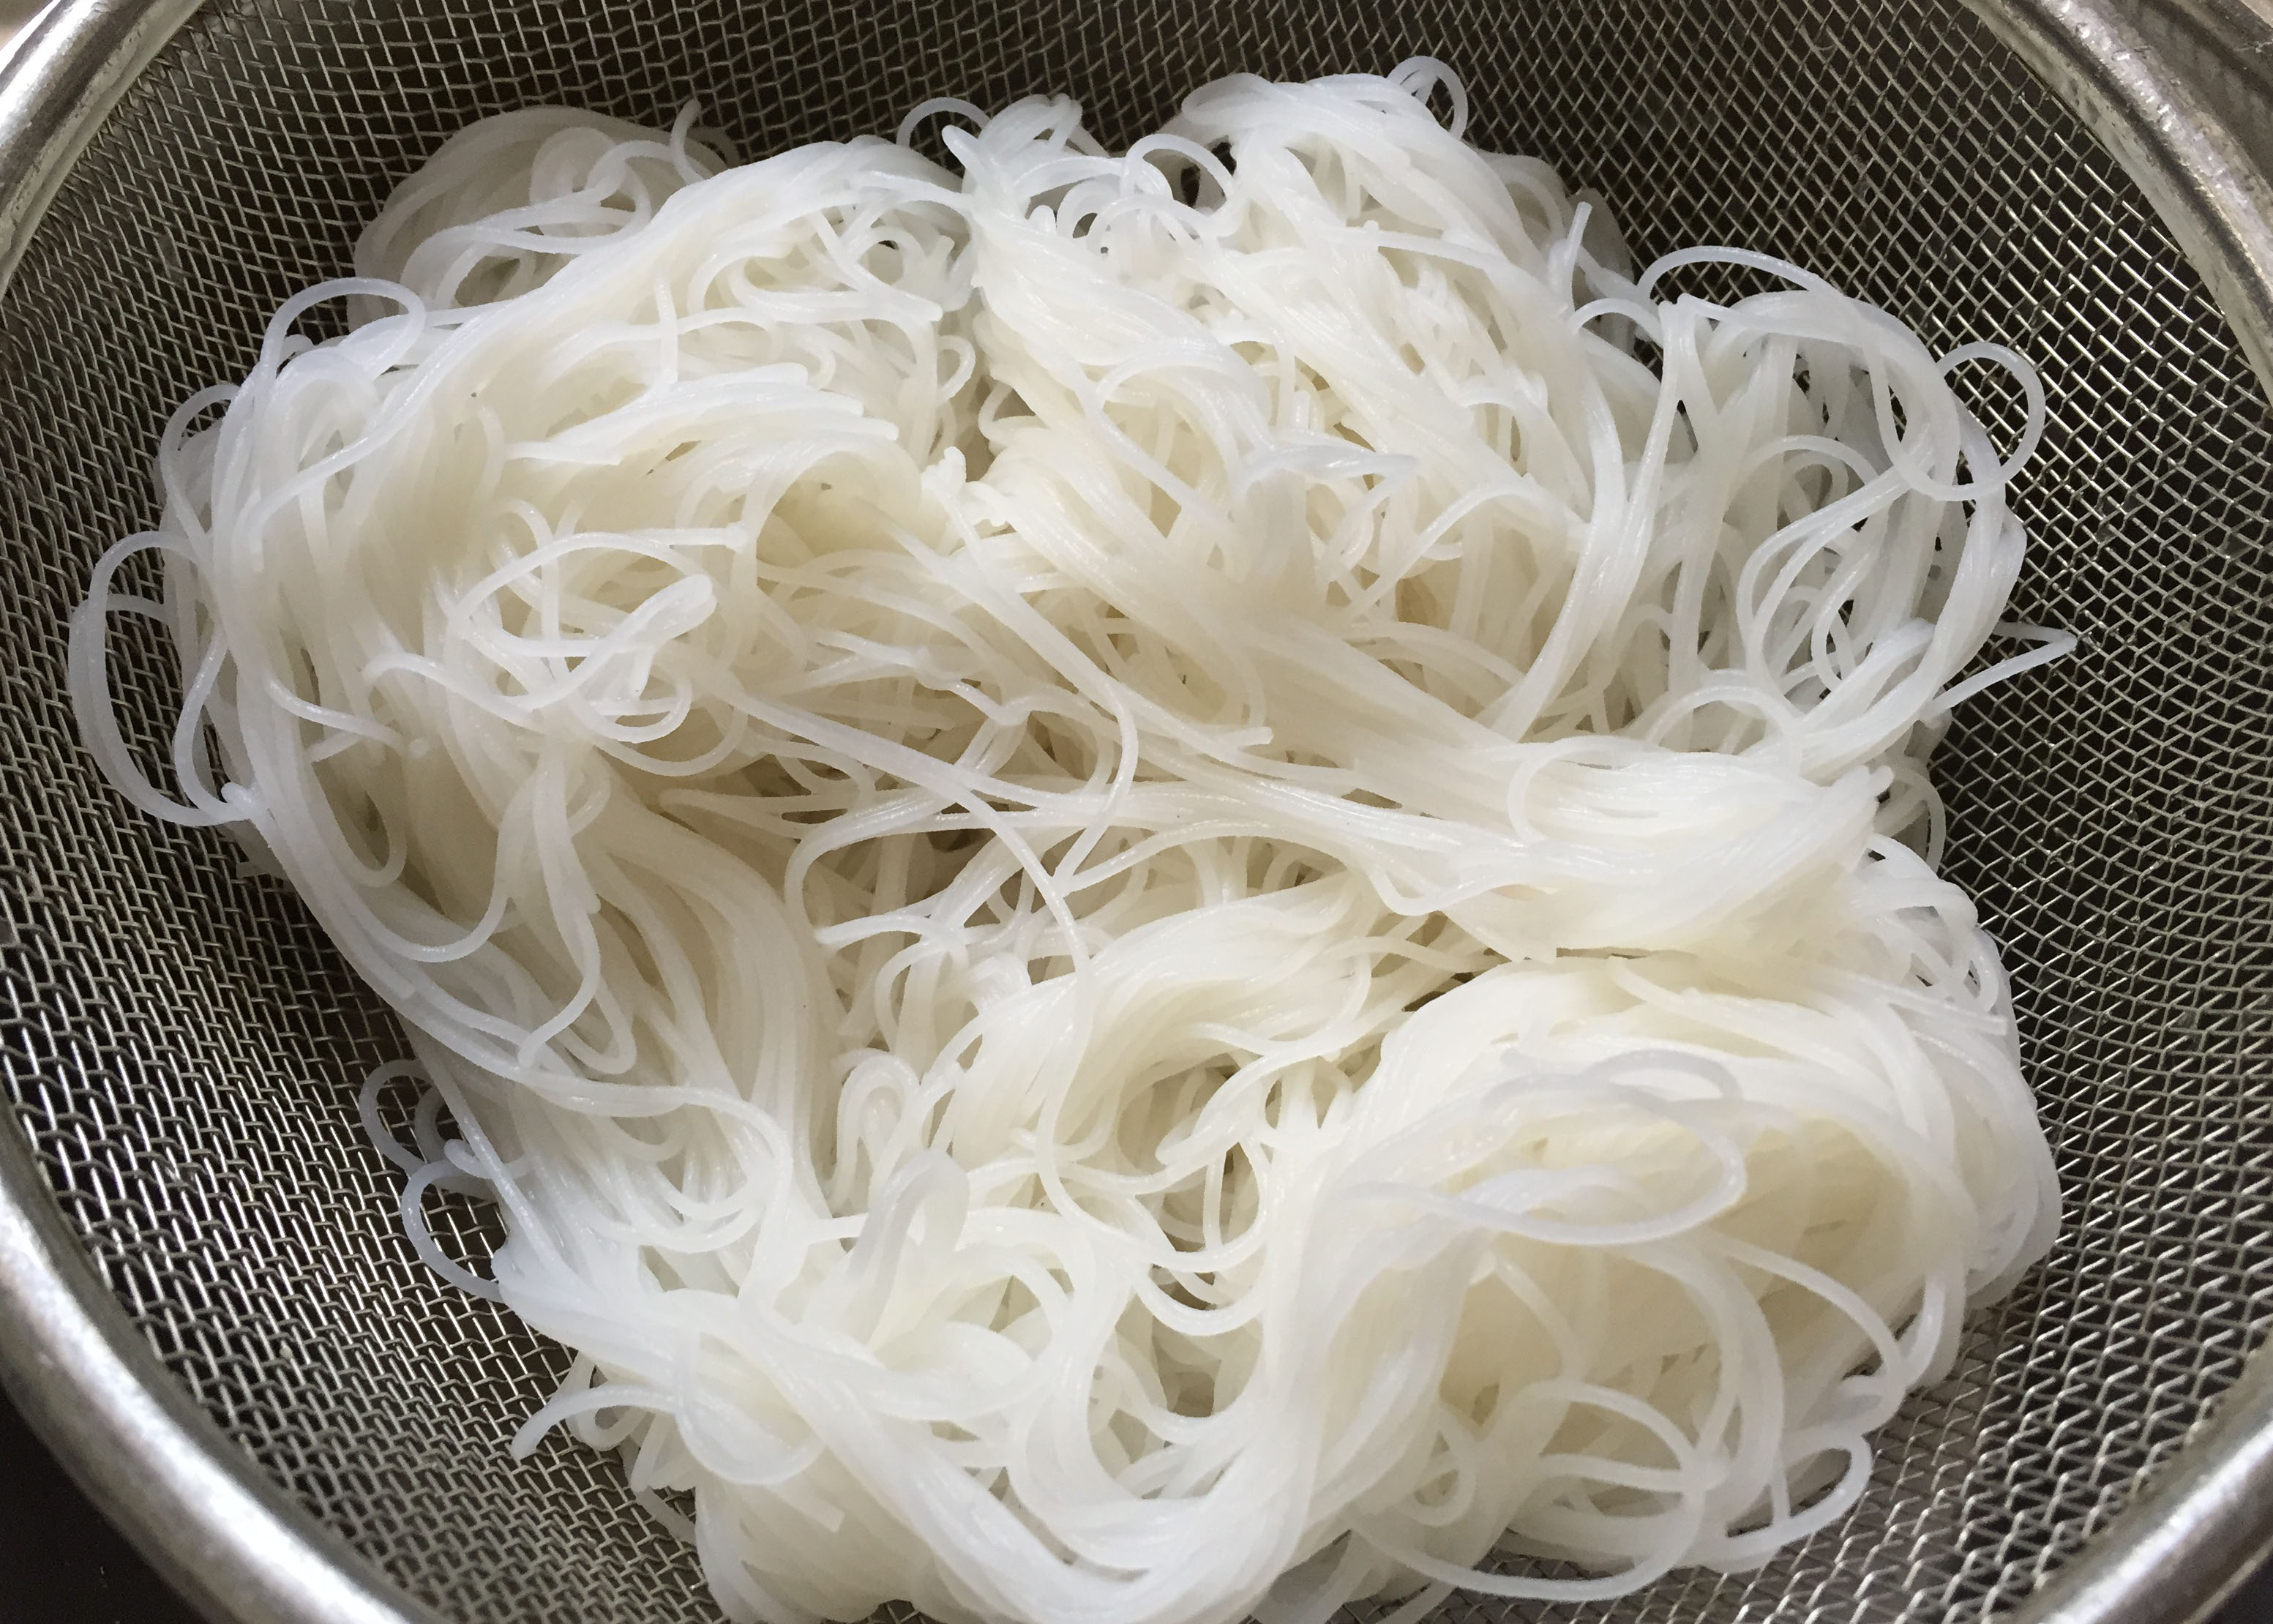
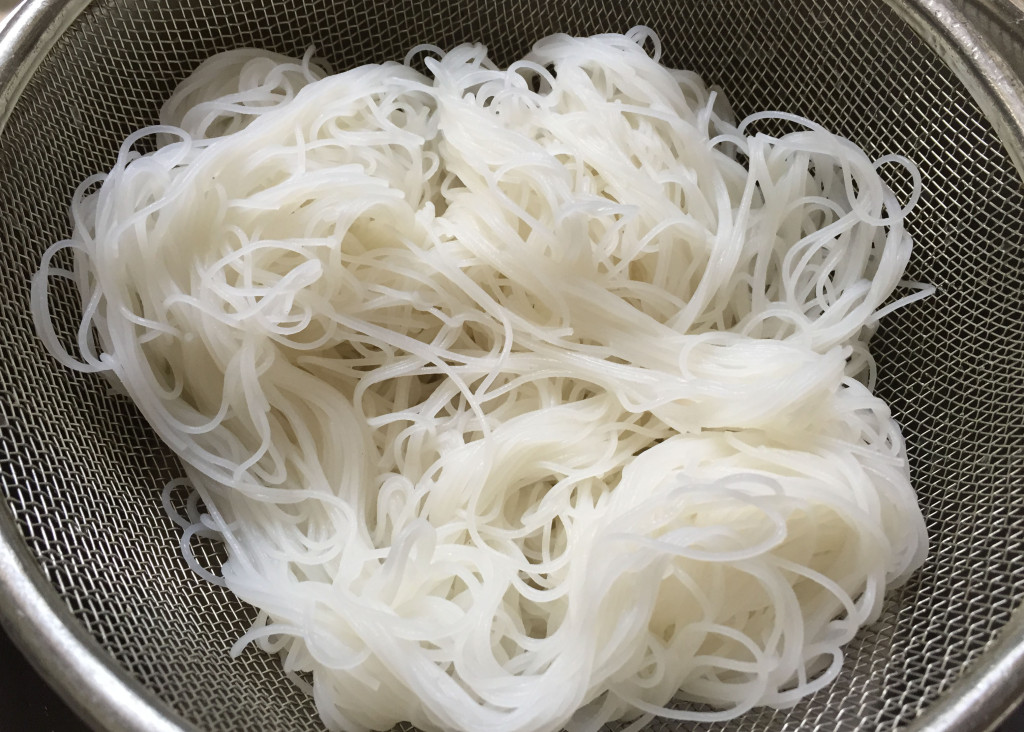
2 oz vermicelli noodles (or about 1 1/2 cups of finished noodles)
6 round rice paper wrappers
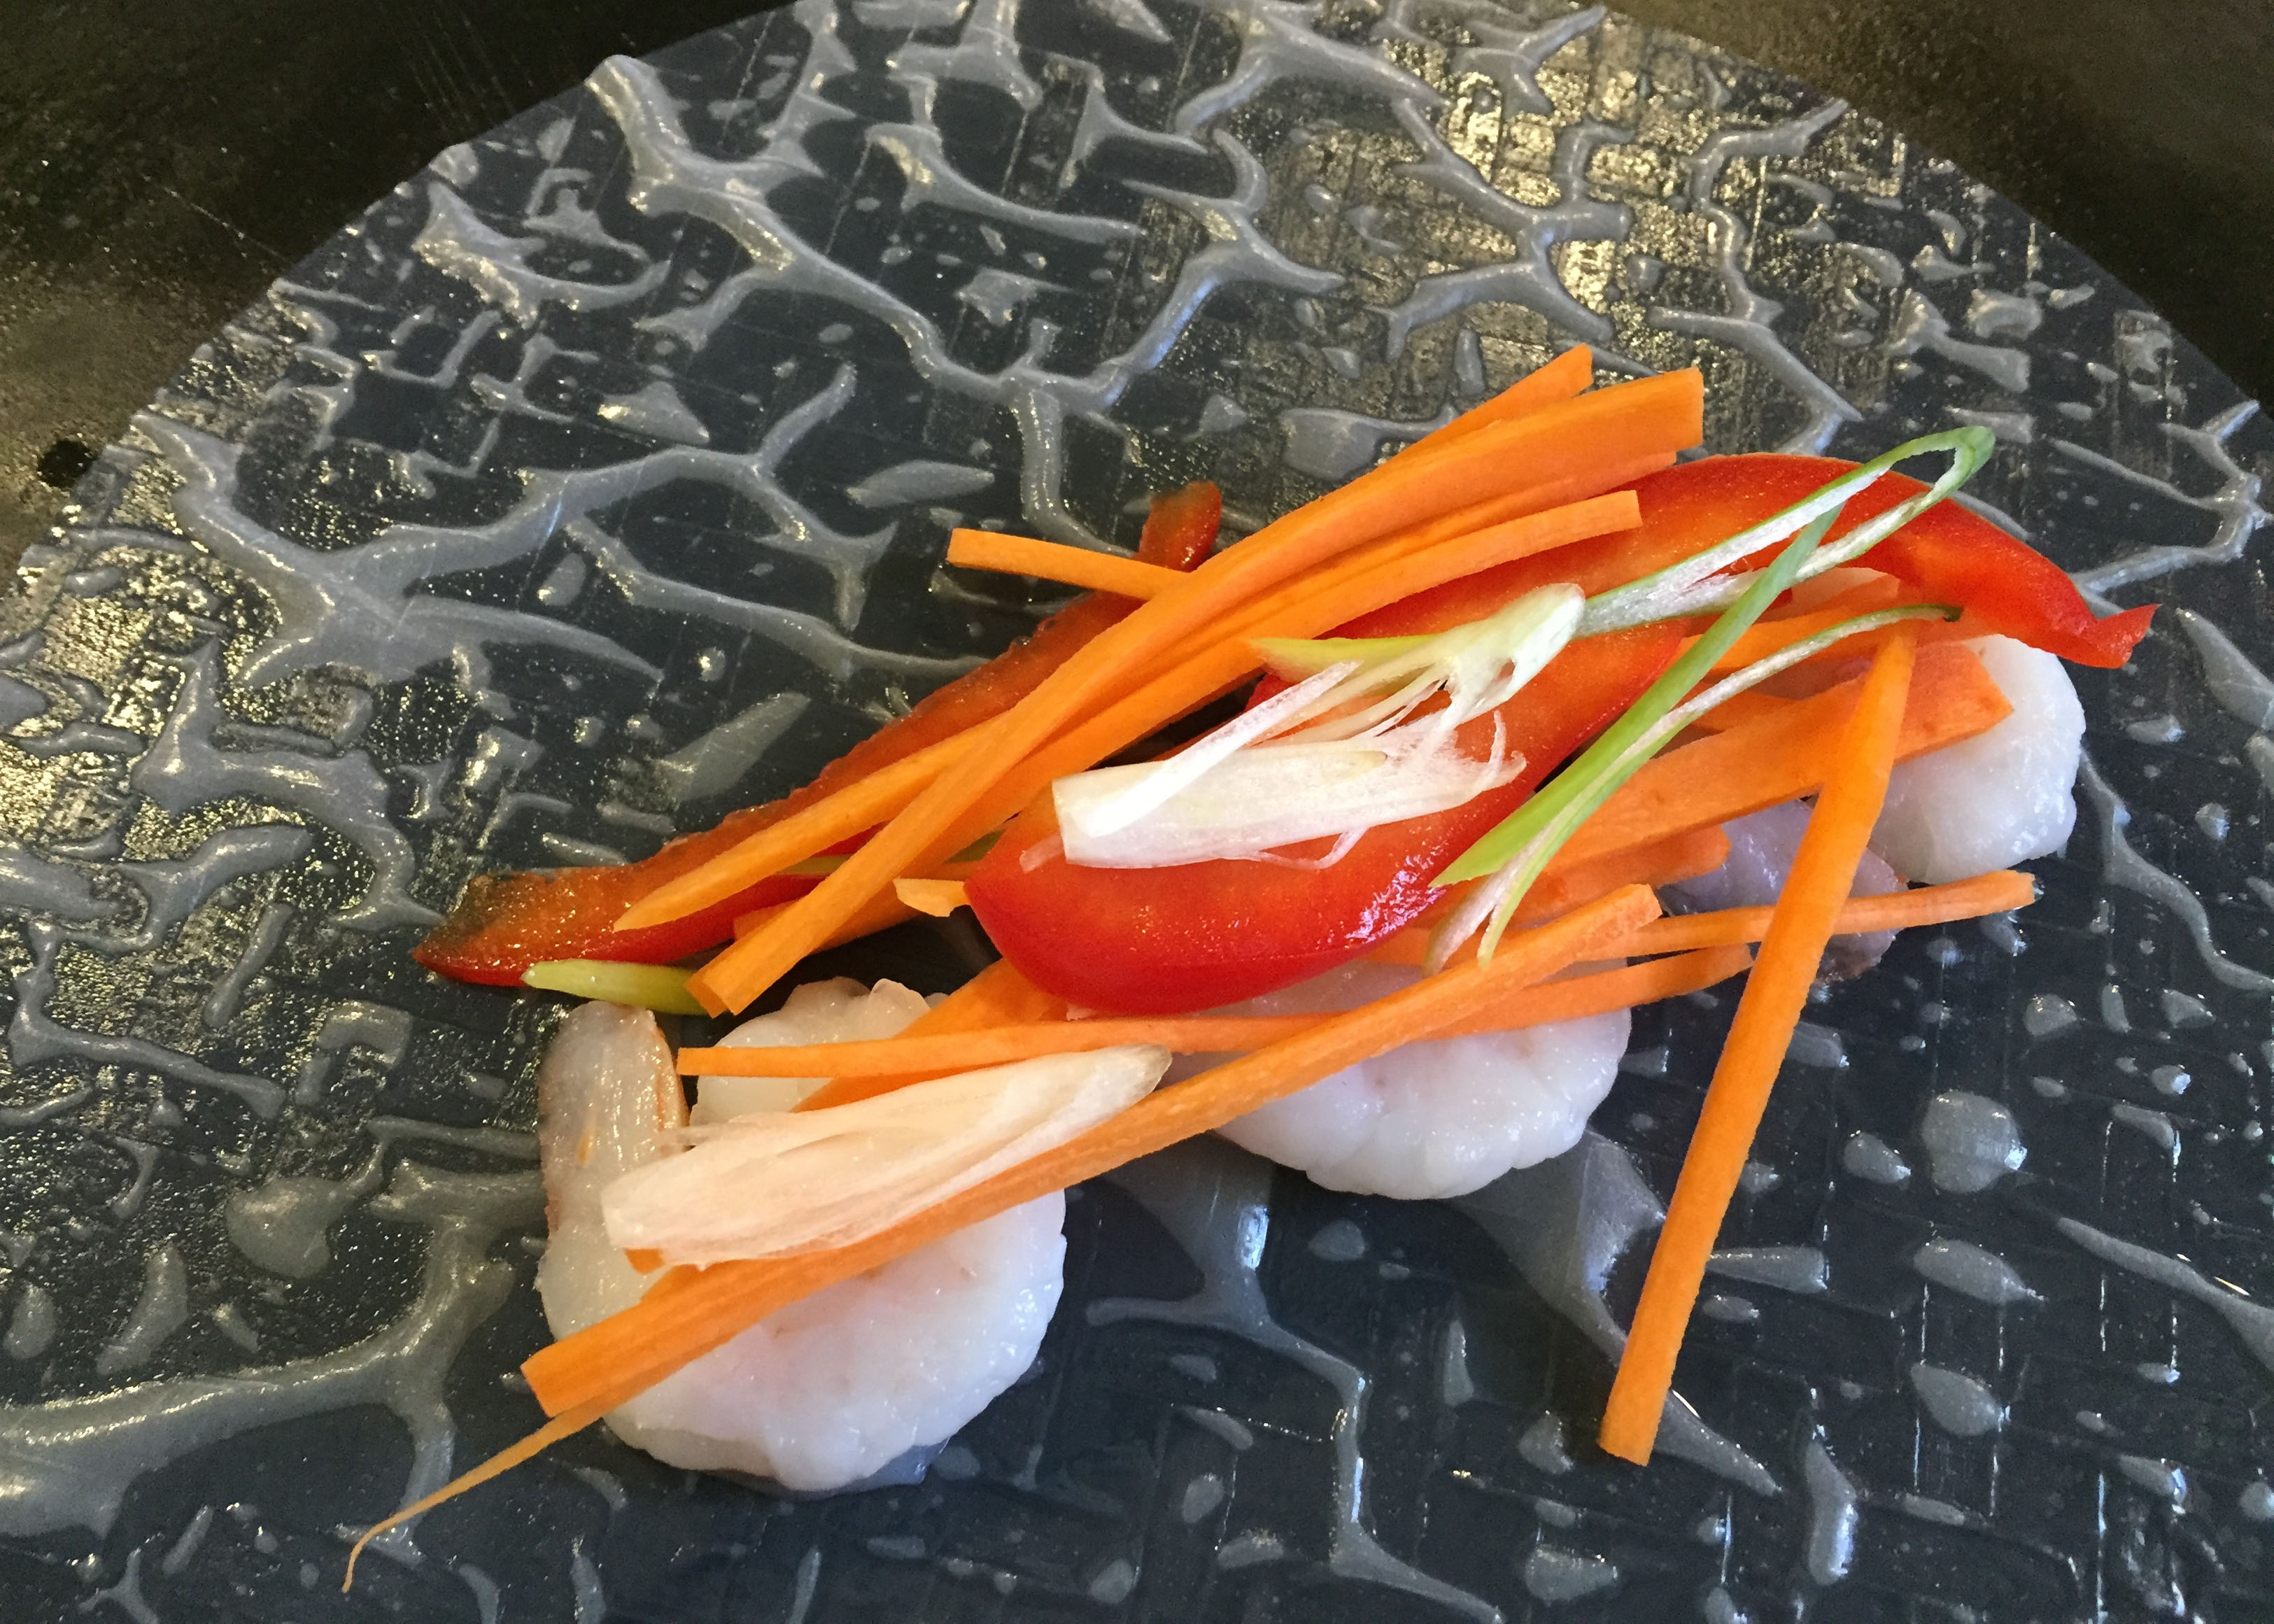
1/2 red bell pepper (thinly sliced, pole to pole)
1 large carrot (cut into thin 3″ matchsticks)
1 green onion (thinly sliced on the diagonal)
leaves from 20  or so sprigs of cilantro

Peanut sauce:
4 TBS peanut butter
1 TBS hoisin sauce
1 TBS fresh lime juice
1 tsp soy sauce
1 tsp honey
1 tsp chili garlic sauce

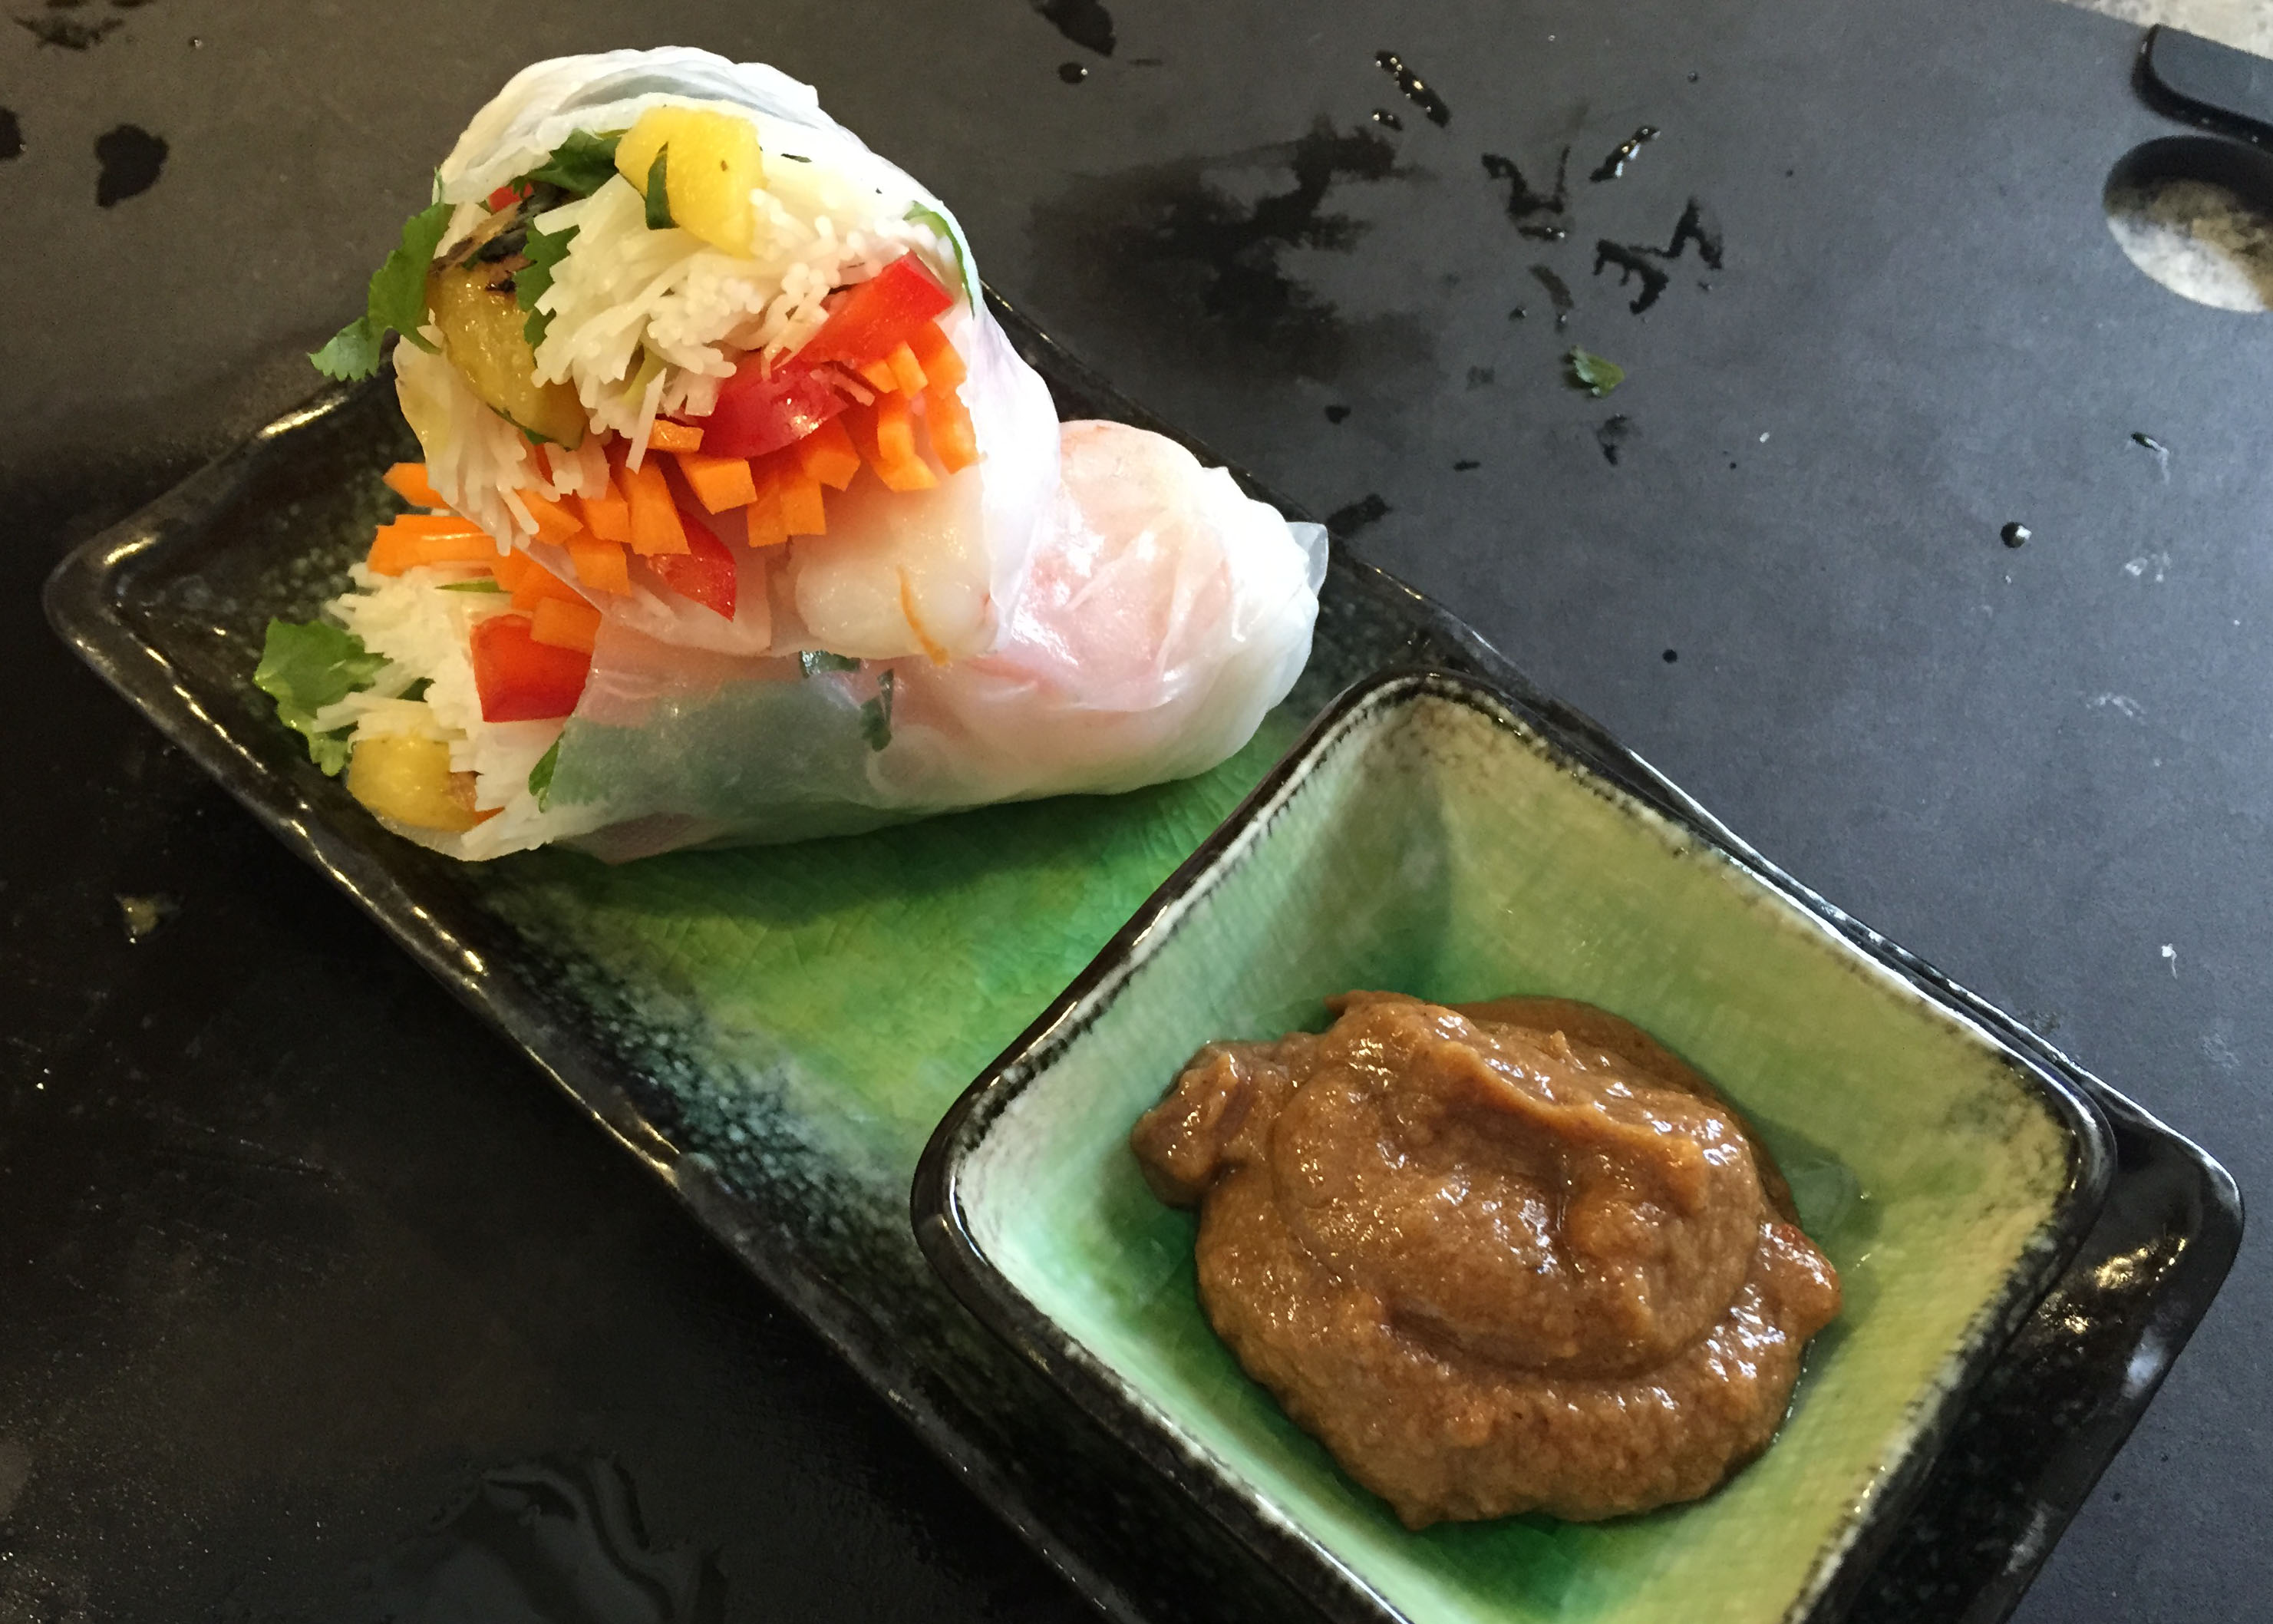
Mix peanut sauce ingredients in bowl, then blend in enough cold water to get the consistency you want. For me, this is about 3 tablespoons. Set aside.

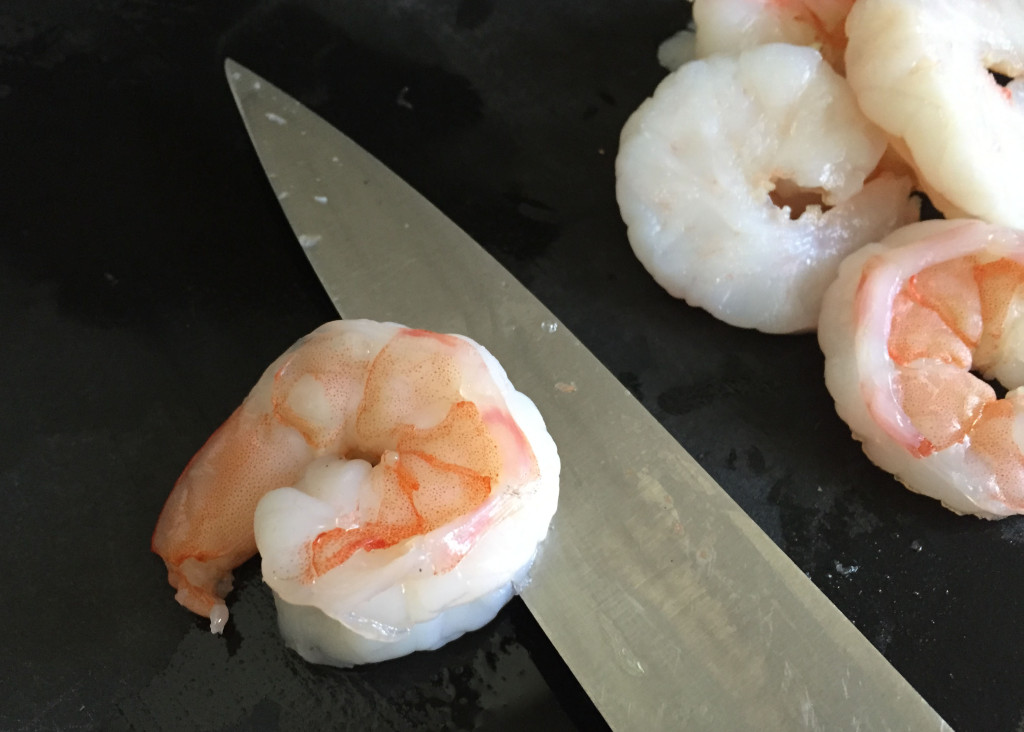
Heat a good amount of water (enough to also cook noodles below) in medium-size saucepan. When it starts to simmer, add prawns and cook for 2 minutes. Remove the prawns from the hot water with a slotted spoon, rinse in cold water and pat dry. Cut in half lengthwise and set aside.
salad roll shrimp

In the still hot water in which you cooked the prawns, cook vermicelli noodles according to package directions. This should entail adding the noodles to the hot water for about 3 minutes, then rinse in cold water and drain.
salad roll noodles

Putting it together:

salad roll ingredients

Place a clean, damp kitchen towel on a work surface. If you work very quickly you don’t need the towel, just make sure the work surface is wet. But if you think making the roll is going to take you longer than a minute, use the towel or the rice paper will stick to your work surface (like my first one did!). Fill a wide, shallow dish large enough to hold a rice paper wrapper with hot tap water (big pie plate or frying pan). Working with 1 wrapper at a time, completely submerge the wrapper until it is soft and pliable, about 10-15 seconds. Remove the wrapper from the water and place it on the towel.

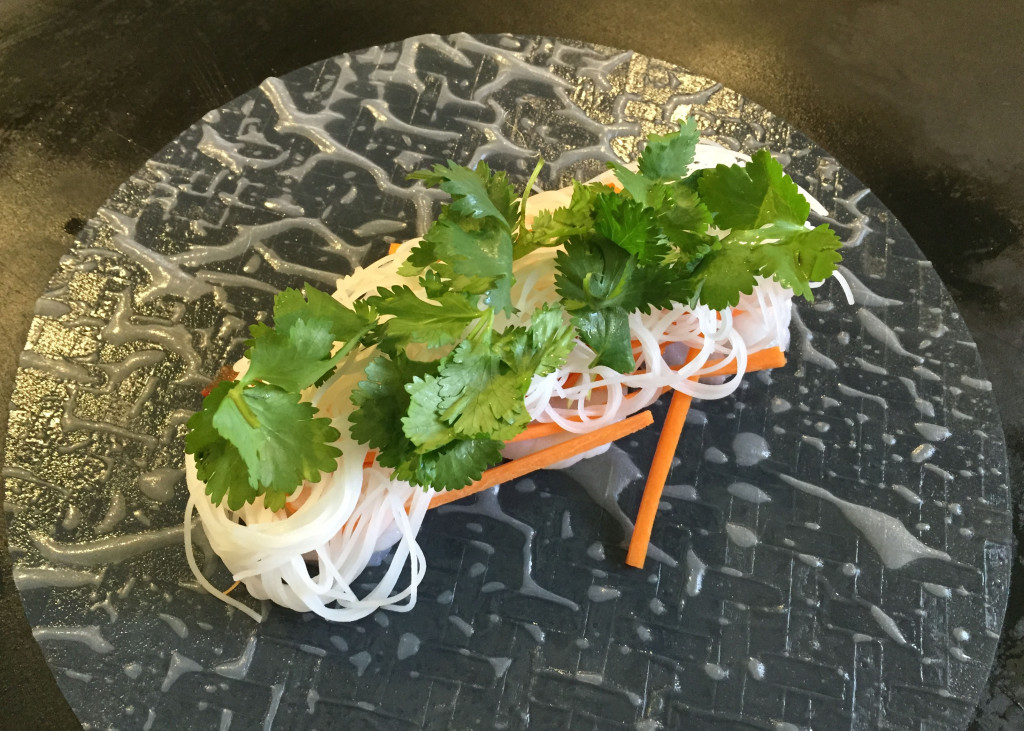
Lay 3 prawn halves in a row along the centre of the wrapper. Add other vegetables lengthwise on top. Make sure they are neatly laid or they will poke through your rice paper when you try to roll it. Add a small amount of vermicelli noodles and top with cilantro.
salad rooll 1
salad roll 2
salad roll 3

Now comes the tricky part!

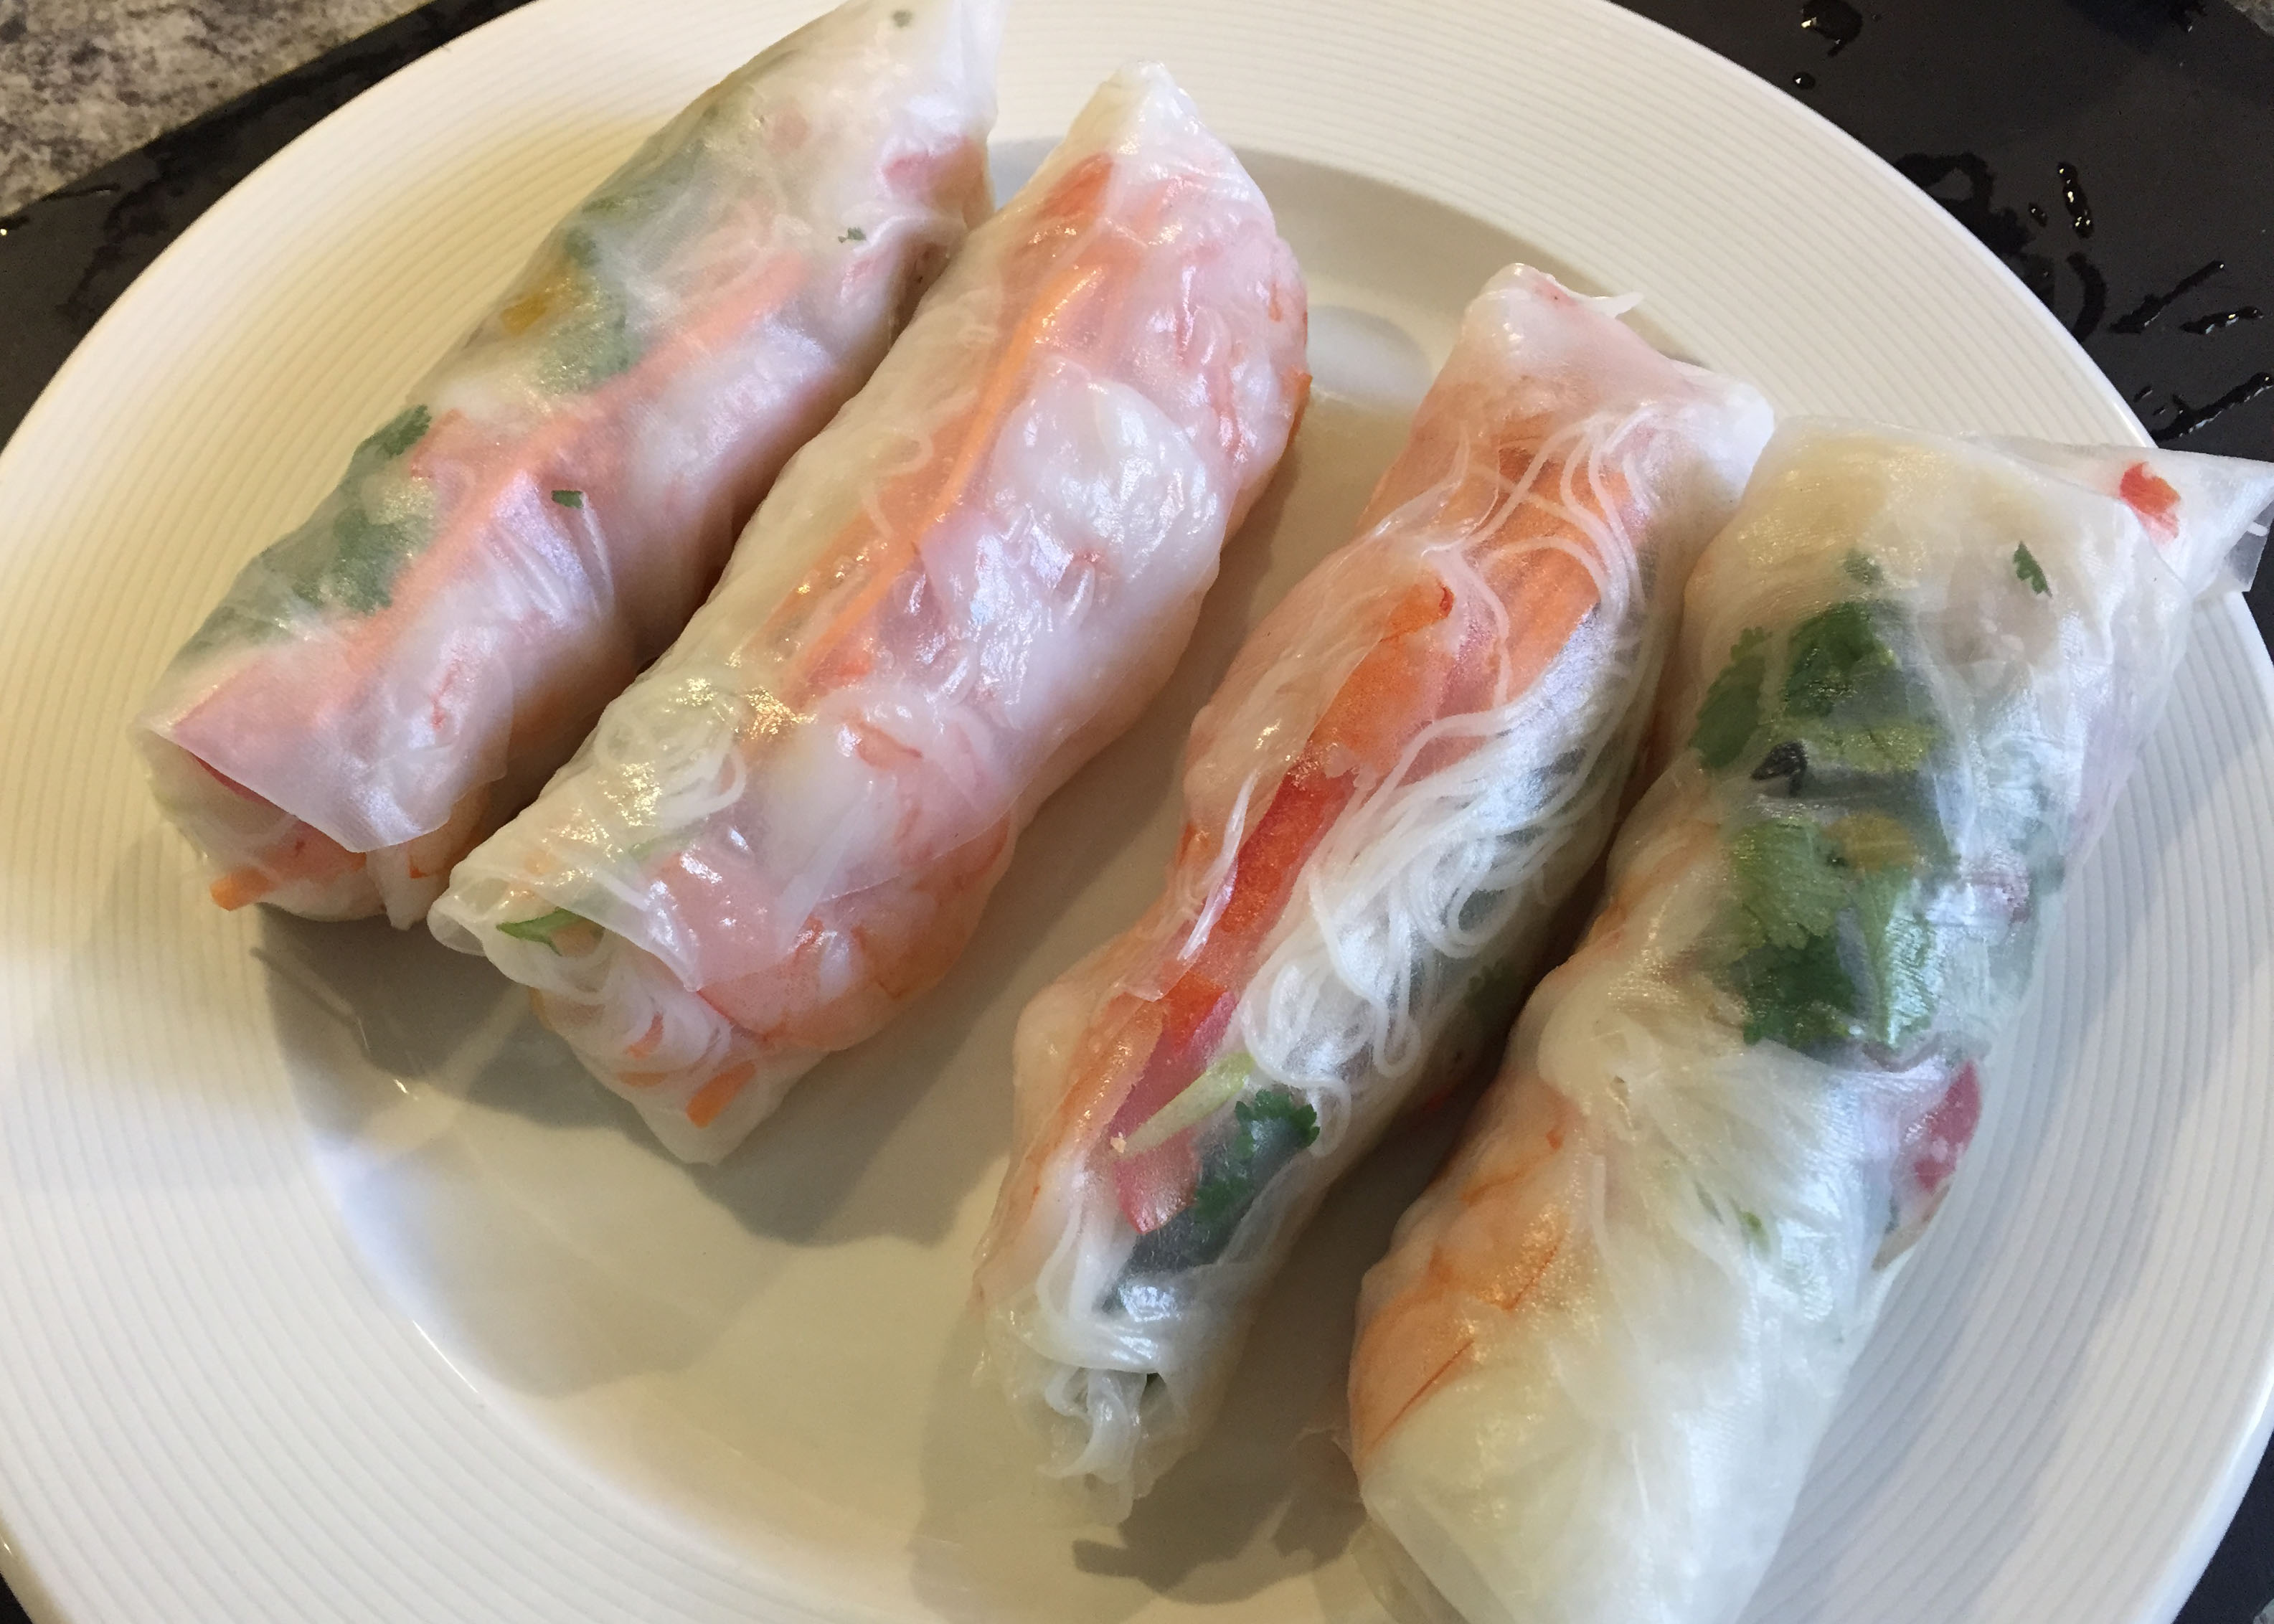
Fold the bottom half of the rice paper over the vegetables. Holding the vegetables firmly, pull back on them just slightly to tighten the roll. Fold in the sides and continue to roll away from you. SEE?!?! You did it! :) Note my picture below. The ones on the right were my first attempts (that second one from the right is especially bad!). Don’t worry if the first couple are messy, they will still taste good and once you’ve done it a few times, you will get the hang of it.
salad roll bad

If you want to hold them for a day or two, wrap them individually in cling wrap. When you’re ready to eat them, just dip them in peanut sauce and go for it. Very fresh and tasty.
salad roll end

Oh, and don’t tell Husband I made these, because I’ve already eaten half of them and the other half are safely hidden… um… STORED in fridge for my lunch tomorrow. :)

Hummus – 3 Ways

hummus originalI am not particularly fond of sweets (I know, right?!?!  Weird.) For dessert, I much prefer some lovely French cheese and a few frozen grapes. But don’t think that makes my life any easier. Eating healthy is still an effort. I would love nothing more than to scarf down a huge bag of potato chips every night. But because I can’t (le sigh), I am always searching for a healthier alternative. Enter… hummus. Who knew that blechy, healthy legumes could be whipped into something light and creamy, or earthy and salty, and made to taste altogether indulgent. And even though the carrot sticks I use as a hummus delivery system aren’t quite the same as a potato chip, they do provide a sort of crunch.

I have many more hummus ideas I’d like to try… like one with feta and fresh oregano or basil. Or how about sundried tomatoes and some sort of sausage or bacon?!?! I suspect you’ll be hearing more from me on that front. In the meantime, let’s do this!

Read more