Author: rradiuk

Pear, Ginger and Olive Oil Cake

I know. For someone who claims not to eat sweets this is the second sweet recipe in a row. I wouldn’t believe me either!

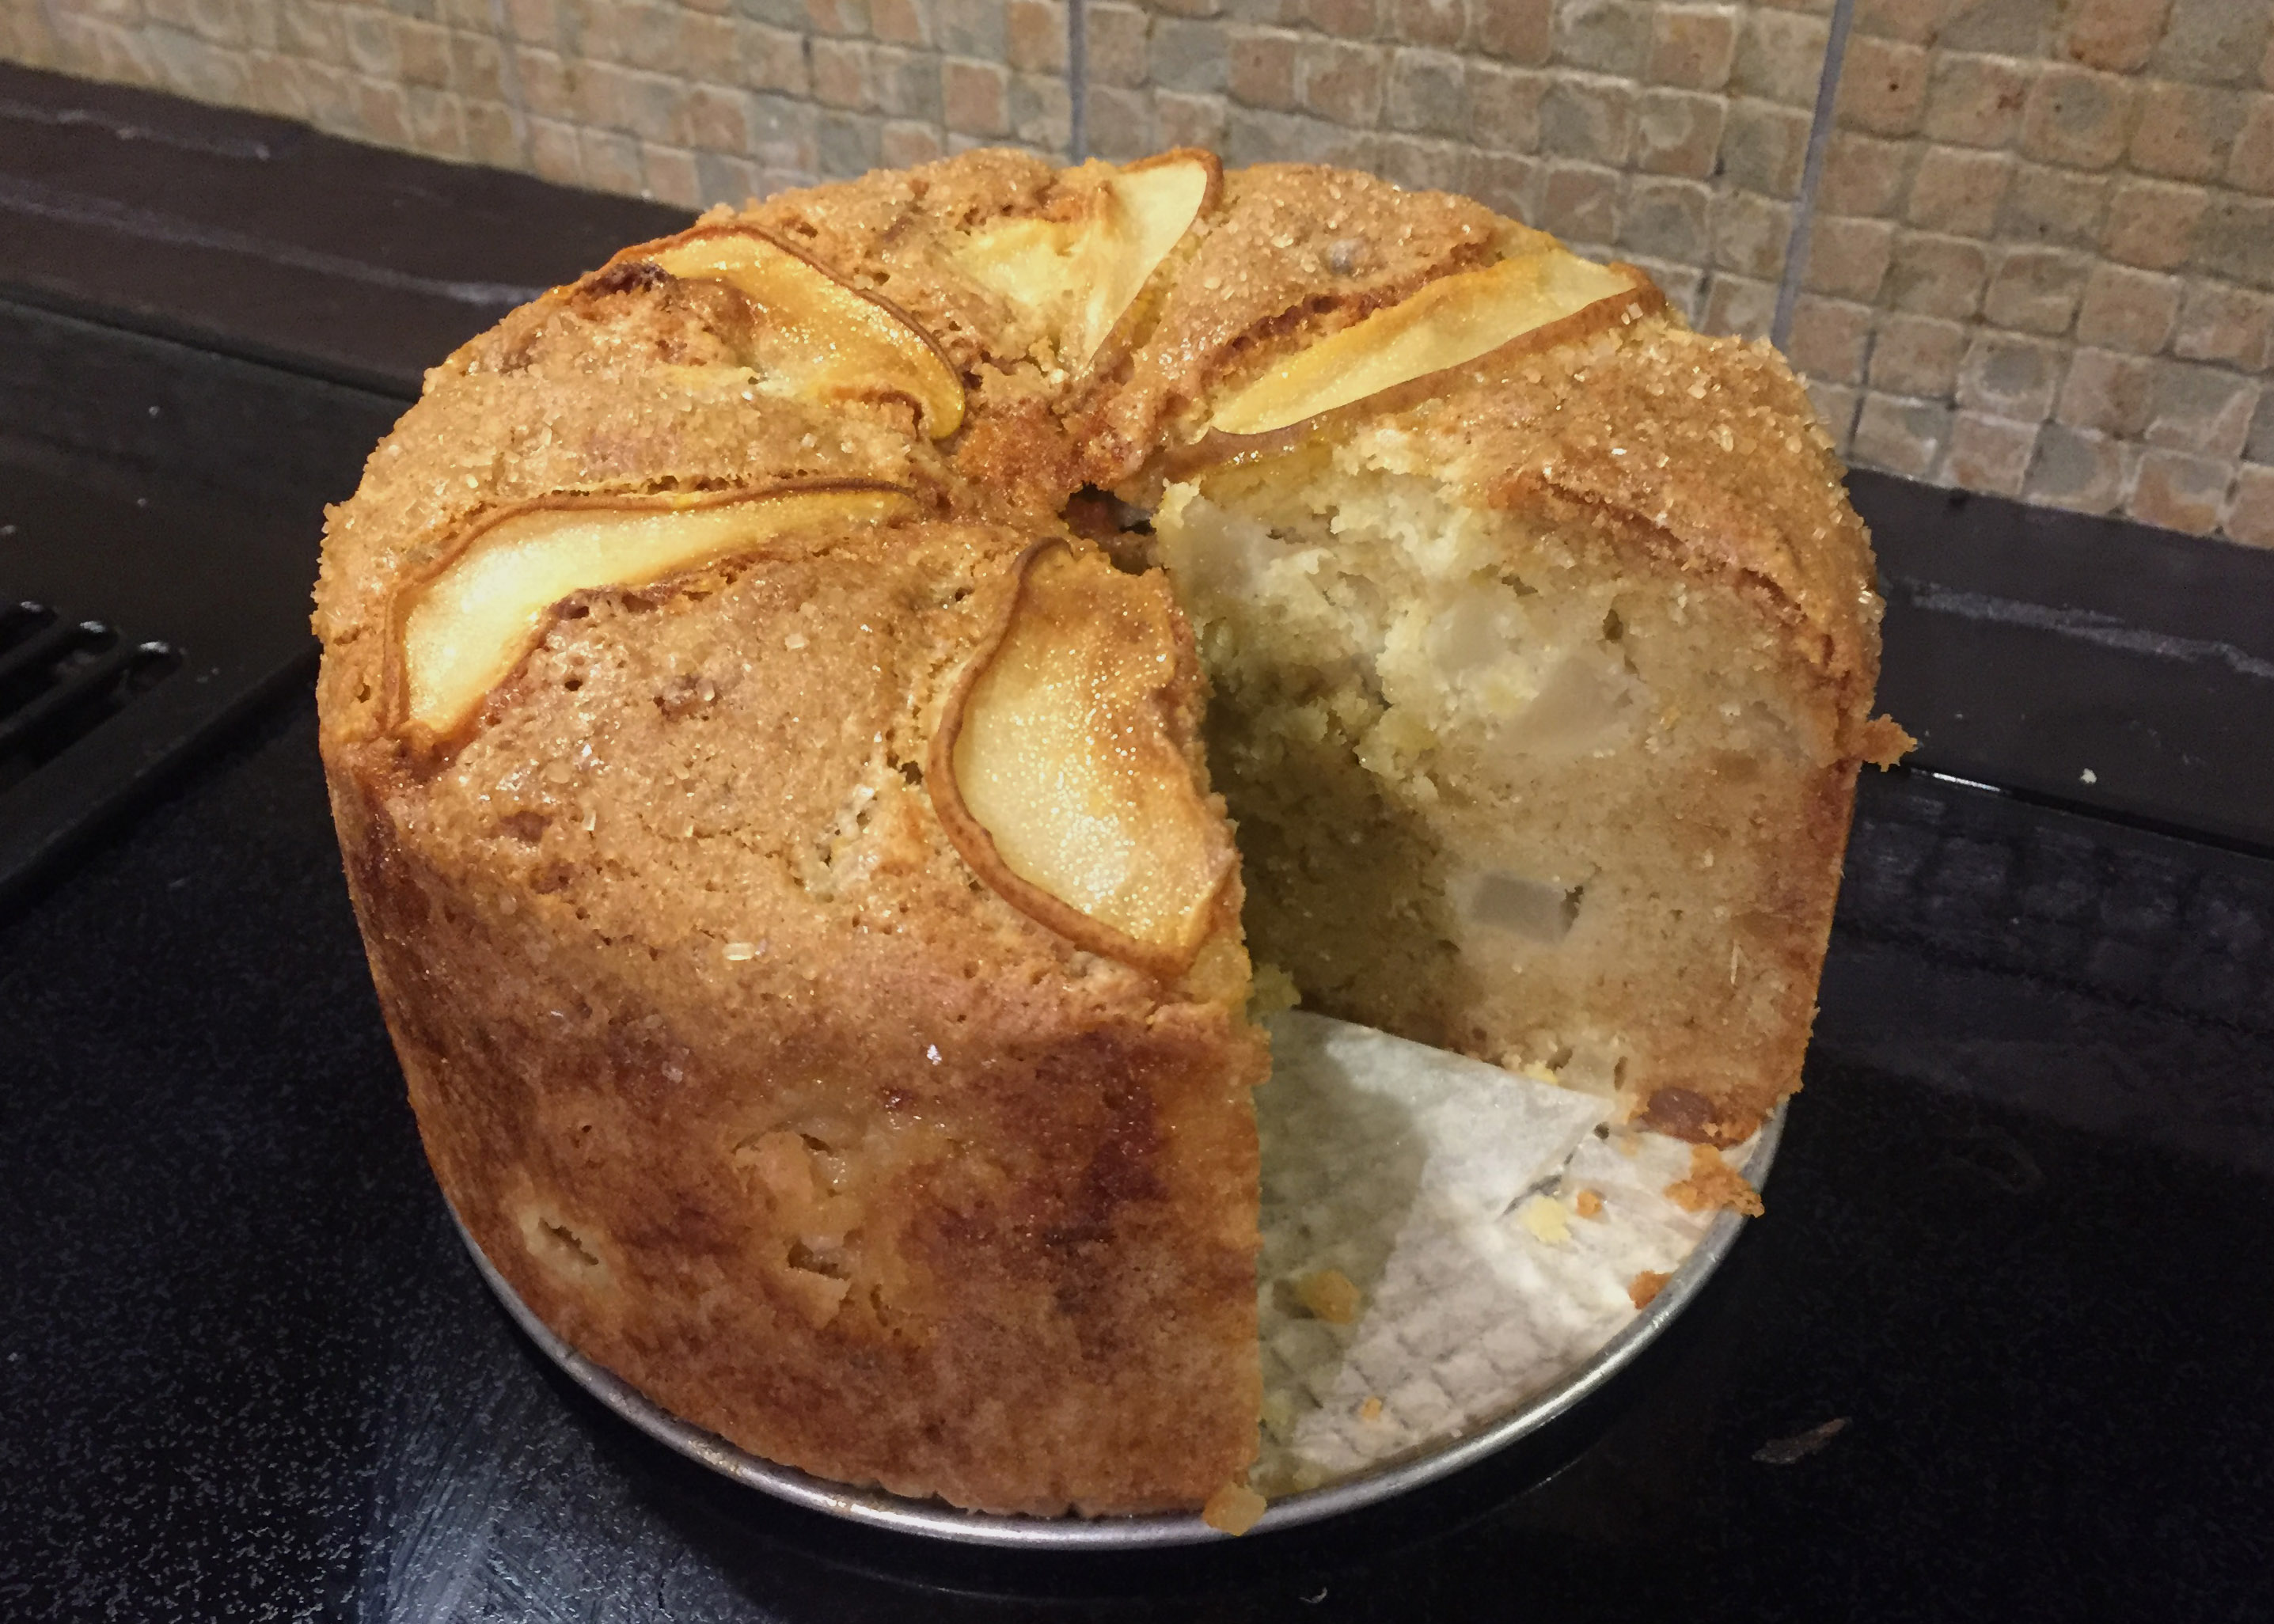
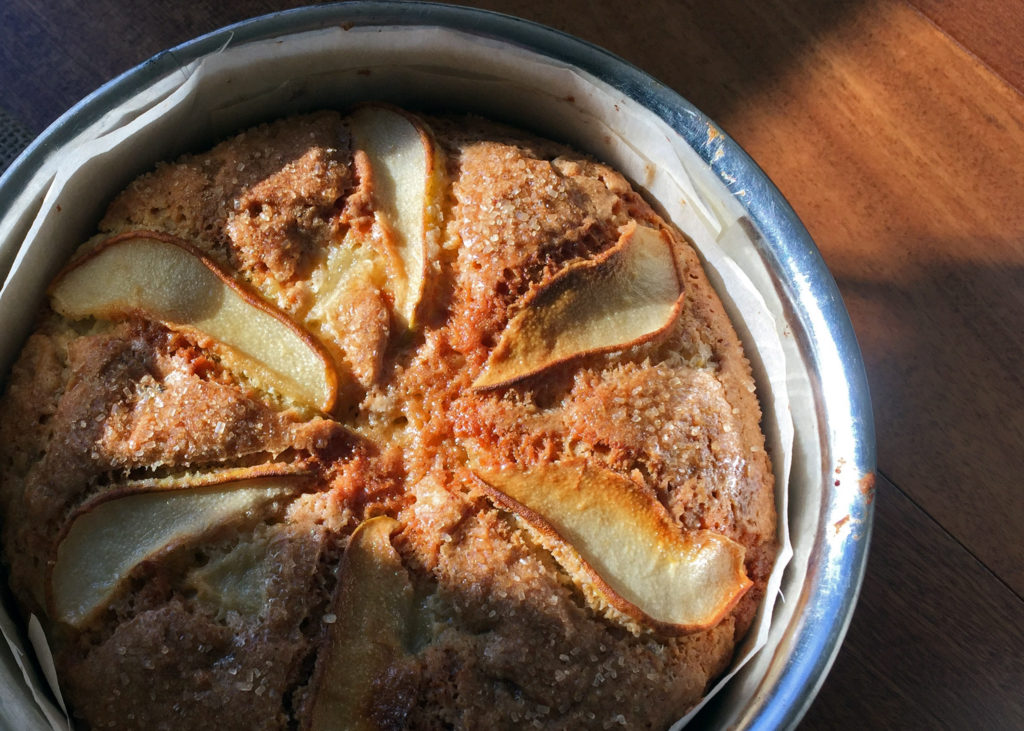
When I do indulge, I prefer a savoury element to my dessert. Despite its popularity I had never tried an olive oil cake and I have to say, I’m sold. The end result is tender and moist and has a lovely fruity grassy flavour from the olive oil that you just don’t get putting regular oil into a cake. I like extra-virgin olive oil for a more pronounced flavour but you can use regular olive oil for a milder cake. In this recipe (which hails from this tiny beloved restaurant in London) the ginger adds a spicy element and the pear is a perfect match with the cheese you should serve with this cake. Yes… cheese! Something sharp and tangy like a Spanish aged sheeps’ milk (Manchego!), or a creamy French blue (St. Agur!) or a runny, slightly salty, bloomy, buttery, somewhat pungent French triple cream (Delice de Bourgogne!). And I’m not even going to mention the amazing crispy crackly caramelized top which comes from a generous sprinkling of demerara sugar… nope, not saying a word.

The original recipe asks for a 2 kg loaf pan which I do not have so I used a 7” springform pan and it took an extra 25 minutes to fully cook the cake in the centre but the top did not overcook so don’t be afraid to leave it in as long as necessary. If the top starts to get too brown for your liking you can cover it with a piece of tinfoil until the cake is done. It will take closer to the recommended time if you use a loaf pan or a larger springform pan.

As well, I highly recommend using a weigh scale to measure the sugar and flour, but I have converted the measurements into volume amounts if you prefer.

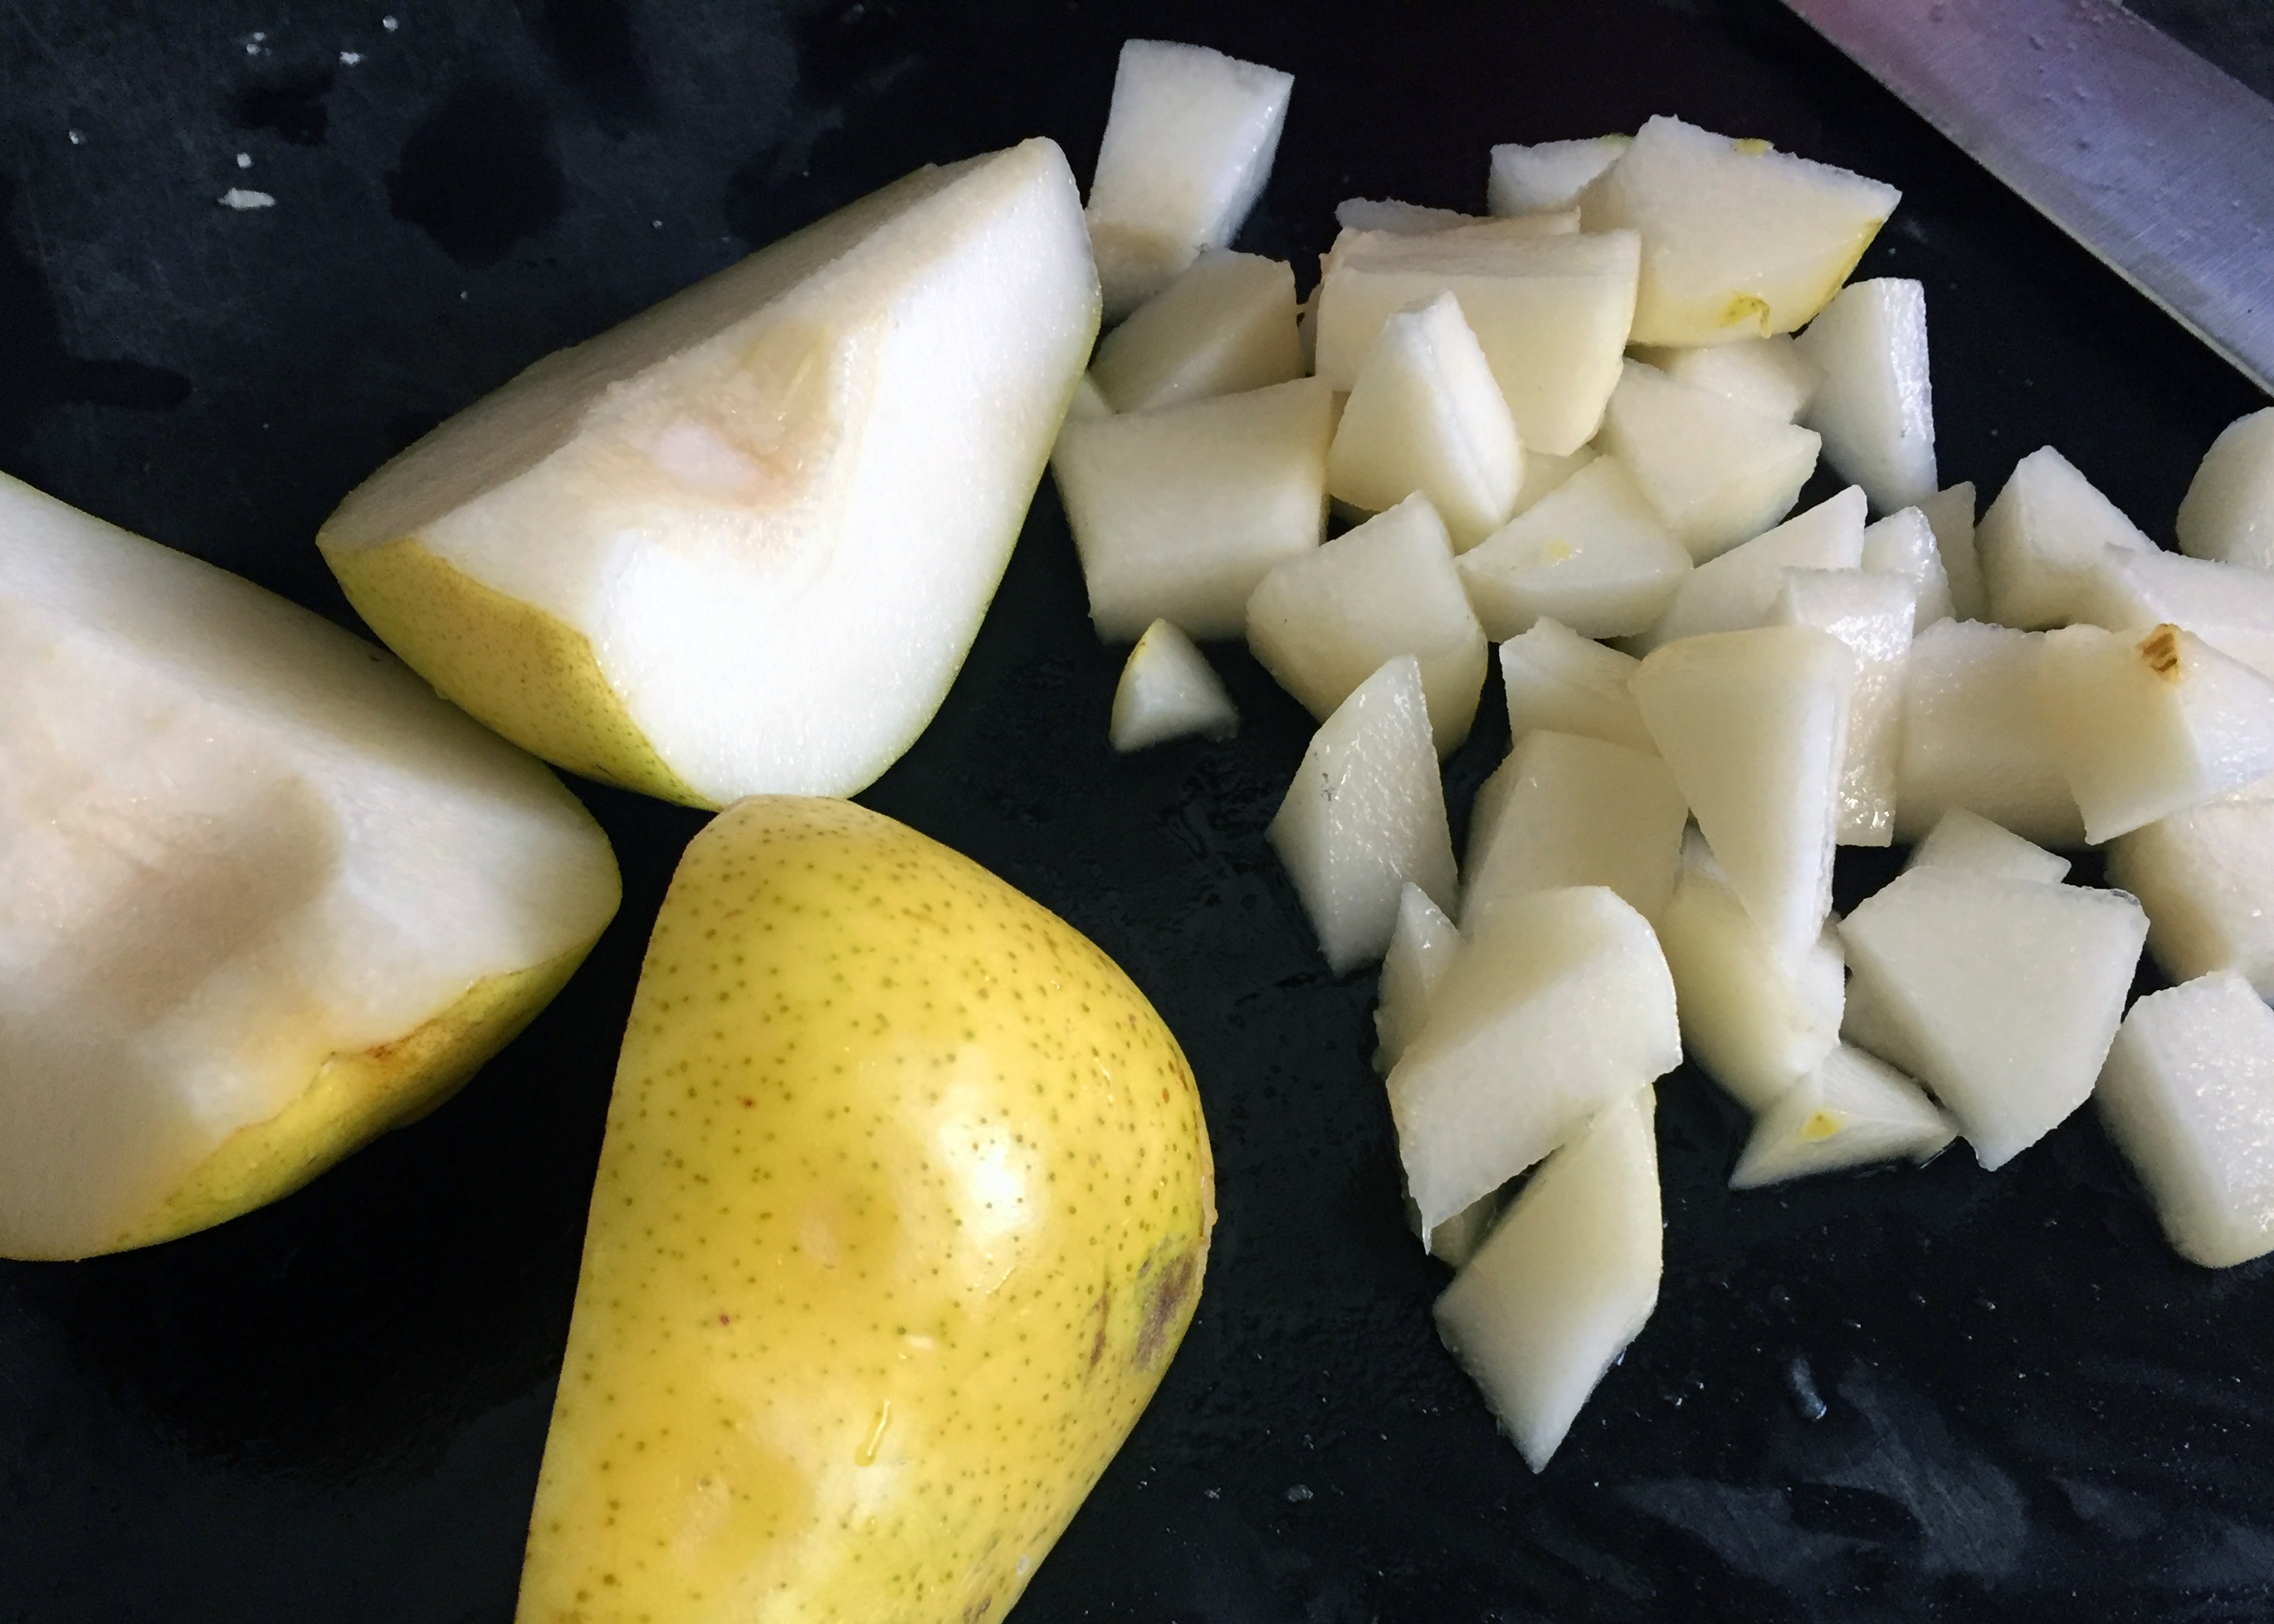
3 medium pears, 2 peeled and diced and one skin on, cut into wedges
1 TBS lemon juice
Zest of 1 lemon
200g (scant 1 cup) sugar
160ml (2/3 cup) good quality olive oil (I prefer extra-virgin for a more pronounced flavour)
2 eggs
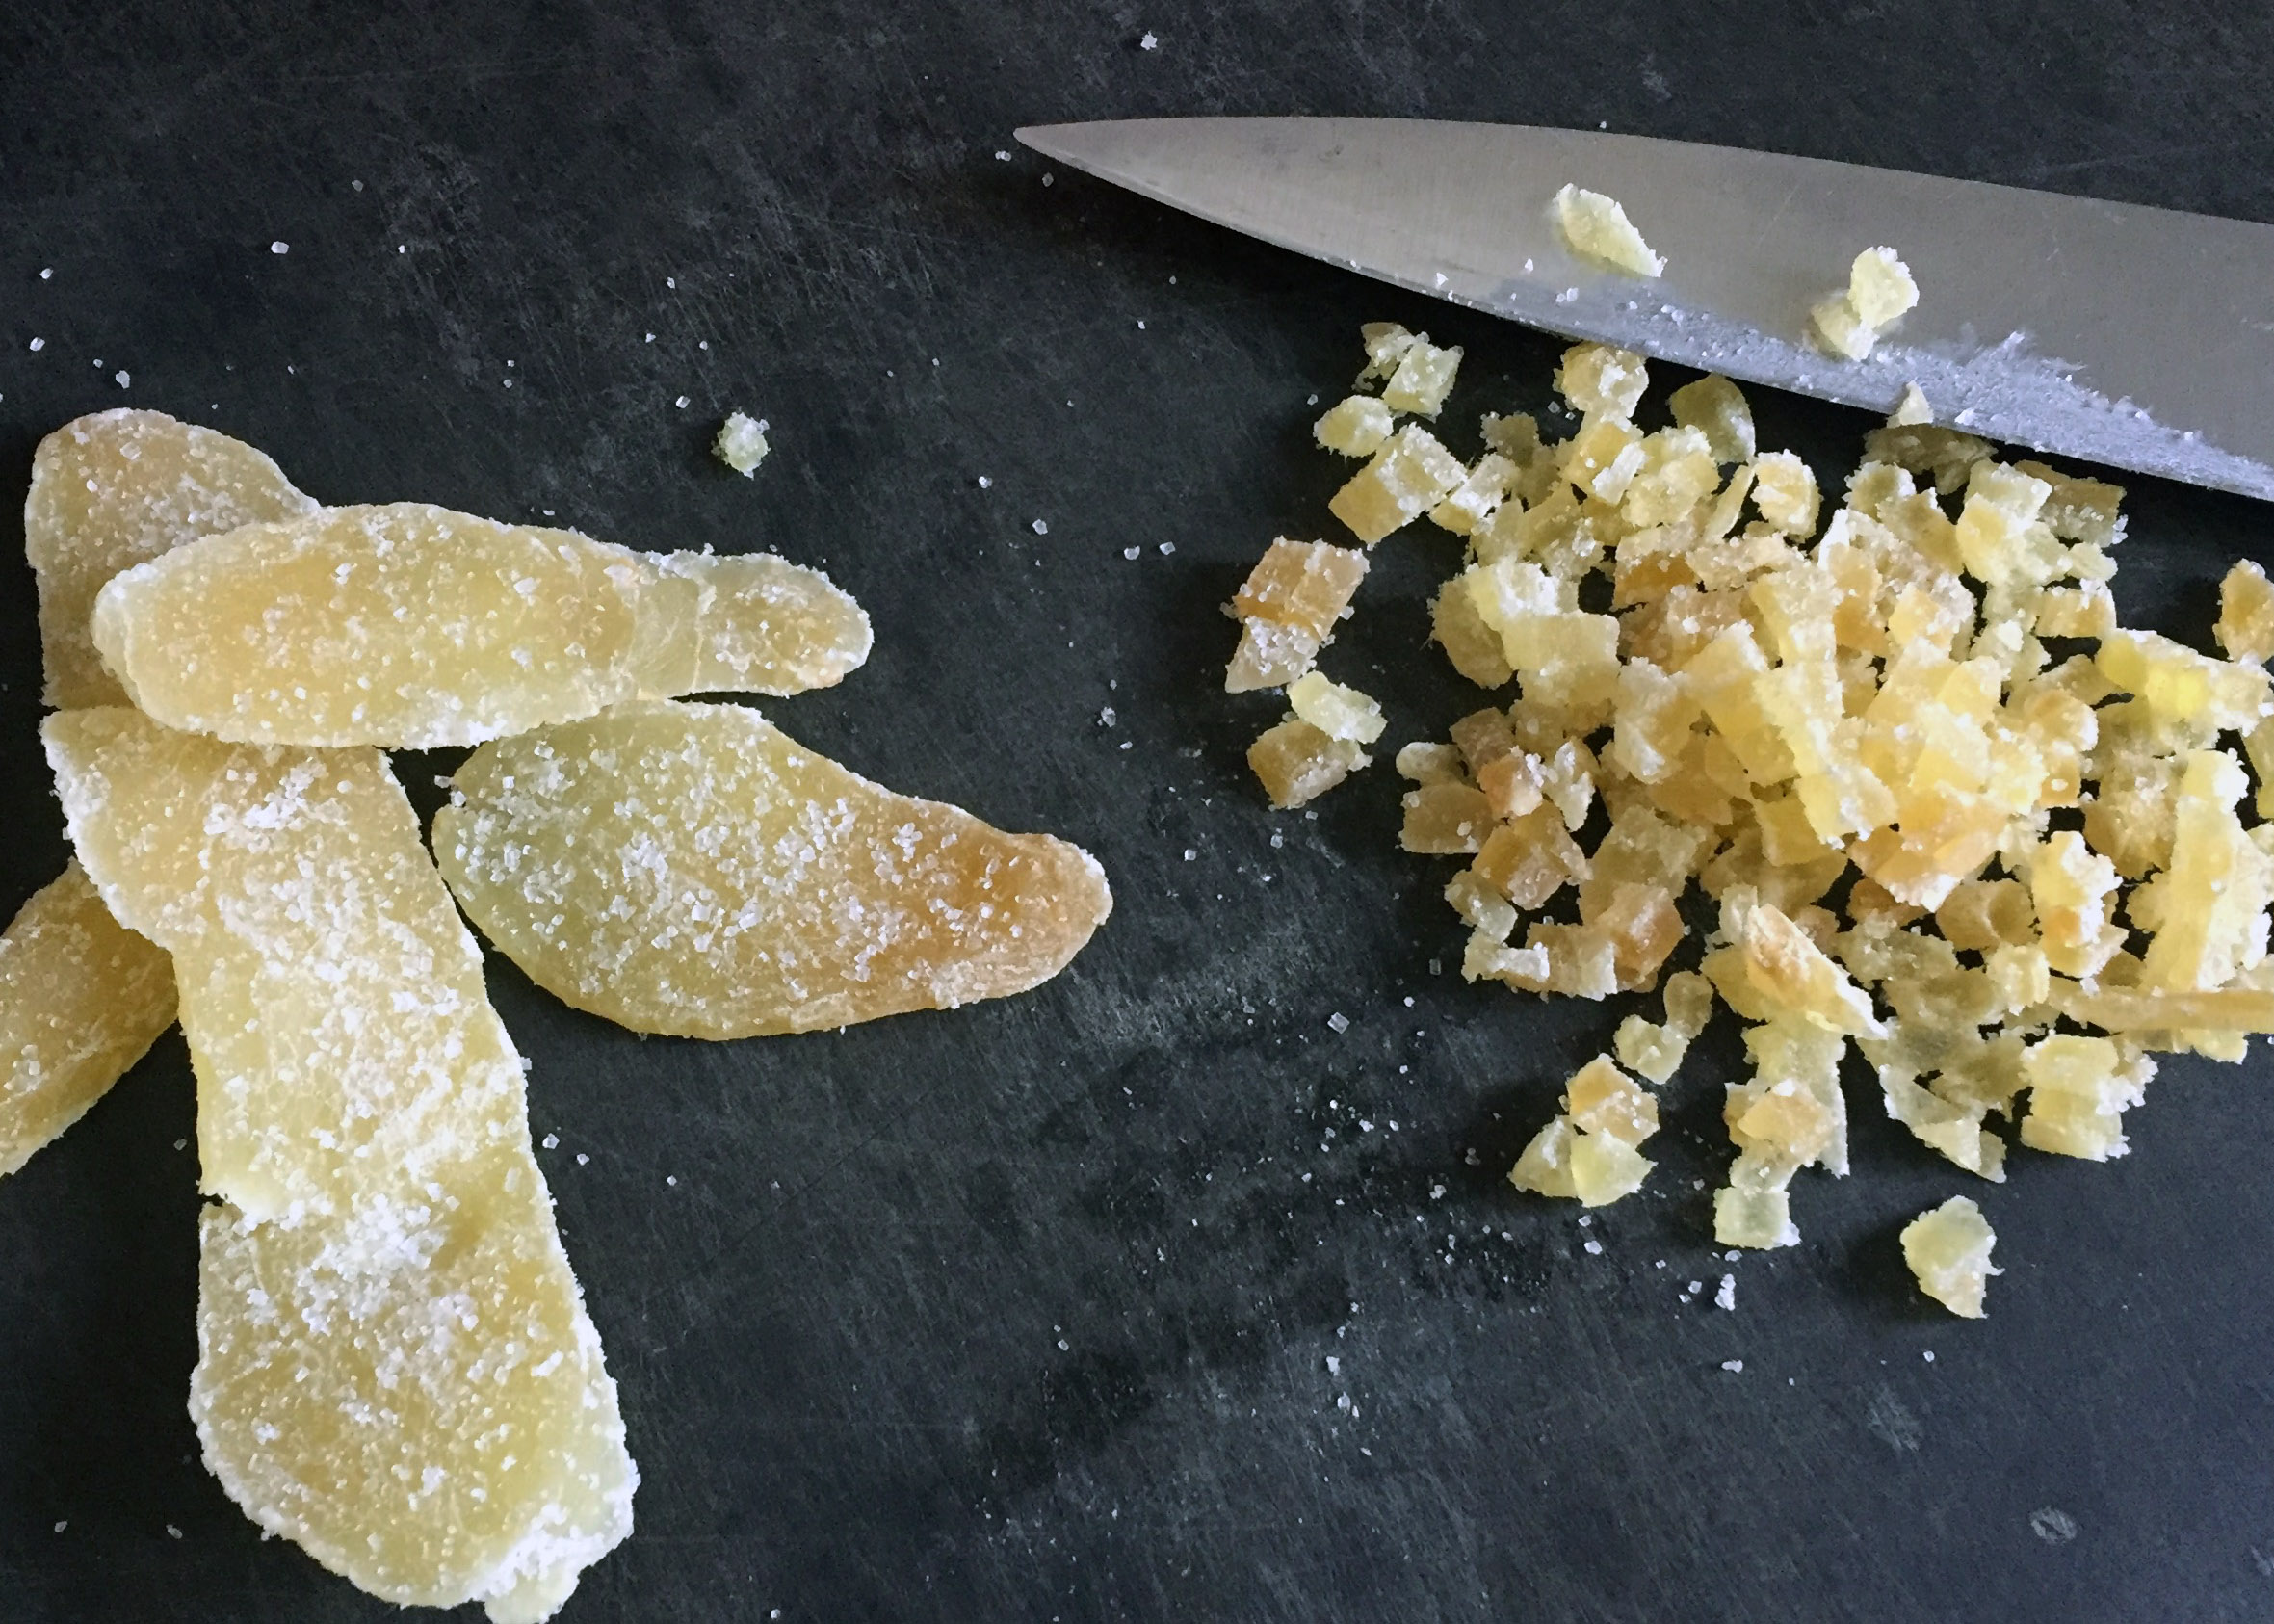
50g (1/3rd cup) crystallized ginger, finely chopped
350g (2 1/2 cups) all-purpose flour
1 tsp ground ginger
1 tsp baking soda
1 tsp baking powder
½ tsp table salt

To garnish:
pear wedges from the third pear mentioned above, skin on and cut in thin wedges
1 TBS demerara sugar

Preheat oven to 350F. Line a 7” or 8″ springform pan or a 2 kg loaf pan with parchment paper.

Mix the peeled, diced pears in a bowl with the lemon juice and zest and set aside.

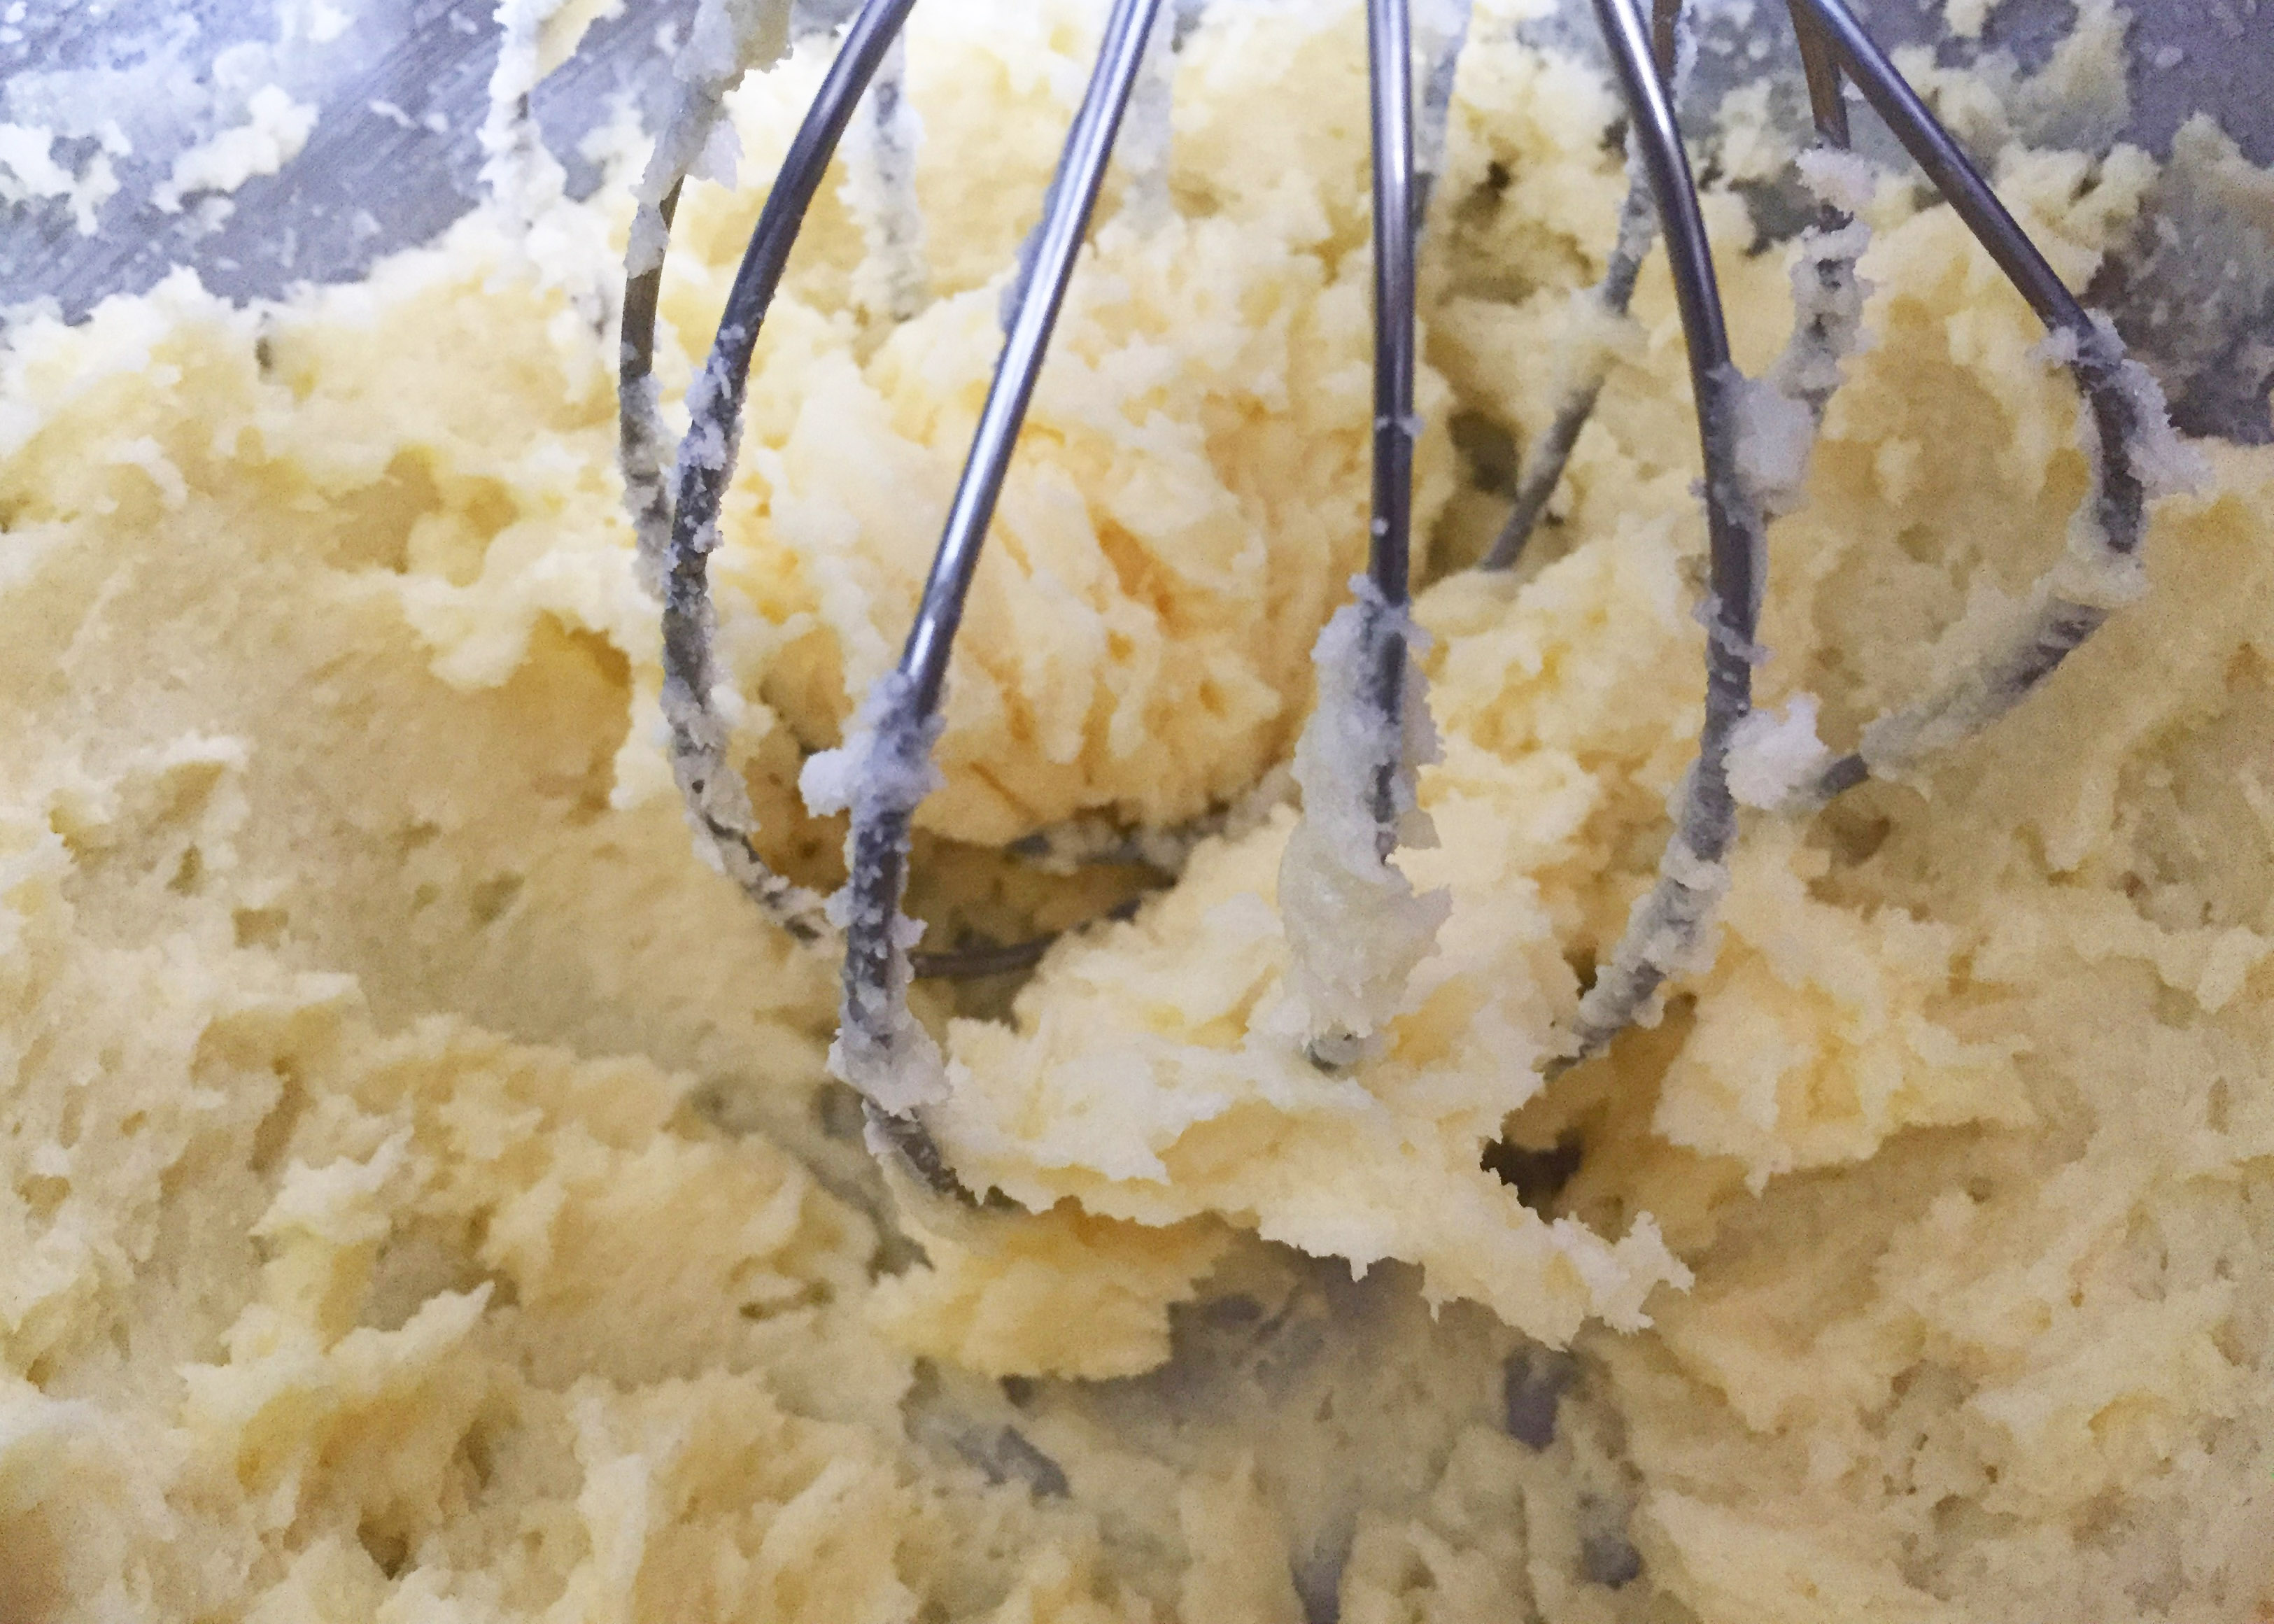
Put sugar and oil in a large bowl and whisk until combined. Whisk in the eggs one at a time until the batter is thick and smooth. Add the diced pear mixture along with the chopped ginger and fold to combine.

In a separate bowl, combine the flour, ground ginger, baking soda, baking powder, and salt. Stir so the ingredients are evenly distributed. Add flour mixture into the bowl with the wet ingredients and gently fold until just combined. Do not overwork or your cake will be tough!

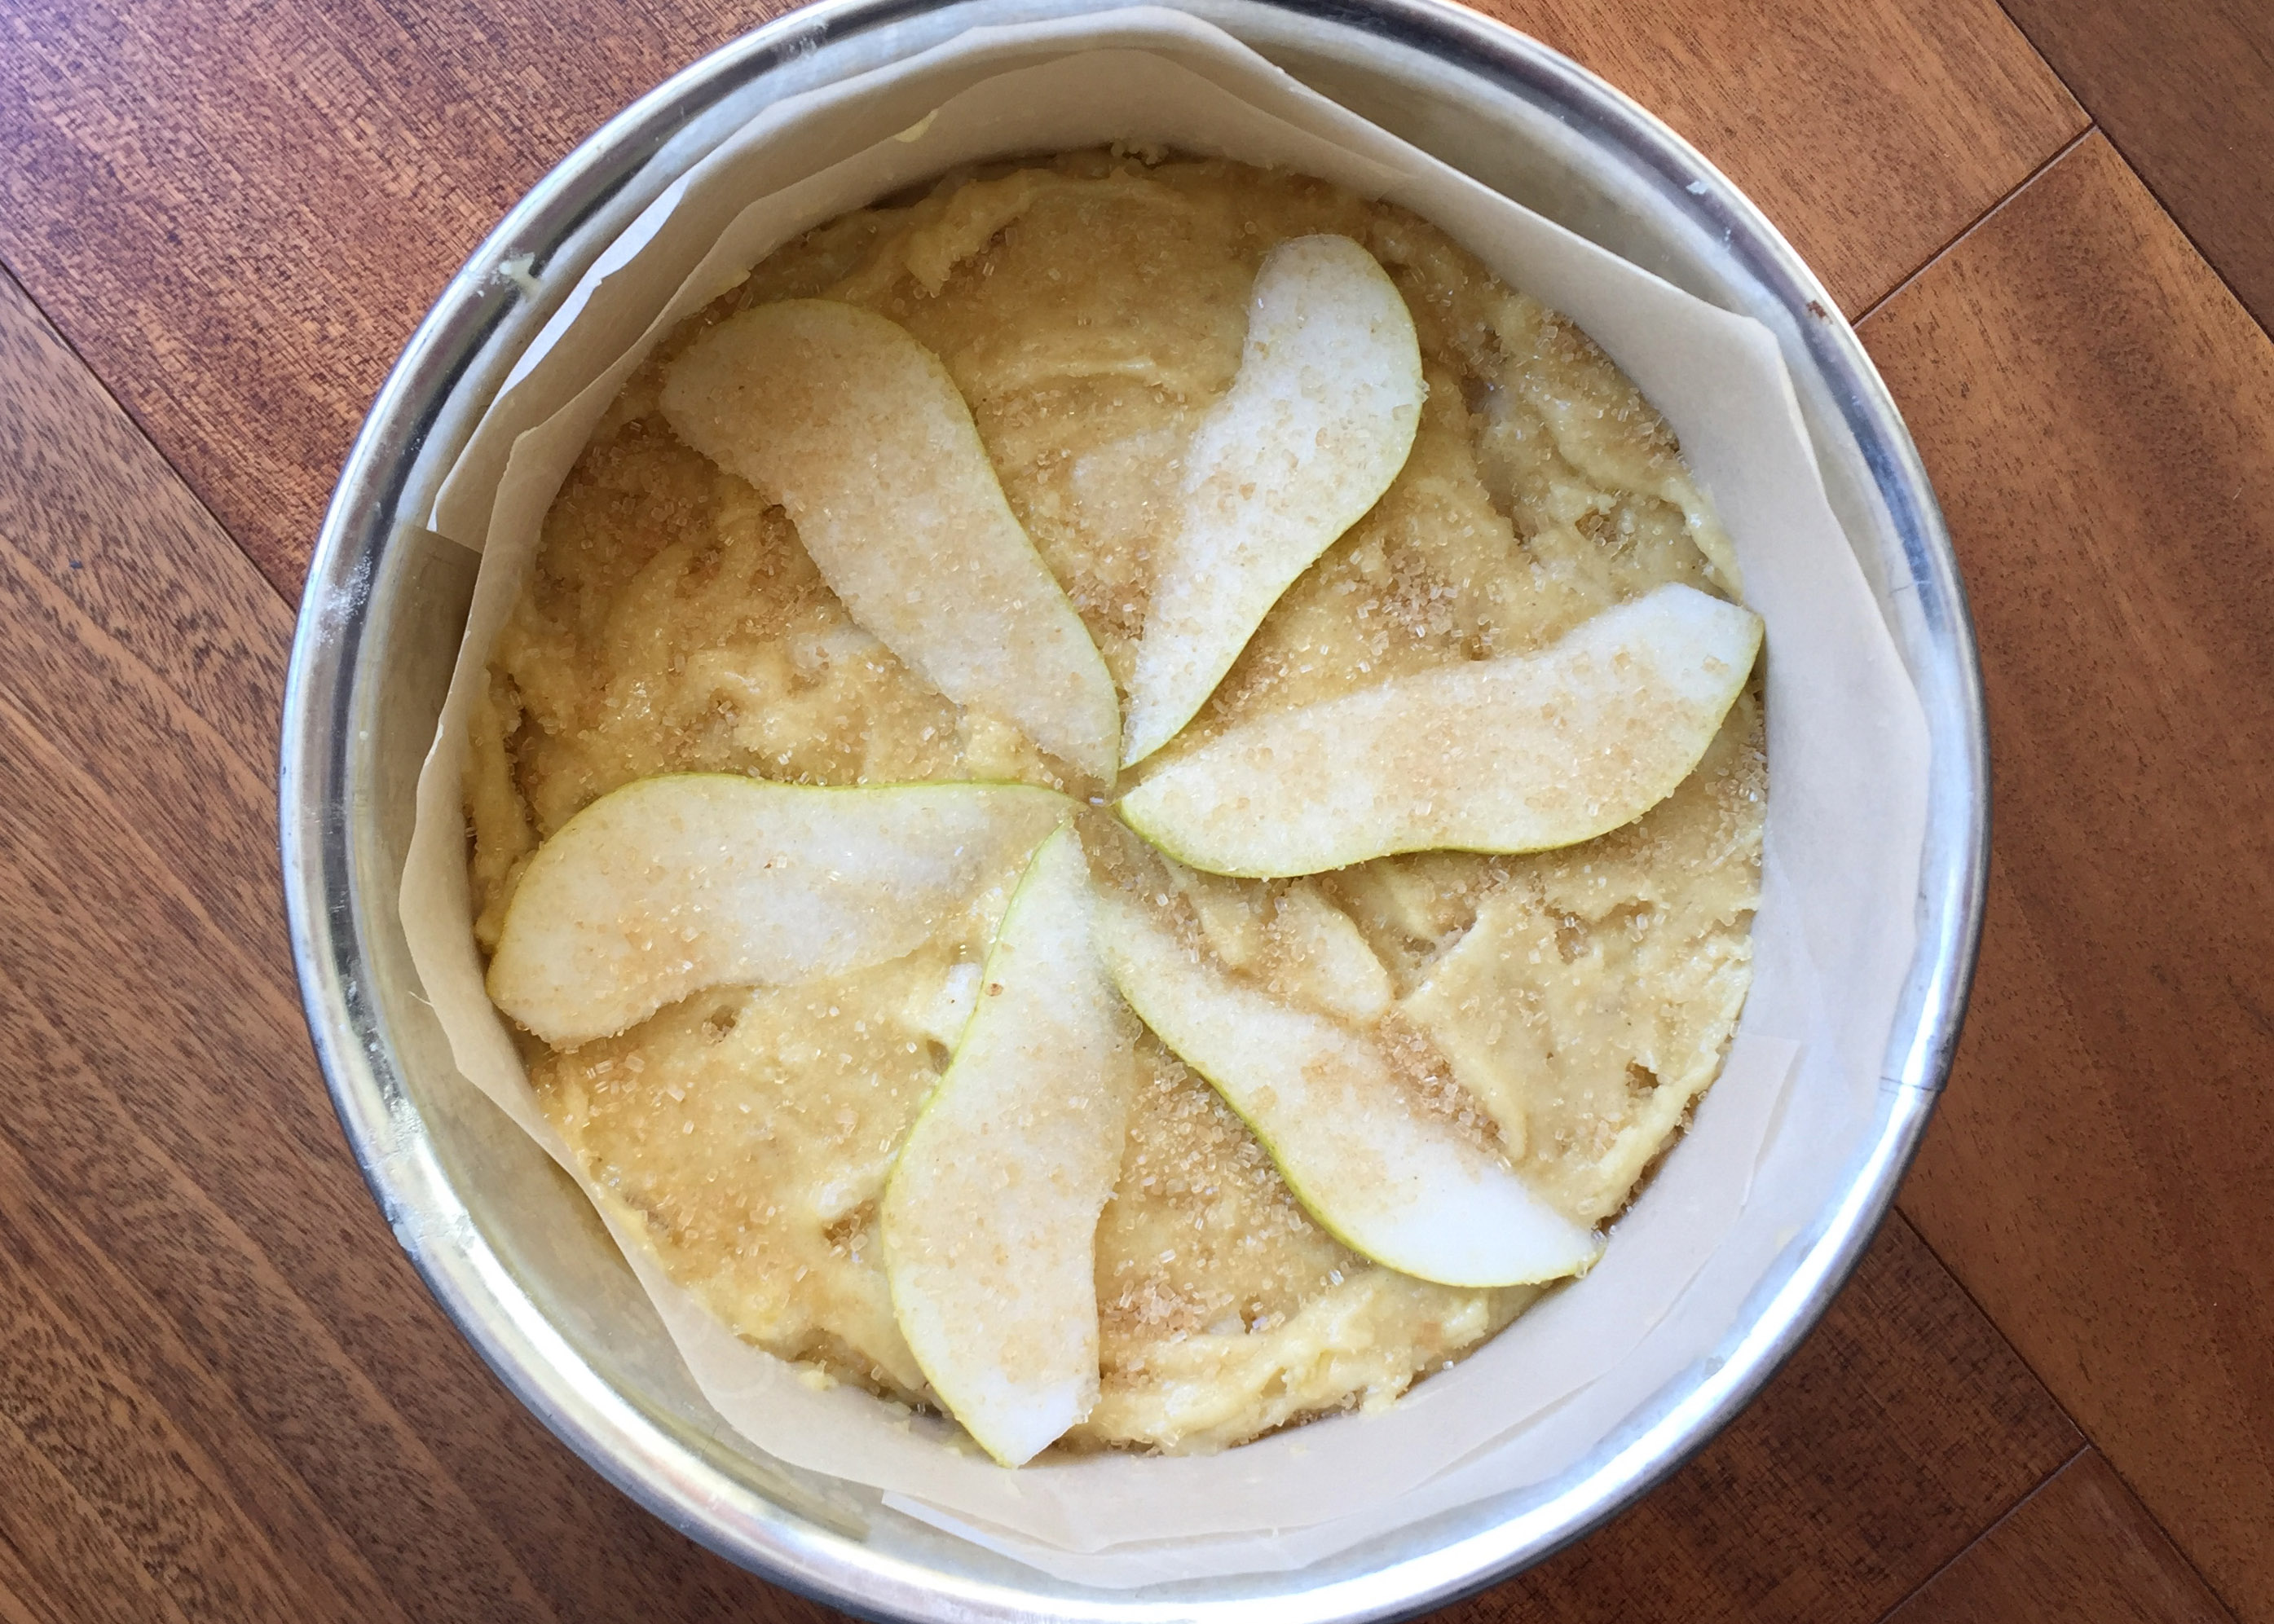
Transfer the batter to the lined springform pan. Top with the pear wedges and demerara sugar. Place in oven and bake for 40 minutes. Turn the pan and bake for another 25 minutes. At this point you can start checking to see if the cake is cooked through by sliding a toothpick or sharp knife into the centre. If there is wet batter, bake for another 10 minutes and check again. Mine had to bake for an additional 25 minutes because I used a smaller sized springform pan.

Remove cake from oven and place tin on a baking rack to cool. The cake will store at room temperature for a couple days in the fridge for 5 days. Serve at room temperature… with cheese!!! Or vanilla ice cream. :)

Love Cookies (Herbs de Provence and Orange)

Oh Valentine’s Day, you are testing me. I am more than happy to cook a nice dinner but… baking?!?! Sweet pink stuff?!?! No… um no. It’s just not me.

Yet every year I wrack my brain for weeks preceding Valentine’s Day. What am I going to do to make it special? What kind of dessert can I make that isn’t sickeningly sweet (in both taste and, you know, that lovey-gunky stuff)?

I nailed it on the not-so-sweet-tasting point but the lovey-gunky stuff… I AM part of the problem. Ugh. Sorry.

I used rubber letter stamps (originally bought for card-making and scrapbooking) to imprint the cookies. I also used mason jar lids to cut circle shapes and then hand-cut the heart shape from there because, duh, where did I put that cookie-cutter?!?! It took a bit of time but you will be much smarter than I was and have everything you need on hand, I know you will.

1 teaspoon dried herbs de provence
3 cups (325 grams) all purpose flour
1 1/2 tsp baking powder

1 cup sugar
2 sticks (8 oz or 226 grams) butter (I let mine sit out for about 20 minutes to soften slightly, but it should still be cool)
1 egg
1/2 tsp orange oil or 1 tsp orange extract

Grind the herbs de Provence with a mortar and pestle or coffee grinder. You don’t want a powder, just enough to break up the bigger pieces of herb. Combine with the flour and baking powder and set aside.

Cream the butter and sugar in a stand mixer until it is fully mixed and somewhat fluffy, a couple minutes. Add the egg and orange oil or extract and cream until combined. Add the dry ingredients and mix on the lowest setting until just combined. Using your hands, form the dough into two or three balls and cover and put in fridge until ready to use.

Preheat the oven to 350F.

Using a rolling pin on a lightly floured surface, roll one ball at a time (leaving the remaining dough in the fridge to stay cold) to about 1/4 inch thickness and use a cookie cutter to cut shapes. Place on baking pad or parchment paper on cookie sheet and freeze for about 5 minutes before baking.

Once the cookies are good and cold, place the cold baking sheet into the preheated oven for 8-12 minutes (depending on how thick your cookies are). Remove to cooling rack when you can see the bottom edges starting to brown (some of mine stayed in a bit too long but they were still delicious).

I had planned to pipe some white chocolate (dyed pink) hearts onto the cookies as well but in the end I thought it would be too much. I liked the simplicity of just the lettering. If you make these cookies without imprinting them, I think some piping of chocolate would be lovely.

Chicken and Zucchini Meatballs over Butternut Squash “Spaghetti”

Guess what?!?! I have another meatball recipe and this one is healthy healthy! Not just healthy, but healthy (lean chicken and zucchini meatballs), healthy (over BUTTERNUT SQUASH NOODLES!). Seriously, unless you’re going to eat grass for dinner, you’re not going to get much healthier than this. It is ridiculously delicious for an almost “normal” meal. Unlike those “zoodles” that are all over the internet (yes, I’m talking about you, limp and wet zucchini noodles), spiralizing butternut squash (or one of those huge carrots you get in an Asian market) and roasting at a high heat for 7-10 minutes to bring out the sweetness is an almost perfect stand-in for real spaghetti, without the calories and carbs. I dare you to try it! Go ‘head… I DARE you. :)

I’m dissing the wet, limp zucchini noodles but adding grated zucchini into the lean chicken meatballs helps keep them tender and moist and adds an extra helping of invisible vegetables. And spooning them over more vegetables?… pffft, I feel like I should be given a medal.

Read more

“All Day” Pho – The Cold Killer!

I have had the worst cold! And not only is it the worst, it is the looooooongest! Seriously, it’s now been 3 weeks. I’M SO OVER IT… GO AWAY! And in this post-holiday, supposedly “get healthy” month, it’s not helpful that I am one of those weirdos who CANNOT GET ENOUGH TO EAT when I have a cold. I don’t know why that is. I’m like a dog eating grass when it feels nauseated. And those people who whimper “Oh, it’s been 3 days and I haven’t been able to eat a bite of food”… are you forking kidding me?!?! Bring on the roast chicken, pasta loaded with sauce (or not), potato chips and cheese. I’ll eat it all!

So after devouring the contents of my fridge, I suddenly had a craving for a somewhat “clean” meal. Hot and spicy and something that would punch this cold in the nose. Pho. Mmmmmmmmm.

I order pho when I’m out for lunch all the time, but I had never tried making it at home. It seemed like a lot of work for a bowl of soup. The rich luscious broth, all those different spices and herbs. Ugh. But shockingly, it wasn’t that difficult. I have been running on about 5% energy for 3 weeks and I still managed to accomplish the best bowl of soup I’ve slurped in a long time, and so can you.

It’s really not “all day”. It’s about 4 hours in total and much of that is lying about watching Netflix while the broth very gently simmers, extracting all the loveliness from the chicken, vegetables and spices. I have made chicken stock many times using leftover carcasses but I had never used a whole chicken before. I was surprised by the the silky tenderness of the meat after gently braising in liquid for 30 minutes.

I don’t have a stock pot big enough for 4 litres (16 cups) of water plus all the other ingredients so I started by simmering the raw quartered chicken, veggies and spices in 12 cups of water. After 30 minutes I removed the now cooked chicken pieces and let cool about 10 minutes, then pulled off the meat. At this point I was able to add a second pre-cooked chicken carcass from the previous night along with the bones, fat and skin from the chicken pieces I just cleaned, plus another 2 cups of water and let simmer for another hour. After which I was able to add the final 2 cups of water (omit the final 2 cups of water if you don’t have a second leftover chicken carcass) and let simmer for the last hour. Finally, strain the broth into a large pot and stir in the fish sauce. Start with 3 tablespoons and add in up to 3 more tablespoons, adjusting for taste as you go. The resulting broth is sublime.

I ended up with about 14 cups of broth (from the original 16 cups of water plus whatever juices came from the chicken). You can skim some of the fat if you want but the point of this broth is its richness so I skimmed only half the fat, leaving the rest in the broth. Kitchen math: Fat = flavour.

This recipe is very loosely based on the many internet versions of Pho Ga by Charles Phan, author of Vietnamese Home Cooking and owner of The Slanted Door restaurants in San Francisco. Some versions suggest you make your own crispy fried shallots for one of the toppings which would be delicious, but I find the fried shallots or onions you can buy at your local grocery store work very well in a pinch, without the deep fry smell lingering in your home for the next 2 days. The broth can be made a day or two ahead of time and when you’re ready, reheat your broth, put some noodles and chicken in the bottom of your bowl, and ladle over the hot broth. I like to add a dollop of Asian chili-garlic sauce and hoisin sauce and mix in a bit. Then top with the green onion, bean sprouts, herbs, shallots, squeeze over some fresh lime and throw on some crispy fried shallots if you wish (I forgot to do this for the picture!).

Broth
2 unpeeled yellow onions, quartered
Three 1/2-inch-thick slices of unpeeled fresh ginger
4 litres (16 cups) cold water (14 cups if you don’t have a second leftover chicken carcass)
One fresh 3 1/2-pound chicken, quartered
1 leftover chicken carcass (if you have one)
1 tablespoon kosher salt
2 teaspoons sugar
2 star anise
4 green cardamom pods
1 tsp whole peppercorns
1 stalk fresh lemongrass, smashed to loosen the fibres

To finish:
3-6 TBS Asian fish sauce
dried rice noodles, a linguine shape

Garnishes:
2 green onions, thinly sliced
1 pound mung bean sprouts
1/2 cup torn basil leaves, Thai basil if you can find it
1/2 cup cilantro leaves
2 limes, cut into wedges
Asian chili-garlic sauce
Hoisin sauce
Crispy shallots or onions

Char onions and ginger:
Heat a cast iron or other heavy bottomed frying pan with just a bare film of oil over medium high heat. Add quartered onions and ginger slices and char all all sides until onion begins to soften. This will take about 5-10 minutes. Alternatively you could put them on a baking sheet in a 400F oven for about 30 minutes.

Make the broth:
Fill a large pot with 4 litres (16 cups) of water and bring to boil. Add the roasted onions, ginger, raw chicken and second chicken carcass if you have it, and the rest of the broth spices. Lower heat to a very gentle simmer and cook until the chicken is done, about 30 minutes. If your pot isn’t big enough (as mine wasn’t), start out with as much water as will fit into the pot along with the veggies, spices, and raw chicken. Once the raw chicken is cooked you can add in the spare chicken carcass and more water.

After 30 minutes, remove the now cooked chicken pieces, let cool until you are able to handle to remove the meat. Set the meat aside and add the skin and bones back into the broth (along with extra chicken carcass if you haven’t already added) and very gently simmer for another 2 hours. Once finished, strain the broth into a large pot and stir in the fish sauce, to taste.

Putting it together:
Cook the rice noodles according to the instructions. Shred the chicken into large pieces and gather the rest of your garnishes. Place some noodles and chicken in your bowl, add in the Asian child-garlic sauce and hoisin sauce to taste. Ladle over the hot broth and top with garnishes. Enjoy!

Note: the cool noodles and chicken are re-warmed by the hot broth but if the soup isn’t hot enough for your liking, you can heat up the chicken and noodles in the broth while it’s still on the burner, then divide between individual bowls. But I would only add the chicken and noodles to the amount of broth you are going to eat in one sitting, reserving the rest of the clear broth for another day or the freezer.

Spaghetti with Ricotta Herb Meatballs

ricotta-meatballs-4I love any pasta you put in front of me but rarely eat it because, carbs (insert sad face here). However, we have had an unusual amount of snow in the past couple days and I still went for a pretty lengthy walk, slipping and stumbling over the icy, uneven ground, and that deserves a treat. And if I’m going to indulge, this is great way to do it. It is delicious and not too unhealthy (no cream!). Adding ricotta to the meat helps keep it tender and the copious amount of herbs give a flavour and freshness that you don’t usually find in a meatball. I used my lovely frozen confit tomatoes but good quality canned tomatoes (San Marzano if you can find them) work just as well. Don’t use ones that are pre-diced. They contain an additive to help them keep their shape and who wants to eat that?!

Read more

Cumin Chicken with Squash, Fennel and Grapes: Another One Pan Miracle

miracle-chicken2-4Remember this from a couple months ago? It was my spatchcock chicken “one pan miracle” dinner and I have another one for you! I followed the latest inspiration recipe pretty closely except I used a whole spatchcock chicken instead of just thighs (I am LOVING the spatchcock chicken) and I added leeks (how many forking leeks did I plant this year?!?!).

The roasted fennel adds a lovely unique flavour and the grapes soften into little pillows of yummy-ness (technical term). If you don’t have leeks I suggest adding wedges of onion or shallot to the veggies to balance the sweetness of the fennel and grapes. Next time I think I will also throw a teaspoon of smoked paprika into the rub to deepen the flavour just a touch.

It’s important to use a pan big enough so the vegetables can be spread out in a single layer to ensure they brown and caramelize rather than just steam. I had more vegetables than I needed so into the fridge they went and the next morning I used the saved chicken bones, the wings and the excess veggies to make a chicken vegetable stock. Shazam! (Sorry, I’ve been watching too many superhero movies…).

1 small 2 1/2-3 1/2 pound chicken, spatchcocked
1 TBS brown sugar
1 TBS ground cumin
1 TBS kosher salt (or 2 tsp table salt)
1 tsp freshly ground black pepper
1/4 tsp cayenne pepper
1 acorn or delicata squash (about 1 1/2 pounds), halved lengthwise, seeded, cut into 1/4″ half moons
1 fennel bulb (about 1/2 pound), cut in half lengthwise, sliced into 1/4″ wedges with core intact
3 or 4 leeks, white and light green part only, sliced in half lengthwise
1/2 pound seedless red grapes (a very generous cup)
1 tablespoon olive oil
small bunch torn fresh mint leaves

Make your rub by combining the brown sugar, cumin, salt, pepper and cayenne.

Just in case you’ve forgotten how to spatchcock, place the chicken breast side down on a work surface. Starting at the thigh end, cut along one side of backbone with kitchen shears. Turn chicken around and cut along other side. Discard backbone or save for stock. Flip the chicken, open it like a book and press firmly on the breastbone to flatten (before flipping, I sometimes help the chicken breast crack by using my knife to make a cut in the thickest part of the bone). Sprinkle both sides with half your rub and refrigerate for at least an hour, or overnight.

Preheat oven to 400F.

miracle-chicken2-1

Toss vegetables with olive oil and the other half of the rub and place on a large rimmed baking sheet, arranging in a single layer. Place the chicken, skin side up, on top of the veggies and fruit and roast for 20 minutes. At this point I like to gently lift the chicken with some tongs and give the vegetables a stir to ensure they are all getting nicely browned. Return the pan to the oven for another 20-30 minutes, until the chicken is cooked through (internal temperature should be 165F).

miracle-chicken2-2

Remove chicken from oven and let rest 5-10 minutes. I like to keep the veggies warm during the resting period by turning off but leaving them in the oven. Cut up the chicken and serve family style or in individual bowls garnished with torn mint. I served this with wild rice and it was delicious.

miracle-chicken2-3

Kuku Cauliflower Cake

cauliflower-cake5I have always loved breakfast for dinner so the other day when I was searching for a way to use up a head of cauliflower and ran across an Ottolenghi recipe for cauliflower cake (sort of an omelet/frittata with flour), it was a no-brainer to use that as a springboard recipe. There are a number of different versions on the internet and after reading some of the reviews (most complaints were about it being a bit bland) I decided to amp up the flavour by roasting the cauliflower with smoked paprika instead of simply boiling, and subbing in a bunch of parsley and cilantro for the basil as a nod to the “kuku” which is sort of the Persian version of an omelet with a ton of herbs. I also replaced part of the onion with leek because, fall garden cleanup. It’s a bit of a mess of different dishes but the end result is a somewhat dense, delicious… ermmmm… “thing” which fed us two nights in a row alongside a salad.

1 medium cauliflower (1 1/2 – 2 pounds)
glug olive oil
1 tsp smoked paprika
salt and pepper to taste

2 cups sliced leeks (white and light green part only) OR 1 large onion, peeled and diced, or a mix of both
4 TBS olive oil
1 tsp finely chopped rosemary or Herb de Provence mix
1 clove garlic, finely chopped

6 large eggs
1 cup flour (125 grams)
1 1/2 tsp baking powder
1/2 tsp ground turmeric
salt and pepper
1 cup grated pecorino cheese (or other hard strong cheese, such as parmesan or gruyere)
handful chopped parsley leaves
handful chopped cilantro leaves

Butter, for greasing pan
1 TBS kalonji or nigella seeds (or substitute white or black sesame or poppy seeds, or a mix of any of those)
1 shallot, peeled and thinly sliced (or reserve a couple slices from your onion above) for decorating the top

Preheat oven to 400F. Break cauliflower into smallish florets. Drizzle with a generous glug of olive oil and sprinkle with paprika, salt and pepper. Spread onto lightly oiled baking sheet and roast for 20 minutes, tossing a couple times during cooking. Remove from oven and let cool.

cauliflower-cake1

Heat 4 TBS olive oil in a frying pan over medium heat and fry onion and rosemary until very soft, about 8 minutes (it may seem like a lot of oil but this is also the oil you are adding to your cake, we are just nicely flavouring along the way!). Add chopped garlic and fry 1 minute more. Remove from heat and let cool.

cauliflower-cake2

Crack eggs into a bowl along with 1/4 cup of milk and whisk well. In a another large bowl blend the flour, baking powder, turmeric, 1 teaspoon salt, and plenty of pepper. Add egg mixture and whisk until fully incorporated and mostly smooth (don’t overmix or your cake will be tough). Stir in onion filling, herbs and cheese until well blended. Gently fold in the cauliflower, trying not to break up the florets.

cauliflower-cake3

If you are not using a non-stick pan, line the bottom of an angel food cake pan or 7-8 inch springform pan with parchment paper. Butter the sides generously and toss the kalonji seeds (or whatever you are using) in the pan so they stick to the sides. Gently spoon or pour in cauliflower batter and scatter shallot or onion slices on top. Bake in the centre of the 400F oven until the top is golden and the centre of the cake is set. This should take about 30 minutes if you are using an angel food cake pan or 40 minute for a springform pan.

cauliflower-cake4

Let cool to warm or room temperature. Run a knife along the sides of the pan to remove. We ate this alongside a cucumber and tomato salad tossed with a simple vinaigrette.

cauliflower-cake6

Beet Galette

beetgalette7A friend from culinary school emailed me a while back to chat (mainly about food) and mentioned she was having guests over that night and was making spanakopita.

ARRRGHHHH. Cue the monster craving! Does that ever happen to you? You are going along minding your own business and then, BAM… you spot a kid eating an ice cream cone and you’re not much into ice cream but you LOVE crunchy and salty so you start thinking about potato chips but those aren’t “appropriate” for dinner so you imagine all the salty crunchy foods you could actually eat for dinner without attracting the attention of the food police and your mind wanders through the possibilities of nachos, homemade french fries, deep fried onion rings, fried chicken, fried chicken and bacon(!) and so on and so on…

So, yup… that happened. Now I had spanakopita on the brain but no filo dough and no spinach. My mind started twirling with ideas. Could I make spanakopita with pastry dough sort of like a hand-held pie instead of the light and crispy filo dough? But no, that would be waaaaaay too heavy. What if I did it open faced (half the pastry!) but instead of a pie, I made a galette? And could I use something from my garden instead of spinach? What about beet greens? And HOOOOOLD ON… what if I used the beets as well?!? \Whoa lady, this could be good!

beetgalette1

After mulling it over a few days (craving still burning hot), I decided to add onions to cut the sweetness of the beets and throw in some feta (my “nod” back to the original spanakopita idea). The end result was, if not one of the tastiest experiments I have ever embarked on, definitely one of the prettiest!

I used my new pressure cooker to cook the beets (15 minutes!) but it is very easy to boil or roast them… just takes a bit longer.

The dough is my usual recipe which you can find here except I subbed in whole wheat flour for half the white. You can use any pie crust dough you are comfortable with. You will need enough to make one round about 14-15 inches across and slightly thicker than 1/8th inch.

Pie crust dough to make one round 14-15 inches across
1 generous pound beets
8 cups beet greens, washed
2 cloves garlic, sliced
Couple glugs olive oil
1 medium onion, halved and thinly sliced
couple sprigs fresh thyme
salt and pepper to taste
pinch red pepper flakes
3 oz feta, crumbled
1 egg
1/4 cup cream
Optional: 1 additional egg whisked with water to brush pastry if you want that shiny look

To make the filling, cook the beets to your liking (boil, bake, or in a pressure cooker). Once cooled enough to handle, peel and slice into 1/4 inch slices. Set aside.

Wash beet greens, do not dry. Warm a glug of olive oil and garlic in a large pan over medium-high heat. Add beet greens and toss until wilted, about 3 minutes. Drain and set aside in a bowl.

beetgalette2

Heat another glug of olive oil in the same pan you used for the beet greens. Add onions and fresh thyme. Fry until starting to turn golden, 7-8 minutes. Discard thyme and add onions to the beet greens.

beetgalette3

Add crumbled feta and pinch of red pepper flakes to the filling. Season with salt and pepper.

beetgalette4

Assemble the galette:

Preheat oven to 375F.

Roll out dough on a clean, lightly floured piece of parchment in a circle about 14-15 inches across and slightly thicker than 1/8th inch. No worries if the dough goes over the edges as you will be folding it up over the galette shortly. Spoon approximately half the beet green/onion mixture in a circle evenly in the centre of the dough, ensuring you have a good 2 inch border all around the edge. Top with beets overlapping the slices in circles. Finish with the remaining beet greens. Fold the edge of the dough up and over the filling, overlapping where necessary and press down lightly to create the folds.

beetgalette5

beetgalette8

Slide the parchment with the dough onto a cookie sheet. Whisk the egg yolk and cream together and pour into the centre of the galette. If you would like the pastry to be shiny, brush the border with the egg wash and sprinkle with flake sea salt.  Place in oven and bake 35-40 minutes until crust is golden. Remove and let sit for 5 minutes before slicing. We ate this as our main course but a smaller wedge alongside a leafy salad would be a lovely first course.

beetgalette6

Chicken and White Beans: A One Pan Miracle

chicken white bean6We were at a friend’s place for dinner last year where another guest regaled us with the story of a previous thanksgiving fiasco when he had been put in charge of roasting the turkey on the BBQ but instead of watching the bird, decided to work out instead. When he returned the turkey was burnt to a crisp and it was about 2 hours before their guests arrived. Wife was still at work and would not be amused. He ran out to the local grocer and paid waaaaay too much money for another turkey and long story short, they didn’t eat until midnight. I wanted to ask why he didn’t spatchcock the bird but that wasn’t the point… it was a funny story.

But, seriously, why didn’t he spatchcock the bird? I cooked a 12 pound turkey for thanksgiving last year in 90 minutes. It’s not magic!

Spatchcocking (or butterflying) is a technique used most often for grilling but it’s ideal for roasting as well. A whole chicken or turkey in its natural form takes a long time to cook because the inside must reach a certain temperature to safely eat. The problem with this is the exterior (and especially the breast) often becomes overdone and dry before the inside is cooked. Opening it up and laying it flat by removing the backbone positions the breast at the centre of the meat which protects it while the darker meat takes most of the heat. It doesn’t make for a very amusing story, but it produces a heck of a tasty bird!

chicken white bean1

The balance of this dish is really just another attempt by me to use up some of my garden vegetables along with another healthy filler… beans. My first thought was to use chickpeas which I think would be a great substitute, but I usually cook my chickpeas from dried (I think they taste better) so I didn’t have any canned in the pantry. I did however have some canned white beans. And, as always, use whatever vegetables are handy. Squash would be great, sweet potatoes, peppers, zucchini, brussels sprouts in the winter. You could substitute rosemary or sage for the thyme. It’s very adaptable. If you’re not using harissa as I did (which has a nice spicy kick), sprinkle over a few red pepper flakes as well.

The miracle part of this recipe is laying the chicken over the vegetables to cook which bathes everything in those rich drippings and multiplies the flavour of this meal by, oh… I don’t know… a thousand?!!! And having only one dish to wash after making dinner?!?! It’s a festivus miracle times two. :)

Chicken:
1 small 2 1/2-3 1/2 pound chicken
1 tsp harissa spice mix
1 tsp za’atar
1 tsp salt
(Or substitute 1 TBS of your favourite rub for the 3 spices above. You could use organo for Greek flavour or a rub with smoked paprika and cumin for southwestern BBQ. Just make sure 1/3rd of your rub is salt.)

Veggies:
olive oil
a few cups sliced mixed veggies (I used carrot, baby golden beets, a leek, shallot, a few little potatoes and the greens from my beets)
few sprigs of thyme
1 pint small tomatoes
2 cloves garlic, sliced
1 can cannellini (white) beans (rinsed and drained)
1/2 cup white wine (or chicken stock)
salt and pepper

Garnish:
lemon
cilantro, chopped

Place chicken, breast side down, on a work surface. Starting at the thigh end, cut along one side of backbone with kitchen shears. Turn chicken around and cut along other side. Discard backbone or save for stock. Flip chicken and open it like a book. Press firmly on breastbone to flatten. Sprinkle both sides with your rub and refrigerate for at least an hour, or overnight.

Preheat oven to 400F degrees.

Separate veggies into two groups, veggies that take longer to cook (carrots, beets and potatoes) and veggies that don’t take as long (leek, garlic, tomatoes).

Put the longer cooking veggies in your cooking vessel along with the sprigs of thyme, drizzle with olive oil and season with salt and pepper. Roast in oven for 15 minutes.

chicken white bean2

After 15 minutes, remove the pan from the oven and add the softer vegetables (except beet greens), tomatoes, white beans, and wine. Re-season with salt and pepper and stir. Brush or drizzle the chicken with olive oil and place, skin side up, over the vegetables and return to oven to roast for about 20 minutes.

chicken white bean4

At this point I like to gently lift the chicken with some tongs and give the vegetables a stir to ensure they are cooking evenly. Return the pan to the oven for another 20-30 minutes, until the chicken is cooked through (internal temperature should be 165F). I check the internal temperature every 10 minutes and once it’s getting close, I stir in the beet greens. When the chicken has hit desired temperature, remove from the oven and let rest for 10 minutes.

Cut up the chicken and serve family style or in individual bowls garnished with a wedge of lemon and chopped cilantro.

chicken white bean5

Confit Tomatoes

tomato confit3Winter is coming.

Sigh.

I am trying desperately to hang on to the last days of summer and preserve some of its goodness to take with me into the dreary cool days ahead. My garden is bursting with at least 5 different varieties of beautiful little tomatoes that are as sweet as candy! Sungold, Sun Sugar, Black Cherry, Sweet Baby Girls, and Indigo Rose… those are the ones I planted this year. Then there are the ones I can’t identify from last year. While we were away the tomatoes ripened, fell and rotted into the garden and magically I had about 376 (not exaggerating) “volunteers” pop up this spring. I pulled about 370 and let the remaining ones live just to see how they would do. Guess what? They did just as well as the ones I had babied from seed under grow lights since March. (I’m tempted to use this method to grow ALL of my tomatoes next year.)

Anyway, we have been eating bowlfuls of these bursts of sunshine every single night but we can’t keep up. I first tried this method of preserving tomatoes about 3 years ago and now wouldn’t do anything else. A slow roast in the oven melts those puppies into a glorious mess of sweetness and softens and mellows the garlic… mmmmmm, sorry, drooling all over my keyboard here.

Read more